Friday, March 31, 2017

DIY Candle holder

Hello, everyone. its Brooke! for todays diy I will be making a candle holder thing. I dont really know what to call it. just being honest here. you will need a mason jar (size of jar depends on size of candle) you will need a candle, gems/clear stones (you can get at michaels or hobby lobby ect.) and a hot glue gun! so the first thingwe are going to do is take the clear stones and hot glue them all over the jar. then take the candle put some hot glue on the bottom and put it into the jar! its that simple and its also really cool! You guys should try this one out! see you next time! -Brooke:)

Thursday, March 30, 2017

Desktop Organizing

I whipped up these super easy small folders to hold all of the sheets of return labels I have (I save all the free ones that different charities send) and stamps that aren't on a roll, then I stood them up in a decorative file box that is on my desk also holding my calculator, scrap paper, envelopes, etc. This way they aren't loose in a drawer or strewn about everywhere! Ahh, much better...


fold a piece of heavy cardstock or thin coated cardboard in half (mine are about 8" x 10")
then staple on a file folder label thingy (what is that thing called? I'm blank) and insert
a piece of paper indicating what is in the folder - I did "return labels" and "stamps"
but you might have other flat odds and ends that need corralling on your desk! 

Wednesday, March 29, 2017

Cowboy Casserole ... by Mr. French

So my blank stare at the meat counter was contemplating, one package of thin sliced pork chops would only allow a scant leftover plate...so I grabbed two. (About 1 1/4 lb.) to make 'cowboy casserole'.  


In a large casserole dish, lightly coat the bottom with BBQ sauce. (Your choice). Lay 1/2 of the slim pork chops across bottom.  Sprinkle a half bag of Stove Top over and around them. Dollop half can cream of mushroom soup and pour about 1/3 cup water on that so you can mix it around over chops with a spatula. Layer the other 1/2 of chops and put just the right amount of BBQ on them! Repeat stuffing, soup routine (you judge the water, not too much). Place generous amount of fresh sliced mushrooms all over the top. Bake at 350 for 30min. 


About 10 min. in, as you are cleaning up, you realize you forgot the second 1/2 of Stove Top😮. Clean a little more, then mix remaining Stove Top with just enough water that most of it is soaked in. Take out of oven and spread across top and put back in oven. I checked it at 30min and went an additional 25min then added shredded cheese (I had Swiss). 5min more and waalaa. Fully cooked and still moist. Add any spices you may like.  We call it "stuff cowboys eat"
Mark
Aka-Mr. French


Tuesday, March 28, 2017

DIY Mod Podge

1. Pour 8 ounces (225 milliliters) of white school glue into a jar.
2. Stir in 4 ounces (112.50 milliliters) of water.
3. Add 2 tablespoons of water-based gloss or varnish if you want glossy Mod Podge.
4. Add 2 tablespoons of fine glitter if you want glittery Mod Podge.
5. Close the jar tightly and shake it to combine.


I needed mod podge to make the cute k-cup blue birds (click here for that post) and found this recipe. I didn't need this much of it so I just used the formula (2 parts white glue 1 part water) to make a smaller batch in a little disposable cup. I didn't add varnish or glitter. 

Monday, March 27, 2017

K-Cup Birds

It's almost April and time for some
spring crafts for Ronda's seasonal display table...these little blue birds are too cute and I had to make them.  Seriously just try to tell me you don't think these are super cute! Yep they're a little silly and cutesy but I love them.

I got the inspiration for these online and changed them a bit - you don't have to make them just like I did but here's what to do if you do!


Supplies:

  • Clean recycled k-cups (I hope you've been saving these now after the couple other cute crafts I've shown you! click here and here for those posts)
  • blue tissue paper, orange and black cardstock, black marker or sharpie, mod podge, foam brush, hot glue
Directions:

Cut or rip tissue paper up into small pieces, spread both sides with mod podge and stick in place all over the K-cup. Keep applying the mod podge and paper until the entire surface is covered, overlapping the edges. Once it's dry hot glue a small bunch of crumpled tissue paper on either side for wings, a small orange triangle for the beak, and black feet (note I punched out a flower shape using a Stampin' Up die cut shape I had on hand and then cut in half, you can just cut out whatever shape you want for feet - or draw on 3 little black lines instead). Dot eyes on using the black marker.


Sunday, March 26, 2017

West African Peanut Soup

Cathy has been talking for so long about this great soup that Al makes, quite truthfully it did not sound good to me so I didn't bother following up and getting the recipe to try it...but then she started raving about it again the other day, and I was in the grocery store when she told me the ingredients, so I figured I'd finally make it. And she is right, this is SO good. Yes, it sounds weird. No, peanut butter and tomatoes do not sound like a good combination. Yes, it is delicious and very easy to make. Trust me people, ignore how it sounds and try it!


Ingredients:

  • 3/4 cup roasted and shelled peanuts
  • 2 Tablespoons peanut or neutral oil, like grapeseed or corn
  • 1 medium red or white onion, chopped
  • 1 Tablespoon minced fresh ginger
  • 3 cloves garlic, minced (1 Tablespoon)
  • 1/2 pound skinless, boneless chicken (about 2 thighs or breasts) cut into chunks
  • pinch of cayenne
  • salt and pepper to taste
  • 6 cups stock or water
  • 2 sweet potatoes or yams (about 1 pound), peeled and cut into thick slices
  • 8 plum tomatoes, cored and halved (canned are fine, drain first)
  • 1/2 pound collards or kale, washed and cut into wide ribbons
  • 1/4 to 1/2 cup peanut butter, chunky or smooth


Directions:

Chop peanuts, or crush them with the side of a knife, or pulse them in a food processor to chop roughly.

Put oil in a deep skillet or medium saucepan over medium heat; add onion, ginger, and garlic and cook stirring occasionally until onion is soft, 3 to 5 minutes. Add chicken and cook for another 3-4 minutes until just coloring. Add 1/2 cup peanuts, cayenne, and salt and pepper.

Stir in the stock and sweet potatoes, bring to a boil then turn heat down to medium-low so the soup bubbles gently. Stir in tomatoes and kale/collards, cook stirring occasionally until the chicken is cooked thru, approx. 10 minutes.

Stir in 1/4 cup peanut butter. Taste, adjust seasonings (you may want to stir in additional peanut butter at this point). Serve garnished with remaining peanuts.

4 servings
recipe courtesy of Mark Bittman/Cooking Channel


Saturday, March 25, 2017

Frozen Smoothie Treats

I used to make smoothies every morning for breakfast but got out of that habit for some reason - probably cuz I'm lazy and got tired of washing the blender afterwards ;). Talking to Cathy the other day has inspired me to get the blender back out (it's been so long it's got dust on it!) and whip one up this morning. There are SO many recipes and ways to make smoothies, I bet you already have your favorites and don't need more suggestions - but I do love these tips from Cathy that I'm going to start doing, and want to share them with you.


She makes her smoothies with flavored yogurt, frozen fruit, protein powder, and a splash of milk. First tip is that she keeps bananas (cut in half or chunks) and berries frozen ahead of time so they're ready to toss into the blender and she doesn't have to add ice. I do frozen berries but have only frozen over-ripe whole bananas to use for banana bread in the future - love the idea of cutting them up so they're ready for smoothies. Second tip is if she has leftover smoothie she pours it into popsicle molds and freezes them, then if she wants a sweet treat later in the day or before bed she has these on hand. Great idea right? I don't have popsicle molds but am going to try this in an ice cube tray, don't see why that won't work! Thanks Cathy :)

Friday, March 24, 2017

DIY Bubble Maker

Hello, everyone, it's Brooke! today I was super bored and decided to ty this DIY bubble maker! So the first thing I did was cut the bottom off of a water bottle, then I took an old sock and put it over the part I cut. then in a bowl, I put a couple squirts of dish soap and water and mixed that. then I went outside and dipped the end of the water bottle with the sock in the mixture and then blew on the nozzle of the water bottle and made bubbles!!!! See sounds easy and is easy! it took like 5 minutes!!  hope you have fun with your bubble maker! see you next time! -Brooke


Thursday, March 23, 2017

Phone Call

Guess what I made today?

A phone call.

To order pizza for dinner.

We don't do that very often but hey, sometimes life gets a little busy and you just gotta take a little help where you can :).

Mmmmm....pizza.

That's my tip (and a laugh) for today.


Wednesday, March 22, 2017

Gallery Wall

I've been thinking about creating a gallery wall on the wall between the stairs, but wasn't sure how I wanted it to look - all the same size or different shapes, lined up in neat even rows like a grid or freestyle, all the same color frames or different, black and white or colored pictures...so many decisions! Then I was inspired by Mark Comon's tips on matting and framing (click here and here for those posts) and decided to stop thinking and just do it already.


 I gathered up what I had around the house, surprisingly we are already sort of following Mark's "rules" and have quite a few black and white frames on hand - and that helped me decide which direction I wanted to go. With the different size frames we already have I'll go with freestyle (meaning not evenly spaced in rows), colored pictures and photos, mostly black and white frames.

I'm sure there are lots of ways to figure out how to make a gallery wall, this is what I did:


  • measure the area of the wall where the collection will be
  • put blue painter tape on the floor (I marked the corners only but you could mask off the whole square) to get an idea of how big the space is you are planning to fill
  • lay out all of the pictures on the floor inside the area you have masked off
  • move the pictures around on the floor (over and over and over) until you have them just right. The hardest part of this is trying to imagine how they will look once up on the wall - remember that the ones on the floor at the bottom of your masked area will be closer to the ground so if they are too small or detailed people are going to have to stoop down to see them!

lay out the pictures on the floor to figure out where they will go on the wall

  • once I decided how I wanted them, I took the largest one on the top row and figured out how high I wanted it to be on the wall. Then I freaked out cuz what if I started wrong and then the whole thing would be off! So I got big sheets of paper approx the same size as the top row of pictures and taped them up where I thought the pictures would go and played with them until it felt pretty centered and high enough - it felt weird to hang pictures up that high and the paper helped me determine what would look good.

I used some big pieces of paper to help decide where to start

  • Starting with that largest picture I pounded in the first of many nails! One at a time I removed a picture from the floor and hung it, then measured 1.5" space between it and the next picture...I did the 4 top pictures first and then worked my way down. I couldn't keep up with the 1.5" spacing when I got to the small frames so at that point I just eyeballed what I thought looked good.


There is open space if I find more small pictures to add above and below this arrangement, and we could even continue the gallery on the side walls if we collect more pieces. I love how this turned out!

Tuesday, March 21, 2017

Tips for Framing Your Photos and Prints


Here is the follow up to yesterday's post (click here to see it) about how Mark easily mats his photos and prints - watch this video for good tips on how to simply frame your prints and photos once you have matted them. In a nutshell, just like your mats should be black or white so should your frames. You do not have to match the frames and mats to your wall color, or furniture, or style! Buy the frame once in a standard size and never have to buy it again - just change out the mat and photo.

 Another thing he said that never occurred to me is that people will spend thousands to go on vacation, another thousand on camera equipment - but they balk at spending money on printing. matting, and framing their special photos. That was an epiphany of sorts for me, I've never looked at it like that. Thanks Mark!

After being inspired by these posts from Mark I made a gallery wall that I'm so happy with - I'll share that tomorrow! And it was easy!

Monday, March 20, 2017

How To Museum Hinge Mat Your Photos

Mark showed me the easy way he mats photos and I want to share it with you guys - this is such a great idea! He made a video but I'm having trouble getting it to post here, check the blog Facebook page if you want to watch him in action. I'll break it down for you though - basically instead of taping all 4 corners of the photo to the back of the mat (like I've always done to get it to stay in place) he only tapes the top edge using blue painter tape. The tape easily peels off of the photo when you want to change it out, and just taping the top edge allows gravity to do the rest of the work creating a smooth hanging photo. You can then pop it easily into the frame of your choice. Love it - and was so inspired that I went and made myself a whole gallery wall this weekend!

Another tip is to choose either a white or black mat for all of your photos. Only those two colors - Mark says not to match the mat to your room, or your furniture (or your hair...funny guy), that a simple white or black goes with everything, coordinates with everything, will make your photo stand out, and that the simple act of matting your photo will make it look so much better!


1) print out your picture so it will fit in a standard size mat and frame - there are so many crazy/detailed/customized ways to mat your pictures if you go to a frame store, but sticking with a simple mat in a standard size lets you only have to buy your frames once, when you want to change them you just get a new mat and picture and pop it into your existing frame. That'll save tons of money and is such a great idea that's never occurred to me - every time I want to put a new picture up I go get a new frame! Check back later this week for more tips and info on framing. For this demonstration he printed his picture on 13"x19" paper, and is using an archival quality no-acid white mat that is 16"x20" overall with a 12"x18" opening.
2) then choose your mat - there are different widths available for how much of the picture gets covered. Again, this example is a 12"x18" opening, pick the opening size based on how you want your picture to look once matted.


3) lay the mat on your picture and pick them both up together holding it towards a bright light source so you are looking thru the back of the picture. This way you can easily see where the picture should go in the mat. Get it exactly where you want it, carefully lay them down on a surface and tape the top edge of the picture to the mat using blue painters tape (or archival linen hinging tape if you are hanging in a gallery or long term).


4) line up the edge of the mat backing board with the picture and window mat you just taped, then tape the two boards together. This creates a hinged mat, the window mat and picture in the front with the solid mat backing board sandwiching the picture. Because you've only taped the top edge of the picture gravity is allowing it to hang flat without buckling like it tends to do if you tape all of the edges.


Now you're ready to put it in the standard size frame of your choosing - easy!

These cool tips come to you from Mark Comon at Paul's Photo (remember when I took the creative photo classes there last year? Click here to see one of those posts) - check them out online and get inspired with tons of ideas or classes! These are super creative and helpful people - thanks for the blog post Mark! paulsphoto.com, creativephotoacademy.com


Sunday, March 19, 2017

Zucchini & Quinoa Cakes

I got this recipe from my niece, who got it from her friend who is vegan and went to culinary school. I'm not vegan so I adapted this slightly (used eggs and chicken broth). She sent the recipe via text and there are few amounts given so just wing it on the spices and breadcrumbs. I served them with grilled chicken and a simple salad of halved cherry tomatoes and chopped avocado drizzled with a tiny bit of olive oil. I'm also not sure what size the patties are meant to be so I made a few large ones and some smaller ones - Dave liked them small, I liked them both. They were a bit dry for me (but I'm a sauce person) so I put a bit of sour cream on top, D liked them plain. It made quite a few patties - I ate them for breakfast and lunch the next couple of days but my niece says you can put them in the freezer if you want to eat at a later date. I will definitely make these again!

Cook 1 cup quinoa in 2 cups veggie broth (or chicken broth, or water) according to package directions.

Shred 3 medium zucchini and squeeze out excess water.

Saute one onion and 1/2 head garlic with some red pepper flakes.

Toss everything together with 2 eggs (or use "flax" eggs if you want this vegan), salt, pepper, garlic powder, onion powder, parsley and then add enough bread crumbs to be able to form the mixture into patties. Bake at 375' for 15 minutes, flip and bake another ten until browned on both sides.


Saturday, March 18, 2017

Wine Bottle Storage

Mark made this very cool wine bottle storage for us just using ABS drain tiles. I didn't cut them but it seems like a fairly easy thing to do...


In our pantry we have 6 cubbies - the top 3 are 12"x14" and the bottom 3 are 12"x13" (we store pop and miscellaneous drinks in the lower ones).  He cut 4"diameter drain tile (Mark says PVC would also work) into 9" lengths and just set them on top of each other in the top 3 cubbies - we have 9 pieces in each of them for a total of 27 bottle holders. Yeah, yeah, yeah, that might sound like a lot - but it won't go to waste ;).  I love this storage idea!


Friday, March 17, 2017

DIY Mini Trash Can


Hello, everybody! For today's DIY, we are making a mini trash can! So my dog always gets into my trash that was under my vanity. So i decided to make a mini one that could just sit on top! So I found this little bucket/container and put a zip lock bag over it. after I put the zip lock bad in/over it I put a ponytail/rubber band over it to hold the bag! then when its full you can just take out the bag and put in a different one! this is so cool and is so useful!

Thursday, March 16, 2017

Tassel Earrings


Here is a very easy last minute idea to make a pair of earrings (well it's last minute if you have all of the supplies on hand, we'll talk about that in a minute....) - make 2 small tassels out of embroidery thread and attach them to earring hooks. This is super fast and pretty cute - I made green ones for St. Patrick's Day but think of the possibilities! Easy, cheap, quick jewelry for every holiday :)


For the earrings you will need:


  • 2 6-foot pieces of emerald green embroidery thread 
  • 4 pieces of thread in a complimentary color (I used a silvery metallic). 2 6-inch pieces and 2 12-inch pieces.
  • A credit card
  • 2 earring hooks

1. Take your 6-inch piece of thread and make a knot that keeps a small loop. Set aside.


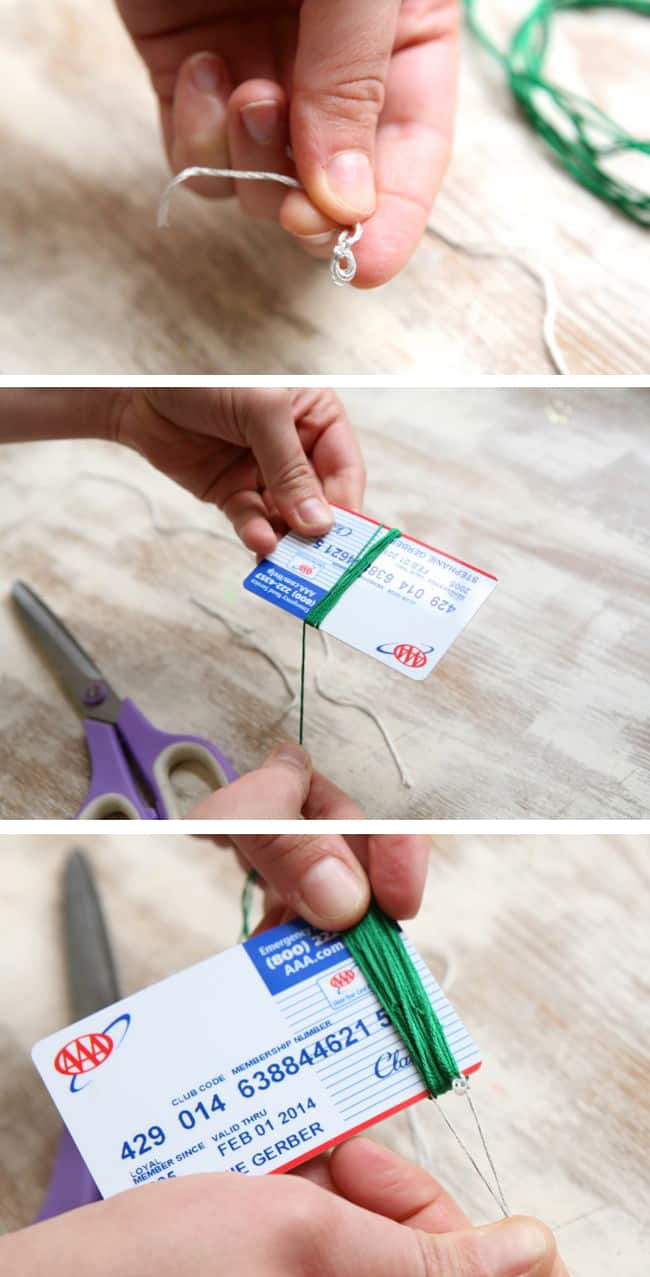
2. Then wrap your emerald thread around the card as shown.
3. Feed the 6-inch piece of thread under the wrapped thread and tie a double knot. Then slide the green thread off the card.
4. Snip the ends of the thread you just knotted, keeping the small loop at the very top.
5. Now take your 12-inch piece of thread and wrap it around the top of the tassel. Make a knot and snip the ends.
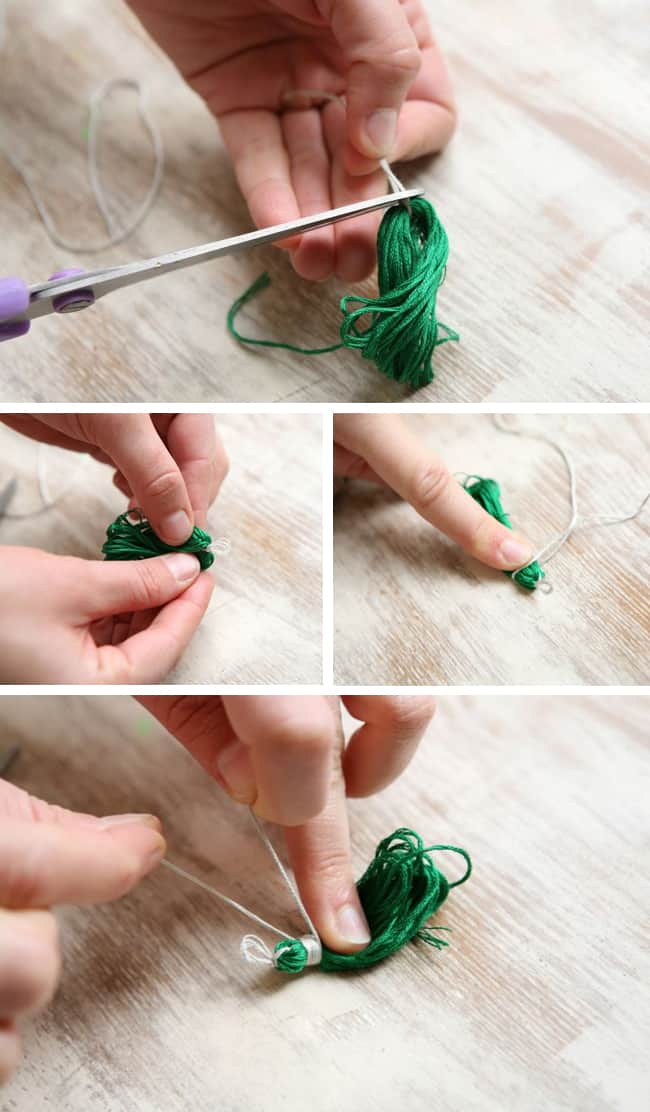
6. Now take your scissors and cut the ends of the tassel. Snip a bit more to even the length.
7. Attach the earring hook to the small loop at the top. You may need to open and close it with your fingers or round nose pliers.
8. Repeat for the second earring. 


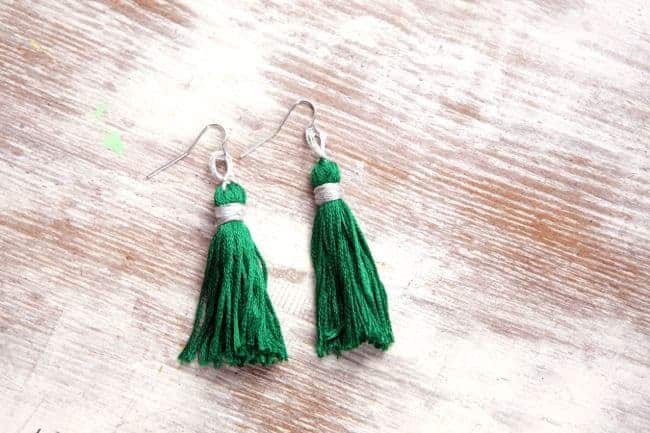
Normally I wouldn't post a unfinished project (!) but I wanted you to be able to make these for St. Patrick's Day if you don't have anything green to wear! I thought I had earring hooks and I don't - so for now I have 2 pretty green tassels but no way to wear them. I will fix that tomorrow with a quick run to the craft store. The other problem with this post is that I used embroidery thread that I had wound on a card (I keep all of my threads on those little cards and filed in a box - know what I mean? If not I will show you!) so the thread has kinks. Not a problem when you are doing embroidery but it is a little problem when making anything else! I am working on a quick solution to get them straightened out, assuming if I get them damp and flatten out with my hand or something heavy it'll be fine. How cute and easy! Just make sure you have all of the materials on hand before you start if you actually want to wear these haha!


Click here to see where I found these directions and more pictures if you want them. 

Wednesday, March 15, 2017

Caramel-Chocolate Chip Cookies

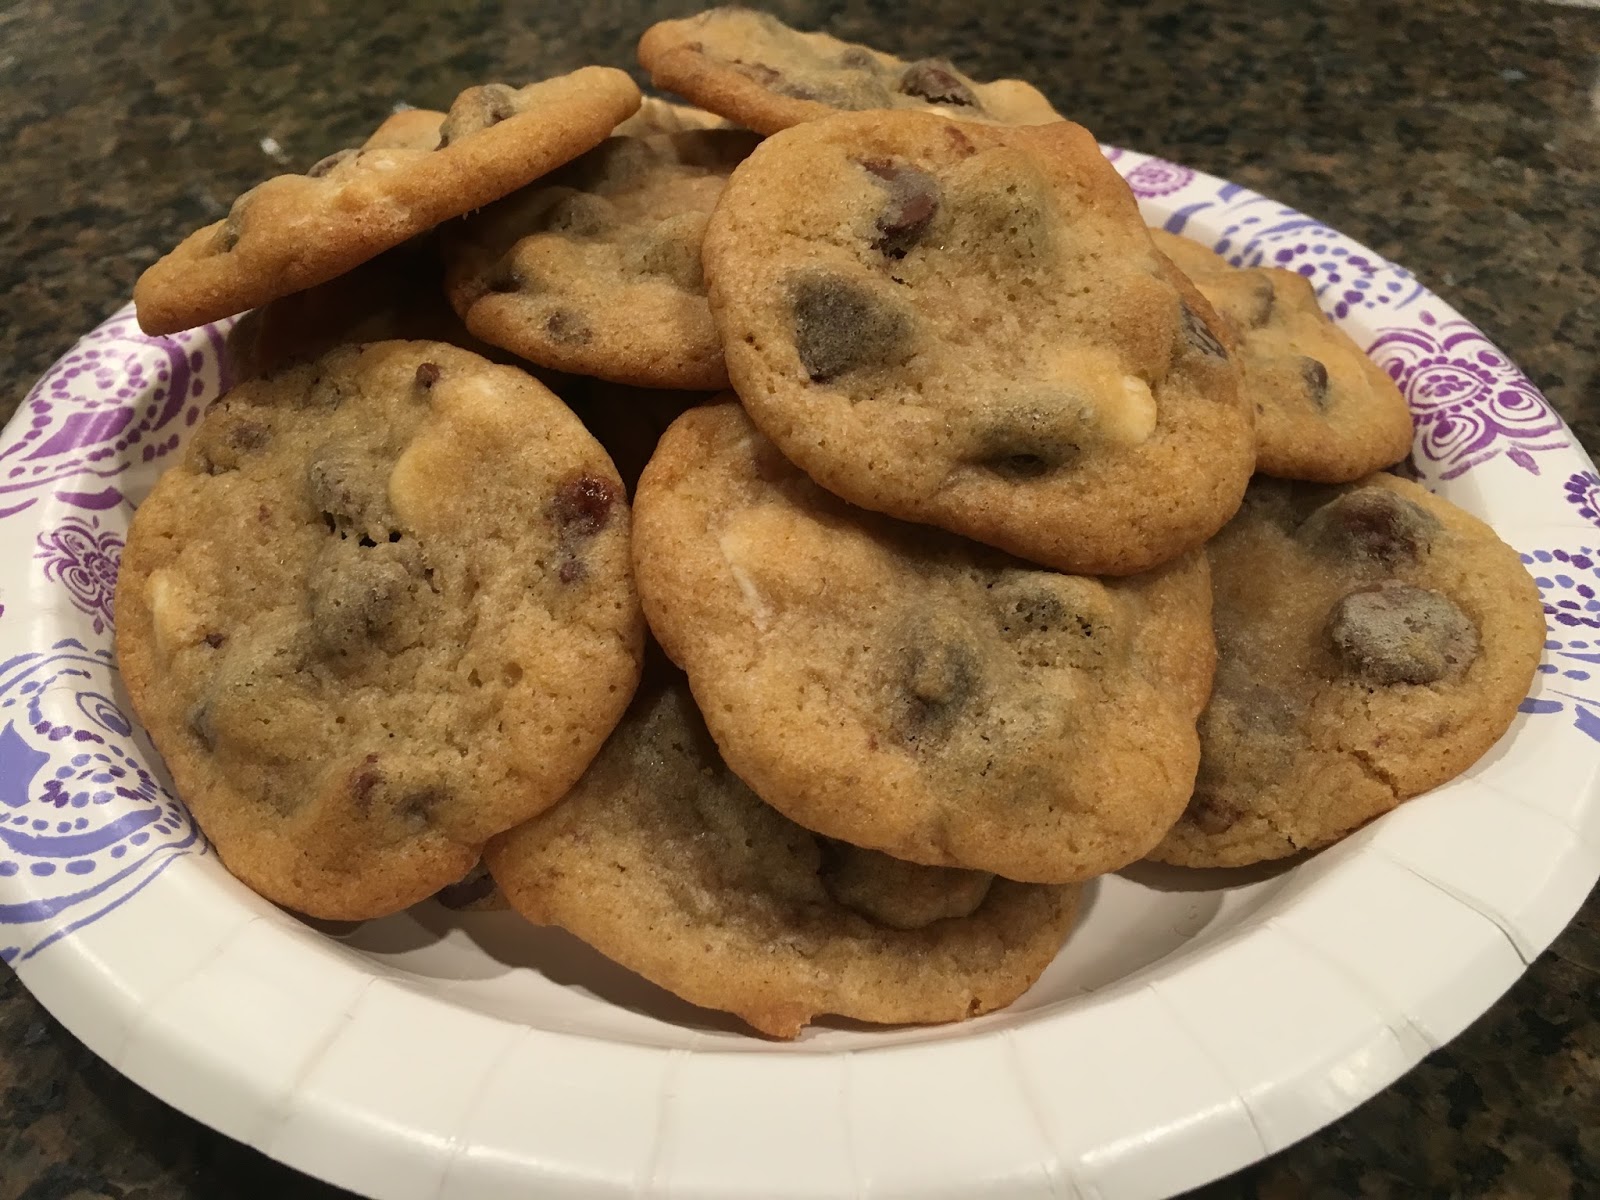
I was in a hurry and needed to whip up some cookies, no time to search for new recipe or spend energy thinking what I wanted to make - after organizing my baking supplies the other day I found some "DelightFulls" which are caramel filled chocolate chips and figured I'd just make the recipe on the back of the package. That's usually safe and it was convenient...these turned out pretty good - good enough to give away and good enough for Dave to chow down a handful before I gave them away haha, not the best chocolate chip cookies ever but if you have these filled chips on hand it's a fine way to use them and the cookies will not go uneaten!

Recipe By:Nestle Toll House
"America's favorite chocolate chip cookie recipe gets a bit dressed up with the lusciousness of Caramel Filled DelightFulls."

Ingredients

  • 2 1/4 cups all-purpose flour
  • 1 teaspoon baking soda
  • 1 teaspoon salt
  • 1 cup butter, softened
  • 3/4 cup granulated sugar

  • 3/4 cup packed brown sugar
  • 1 teaspoon vanilla extract
  • 2 large eggs
  • 1 1/2 cups NESTLE(R) TOLL HOUSE(R) Delightfulls Caramel Filled Morsels
  • 1 cup chopped nuts*

Directions

  1. Preheat oven to 375 degrees F.
  2. Combine flour, baking soda and salt in small bowl. Beat butter, granulated sugar, brown sugar and vanilla extract in large mixer bowl until creamy. Add eggs, one at a time, beating well after each addition. Gradually beat in flour mixture. Stir in DelightFulls morsels and nuts. Drop by rounded tablespoon onto ungreased baking sheets.
  3. Bake for 9 to 11 minutes or until golden brown. Cool on baking sheets for 2 minutes; remove to wire racks to cool completely.

Tuesday, March 14, 2017

Rope Covered Curtain Rod - yay or nay?

I'm taking a poll - do you like the rope swagged around the curtain rod? Dave says it looks like I'm getting ready to hang myself, I think it looks good ;). What do you think?

Monday, March 13, 2017

Shamrock Butterfly Card

I made a version of this last year (click here for that and other St. Patrick's Day decorating ideas), this time I changed the direction of the shamrocks and added gold sequins - cuz really, why stop at just cute shamrocks when there's sequins just laying there waiting to be used - and put it on pretty paper for Ronda's seasonal display table. And because I went crazy punching out green hearts for the wreath I made last week (click here for that post) I had some left over so also made an 8x10 sized vertical one - you can't tell in this picture but I drew yellow vertical lines on white paper for the background.