Wednesday, July 31, 2019

Mexican Street Corn Salad

I found this recipe at melskitchencafe.com when looking for an idea for a summer side dish - I cannot even begin to tell you or describe how good this is! Everyone loves it, I actually made it twice in one week we love it so much. I did it with both fresh and frozen (unthawed) corn kernels, I prefer the texture of the fresh corn but the frozen is a very close second. It took a lot longer to get a nice golden color on the kernels (I did it in a pan, not grilled) didn't grill the corn on the cob, just cut the kernels off and cook them in a skillet as directed for the frozen corn. It took me a lot longer to get a nice golden color than the recipe states, but it's worth the little extra time. Mmmmmmmm this is the best! 


 for the corn:
  • 3 to 4 cups frozen or fresh corn kernels  OR 6 to 7 ears fresh corn on the cob
  • 1 T. butter
  • 1 T. oil
for the dressing:
  • 1/4 cup mayonnaise (I used light)
  • 1/4 cup sour cream (I used light )
  • 1/4 cup copped fresh cilantro, plus more for serving if desired
  • 2 T. lime juice
  • 1 t. chili powder
  • 1 t. salt
  • 1/4 t. ground cumin
  • 1/8 to 1/4 t. paprika (or smoked paprika)
  • pinch black pepper
for the salad:
  • 1/4 to 1/2 cup crumbled cheese (like quest fresco, cotija, or feta)
  • lime wedges or slices, for garnish if desired

                                     
Directions:

For the corn: for corn kernels, heat the butter and oil in a skillet until sizzling. Add the corn in an even layer and let cook for 1-2 minutes without stirring. Continue to cook, tossing, until sizzling and golden, another 2-3 minutes. For corn on the cob, brush the corn with oil or melted butter and grill over medium heat until golden and starting to char, 3-4 minutes. When cool enough to handle, cut the kernels off the cob. 


For the dressing:
In a medium bowl, whisk together the mayo, sour cream, cilantro, lime juice, chili powder, salt, cumin, paprika and pepper. 


Add the corn kernels and stir to combine well (I like to add the corn when it is still slightly warm). Add additional salt and pepper to taste, if needed. 

Sprinkle top of salad with cheese, additional cilantro, and serve with fresh lime wedges or slices. Salad is delicious warm, room temp, or chilled.

makes 6 servings

click here for original source


Tuesday, July 30, 2019

Tuesday Tip: Guacamole Toast

We are obsessed with avocado toast. Dave said the other day that "those Millenials actually know what they're doing when it comes to avocado toast - why didn't we think of it first?" hahahah. We had some leftover guacamole and I wondered how that would taste in place of plain old regular avocado toast (literally I just mash avocado on bread with salt and pepper - beyond easy) - and it's good!


Not sure this really counts as a "tip" for today's Tip-sy Tuesday post, more like an experiment or observation or something. Wanted you to know that it's good!

Monday, July 29, 2019

Steering Wheel Cover


I was inspired to make this after seeing something similar in a catalog but they wanted like $30 bucks for it - um, no...I made it for under 5 and love how it turned out. I get that you're either gonna love it or hate it - based on my sister's reaction most might be in the later category LOL but I don't care because it makes me happy! C'mon, who doesn't want fringe on their steering wheel? Oh wait, Dave isn't going to be thrilled about this when he has to drive my car - oh well, whatever. He'll be happy that it doesn't have any glitter on it, he really hates that. Hahahaha. I do love me some fringe.


I got the plain steering wheel cover at the dollar store, and sewed on some fringe and other trims. I planned to add one more blue rickrack stripe but after trying it out in the car I feel like this is "enough" - but who knows, I might add more in the future. And if the fringe touches my legs and makes me think a bug is crawling on me I might trim it down a little!


Here's what it looks like when I turn it around and only the fringe is showing - hey look, options!


7.29.17: wonder woman keychain 
7.29.16: Brooke makes a tie blanket

Sunday, July 28, 2019

Around the Campfire 🔥 (week 30)

Dear Campers ~

Here's what you might have missed this week at MMDC:

Posts ~

7/21: 🔥 (week 29)
7/22: Mark's goulash
7/23: Tip-sy Tuesday: plumping dried fruit
7/24: grow a schefflera plant
7/25: Jen's broccoli salad mash-up
7/26: lego cord holder
7/27: penne alla vecchia bettola

Miscellaneous stuff keeping me busy but not worth a whole post ~
  • read "American Predator" which scared the crap out of me. I read a lot of thriller/murder/action books, and I love that genre, but this is a true life serial killer story and I did not like it. I mean, it's a good book and all, but now I'm on the alert for random serial killers in my midst. Not cool. So I give it a ⭐️ purely because it's turned me into Nervous Nelly, which I am normally not.
  • camped last weekend, it rained one day and I spent the entire time cleaning out my computer photos. And I still have a few thousand to still go thru.
  • working on two projects that I can't tell you about yet! So far they're turning out cute....will keep you posted. 
That's it for this week - I've been super busy and now my niece is here visiting so not much quiet time hahahah. Hopefully I'll be able to squeeze in a bit of crafting - check back next week for some recipes, whatever crafts I make, and anything else I can think of! Have a great week :)

Sincerely ~


Jill
camp counselor and niece entertainer

Saturday, July 27, 2019

Penne Alla Vecchia Bettola

Al made us this rigatoni in creamy tomato-vodka sauce for dinner (served with grilled sausages) and it is SO good I want to pass the recipe on. He found it on Food Network (Ina Garten, she's the best) and didn't change anything as far as I know. This is a keeper recipe -  and while it isn't exactly healthy or quick, it doesn't sound too hard to make and it's delicious - totally worth the creamy cheesy calories!


  • 1/4 cup good olive oil
  • 1 medium Spanish onion, chopped
  • 3 cloves of garlic, diced
  • 1/2 teaspoon crushed red pepper flakes
  • 1 1/2 teaspoons dried oregano
  • 1 cup vodka
  • 2 (28-ounce) cans peeled plum tomatoes
  • Kosher salt
  • Freshly ground black pepper
  • 3/4 pound penne pasta
  • 4 tablespoons fresh oregano
  • 3/4 to 1 cup heavy cream
  • Grated Parmesan cheese

  1. Preheat oven to 375 degrees F.
  2. Heat the olive oil in a large oven proof saute pan over medium heat, add the onions and garlic and cook for about 5 minutes until translucent. Add the red pepper flakes and dried oregano and cook for 1 minute more. Add the vodka and continue cooking until the mixture is reduced by half.
  3. Meanwhile, drain the tomatoes through a sieve and crush them into the pan with your hands. Add 2 teaspoons salt and a pinch of black pepper. Cover the pan with a tight fitting lid and place it in the oven for 1 1/2 hours. Remove the pan from the oven and let cool for 15 minutes.
  4. Meanwhile, bring a large pot of salted water to a boil and cook the pasta al dente. Drain and set aside.
  5. Place the tomato mixture in a blender and puree in batches until the sauce is a smooth consistency. Return to the pan.
  6. Reheat the sauce, add 2 tablespoons fresh oregano and enough heavy cream to make the sauce a creamy consistency. Add salt and pepper, to taste, and simmer for 10 minutes. Toss the pasta into the sauce and cook for 2 minutes more. Stir in 1/2 cup Parmesan. Serve with an additional sprinkle of Parmesan and a sprinkle of fresh oregano on each plate.


Click here for source


7.27.18: Japanese string gardening
7.27.17: crochet a mug cozy
7.27.16: travel trip for medications

Friday, July 26, 2019

Kid Craft: Lego Cord Holder

Looks like I'm not the only one in the family who likes playing with Legos...Brooke made this funny usb cord holder for my desk, and I smile every time I look it - of course she had to use a scary face instead one of the pretty ones LOL. Such a funny girl :)


7.26.18: chickpea cucumber salad
7.26.17: granola bites
7.26.16: apple strudel...fail

Thursday, July 25, 2019

Broccoli Salad/Cole Slaw Mash-Up...by Jenny

I didn't make my sis dinner this week (I know I'm going to hear her say she's hungry and I'm starving her haha), but I do have this post that she did for me a while ago but I forgot to share it! So here's the replacement post from her instead of a 'my sis is hungry' review for this week...hey, maybe I should review HER cooking this time LOL:


Continuing on my trend of lousy blogs that are not real cooking or real crafting ~

Today’s no cooking-skill required thing that I eat: 
Odd concoction of Broccoli Salad and Cole Slaw.  Yes that’s my official name for it.  Catchy I know.

I LOVE broccoli salad that you buy from the deli.  You know the one that swims in sugary mayo?  Coating the broccoli but yet still allowing people to feel they are being healthy by eating a vegetable?  I love it.

Anyway.  One day I decided I could make that healthier and better.  Below is my attempt at it - adding coleslaw mix (not already with dressing) for filler.


1 head Broccoli- cut and washed
½ bag Cole Slaw mix
1 cup Craisins
1 cup Light Coleslaw dressing

Love this so much. The Craisins make it sweet, its crunchy so I feel like I’m getting a snack and I can make a big bowl and keep it in the fridge for a couple days of snacks.  Love it. 
Yes I realize my sister will mock this – or she will say she used to make that years ago, with some kind of homemade dressing that made hers better than mine, but whatever.  Love it.


*Jill here - no I'm not going to mock this salad, it sounds delicious - I am going to mock her for how many times she says "love it" in the post tho - I count 5!!! 


7.25.18: peanut butter granola
7.25.17: how to sharpen knives
7.25.16: Prague

Wednesday, July 24, 2019

Propagating a Schefflera

We have a very big Schefflera plant in our living room that grows crazy fast and I have to cut off the top branches a couple times a year - one time we came home in the spring to find it making a break for the ceiling, its got SO tall!! We started calling it Seymour...wait a minute, wait a minute - I'm just remembering that I've written about my crazy houseplant before and I need to go find the previous post...


Ok, I was right - and I'm going to repost it today because I have two stems that are ready to be planted, check out the roots that formed in less than 2 months! I literally cut off two stems and put them in a vase of water - nothing else. I'm going to give these cuttings with their fresh roots to my niece so she can grow her own big ol' Seymour Schefflera hahahah!. Pretty cool, huh? And so easy to do...


Here's the other post from last June:


This is very not exciting but thought I'd share what I'm working on today...houseplants. Sometimes you don't get to make fun things that you'd rather work on, and have to do a little maintenance instead hahaha! Boring, but necessary. About once a year I realize that my indoor plants have either outgrown their pots, need some general TLC, or have shot up so high they look like they are making a break for it and trying to burst thru the ceiling (or maybe more like the plant in Little Shop of Horrors that eats people - what's it's name, Seymour? Sydney? Can't remember, I should probably google but I'm busy potting plants and I'm not taking the time since it totally doesn't matter). I'm trimming some back (and if it's a nice plant I put a couple of the longer pieces in water and root it - just let the stem hang out in a glass or vase of water until roots start forming and then plunk it in some dirt, voilà another plant) and if they are shooting off sideways I take twine and a stick (put it in the pot and use as an anchor/support) and tie the side branches up so it's more compact; some just need a bigger pot, and I have a couple that I should throw out but I'm putting them in our screened porch to see if a little summer vacation help them - if they still look bad in a couple months and aren't trying hard enough to earn their way back into the house then out they go. Fair warning ;)


7.24.18: Candy's shrimp dip
7.24.17: paper gift pouches
7.24.16: Nuremberg

Tuesday, July 23, 2019

Tip-sy Tuesday: Plumping Dried Fruits

Plumping dried fruits like raisins is easy and really makes a difference. They get a softer texture, adds moisture, and brings out the flavors. Put the dried fruit in a small bowl and cover with hot water, let them soak for a few minutes then drain off the water. You can also add more flavor by soaking them in fruit juice or alcohol like rum, bourbon, or brandy (like I did for last week's 'North Carolina Tarheel Cookies').

Try adding plumped dried fruits to salads and other dishes in addition to baking with them. I don't love raisins but plumping them first (especially in alcohol haha) makes them way better!


Monday, July 22, 2019

Man-day Monday by Mark

So, after three days of forcing leftovers down me from our wonderful weekend boater guests, I was more than ready to cook. 
(Wife gone too😲)

"I Think They Call This Goulash"

  1. Go to local grocery store and purchase macaroni noodles, 1# hamburger, onion, green pepper can of diced tomatoes and tomato paste to thicken. 
  2. I asked our friendly store lady if it looked about right and she said yes! I'm feeling good now. 
  3. You know what to do next. 
  4. Wondering how many noodles to put in I read the bag, it had another recipe that called for half a bag and 2 cloves of fresh garlic (which we had!) so I did it. 
  5. It looks to thick so I emptied the catsup bottle tipped upside down in the frig and decided equal part of Sweet Baby Rays couldn't hurt. Oh, I tossed in some Awe Shit hot powder I got for my birthday too.   
  6. Accidentally communicate with Jill so she can ask you for a guest blog 
  7. Relax to some music and have a drink as it simmers


PS:  Wife got home - leftovers get a "special" tweaking! 


Sunday, July 21, 2019

Around the Campfire 🔥 (week 29)

Dear Campers ~

Here's a recap of what happened at camp this week in case you missed anything:

Posts ~
7.14: 🔥 (week 28)
7.15: Miss Lori's gorgeous felt flowers
7.16: Tip-sy Tuesday: frosting tip
7.17: North Carolina Tarheel cookies
7.18: my sis is hungry: Mexican stuffed peppers
7.19: Brooke makes funny t-shirts
7.20: grilled tuna pasta salad

What's Cooking ~
  • garden tomato sauce with chicken sausage and meatballs, polenta (recipe to follow shortly!)
  • grilled tuna, greek salad with creamy dressing, roasted garbanzo beans
  • grilled chicken, black bean and corn salad (mixed with tomatoes and cojita cheese)
  • grilled tuna pasta salad (see above)
Miscellaneous stuff keeping me busy but not worth a post ~
  • read "A Stranger in the Woods" that Al recommended, it's an interesting book about a real life guy who decided one day to get lost in the woods and stayed in there for 27 years becoming a hermit and never having contact with anyone. He stole supplies and food from local cottages until he was finally caught. I like quiet and being alone, but 27 years? Wow. ⭐️⭐️⭐️⭐️
  • spent way longer than necessary organizing my new golf bag I got for Christmas. Yep, it's July and I just now set it up. Not sure why I needed a new bag when apparently I'm a very lazy golfer who only goes out once a year haha! Then I spent even longer on Amazon picking out new golf club covers that go with the new bag and my big stuffed Scottie head cover. How is it I ever get anything done? 
Hope you had a great week and are staying cool! I walked Sarge at 6 am Friday because it was already in the mid-80's and humid - ugh. Stop back next week to see a couple more recipes, a blog from Brooke, and whatever else I can think of. 

Sincerely ~


Jill
camp counselor and hot weather whiner

Saturday, July 20, 2019

Grilled Tuna Pasta Salad

It is smokin' hot and super humid out (aka: also known as my least favorite weather!) and I really really wanted cold dinner last night - we had some leftover dressing from making creamy cucumbers and a big piece of tuna that Dave grilled the night before (seasoned with Montreal steak spice blend);  I did a quick boil of cavatappi noodles and after they cooled mixed with some diced celery, a big handful of thawed frozen peas, shredded mozzarella/cheddar cheese blend, a big sprinkle of grated parmesan, the chopped up leftover tuna and   the creamy dressing. This was so good! Hit the spot during the oppressive heat, clean up was easy, and Dave said "this is great, are you going to blog it?" I wasn't, because it's just basic tuna pasta salad but the addition of the creamy dressing and fresh fish really made it a little more special - so yes, I'm sharing :)


The dressing is easy and I make it all the time - it's really good on a greek salad of chopped cucumbers, halved cherry tomatoes, feta cheese crumbles, and roasted garbanzo beans - mix all together in a small bowl:
  • 1 teaspoon sea salt (or to taste)
  • 1 1/2 cups mayonnaise (or mix 1/2 mayo with 1/2 greek yogurt)
  • 2 tablespoons vinegar
  • 1 tablespoon white sugar
  • 1 teaspoon dried dill weed
  • 1 teaspoon garlic powder
  • 1 teaspoon ground black pepper
I've been making it lately without the sugar and adding a dollop of Miracle Whip since it's a little sweet and I have a jar of it right now.


7.20.18: kid craft: beach jars
7.20.17: how I organize my garden stuff
7.20.16: Budapest and Vienna

Friday, July 19, 2019

Fabric Transfer T-shirt

Brooke came over the other day and asked if I knew how to print a photo on a t-shirt. I do, and I even have the transfer paper left over from making her Halloween costumes a few years ago (click here to see them). It's very easy and I can't even tell you how over-the-top happy she was after making these shirts! Super cute.


She did a silly one with a picture of her friend on it which she thought was hilarious and couldn't wait to wear in front of her friend, and she was dying to make one with this guy from Stranger Things on it (I don't watch the show so I don't know his name. And it's probably against some law to snap a picture of the guy and then print it on a shirt hahahaha but since she isn't selling them or profiting from it fingers crossed we she doesn't get busted. I'm totally pointing the finger at her if that happens).

You need fabric transfer paper for either light or dark colors, depending on the color of your shirt. For the light blue one we used light paper, and dark paper for the coral one. Follow the directions on the package - the directions differ depending which paper you're using. The coral shirt using the dark paper was easier - after printing your image on a piece of fabric transfer paper you remove the backing, lay the print on the t-shirt, cover with tissue paper, iron. Easy! The light paper transfer is a bit different - you print your image in reverse, lay it face down on the t-shirt, iron, wait for it to cool, then peel the backing off. Not hard but the paper didn't want to peel off very easily.

All-in-all a fun quick project and the girl was thrilled. Can't beat either of those things 😊

light transfer paper - I didn't include the finished
t-shirt because Brooke said her friend wouldn't want
her face on the t-shirt on the blog LOL! 

dark fabric transfer -
remove the paper backing and place the image where you want

iron following package directions

7.19.18: baked artichoke dip
7.19.17: grilled artichokes
7.19.16: chicken salad endive cups

Thursday, July 18, 2019

My Sis is Hungry: Mexican Stuffed Peppers

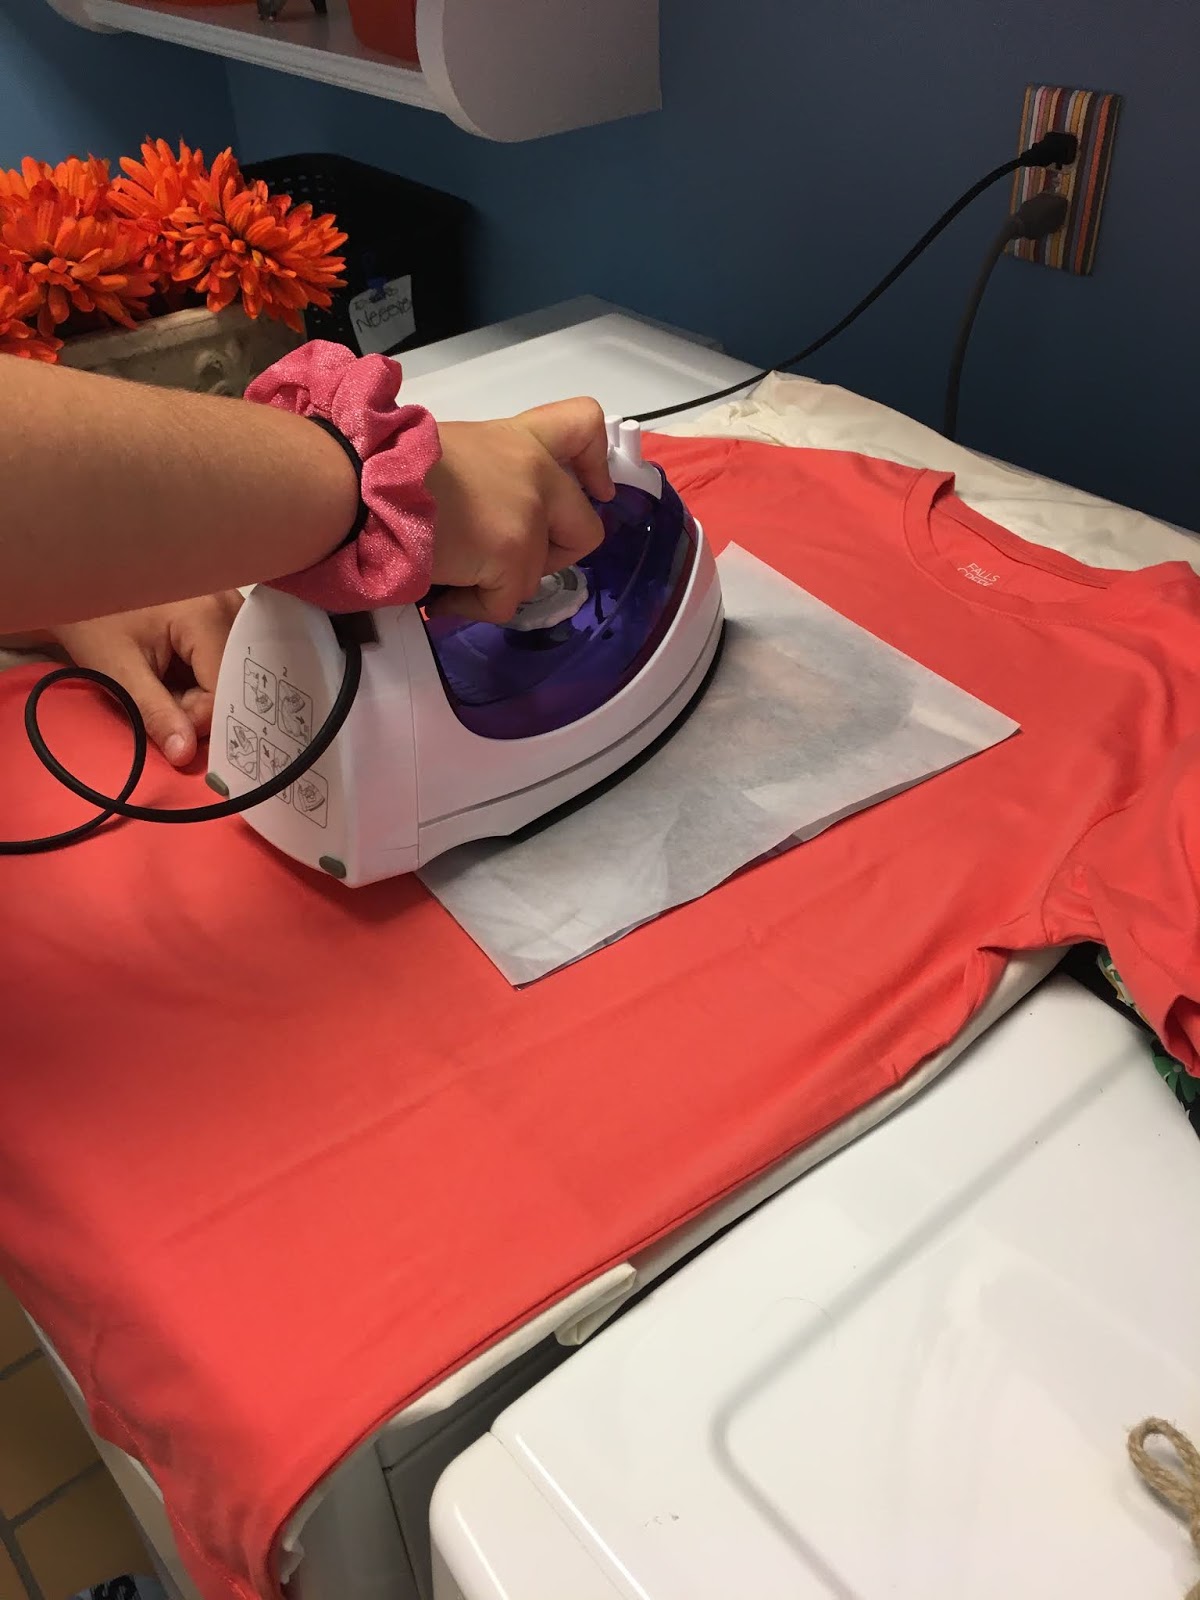
It's been 2 weeks since I made dinner for my sis to review and she's making it sound like it's been months 🙄 such a drama queen LOL. This week I made her these stuffed peppers (I also gave her some of yesterday's North Carolina Tarheel Cookies which she deemed "money" but wished there were no raisins in them, after she finds out they're rum soaked she might change her tune hahahah) - here's what she has to say about the peppers:


Hello!! I’m still here!! My sister tried to kill me by starving me to death but I refused!
Today’s meal could have really been anything and gotten a good review because we were so hungry! (haha . just kidding). Ok so lets get to it. 

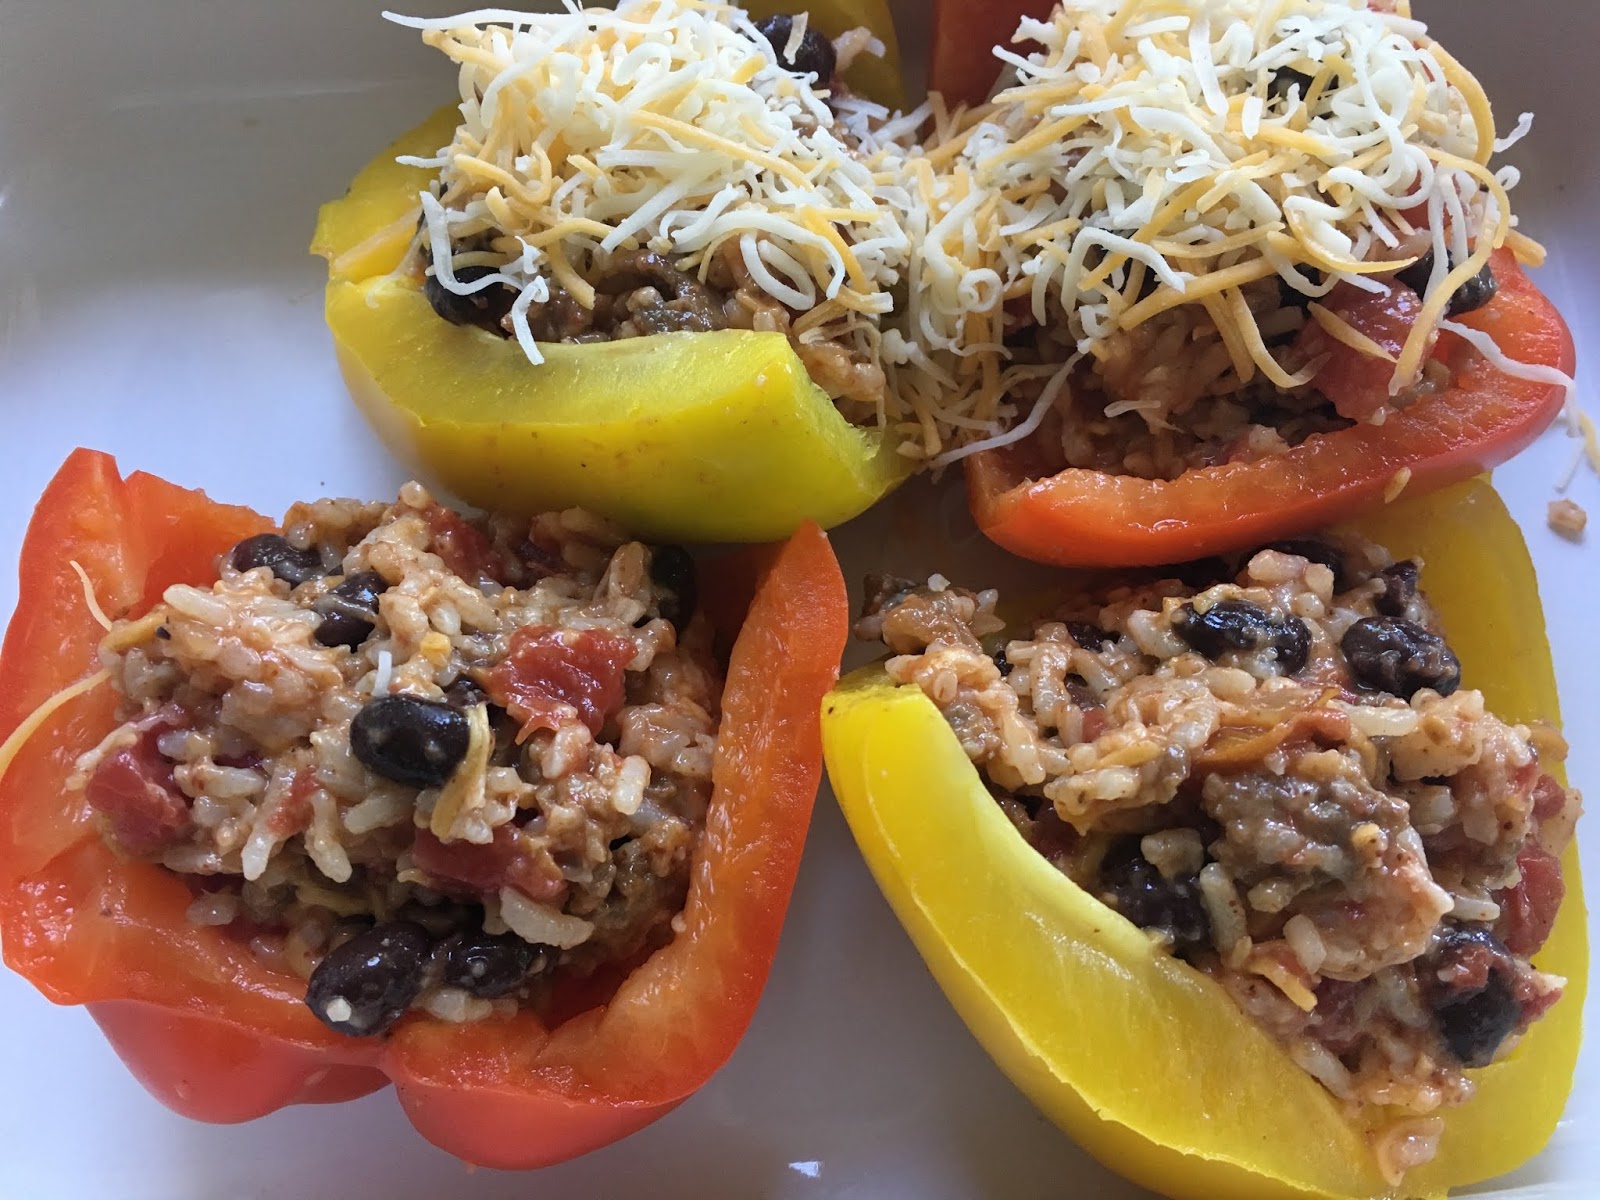
Stuffed peppers of some sort.  She called them “Mexican” something or other, probably just to get my husband to accept he was eating vegetables.
First her instructions to bake said “until heated thru and cheese is bubbly, at least 30 minutes”.  How would I know if heated through unless I bit into one?  The cheese was melted so I took them out and served them.  Yep, you guessed it, cold inside. So don’t listen to her 'at least 30 minutes'.  Lets say at least 45 minutes.

These look fantastic.  So pretty.  Plain green peppers wouldn’t have been as pretty at all so loved the peppers. I loved this meal.  Really loved it.  Have to be honest I have never had stuffed peppers before so can’t compare it to others.  But this one I liked. I am also a fan of the burrito bowl so this reminded me of that.  I hope they were healthy- which would make my rating of this go even higher.  If it wasn’t healthy I don’t see a reason it couldn’t be.  Whatever sauce was in the filling wasn’t strong or overpowering so I’m assuming its healthy (haven’t actually read the recipe yet.)
Now lets discuss the husband.  He doesn’t like rice, black beans or peppers so his review of “Not Bad” was actually a compliment. And he did eat it all so “Not Bad” must have been kinda ok.

All in all, I didn’t get a rating from him (forgot to do that) but I give it a 7.  If I hear its healthy I will go up to an 8.  I plan to actually make this one- I love the idea of putting all my burrito bowl ingredients into a pepper and baking. Hmmmm maybe I’ll swap her rice for cauliflower rice?  Yum.  Now I gotta look it up- unless I can get her to make it for me again. ðŸ˜Š

Mexican Stuffed Peppers ~
  • 6 large bell peppers
  • 1 tablespoon olive oil
  • 3 (sweet or hot) Italian sausages, casings removed
  • 1/2 cup chopped onion
  • 2 cups cooked rice
  • 1 (15 oz) can no-salt-added black beans, drained and rinsed
  • 1 (14.5 oz) can no-salt-added diced tomatoes, don't drain
  • 2 teaspoons chili powder
  • 1 teaspoon Mexican spice blend
  • 1/2 teaspoon garlic powder
  • 1/2 teaspoon cumin
  • 1/2 teaspoon salt
  • 1 (8 oz) package shredded Mexican cheese blend, divided

Preheat oven to 350'. Bring a large pot of water to a boil.

While waiting for the water to boil, cut off tops of peppers. Scoop out seeds and discard. Cook peppers in boiling water until slightly softened, 3 to 4 minutes. Drain and set aside.

Meanwhile, heat oil in a skillet over medium heat. Cook onion and sausage, stirring and breaking up the meat into small crumbles, until the onions are softened and the sausage is cooked thru. 

Stir together sausage, onion, rice, beans, and tomatoes in a large bowl. Stir in spices, then fold in
1 1/2 cups cheese. Divide rice mixture evenly among the peppers, stand them in a baking dish, sprinkle with remaining cheese.

Bake until cheese is melted and bubbling, about 30 minutes.


*Jill here - my sis didn't tell me that her husband doesn't like rice, black beans, or peppers! Good grief, the poor guy hahahaha. This is healthy up until the Italian sausage, if you omit the meat and use low-fat cheese they are definitely good for you and I think they'll still taste great without the sausage. LeDonna and I split one of these for lunch, we didn't bake them but microwaved for a couple minutes and they were plenty hot and we both loved them - she said she likes them maybe even more than regular stuffed peppers. I will absolutely be making this filling again - Dave doesn't like peppers so I will stuff large hollowed out tomatoes or zucchini next time. Oh, and I think cauliflower rice would definitely work Sissy!


7.18.18: Cathy's strawberry pie (so good!!)
7.18.17: tip to keep off the shoulder tops off the shoulder!
7.18.16: Jen's tip for washing baseball hats

Wednesday, July 17, 2019

North Carolina Tarheel Cookies

  1.  I have no recollection of taking a cooking class at "The Tasting Spoon" in Marina del Rey   where this recipe is from.
  2.  I have a terrible memory so even tho I don't remember it, doesn't mean it didn't happen.
  3.  I wrote on the top of the recipe "very good - chewy, many flavors"; I should totally be a food   critic with my eloquent descriptions.
  4.  I didn't read this recipe all the way thru, probably wouldn't have made them if I saw that it  makes 6 1/2 to 7 dozen cookies! 
  5. At the bottom of the recipe the author wrote "I always get 7 dozen, but I don't eat raw dough"
  6. Anyone else feel like that's a little bit judgey? hahahaha. I only got 57 cookies which is 4.75 dozen (I had to use the calculator to figure that out) but I did not eat 2.25 dozen cookies worth of dough Ms. Judgey Judgerson. Maybe my idea of "walnut size"* and hers is different.
  7. Lastly, I have no idea why these are named "North Carolina Tarheel Cookies". When I googled for other recipes nothing came up except college-themed frosted cookies. Weird. But whatever the name, these are really really really good. Oh wait - actually they are "very good - chewy, many flavors". Sort of a cross between chocolate chip and oatmeal with a few other things thrown in. Note I didn't add nuts so Dave could also eat them, which is good since I have 4.75 dozen cookies.
Ingredients:
  • 1 1/4 cup raisins
  • 1/2 cup rum or brandy
  • 1 stick butter, room temperature
  • 1/2 cup shortening
  • 2 cups firmly packed brown sugar
  • 2 eggs, lightly beaten
  • 6 ounces semisweet chocolate chips
  • 2 teaspoons vanilla
  • 2 cups flour
  • 1 teaspoon baking powder
  • 1 teaspoon baking soda
  • 1 teaspoon salt
  • 2 cups shredded coconut
  • 1 cup chopped nuts
  • 3 cups quick-cooking oats (note* I used regular old-fashioned oats which makes an even chewier cookie)
Directions:
  1. Soak raisins in rum overnight - or microwave, covered with plastic wrap for 1 minute. 
  2. In an electric mixer cream butter, shortening, and sugar until light and fluffy. Beat in eggs, then chocolate and vanilla.
  3. In a separate bowl combine flour, baking powder, baking soda, and salt. Add to mixer. On low speed add coconut, nuts, and oats. Drain the raisins and add to mixture (discard brandy).
  4. Roll dough into tablespoon/walnut-sized* balls. Place on parchment lined baking sheet about 2 inches apart. 
  5. Bake at 325' for 12-15 minutes until light golden brown. Leave on baking sheet for 1 minutes, then remove to wire racks to cool. Store in tightly covered containers in a cool place. 


Tuesday, July 16, 2019

Tip-sy Tuesday: Frosting

After making the cookie dough cupcakes last week I learned something I didn't know - the batch of buttercream frosting made exactly enough frosting for 2 tablespoons on each of 24 cupcakes. Usually I pipe the frosting on using a decorating bag but this time I used a scoop and found the size of the scoop is exactly right to divide the frosting evenly on one batch of cupcakes. Cool. Good to know.

mmmmm...nothing like ice cream scoops
of homemade buttercream frosting! 

I've posted my buttercream recipe a few times, but here it is again so you don't need to go looking:

Cream 1 stick of unsalted butter in a standing mixer (or use a hand mixer) until its fluffy. Add 1 teaspoon vanilla, a pinch of salt, 1 cup powdered sugar. Gradually add another 3 cups of powdered sugar alternating with a little milk or cream until you reach the right consistency.

You can change it up by adding cocoa powder to make chocolate frosting; or beat in some cream cheese or marshmallow fluff; or fold in thick pudding, whipped cream, or cool whip...lots of variations but you can't beat plain ol' vanilla buttercream in my book.

Funny story from when my nieces were little - I made cupcakes and for whatever reason used canned frosting. They were all "these are weird and don't taste like usual" - even little kids could tell the difference! After that they'd ask for cake with "the good" frosting. So cute.


7.16.18: golf counter pin
7.16.17: zucchini lasagna
7.16.16: Jen has a fun friend gift idea

Monday, July 15, 2019

Felt Flowers

Guys!

Check out the beautiful felt flowers Miss Lori made - I'm so, so impressed with how talented my friend is (and if I'm being truthful I'm also a tiny bit jealous - I mean c'mon, I make silly Lego crap and she's turning out these stunning flowers?). Just look how pretty they are, are you thinking what I'm thinking and cannot wait to attempt this yourself? 'Cuz after seeing these photos my first thought was 'I need to learn how to do this, and I need to do it asap'!


Big thanks and shoutout to Miss Lori for sharing this with me (and you!) along with a few notes, I will absolutely be attempting to make these in the near future. Seriously, I love these wreaths so much...I can't even pick a favorite, they are all gorgeous.


Here's what Lori has to say about making them:


Thank you Jill! I saw this little video on the Hobby Lobby website and gave it a whirl!  (I started with the flowers on the side like in the video but I didn’t like how it hung when it was done, so changed it up a bit)


I did a little variation on the one where you clip straight lines along the fold-I just did the cuts diagonally instead and it turned out cute!


For the tall, longer flowers, you use the same folded and clipped piece that is shown in the video and then hot glue at the top of the wire then wrap the piece around and around from top to bottom, push it up to where you like and hot glue bottom in place.


For the flower with the felt center, I just cut the inner piece for example, 1 inch and the outer piece 2 inches.  Cut and rolled the inner, then cut and rolled the outer piece over it.


I tried a couple variations-a 6 petal flower instead of 5, and I used pinking shears on a couple.

I saw this pic for the daisy-it is the only one that is sewn rather than hot glued-

By altering the colors and sizes the possibilities are endlessly wonderful!  The best thing, they don’t take long at all!


This is it for a bit now though, my fingers need a break from hot glue!


7.15.18: greek chicken bowls
7.15.17: card holder
7.15.16: Jen organizes some clutter