Friday, September 30, 2016

Cauliflower Pizza

Ok, stay with me here - I love this and it's a much healthier version of pizza ... even if you aren't looking for a healthier version of pizza it's worth trying! I know it sounds weird but it's good - Dave will even eat it (when I won't let him order regular pizza!) and seems to like it - or doesn't complain about it if he doesn't haha :).  After baking the crust for a few minutes add whatever toppings you like (we like mushroom, canadian bacon and fresh tomatoes) - or you can top the crust with just cheese (no sauce) and bake it for a few more minutes, then cut into "breadsticks" which is also yummy and makes a good side dish. C'mon, try it :)

I follow this recipe (click here to see original post), but there are many recipes online if you want to check them out. Note: after microwaving the cauliflower I press paper towels on it to remove as much moisture as possible, I don't put it on a towel like the recipe says.


Ingredients: 
  • 1 head cauliflower, stalk removed
  • 1/2 cup shredded mozzarella
  • 1/4 cup grated Parmesan
  • 1/2 teaspoon dried oregano
  • 1/2 teaspoon kosher salt
  • 1/4 teaspoon garlic powder
  • 2 eggs, lightly beaten
Directions:

Preheat the oven to 400 degrees F. Line a baking sheet with parchment paper.
Break the cauliflower into florets and pulse in a food processor until fine. Steam in a steamer basket and drain well. (I like to put it on a towel to get all the moisture out.) Let cool.
In a bowl, combine the cauliflower with the mozzarella, Parmesan, oregano, salt, garlic powder and eggs. Transfer to the center of the baking sheet and spread into a circle, resembling a pizza crust. Bake for 20 minutes.
Add desired toppings and bake an additional 10 minutes.
Recipe courtesy of Katie Lee


Read more at: http://www.foodnetwork.com/recipes/katie-lee/cauliflower-pizza-crust.html?oc=linkback

Thursday, September 29, 2016

Chalkboard Doors


My mom did this really cool thing to her pantry doors and I wanted to share - it's a fun creative idea that I am totally gonna steal! She taped off a border around each panel and then painted the inside with chalkboard paint. Simple and look how cute it is! She drew pictures and words of favorite places, I can also see using it for grocery lists, recipes, or just fun doodles. Good job mom :)

Wednesday, September 28, 2016

pumpkin nutella cookie bars

Mimi 🍰:
I GOT YOUR BOX!!!!!
Omg it smells so good! 
Omg. Stuffed w Nutella. Omg omg omg so delicious 
The fricken best thing ever
         They're great!!!!! So so good. Thank you so so much!

That's the text my niece sent after she got these pumpkin nutella bars in the mail from me - a few weeks ago she sent me a pin from Pinterest with a note that she hoped they would come in the mail hahaha. So I thought I'd do just that for her.   If any of my other nieces want something in the mail they should let me know ;)

Shipping them was easy - remove the entire baked thing from the pan by lifting the foil out and leave them whole instead of cutting up into bars, wrap tight in more foil and bubble wrap and then put in a priority box. It took 3 days for her to get them and she said they were still all in one piece and super moist - this is a winner recipe for sure!

I (for once) didn't change a thing - found the recipe here at crazy for crust. 


Ingredients:

1/2 cup unsalted butter, melted
1/3 cup pumpkin puree
3/4 cup dark brown sugar
1/4 cup granulated sugar
1 egg yolk
1/2 teaspoon baking soda
1/2 teaspoon salt
1/2 teaspoon ground nutmeg
1/4 teaspoon ground ginger
1/4 teaspoon ground allspice
1 teaspoon ground cinnamon
1 teaspoon vanilla extract
1 3/4 cups all purpose flour
3/4 cup Nutella

directions:

1. Preheat oven to 350'. Line a 9x9" pan with foil and spray with cooking spray.
2. Place melted butter, pumpkin, and both sugars in the bowl of an electric mixer fitted with the paddle attachment (or use a hand mixer if you prefer). Mix until smooth, about 30 seconds. Mix in egg yolk, baking soda, salt, spices, and vanilla. Mix in flour until batter is smooth. It'll be a soft batter.
3. Press half the batter in the bottom of the pan. The batter is sticky so you may want to spray your hands with cooking spray. It'll be a thin layer in the bottom of the pan. Bake for 8 minutes.
4. Place Nutella in a microwave safe bowl. Heat for just a few seconds until pourable. Pour evenly over the top of the partially baked crust. Spread it carefully so it doesn't rip the cookie bars. Scoop tablespoons of batter of the top and carefully spread with your fingers. It won't be a smooth layer but will mostly cover.
5. Bake an additional 17-20 minutes until the top is no longer glossy and the edges are golden brown. Cool completely before slicing.
6. Makes 16 bars. Store in an airtight container for up to 3 days or freeze for up to 1 month. 


Tuesday, September 27, 2016

Organizing 101... Socks

This is Cathy's idea and I just started doing it cuz it's an easy thing to do and helps to be more organized - who doesn't like that? Pretty smart actually...she saves the paper liners that come in her no -show socks (in my case I'd thrown them all out so made up a simple template and cut more out of coated cardboard or heavy cardstock) and keeps her socks on them lined up in her drawer. No more searching for the match!

before....
...and after! I just realize I'm missing
my "friday" socks...Brooke?

make a template...

cut out however many you need and insert
into your pair or no-show socks.

Monday, September 26, 2016

Wood Box with Chalkboard Message

with or without words it's so cute!
How cute is this easy little message box? It's pretty simple and not much skill involved.

You'll need a small unfinished wood box (with or without a clasp), stain or craft paint, chalkboard paint, and some kind of fake plant that fits in the base of the box.

Stain or paint the box whatever color you want. When it's dry paint 2 coats of chalkboard paint under the lid. Put the fake plant in the base, write a message in chalk on the lid or not - whatever you want. My inspiration idea for this came from a project idea I saw on Michaels.com, they used a bunch of little succulents in glass vases to fill the box but I saw this sheet of fake grass and liked it better. I put it in the bathroom with no chalk message but then saw the soap eggs I have on the counter and was inspired by them to write "nest" and place the eggs on the grass. Awwwww, I enjoy.

wearing gloves, I just wiped the stain on and off with paper towels


trim the plant to fit inside the base of the box

seeing the soap eggs made me think of a nest...

Sunday, September 25, 2016

Grilled Chicken with Veggies and White Bean Bake

I know, I know... we eat a lot of baked veggie and bean combos! Here's another one that sort of just happened - I didn't have a plan, just started putting things in the baking dish and it turned out so good I figured I might as well share in case you're looking for an easy fairly healthy summer meal.

not the prettiest picture, but I didn't know how good
it was going to be until after I plated and tasted it! 

The grilled chicken was super simple - put boneless chicken breasts in a large baggie and drizzle with olive oil. Add in a bunch of italian seasoning (I have a grinder of this that I'm obsessed with and put on everything!) and a heavy sprinkle of poultry seasoning, seal the bag and smush it all around so the oil and seasoning has coated the chicken evenly. Grill until done.

In a 13x9 baking dish put a couple thickly sliced zucchini, 8 oz sliced mushrooms, a big handful of halved cherry tomatoes, and a can of rinsed and well drained white beans (I used Great Northern). Drizzle with olive oil, sprinkle with coarse salt, stir all together to combine and bake at 400' for about 45 minutes. Remove from oven and add a splash (maybe 1/3 cup) of reduced fat alfredo sauce, stir again and put back in the oven for a few minutes until the sauce is hot. Sprinkle with grated parmesan.

Easy and really good -  Dave and I both went back for seconds and there were (unfortunately) no leftovers. That's a good sign!

Saturday, September 24, 2016

Tip for Ice Cream Containers

A quick little thing that makes life a little easier - if you get ice cream in the tall circular half gallon carton, cut down the container as you eat it, cover it with plastic wrap then put the lid back on. It helps the top of the ice cream not get all yucky (I'm not sure why ice cream gets weird in the container as you eat your way down, you know what I'm talking about?) and stays fresher. Also it takes up less space in the freezer and goodness knows I need all the space I can get - I have that baby jammed full all the time.

When I'm making an ice cream dessert I just cut the carton in half with a long serated knife while it's still full and that makes getting the portion I need out easier. Otherwise I trim the carton down with scissors if the top of the container is empty.

Friday, September 23, 2016

Painting Pottery

the under colors are different soft shades
of pink, yellow, pale blue, pale green - hard
to see in this photo. 
Brooke and I did one of our favorite things a couple weeks ago and went to the pottery painting place for the afternoon. We've been doing this since she was little and let me tell you, her skill level is certainly improving! You'll have to ask her about the time she was painting a mickey mouse figurine and decided to do this flicking paint thing all over it that she watched someone else doing, that sounds fine until you picture her doing this with red paint right across from where I was sitting carefully painting a platter for a friend's birthday -- you guessed it, I had red flecks everywhere and wasn't happy about it! Yikes. She's really good at it now thank goodness :) For her mom's birthday she painted a travel mug in very tasteful gray with white polka dots and the inside yellow - very cute.

I couldn't decide what to make (it's good to go to the place with a plan!) but then thought I'd try a technique I saw somewhere and make a platter with the blog name on it - I painted the first few coats multiple different washed colors, then stuck the letters down where I wanted the words to be and painted a couple coats of dark teal over top of the whole thing. After it dried I removed the letters so the washed colors could be seen from underneath. If I do it again I will make the under colors much brighter, the soft washed colors don't show up super good - but it's still cool and I'm going to make it my Facebook profile pic for awhile. Have you ever gone to paint pottery? Great way to entertain a kid, kill some time, and make something different and unique while you're at it!
working on the travel mug for her mom.

painting pottery selfie 

you can see the letters stuck down on the plate, then I painted overtop. after it's dry carefully peel off the letters.
yes, Brooke is for some reason singing into her pretend microphone in the background - hahaha! 

Thursday, September 22, 2016

Wine and Design - Corn Husk Wreaths

Candy and I took another "wine and design" class at our local nursery - although this project required full use of both hands  all time so there was not much opportunity for drinking anything! Oh well, it was still fun - but more difficult than I thought it'd be! Not hard, just awkward - and it took some muscle.

Starting with a grapevine wreath and a bunch of freshly cut corn husks (when we signed up I assumed we would be working with dried husks - but they're fresh). Using 2 or 3 husks, bend and gather them into about 6-8" bunches then place them on the wreath and wire them on using a paddle of thin easily bendable wire - this is where the muscle comes in, you want to pull the wire quite tight so things don't shift and the husks get dislodged.

The rule of thumb is to wire 2 bunches on the outside, one on the inside, and one on the top and then shift down a couple inches and repeat. Pay attention to your placement and spacing trying to keep things similar all the way around, if your bunches get longer or fuller/less full it will change the symmetry of the wreath. When you get done run the wire over and under a couple places in the back to secure it.


One tip or word of caution - don't leave these in the back of the car when you get home or your car will smell pretty bad the next day and you'll get grief from your husband about it. You want to leave them to air out. Don't ask me how I know.

our instructor made this one, we used it as an example. He
suggested added bows, branches of bittersweet, or maybe
small gourds, indian corn, etc. to change it up thru the season.


Wednesday, September 21, 2016

Sprinkles No-Bake Cheesecake

Funny story - at my sister's work they take turns bringing in birthday treats, you bring for the person who has the next birthday after yours. Every year when it's her turn to bring in for the guy (I'll call him P.) who has the birthday after her (and it's always been P., no one has hired in to change the order) I always volunteer to make the dessert for her because...well I think we all know why - she dislikes baking but I love it! So over the years I've made quite a few different things for her to take in, P. doesn't like buttercream frosting so I come up with something other than the usual frosted cupcakes for him (last year it was a giant whoopee pie). Well this year another man has hired in that shares the same birthday with P. - they were all discussing this and someone said they were sorry for my sister cuz now she'll have 2 people to bake for and P.  goes "no, I feel sorry for her sister!". Ha! That made me laugh...
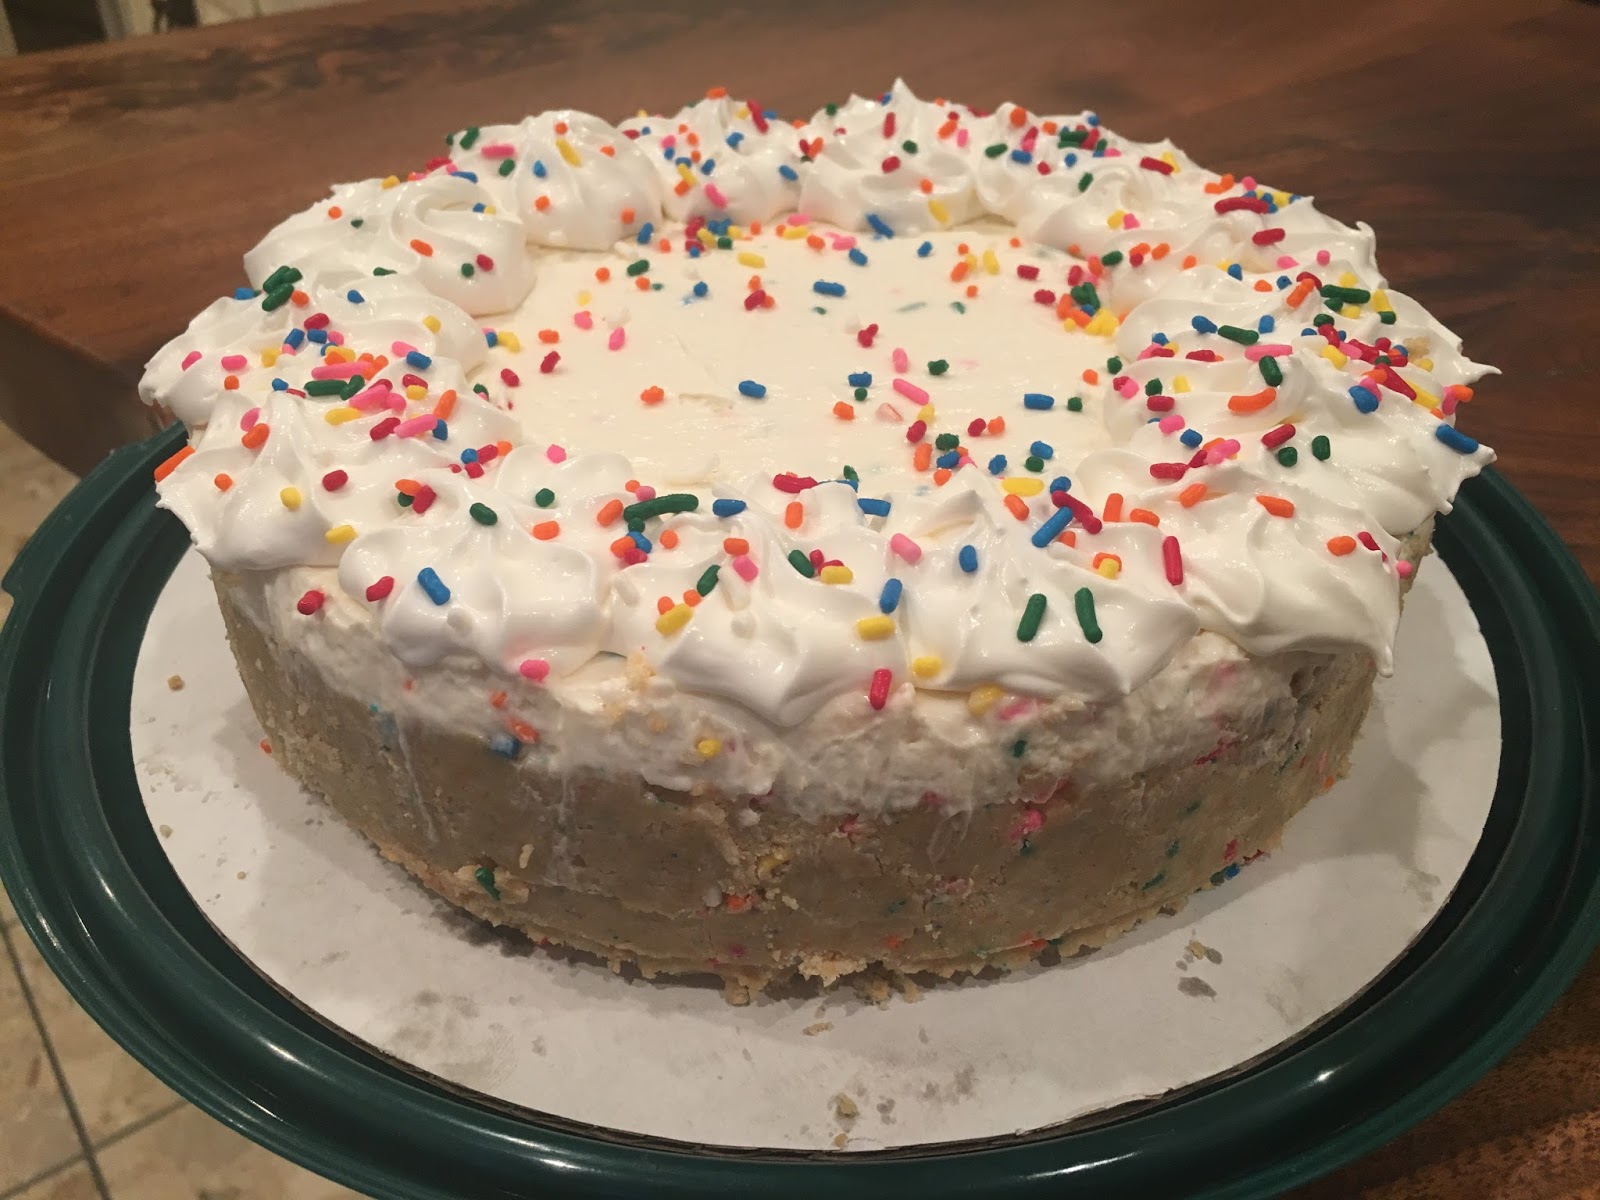
Add caption

Anyway - this year I decided to make Sprinkles No-Bake Cheesecake and it turned out pretty good. It tastes great, there are just a couple things I'd do different next time - here's the recipe I followed and then I'll post my notes after.

Crust:
2 1/2 cups Golden Birthday Cake Oreo crumbs (I found it's about 25 oreos FYI)
3 T. melted butter
2 T. sprinkles

Filling:
24 oz. cream cheese, room temperature
3/4 cup granulated sugar
2 Tablespoons flour
3 teaspoons vanilla extract
1 1/2 teaspoon butter flavor
3 T. sprinkles, plus more for decorating
12 oz. Cool Whip, divided
*note I added a big spoonful of sour cream to the batter, I like that flavor in cheesecake - you do not have to do this and it's still delish.

Instructions:
1. Combine oreo crumbs with melted butter and sprinkles, press into the bottom and halfway up the sides of a 9" springform pan. Set in the refrigerator to firm.
2. Mix cream cheese, sugar, flour, vanilla, butter flavor together in a large bowl until smooth and well combined.
3. Gently stir in 8oz Cool Whip and sprinkles.
4. Pour filling evenly into the crust and smooth the top.
5. Refrigerate for about 4-6 hours or until firm.
6. Remove cheesecake from springform pan and put on a cake plate. Top with remaining whipped cream and additional sprinkles. Refrigerate until ready to serve.

Notes: spray the springform pan before putting the crust in to make it easier to remove the cheesecake from the pan. make sure the crust around the sides of the pan is not too thin or it will crumble when you remove the finish cake from the pan - try to get it even all around the sides and the bottom. I put the cool whip in a decorating bag and piped stars around the top and added sprinkles, it wanted to spread though and didn't stay in high peaks. I would probably make fresh whipped cream in the future for decorating - or just spread the cool whip evenly across the top (or swirling it around with a spoon would be pretty) and then add sprinkles. Oh, and you will use a small bottle of sprinkles for this cake so make sure you have enough!
I didn't know there was such a thing as birthday cake oreos! Where have I been?

Sarge wondering why I'm holding this pan over his head..


I based the idea for this cheesecake from this recipe (click here to see it), then changed it a bit.

Tuesday, September 20, 2016

Finish What You Start

I'm trying really hard to live by my new "motto" - to finish what I start. It's harder than it seems! I'm a pretty organized neat person generally, but trust me - if I let things go I can leave a tornado in my wake and not even realize it. And then I'm so overwhelmed by all the stuff I've left out in every room, and the laundry still in the dryer, and the dishes not done, I panic and don't know where to start so I procrastinate and go distract myself by reading book or leaving the house hahaha!! So I have to tell myself repeatedly "finish what you start. finish what you start" before I leave the room. Even simple things like putting something away before leaving a room helps me - it might seem like a little thing to use the scissors and not put them immediately back in the drawer but if you do this a few times in every room there will all of the sudden be stuff everywhere and then it becomes more work to take care of everything. Does this happen to you? Maybe my new motto can help :)


Example of what happens when I don't pick up my craft areas when I'm making things - I end up working on top of other projects, or pushing stuff to the side to free up space. Both of these tables have numerous projects going mixed in around and on top of each other! Ugh - it's not a good environment for my creativity when this happens!!

I've also learned it's important for me to clean up as I go, especially in the kitchen. When I'm baking I keep a big bowl of hot soapy water in the sink and dump all the measuring cups and utensils, etc. in the bowl as I use them - and wipe stuff up as soon as possible, that saves me time not having to chisel hardened stuff off the counter.

Monday, September 19, 2016

Beaded Bracelets with Words

I was online surfing and came across these stretchy bead bracelets with words and sayings - and they wanted $20 apiece for them! Seriously, I own the same exact beads and of course thought to myself "I can make that". It took less than an hour to make all three of these - and cost nowhere near $20 to make all three let alone just one...I have made bunches of these in the past but they sort of seemed out of style for awhile - but after seeing them for sale in an adult online store (and for that price) I'm totally making them again!

I made them 6.5" long, measure your wrist to determine how long you want yours - before starting to string the beads I lay out how long the word/words are and then roughly figure how many beads I'll need to make 6.5", divide that number in half. Tie a knot in the end of a 10" piece of stretchy cord, string the larger middle bead on first then follow with half of the beads you are using, followed by the word beads. I put a small accent bead on either side of the word, and a longer small bead between the words to separate them. Then add the rest of the beads making sure the whole thing is how long you want it. Note if you realize the bracelet is too big or too small I adjust by removing the knot and larger middle bead and remove or add from that end - that way you don't have to remove them all and then have to restring them, you'll only need to remove the middle bead to add or detract. You want the same number of beads on either side of the middle bead and the words in order for the bracelet to by symmetrical...if you don't care if it's balanced or not then don't worry about that step and put them on however you want! When you have the correct number of beads strung tie the two ends together - pull the cord pretty tight but don't reef on it or it might snap - then put a dot of clear craft glue on the knot. Then slide the larger middle bead over the knot to hide it if possible.

you'll need stretchy cord, word beads, other filler beads, one larger middle bead,
a couple small accent beads, and a dot of clear glue. 
tie a knot in one end and add the larger middle bead, then string half of the filler beads before adding the
word beads, accent beads, and then the remaining filler beads. 

measure how long your words on so you can center them in the middle of the bracelet

when you are done stringing beads tie the two ends together and add a drop of glue on the knot.
then put the larger middle bead overtop of the knot to hide it. 


These are so easy and quick to make, good gifts, and it'd be a great kid craft - other than cutting the 10" piece of cord everything else is harmless (unless they swallow the beads I guess, use your judgement!).

Sunday, September 18, 2016

Steven's Favorite Baked Macaroni and Cheese

Candy brought me two pieces of this mac and cheese, said it's her husbands favorite but it isn't hers so she wanted me to try it and see what I thought. Well I'll tell you what I thought - it is great!! I can't believe she doesn't love this rich, cheesy, creamy fabulousness of pasta! I try to not each much pasta but I could not stop eating this - fortunately she told me he cuts it up into squares and freezes it so when he just wants a piece it's already portioned out and is still great after thawing and re-heating, so I attacked the first piece and then immediately popped the second piece into the freezer so I wouldn't inhale that one too (for now anyway!). I love the idea to freeze this in individual squares, that will be perfect to go with my frozen meatloaf "cupcakes" - if you need a quick dinner, just pull out a meatloaf cupcake and a piece of mac and cheese...I can't think of a better frozen dinner. Mmmmm... Thanks for sharing the recipe Candy and Steve :)

12 oz. macaroni
1/4 cup butter
1/4 cup flour
1 1/2 cups milk
1 cup half and half
2/3 teaspoon dry mustard
1 teaspoon onion powder
salt and pepper to taste
1 can cream of cheddar soup
4 cups sharp cheddar (divided)
1/2 cup parmesan cheese
bacon bits

Cook macaroni according to package directions, don't overcook - you want the noodles slightly firm.
Melt butter in large saucepan. Whisk in flour and cook 2 minutes. Then slowly add milk and cream. Remove from heat, add parmesan and 3 cups cheddar cheese. Add soup and mix well.
Place cooked macaroni in ungreased 13x9 baking dish and pour sauce over macaroni, stir to combine. Top with 1 cup cheddar cheese and bacon bits (sprinkle on however many you want!)
Bake at 425' for 18-20 minutes until bubbly.

after it cools cut it into pieces and put in the freezer - great leftover idea!
This is really really good - you're gonna love me (and Steve!) for sharing this one with you!

Saturday, September 17, 2016

German Chocolate Cake

Today is LeDonna and my little sis's birthday (sis lives out of state tho so she doesn't get cake!) - last year I made L. German Chocolate Cupcakes (click here for that post) and when looking back at that post I don't think I explained it very well so decided to try to fix that today. I usually make her this 9" layer cake and all the ingredients are the same as for the cupcakes, but it's so much more impressive in layer cake form! I've made this many many times and like to think I've perfected it - Dave can't sample it because of the nuts so I can't get his vote, but everyone seems to love it. Warning - it's very very rich, serve in small slices!


for the cake:
  • 1 german chocolate cake mix
  • 1 package vanilla instant pudding mix
  • 1 cup sour cream
  • 1/2 cup water
  • 1/2 cup vegetable oil
  • 4 large eggs
  • 1 cup miniature chocolate chips
*mix all together and bake according the mix instructions. Let cool completely then either split the 2 layers in half to make 4 layers or leave as 2 layers.

for the filling:
  • 1 can (12 oz) evaporated milk
  • 1 1/2 cups granulated sugar
  • 12 tablespoons (1 1/2 sticks) unsalted butter
  • 4 large egg yolks, slightly beaten
  • 1 1/2 teaspoons vanilla extract
  • 1 package (7 oz.) sweetened flaked coconut
  • 1 1/2 cups chopped pecans
*place the evaporated milk, sugar, butter, egg yolks, and vanilla in a large saucepan over medium heat. Cook, stirring constantly with a wooden spoon, until thickened and golden brown in color, 10 to 12 minutes. Remove from the heat. Stir in the coconut and pecans. Cool the frosting to room temperature (about 20 minutes) before spreading between the layers. Note I do not put the filling on the top of the cake, just between the layers.

ganache for the top of the cake:
  • 3/4 cup heavy whipping cream
  • 8 oz. (1 1/3 cups) semisweet chocolate chips
*bring the cream to a boil in a saucepan. Meanwhile place the chocolate in a large mixing bowl, then pour the hot cream over the chocolate, stir until the chocolate has melted. Let it rest on the counter for about an hour uncovered and it will thicken up a bit. Then you have options - you can serve warm as a glaze or ice cream topping; chill it in the fridge for a filling or scoop out with a melon baller into truffles and roll them in unsweetened cocoa powder;  or whip on high speed with an electric mixer for a whipped ganache frosting. This is SO GOOD - any way you use it!

After it has cooled on the counter and thickened a bit I pour it over the top of the cake letting it drip down the sides. Put the cake in the fridge and let the glaze set up. Then whip the rest of the ganache until it is the consistency of frosting and spread that on top of the glaze, garnish or decorate with whole pecans. Seriously - this is so impressive and beautiful, rich and moist, and really good. Wicked good. I dare you to not eat whipped ganache with a spoon ;)

picture from 9/21/15 post - same cake made up into cupcakes,
put 2 T. batter in the cake liners and add some filling, then
top with more batter - so the filling bakes into the
middle of the cupcake. then top with glaze and nuts. 

Friday, September 16, 2016

Celebrate!

Woohoo! 364 posts and one year later, we need to celebrate the first anniversary of the blog today! What better way then with cake and a present? A present for one lucky person anyway :) I'm holding a drawing on Facebook today - if you "like" the blog and "share" today's post to your timeline you will be entered to win a $25 Michaels card! You have until 9am EST tomorrow 9/17 to enter and then I'll do a random drawing to pick the winner  - and no Brooke, you can't enter even tho I know you really really want the gift card :) Everyone else can enter and have a chance to win, good luck and thanks in advance for entering!

My very first blog post was 9/16/15 - "Sprinkles"... chocolate cupcakes with chocolate buttercream frosting and lots of sprinkles of course (and they were yummy!).  Click here to see that post.

Thursday, September 15, 2016

First Year Blog Anniversary!

So tomorrow is the one year anniversary of the blog... I can't believe I've done this for a year already! I'm pleasantly surprised that coming up with enough posts for the year wasn't hard at all, and it's flown by -  my phone and iPad are still full of inspiration photos, ideas, and recipes - everywhere I look it seems there is something I want to make, bake, try, and do - so I'm going to keep creating and posting, and hopefully you'll keep reading and be inspired to make stuff. I LOVE when you guys comment or privately tell me that you are following the blog (I can't tell who reads it unless you tell me or leave a comment on the blog or Facebook) - it's fun to know you are out there! Blogging makes me happy because it's a great way for me to share all of the things that keep me busy every day, and if you get an idea or are inspired by something then I'm happy to be sharing.

I can't even tell you how true every one of these are - this is my life!
Heads up - if you are on Facebook I am going to hold a drawing tomorrow to celebrate the blogs first year birthday. Check in there to see what the "rules" for entering are and hopefully you'll participate and win! Good Luck! :)

Thanks to everyone for reading my blog, for all of your comments, for all of your private messages, and for your support - it means SO much to me! In return I'll do my best to keep making, creating, baking, snapping, planting, fashioning, arranging, exercising, decorating, mixing, and entertaining you the best I can :)