Sunday, January 31, 2021

🔥Around the Campfire (week 5)

Dear Campers ~

Here's a quick recap in case you missed anything at camp last week:

Posts ~

1/24: 🔥week 4 

1/25: beaded mask leash

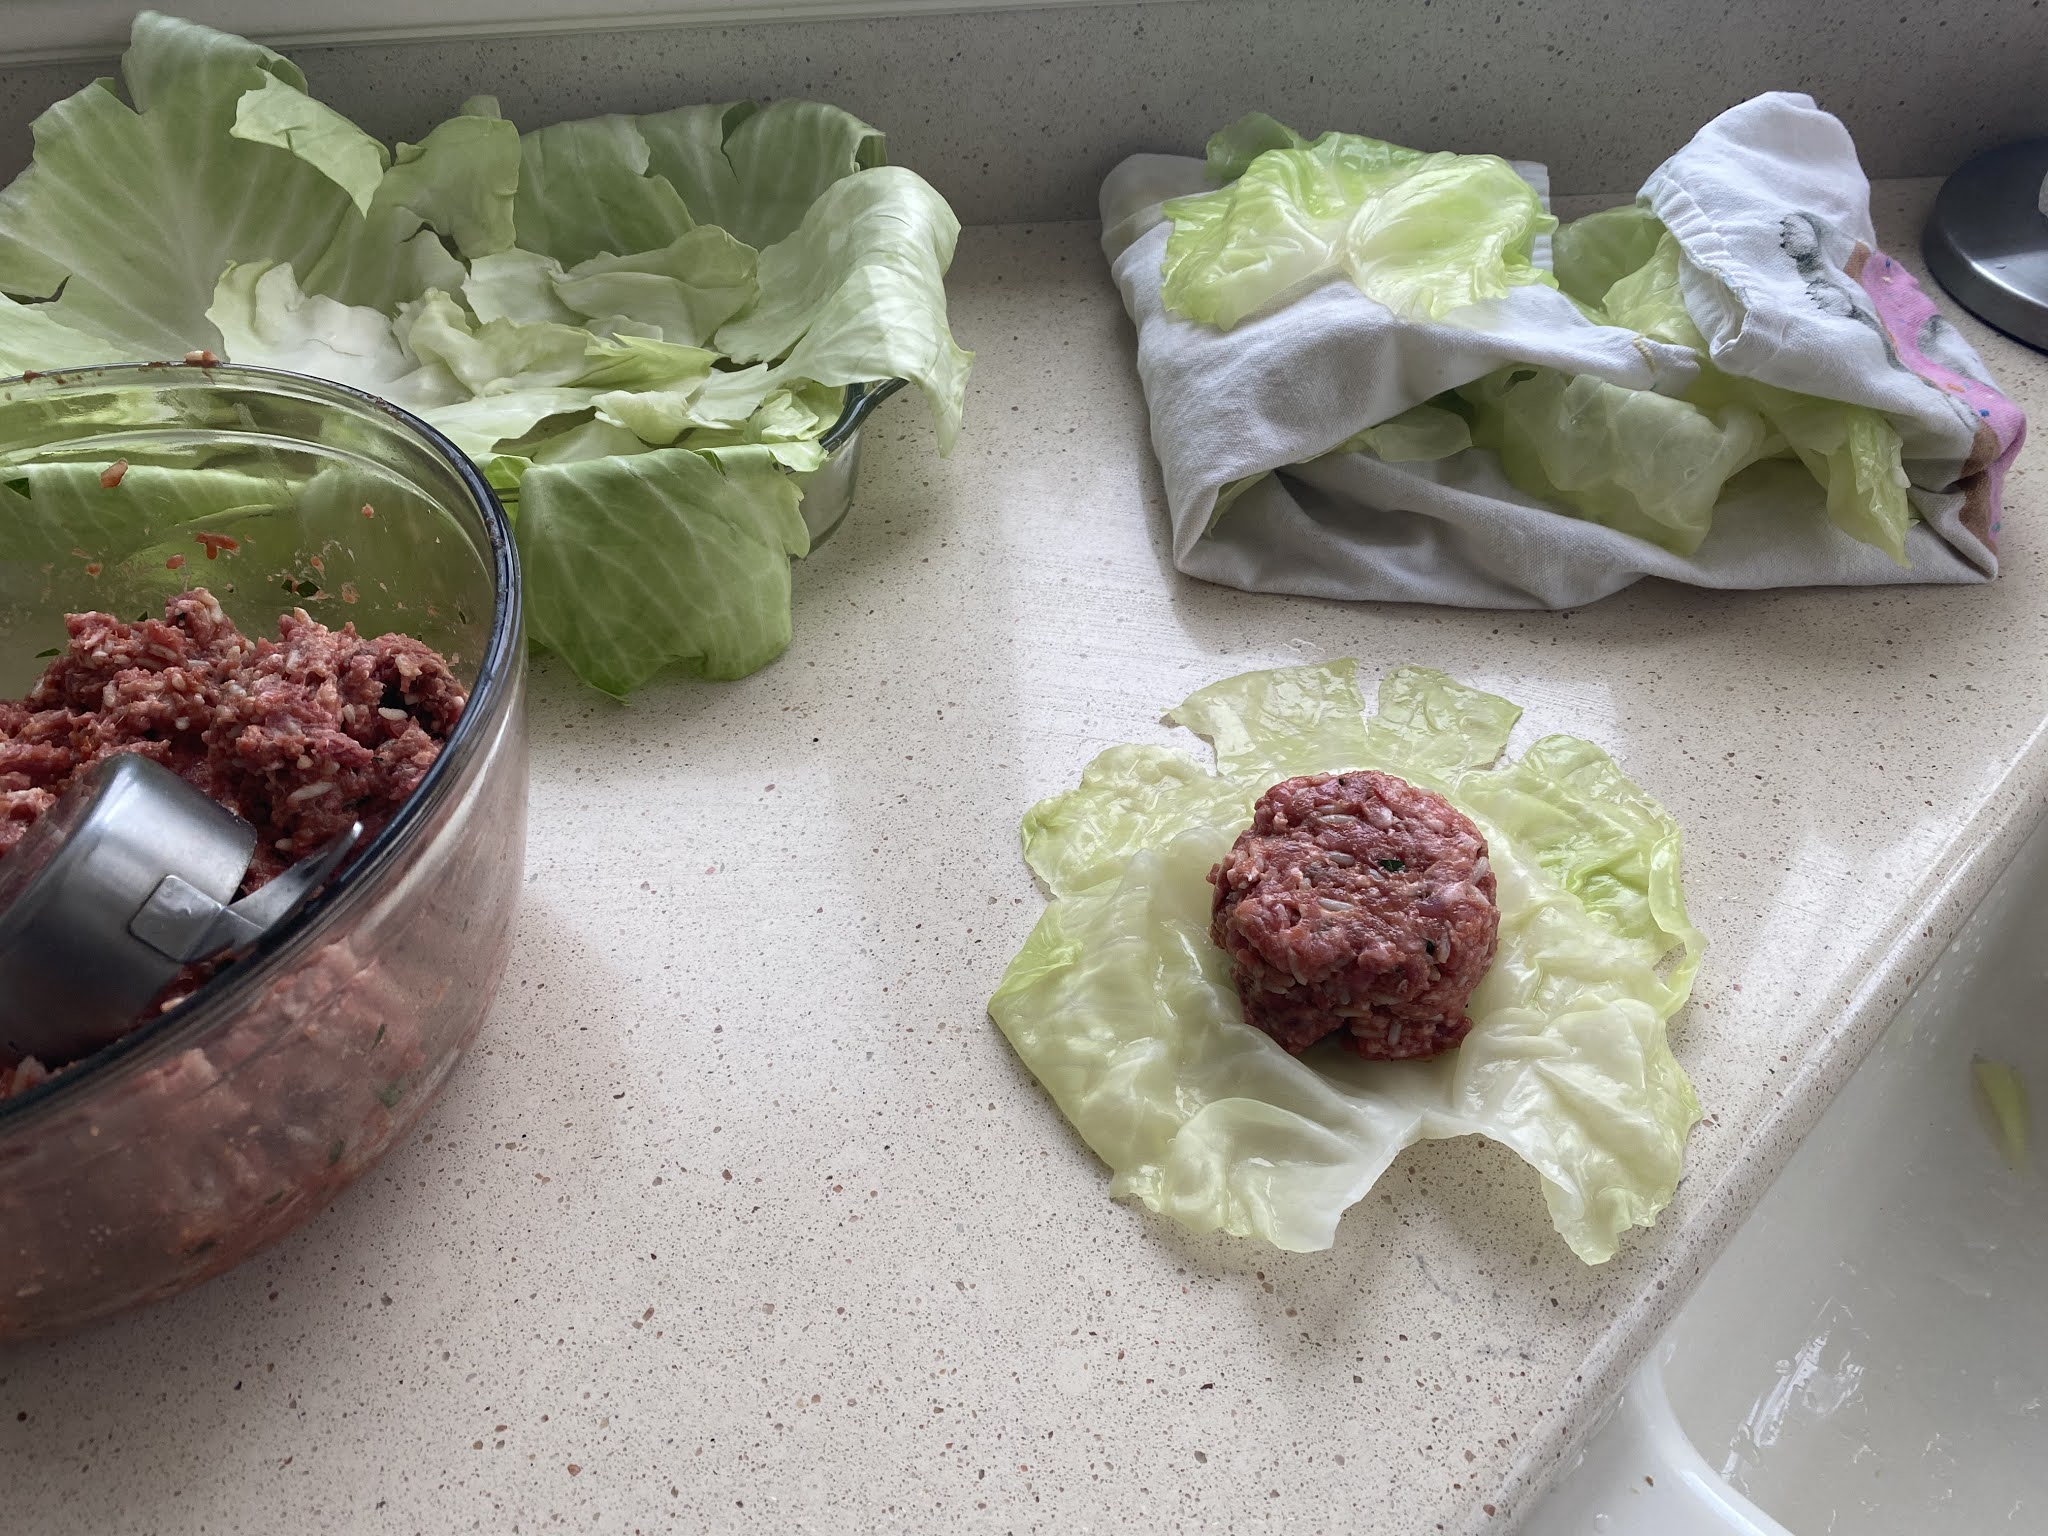
1/26: tip-sy tuesday: separating cabbage leaves

1/27: stuffed cabbage rolls

1/28: old fashioned ham salad

1/29: air fryer avocado

1/30: creamy chicken soup

What's Cooking ~

  • crockpot lemon glazed chicken, noodles, steamed green beans
  • stuffed salmon (Costco), couscous, spinach and tomato salad
  • grilled chicken, sautéed vegetables
  • stuffed cabbage rolls
  • crockpot pork chops with apricot sauce
  • steak, baked steak fries, sautéed mushrooms, caesar salad
Miscellaneous stuff keeping me busy ~
  • I spent the week making masks that are a little different than what I've spent the past few months making - and these are waaaay more fun to make. I'll share them with you soon!
  • read 'Christmas Cake Murder' by Joanne Fluke - she writes a series of murder mystery with recipes books, they are simple usually light mysteries that are ok easy reads...and there's recipes so that makes it even better ⭐️⭐️⭐️
  • also read 'Dark of the Moon' by John Sandford, #1 in the Virgil Flowers series. I got tired of reading so-so books and was whining about not having read any good mystery thriller book like the John Sandford type, when I decided to start both his Virgil Flowers and Lucas Davenport series over from the beginning. I love his books and this one is no exception. ⭐️⭐️⭐️⭐️⭐️
  • took a few early morning walks in the cold - one day it was 4 degrees! I'm learning how many layers I need to wear while walking that are warm but don't leave me sweating by the end! It's a struggle for sure!
That's it for me - hope you had a great, productive, creative week. Stop by often and see more projects, crafts, recipes, whatever I can think of to make at camp! I know there'll be a couple Valentine things this week for sure :) Bye! Happy Sunday!

Sincerely ~


Jill
camp counselor

1.31.17 ~ hair bump trick
1.31.16 ~ pretzel hugs

Saturday, January 30, 2021

Creamy Chicken Soup

It's Saturday and just feels like a soup day to me - I made this one for lunch a couple weeks ago and we absolutely loved it and I wanted to share (also want to have this recipe on the blog so I know where to find it and can make it again!). Seriously, there were 4 of us eating and had no leftovers it's so good!


SOUP:

  •  1-2 teaspoons olive oil
  •  1 1/2 cups peeled, diced carrots (about 3-4 medium carrots)
  •  3/4 cup diced celery (about 3 stalks)
  •  1/2 cup diced onion, (1 small onion)
  •  4 cups chicken broth (I use low sodium)
  •  2 cubes chicken bouillon or 1 tablespoon chicken bouillon paste (this is optional, it'll add more flavor)
  •  3 bay leaves
  •  1 tablespoon dried parsley
  •  1 1/2 teaspoons herbs de provence  (a mixed blend of herbs like thyme, basil, rosemary, tarragon, savory, marjoram, oregano, and bay leaf. lots of recipes online if you want to make your own blend)
  •  1 teaspoon turmeric
  •  1/2 teaspoon garlic powder or 2-3 cloves garlic, finely minced
  •  1/2 teaspoon coarsely ground black pepper
  •  3 1/2 cups milk or half-and-half (or a combo - see note)
  •  3-4 cups cooked, chopped chicken
  •  Shredded parmesan, asiago or gruyere cheese, for topping (optional)

ROUX:

  •  6 tablespoons all-purpose flour
  •  3 tablespoons olive oil
  •  3 tablespoons butter

INSTRUCTIONS

  1. For the soup, in a 4-quart or larger saucepan, heat the olive oil over medium heat. Add the carrots, celery and onion. Pour in the broth and add the chicken bouillon, bay leaves, parsley, herbs de provence, turmeric, garlic powder, and pepper. Stir to combine.
  2. Bring the mixture to a simmer and cook, uncovered or partially covered, for 12-15 minutes until the vegetables are tender. 
  3. For the roux, while the soup simmers, in a small saucepan, add the olive oil and butter and cook on medium heat until the butter is melted. Add the flour and whisk to combine until a smooth paste forms. Remove from the heat. 
  4. Add the milk (and/or half-and-half) to the soup and heat through. Add the roux to the soup and cook, stirring or whisking constantly, over medium heat until the soup thickens and gently simmers, 5-7 minutes. 
  5. Stir in the chicken, season to taste with salt and pepper (this is important for flavor!) and heat through. 
  6. Remove the bay leaves and serve with a sprinkle of Parmesan, asiago or gruyere on top. 


my notes: I added less celery and onion, and chopped in pretty small pieces. Boiled frozen boneless chicken breasts in water for a few minutes, then removed it from the cooking water and chopped it into pieces. Add the not-fully cooked chicken to the veggies and add the water from boiling the chicken in addition to chicken broth to equal 5 cups. I mixed together skim milk and cream. Also made the roux using 4 T. olive oil, 4 T. butter, and 8 T. flour.

This would also be good with diced potatoes and corn! Yum. 

original recipe found here at melskitchencafe.com 


Friday, January 29, 2021

Air Fryer Avocado

Today's post comes from my niece Mickey - I have a new toaster oven that also has an air fryer so I will be experimenting with this for sure...because, hello, fried avocado!! Here's how she did it:

Since air fryers are all the rage right now, I figured we would try to make air fried avocado. We used a Ninja Foodie which does everything in one. In separate bowls whisk egg, in another bowl mix flour, salt, pepper, garlic powder, and cayenne powder (but really you can use any seasonings). Slice your avocado length wise. Dip the avocado in the egg, then flour, then egg, then flour, then egg again and finally in panko or breadcrumbs. Place into air fryer. Repeat with however many slices you want. Cook in your air fryer at 400 degrees for 6 minutes. Dip in ranch or hot sauce and enjoy! It isn’t the most pretty looking, but it turned out really good! 


Thursday, January 28, 2021

TBT: Old-Fashioned Ham Salad

I haven't done a throwback Thursday recipe in a long time - if you grew up like me you're probably familiar with ham salad and if you're an adult like me it's probably been a while since you've had ham salad? Am I right? Or do you eat this all the time? My mom gave me an old hand-crank food grinder that attaches to the counter or tabletop so when we had a lot of leftover ham I thought I'd get out the old grinder and make ham salad...except the grinder is really old and needs to be thoroughly cleaned and I wasn't in the mood for that so I used my food processor. (Note: I'm thinking the grinder will be a displayed item instead of an in-use tool because hello, food processor!)


 Didn't really follow a recipe although I did Google for the basic gist of how to make it. This is like most meat or egg salads and there's a lot of winging it involved. Put chunks of ham in the food processor, add bread and butter slices to your liking and a splash of pickle juice and pulse it up until they're combined. Add chopped celery including the inner leaves and enough mayo to hold it all together and pulse a bit more. 


I served this with the pub cheese soup I posted a couple weeks ago, and everyone said how their mom always made it and they hadn't had it in ages - it's super easy to put together and was surprisingly delicious, better than I remembered actually! 

Wednesday, January 27, 2021

Galumpkis (Stuffed Cabbage Rolls)

I posted this in 2016 but only linked the recipe and didn't share many good pictures, so I'm doing an updated post on how to make stuffed cabbage rolls following Tyler Florence's recipe from Food Network and I took lots of photos this time. We had these for dinner last night with roasted baby potatoes and steamed broccoli, I kinda think the rolls are a stand-alone dish though and don't really need a side - other than filling up more of your plate hahha. It's veggie, meat, and rice all in one. 

I pretty much followed the recipe except for microwaving the whole cabbage for a couple of minutes to help separate the leaves (did you see yesterday's tip how to do that?) so when I blanched the leaves it only took a couple minutes to get them pliable; in fact, I probably wouldn't have even had to blanch them if I microwaved the head for another minute or two - the smaller leaves were almost cooked enough to easily roll (that's the reason for blanching, to make it easier to roll the leaves around the filling). 

Another note is the recipe makes a lot of tomato sauce and I put all of it over top of the stuffed rolls - thankfully I put a cookie sheet underneath the casserole dish for baking because it overflowed big time! Also, the sauce was quite runny after cooking for almost 2 hours - note the recipe says one hour but reviewers said it took longer so I let it go an extra 45 minutes - next time I will only pour enough sauce on the rolls to cover them and serve a bowl of hot tomato sauce on the side. 

GALUMPKIS (STUFFED CABBAGE ROLLS)

Sweet and Sour Tomato Sauce:

  • 2 T. olive oil
  • 2 garlic cloves, smashed 
  • 1 1/2 quarts crushed tomatoes (I used 2 big cans)
  • 2 T. white wine vinegar
  • 1 T. sugar
  • salt and pepper
Cabbage rolls (heads up - you make a small second sauce in addition to the above sweet and sour sauce to put in the filling):
  • 2 T. olive oil
  • 1 yellow onion, chopped
  • 2 garlic cloves, minced
  • 2 T. tomato paste
  • splash dry red wine
  • 2 T. chopped fresh flat-leaf parsley
  • 1/2 cup of the sweet and sour tomato sauce from above
  • 1 pound ground beef
  • 1 pound ground pork
  • 1 large egg
  • 1 1/2 cups steamed white rice
  • salt and pepper
  • 2 large heads green cabbage, about 3 pounds each
~to make the sweet and sour tomato sauce:

In a 3-quart saucepan heat 2 T. olive oil over medium heat. Add the garlic and saute for 1 minute. Add the tomatoes and cook, stirring occasionally, for 5 minutes. Add the vinegar and sugar; simmer, until the sauce thickens, about 5 minutes. Season with salt and pepper and remove from the heat. 

~to make the cabbage rolls:
  1. Place a small skillet over medium heat and add 2 T. olive oil. Sauce the onion and garlic for about 5 minutes, until soft. Stir in the tomato paste, a splash of wine, parsley, and 1/2 cup of the prepared sweet and sour tomato sauce; mix to incorporate and then take it off the heat.
  2. Combine the ground meat in a large mixing bowl. Add the egg, cooked rice, and the sautéed onion mixture. Toss the filling together with your hands to combine, season with a generous amount of salt and pepper.
  3. Bring a large pot of salted water to a boil. Remove the large, damaged outer leaves from the cages and set aside (don't throw out, you'll use them to line the casserole dish). Cut out the cores of the cabbages with a sharp knife and carefully pull off all the rest of the leaves, keeping them whole and as undamaged as possible. You need about 12 leaves total for the rolls, save the small inner leaves for another dish like coleslaw or something. Blanch the leaves in the pot of boiling water for 5 minutes, or until pliable. Put the leaves in a large bowl of cold water to stop the cooking, then dry them off and lay out for filling. 
  4. Carefully cut out the center vein from the leaves so they will be easier to roll up. 
  5. Preheat the oven to 350'. 
  6. Take the reserved big outer leaves and lay them on the bottom of a 13x9" casserole dish, let part of the leaves hang out the sides of the pan. This insulation will prevent the cabbage rolls from burning on the bottom when baked. Use all the good looking leaves to make the cabbage rolls. 
  7. Put about 1/2 cup of the meat filling in the center of the cabbage and starting at what was the stem-end, fold the sides in and roll up the cabbage to enclose the filling. Place the rolls side by side in rows, seam-side down, in the casserole pan.
  8. Pour the remaining sweet and sour tomato sauce over the cabbage rolls. Fold the hanging leaves over the top to enclose and keep the moisture in. Drizzle the top with a little olive oil. Bake for 1 hour until the meat is cooked. 
makes about 1 dozen

another note from me: the cabbage leaves that line the bottom of the dish were not long enough to fold much over the top before baking, so I laid a few more raw leaves on top to cover the rolls completely. 

Here's photos of most of the steps for your reference:

step 1 from making the cabbage rolls above - the sweet and sour tomato sauce is
the brighter red sauce in the middle in this photo

step 2 - combine cabbage roll ingredients in a large bowl

step 3 - blanch the leaves in hot water until pliable

also step 3 - put the blanched leaves in cold water

add filling to the center of a leaf, fold up the sides and then roll 
up around the filling


yep, I should have known this would boil over! so much sauce...

leaves from the bottom don't quite cover the top

so I added additional leaves to cover 


remove the leaves covering the rolls before serving
 (they taste good though so feel free to eat those in addition to the rolls!) 


Tuesday, January 26, 2021

Tip-sy Tuesday: separating cabbage leaves

Tomorrow I'm going to share a recipe for stuffed cabbage rolls, while I was making them this morning I  found an easy tip for separating the leaves - I figured this out all on my own and (for once) didn't Google it so I have no idea if everyone else already knows this hahahha. 

Core the cabbage and put on a plate core side up in the microwave, heat on HIGH for a couple minutes. Remove from microwave and carefully peel the leaves off. If they won't come easily, run a light stream of water between the cabbage head and the leaf you're trying to peel off. This totally worked for me and I easily separated the leaves keeping them mostly intact to then stuff and bake. 


When I last posted the recipe I said the reviews were full of the trouble people were having separating the leaves but I was all cocky and bragged about not having a problem...so of course this time do you think I could get the leaves apart? Hence coming up with an easier way LOL!

Check back tomorrow for the updated recipe - now you're all set with the hardest step! 

Monday, January 25, 2021

DIY: Beaded Mask Leash

Hope you aren't tired of all my mask leash posts lately! Sorry if it's too much, but that's what I've been making so that's what I'm showing hahahahah. Last week was how to make one out of chain, and another out of cord, and today it's how to make a beaded leash. These are pretty and not hard to make, and while they are a little heavier they're still lightweight - think of a beaded necklace. So far the people I've given them to are liking them (haven't heard about any of them breaking and beads going everywhere!) and there's been no complaints! These are a little more of a statement accessory, the cord and chain ones sort of go away - so I made them in colored beads that are easy for the wearers to 'match' to their outfits if they're into that hahah. 

Materials for 1 leash:

  • clear monofilament line (mine says 'transite', it's a clear monofilament line - it's like fishing line, you can use that too) or beading string. If you use the clear monofilament thread you won't need a needle to thread the beads on, I just scoop the beads up with the end of the line. 
  • beads (I used 6/0 seed beads, mine came in small tubes and it took all of one 17g tube to make these approx 22")
  • 2 crimp beads, 2 crimp bead covers, 2 jump rings, 2 lobster clasps, and a charm (optional)
  • jewelry pliers and/or tweezers


Tie a knot in one end and add a crimp bead, crush the bead to cover the knot. Then add a crimp cover that has a loop on one end where you'll be able to attach the clasp later. Then string on beads until you've reached your desired length. I use seed beads that are size 6/0, they have smaller and larger beads but I like this size. Tie a knot, string on the crimp cover and then a crimp bead; crush the crimp bead over the knot and then fold the crimp cover with the loop on the end. Attach a jump ring and clasp to each of the crimp covers. If you want, you can attach a charm along with the clasp on the jump ring before attaching to the crimp cover. 


One note: in the above pictures I used 2 different kinds of crimp covers - the blue one with the 'B' charm I used a cord crimp cover (like when I made the cord leashes, you fold this style in from the sides) the other 2 are more like a clamshell that folds over the crimp bead. 

click to see how to make a chain mask leash

click to see how to make a cord mask leash

Sunday, January 24, 2021

🔥 Around the Campfire (week 4)

 Dear Campers ~

Here's a quick recap in case you missed anything at camp last week:

Posts ~

1/17: 🔥week 3

1/18: chain mask leash

1/19: tip-sy tuesday: baked chicken tenderloins

1/20: mixed fruit crisp

1/21: Natalie's butter curry chicken

1/22: Macey's doctored cauliflower crust pizza

1/23: cord mask leash

What's Cooking ~

  • firecracker meatballs, basmati rice, roasted carrots and broccoli
  • baked shrimp, cauliflower rice, roasted asparagus
  • grilled chicken sausage, white beans in marinara, green beans
  • eggplant lasagna (recipe soon)
  • bbq pork chops, chopped kale salad, roasted baby potatoes
  • marinated bone-in chicken breast, chopped salad, steamed spinach
Miscellaneous stuff keeping me busy ~
  • read 'The Altruists' by Andrew Ridker - the description of the book says it's a darkly funny and ultimately tender family saga, blah blah blah. I really did not enjoy this book - none of the characters are likable (even if they don't 'have' to be likable to make it a good read, I just did not care for any of these people hahha), didn't like the plot, didn't like the end...I just wrote a lot of words to say I don't like this book. ⭐️ it can have one star only because I finished the book!
  • read 'Death and the Girl He Loves', number 3 of the series by Darynda Jones. I liked it better than the Altruists haha but it's also not great. Supernatural sci-fi which I am a fan of, but this one is just weird. ⭐️⭐️1/2
  • I have 5 books on my library shelf, they all came in at once - why am I still sitting here typing when I should be reading?!!! 
Have a great week - hope you'll stop by lots to see more projects, recipes, and whatever else I can think of to make at camp...bye!

Sincerely ~


Jill
camp counselor 

Saturday, January 23, 2021

DIY: Cord Mask Leash

The other day I showed you how to make an easy chain mask leash, today it's an equally simple one made from a stretchy cord. You need a length of cord, 2 cord crimps, 2 jump rings, 2 lobster clasps, charm (optional), clear glue (optional), and jewelry pliers. 

1. put a drop of glue in the cord crimp, lay one end of the cord in the crimp and using the pliers scrunch one side of the crimp over the cord and then the other side of the crimp. You're basically folding the crimp over the cord. Squeeze pretty hard so the cord won't slip out of the crimp. The purpose of the cord crimp is to have a place to attach the jump ring and clasp. note: the drop of glue is optional, I don't know if it actually helps hahaha, but I do it anyway.


2. open the jump ring (remember to not pull it apart, twist it being careful to not change the alignment). add the clasp, a charm if you want, and the end of the crimp, close the jump ring.

3. there is no third step - you're done!

Guys, how funny is this - I made the above cord for my sister and she asked how to attach it since there's only one clasp? She thought I came up with a new way of attaching the leash to a mask but actually I just completely missed the fact that I forgot to put a clasp on the other end - I took the picture and didn't even notice it was missing one LOL!!! 

I also made this one from 3 different embroidery threads I braided together, attach the cord crimp and clasps using the same technique as above. I bought some satiny ribbon cord and am going to make some with that next. 

Friday, January 22, 2021

Doctored Cauliflower Crust Pizza

Have you tried, and if so do you like, cauliflower crust pizza? I haven't had a store-bought one but I like making them from scratch at home, and even tho it's not going to fool anyone that it's pizza dough it is really good! Here's another fun recipe from Macey - how to doctor up a Trader Joe's pizza:

‘Doctored Up’ Trader Joes Cauliflower Crust Pizza


Boiled Chicken, shredded. 

Toss chicken in homemade bbq sauce


‘BBQ Sauce’

Ketchup, Brown Sugar, a dash of apple cider vinegar, smoked paprika, splash of tobacco sauce, cayenne pepper


Saute Onions, Peppers and Basil


Add chicken and veggies to the top, sprinkle additional cheese (as desired) and bake in oven


Thursday, January 21, 2021

Butter Curry Chicken by Natalie

Natalie texted me the other night after she made this butter curry chicken and said that it turned out phenomenal - at least that's what her husband said! I think that's a great compliment and can't wait to make it, and she said I can share it with you, thanks Nat! Here's what she did, in her words:

I combined 3 different recipes to make what I thought sounded good:

For Butter Curry Chicken:

Naan for dipping

Marinade:

  • 1 lb chicken thighs trimmed and chopped to bite size
  • 1c. Plain Greek yogurt 
  • 2 garlic cloves minced
  • 1/2 Tsp ginger powder
  • 3 Tsp kosher salt-really-that was less than it called for!
Whisk and then soak thighs for 30 minutes to 24 hrs. I did 3 hours.

Chicken:

Heat cast iron /le creuset braising pan or thick risotto pan to medium. Use 1 T. Veg oil, and sauté marinated chicken for 3 minute a side. It will finish cooking in sauce later. Remove from pan to plate with paper towel to drain. Wipe out chicken/yogurt marinade from the pan.

Put cast iron/lecreuset risotto pan on low. 

Have oven on 325. To heat naan.

1. Heat 3 T. Butter on medium-low in the cast iron risotto/braising pan. Add 2tsp dried minced onion or half of a diced real onion if your kids will allow it. Cook til sweated. 
2.Mix 14 oz crushed tomatoes, plus 1/4 c. Water, 1/2 tsp garam masala ( I did a dash of cinnamon, garlic, dash of cardamom, dash of chili powder, cumin, dash of coriander-because I don’t keep it in my pantry), 1/2 t. Chili powder, dash cayenne powder into the butter. Add 1/2 t. Red curry paste, 1/4 t. Curry powder (curry just means gravy/sauce—so curry spice is optional-it’s just if you like that spice involved-usually garlic/salt//red pepper and differs by brand .🤷‍♀️); If you want it spicier you can increase the cayenne or add some red pepper flakes. 
3. Add in previously cooked chicken for 8-10 minutes.
4. Add 1c. Half and half to finish. Stir and warm thoroughly. Serve with cooked rice and warmed naan bread.


On the side I use 1 c. Chicken stock, 1 T. Butter, amd 1c. Basmati rice in my rice cooker:)

It’s perfect butter chicken. You can use boneless skinless breasts if you aren’t a thigh fan:) 

Wednesday, January 20, 2021

Mixed Fruit Crisp

I love, love, love fruit crisp. Any fruit crisp. Usually I make apple but I had the thought to mix together all kinds of fruit and see what happens - and guess what? It's fabulous. So I can honestly say I love any and all fruit crisps hahaha - whether it's just one fruit, berries, or mixed fruit...it's all good! 


I didn't really follow a recipe because you can pretty much just add a little sugar and cornstarch to the fruit and then add a mixture of flour, oats, brown sugar, butter and cinnamon and get a great dessert. I don't even always measure, this is not the kind of recipe that needs exact measurements! The perfect dessert LOL! 


But to make it a legit recipe I did measure the ingredients this time, except I didn't measure the fruit, just added enough to fill my dish - I'd say maybe 6 cups? Chop up or mix together your choice of fruit(s), you can use fresh or frozen; for this mixed fruit crisp I combined rhubarb, blueberries, apples, and pears with about 1/2 cup sugar, a couple Tablespoons of cornstarch, and a squeeze of lemon juice and put it in a buttered 11x7" baking dish (sometimes I use an 8x8" dish).


For the crisp topping: combine 1/2 cup flour, 1 cup oats, 1/2 cup brown sugar, 1/2 t. cinnamon, and a pinch of coarse salt. Cut in 1/2 cup butter cut into small pieces (cut in using a pastry cutter or two forks, work the butter in until the mixture is small pea sized crumbs). Sprinkle the topping over the fruit in an even layer. Bake at 350' for about 45 minutes until the filling is bubbly and the topping is lightly browned. 

Yum. Serve warm with or without ice cream or whipped cream, or do as I do and eat it for breakfast - hey, it's fruit and oatmeal so nothing wrong with that hahaha. Enjoy!

Tuesday, January 19, 2021

Tip-sy Tuesday: Teri's Baked Chicken Tenderloins

Not sure if this is a 'tip' but it's such an easy recipe that I consider it a very helpful easy convenient one! You can buy bags of frozen chicken tenderloins at the grocery store, Gordons, Costco, Sams...maybe it's weird but I have never purchased chicken this way before and I'm now hooked. Remove however many frozen tenders you want from the bag, put in a baking dish and drizzle or brush both sides with olive oil. Add seasoning on both sides to your liking - my favorite so far is Dash's original seasoning blend but do whatever you have and like; pop into a preheated 375' oven and bake for about 35 - 37 minutes until cooked thru. That's it! It's the most flavorful moist chicken and just about the easiest prep ever. She makes these a few times a week for her family, I've been doing it every few days so we always have cooked chicken for lunches or even just to snack on. Soooooo good!


Monday, January 18, 2021

DIY: Chain Mask Leash

Well it seems having to wear a mask isn't going away in the foreseeable future - and I'm pretty used to wearing one now (other than exercising in one, that's not easy) except I will still get out of my car and halfway to the store before realizing I forgot my mask. Can't tell you how many times it happens! So when I started seeing mask leashes I knew I had to make some - because maybe if I have my mask on a retainer  I will finally not keep forgetting it! These are especially nice when you have multiple stops to make - you know, you leave one place and take the mask off before getting to the next stop, repeat. This way you can just have the mask dangle on the leash in between needing to wear it, instead of putting it in your pocket, or hanging from one ear, or push it under your chin, or put it down in the car and forget to pick it up again! 

I've been playing around with different materials to make the leash out of - chain, cord, braided embroidery thread, ribbon, beads - and they all work. So it's just a matter of what you like, how much time you want to invest, and how crafty you're feeling. They all have a lobster clasp at each end for attaching to the ear loops of your mask - there are different ways to attach the clasps depending on what material you're using to making the leash. 


Today I'll show you how to make a chain leash - these are very easy and you only need a few supplies, they literally take a couple minutes to make. You'll need lightweight chain, 2 jump rings, 2 lobster clasps, and tweezers or jewelry pliers. Remove links of chain if necessary to get the length you want, my shortest one is 19.5 inches of chain (see picture for how long it is when I have it on) but you can make as long or short as you want. Open a jump ring using tweezers or pliers - you want to twist the ring open, don't pull it apart; I find it easiest to use 2 tweezers (or pliers), grab on either side of the opening (the ring has a tiny seam or gap, that's where it'll open), push one side away from you and pull the other side towards you, only open as wide as you need. Add the lobster clasp to the open jump ring, then add one end of the chain, then close the ring by reversing how you opened it (push/pull the sides back to the starting point, there should be no gap in the ring). Repeat with the other end of the chain. 


Now just attach the clasps to the ear loops and you're good to go. When you don't need to have the mask on as a face cover, just let it hang on the leash. 


It took three times as long to write this post as it did for me to make a leash! Here, I'm going to simplify all my instructions so you get the gist that this is a very quick project:

  • open a jump ring
  • add a clasp and an end of the chain
  • close the jump ring
  • repeat other end of chain
  • hook onto a mask