Thursday, October 29, 2020

Witch Hat Cupcakes (re-run)

Here's another repeat post, these cupcakes are so cute and not hard to make at all - and look how cute these witch's hats are! Originally posted 10/15:

Happy Halloween! For my last post this month I decided to make witch hat cupcakes for my niece's soccer game today - probably not the most practical treat at a soccer game but they are so cute I'm doing it anyway :) Girls are going to love them!

I just made regular white cupcakes from a mix and frosted with white store bought vanilla frosting (left over from Halloween gingerbread houses) whipped with some cocoa to make it light brown and fluffy. My sister heard a tip somewhere that if you whip the store bought frosting with a mixer it gets light and fluffier and it worked! Giving the non-baking sister credit for that baking tip of the day ;).

For the witch hats: melt black candy melts in the microwave according to directions on the bag (I added a little bit of shortening to it to make it a little runnier, maybe a tablespoon), then using a pastry brush I brushed small sugar cones with the melted candy and set them on a parchment lined baking sheet to dry - it doesn't take long to set up.


 For the brim I cut small (about 1 1/4")  holes in patterned cupcake liners and slid them over the top of the cones. Set on top of frosted cupcakes at a slight angle so you can see some of the frosting underneath.


This idea came from Country Living Magazine , click here for the article. 

Wednesday, October 28, 2020

Zombie Brains Cheese Ball (re-run)

I made this back in 2017 and thought I'd share again in case you're in need of an easy fun appetizer for Halloween (or any time really, it's good even without forming it into brains hahaha):

I have very nice friends who don't seem to mind that every time I bring food to a party, I'm going to make something that I want to blog hahaha. So even though it was NOT a Halloween party I brought this zombie brains cheese ball to Ronda's party so I could try it out...and no one even blinked.


This is quite easy to do and tastes yummy (once you get past the way it looks that is!). It's a pesto flavored cheese ball topped with squiggly "brains" made from feta and cream cheese, surrounded by sun-dried tomato sauce. Even if you don't want it "zombie" themed this is a very good combo, just spread the topping on instead of making it look brain- like!


Ingredients:
  • 2 pkgs (8 oz. each) cream cheese, softened
  • 1 pkg (3.5 oz.) crumbled feta cheese
  • 1/4 cup grated parmesan cheese
  • 1/4 cup Classico Traditional Basil Pesto Sauce
  • 2 T. toasted pine nuts
  • 1/2 cup oil-packed sun-dried tomatoes
  • 1 clove garlic
  • 1/2 cup water
  • 1/4 cup olive oil
  • 1 T. balsamic vinegar
  • crackers for serving
Directions  - see my note after about the feta mixture:
  1. In a food processor, blend 1 pkg. of cream cheese and the feta until smooth, scraping down the sides as necessary. Spoon into a plastic baggie and refrigerate. 
  2. Add the remaining 1 pkg. cream cheese, parmesan, and pesto sauce to the food processor and process until well blended. Add the toasted pine nuts and pulse several times to mix. Place the mixture into a piece of plastic wrap and shape into a ball, cover and refrigerate for 1 hour.
  3. Add the sun-dried tomatoes, garlic, water, olive oil and balsamic vinegar to the food processor and process until smooth. Set aside.
  4. Unwrap the pesto ball and turn onto a plate. Gently shape into an oval. Cut the tip off one corner of the feta mixture baggie and pipe onto the pesto ball in a twisting brain-like pattern. Spoon the sun-dried tomato sauce around the cheese ball and serve with crackers. 

note: I put the feta mixture in a baggie and into the fridge like they said but two things - 1) it was too firm after chilling it to squeeze out of the baggie and 2) I couldn't control the squiggles like I wanted to using the plastic bag. So I let the mixture set out to warm up a bit and then put it into a decorator bag with a big circle tip so I could make the "brains" look better.


original recipe found here. 


one year ago: baked crab cakes
two years ago: Halloween spider soap


Tuesday, October 27, 2020

Tip-sy Tuesday: storing seeds

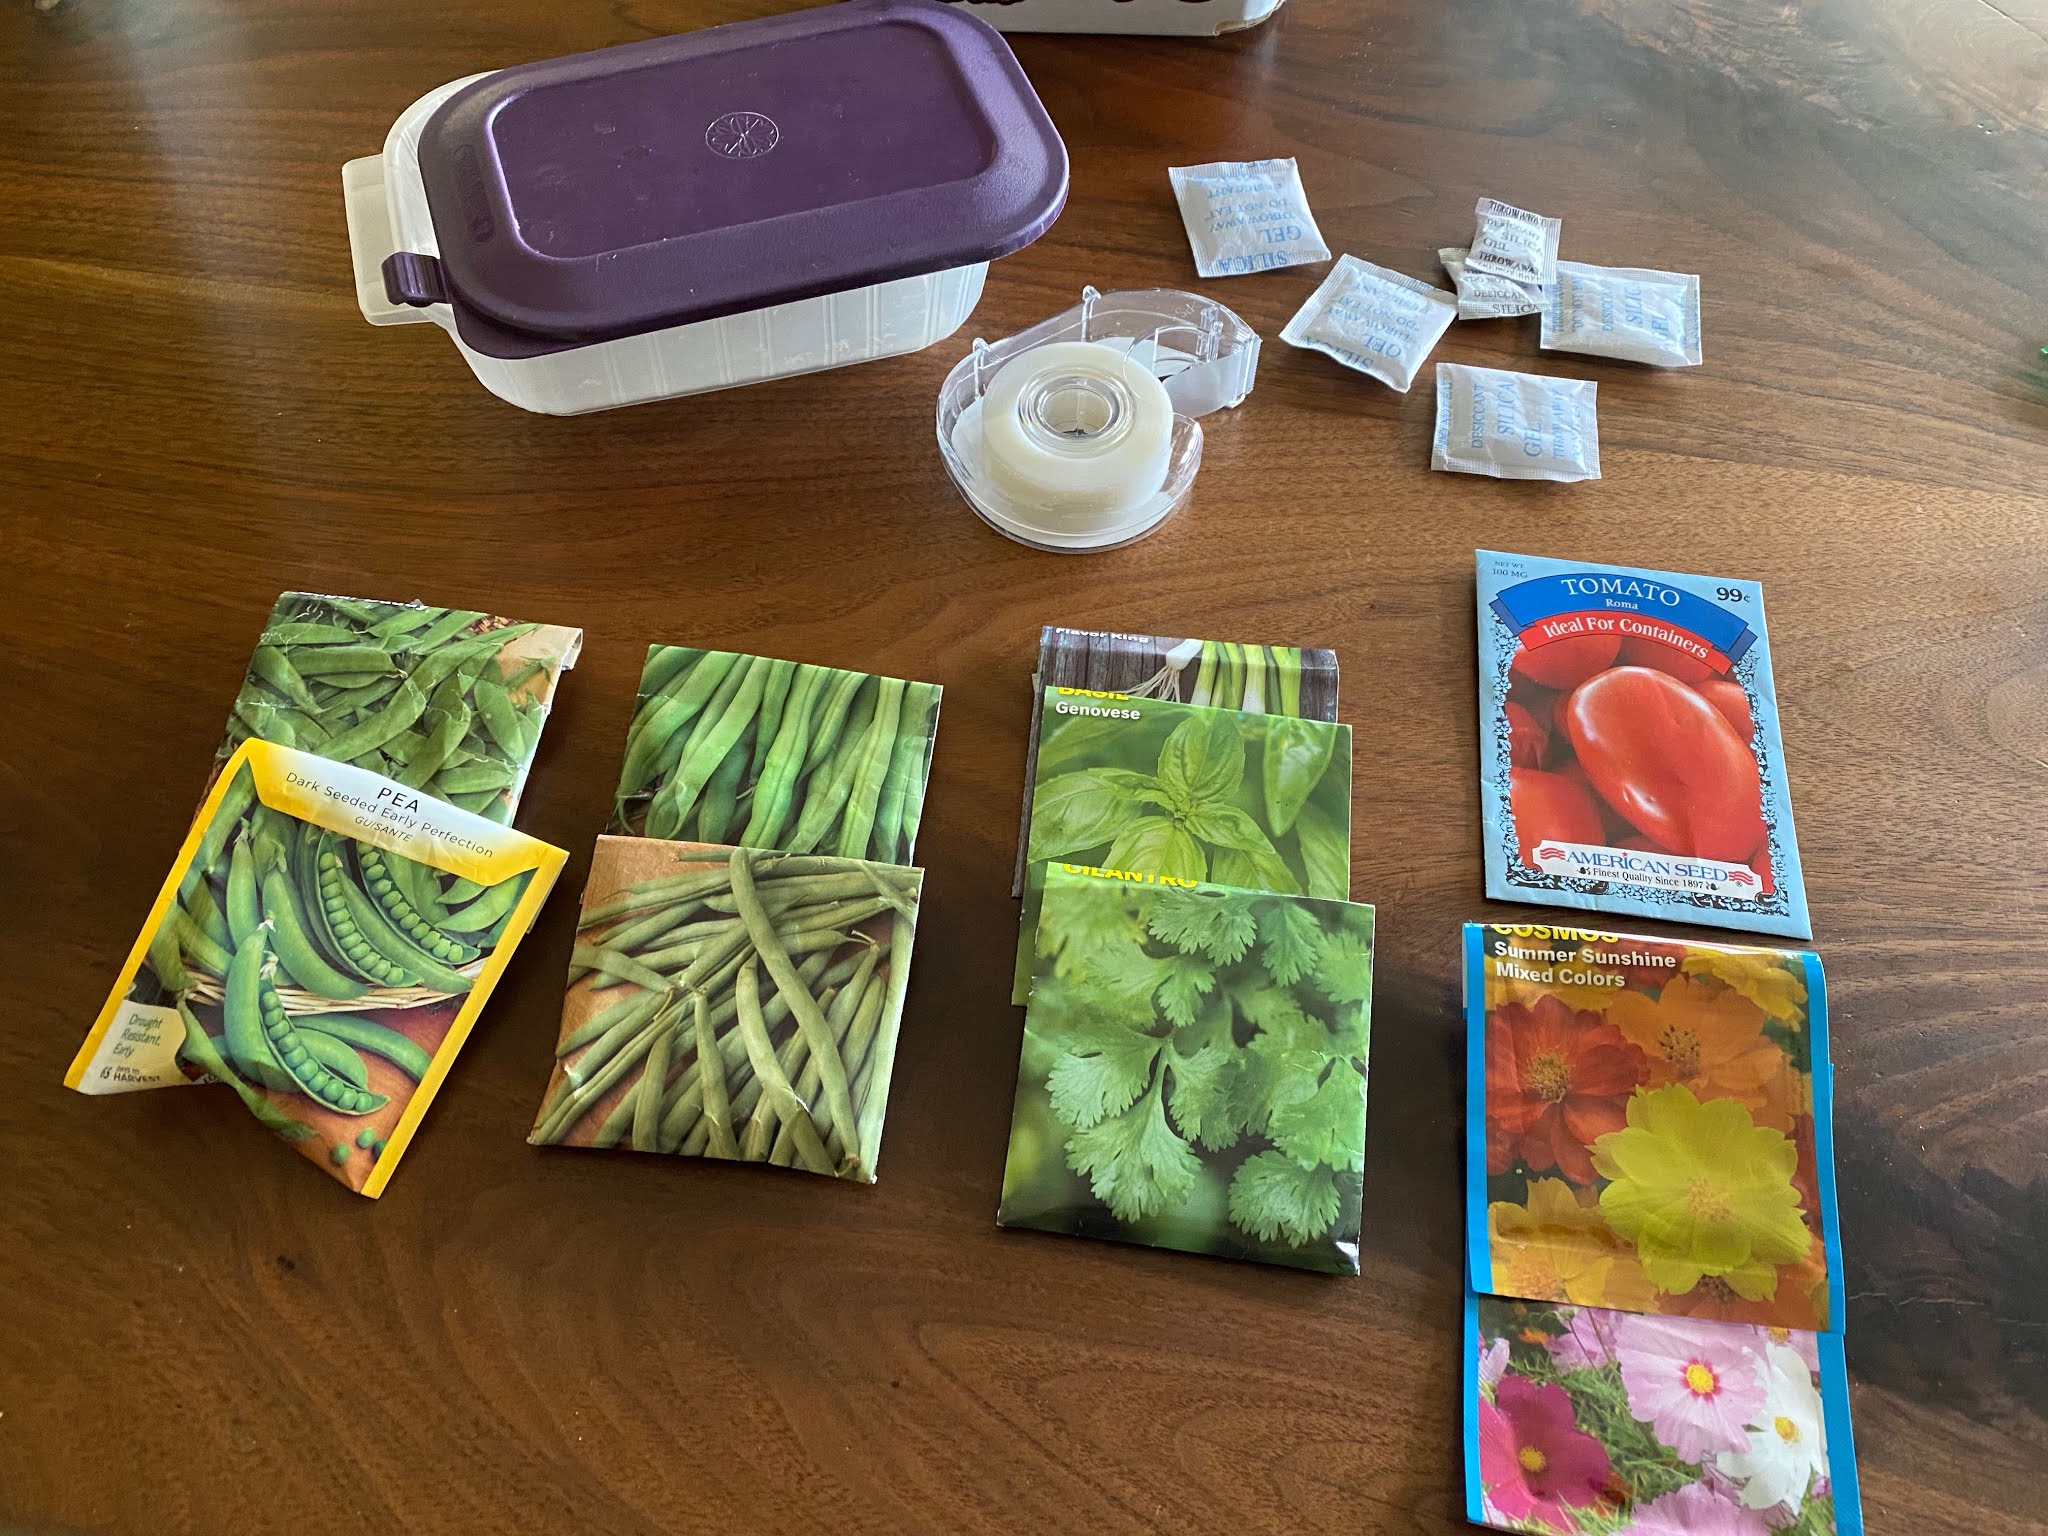
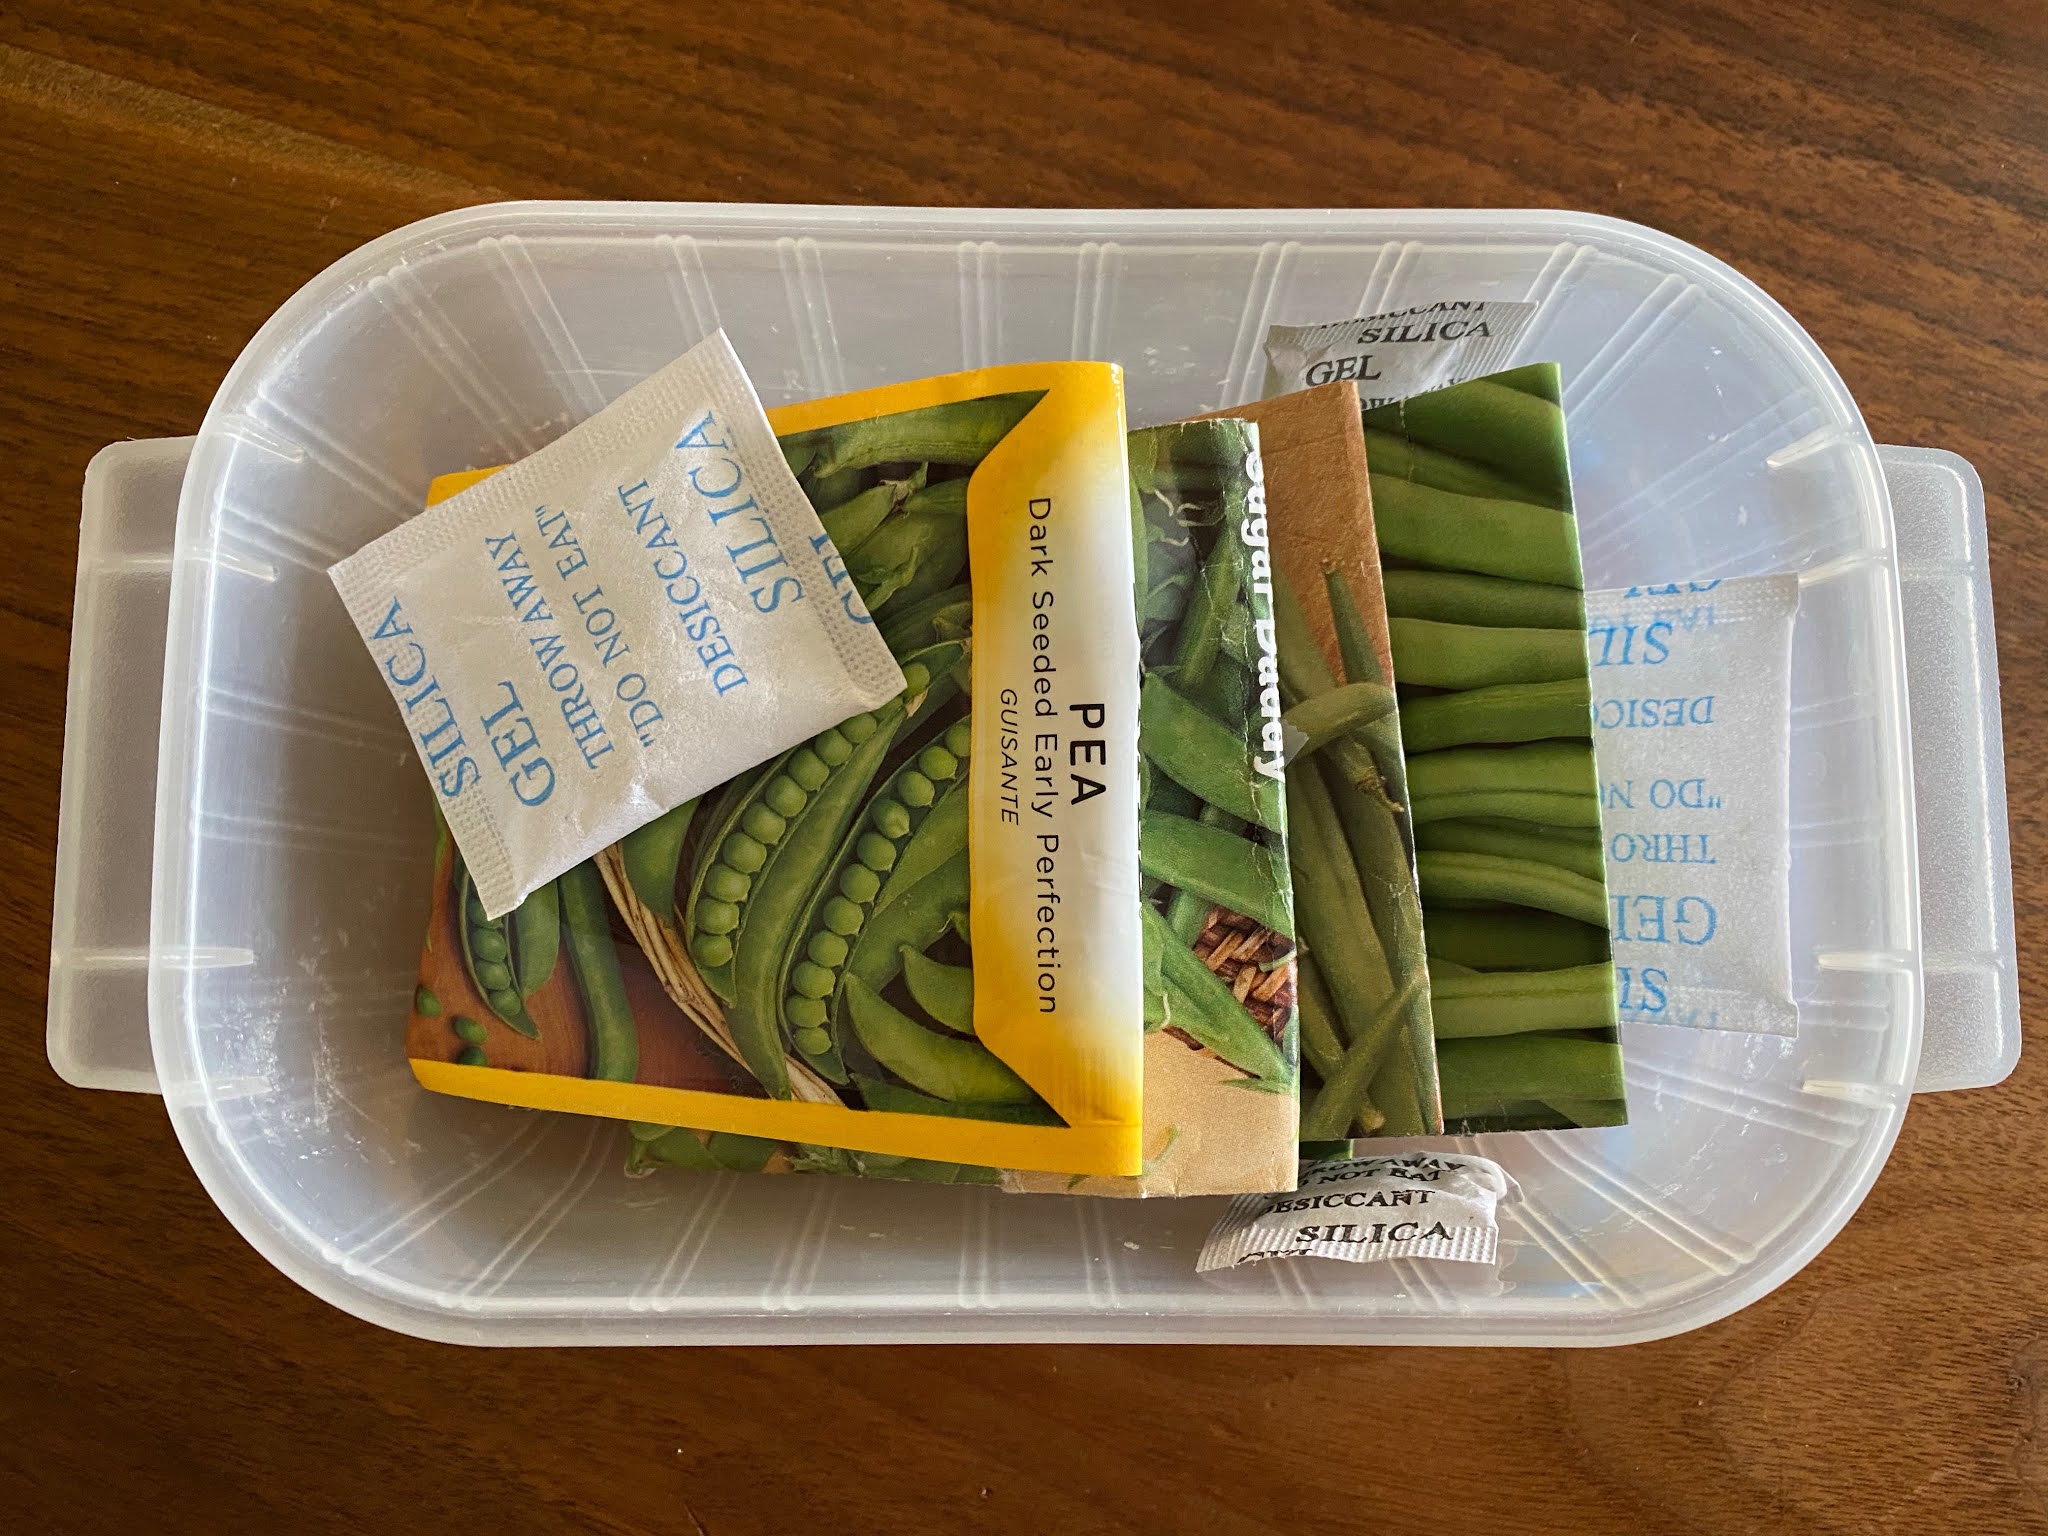
The garden is put away for the winter and while organizing my garden cabinet I remembered a tip I saw somewhere about storing leftover seeds -  after the whole 'not being able to find seeds because people were hoarding them' situation last spring I'm certainly not throwing my leftovers away! Hopefully storing them this way will help keep them fresh and viable for next year.


I taped up the individual open packets, then put them in an airtight container along with a couple silica gel packs to help keep them dry. Store in a cold dark spot - I have a cabinet with doors in our unheated garage so that should be perfect. I'll do a germination test in the spring and hopefully they'll all be viable, fingers crossed!


Monday, October 26, 2020

Pop Tab Earrings by Grace

Another cute and creative project from Grace, in her words: 

Materials

Pliers, soda tabs, earring loops and chain the length you want your earring to hang

First you're going to need to open up a chain link on both ends

Then put the tabs in one of the open links, then put the earring loop in the other (or if you don't want them to dangle on the chain just put the tabs and the earring loop in the same open link)


Close that bad boy up and boom - you got a cute earring 


Jill here - last time I saw G she had on one pop top earring and one zipper pull earring and I loved how original and hip she looked! Whodathunk to make cool earrings from pop tabs?!


Sunday, October 25, 2020

🔥Around the Campfire (week 43)

 Dear Campers ~

A recap of what happened at camp this week:

Posts ~

10/18: 🔥week 42

10/19: crochet cat basket

10/20: tip-sy tuesday: organizing fabric

10/21: cracked sugar cookies

10/22: spider web eyeshadow

10/23: spice cake with brown sugar caramel sauce

10/24: spooky eye shadow

Well this is weird - cleaning up and doing a little back work on blog posts and came across this half-done weekly recap. Why didn't I finish and post it? Hmmmm....it's now 4/2/21 and I'm posting it just so it has a place in the 'around the campfire' log list! I'm confused - I'm assuming I got busy hahahha. 

Saturday, October 24, 2020

Spooky Eye Makeup by Grace

Here's another spooky eyeshadow/liner idea from Grace (click here to see her spiderweb one), these are fun ideas for a quick easy way to decorate your face for Halloween! Here's how she did it, in her words:

First I prime and use a thick layer of concealer and blend it in


Then I put a light layer of a skin tone shadow, This base layer will make the shadow blend better


Put a light purple on the lid


Then blend a darker purple in the crease and blend the edges out with pink


Use a black liner to line from the outer corner out and connect the end and go up, 

don't connect it to the lid


Make a backward c from the to line to the lid then fill


Draw two lines down and connect each line with a C to get this


Then at the end it it should look like this!


Friday, October 23, 2020

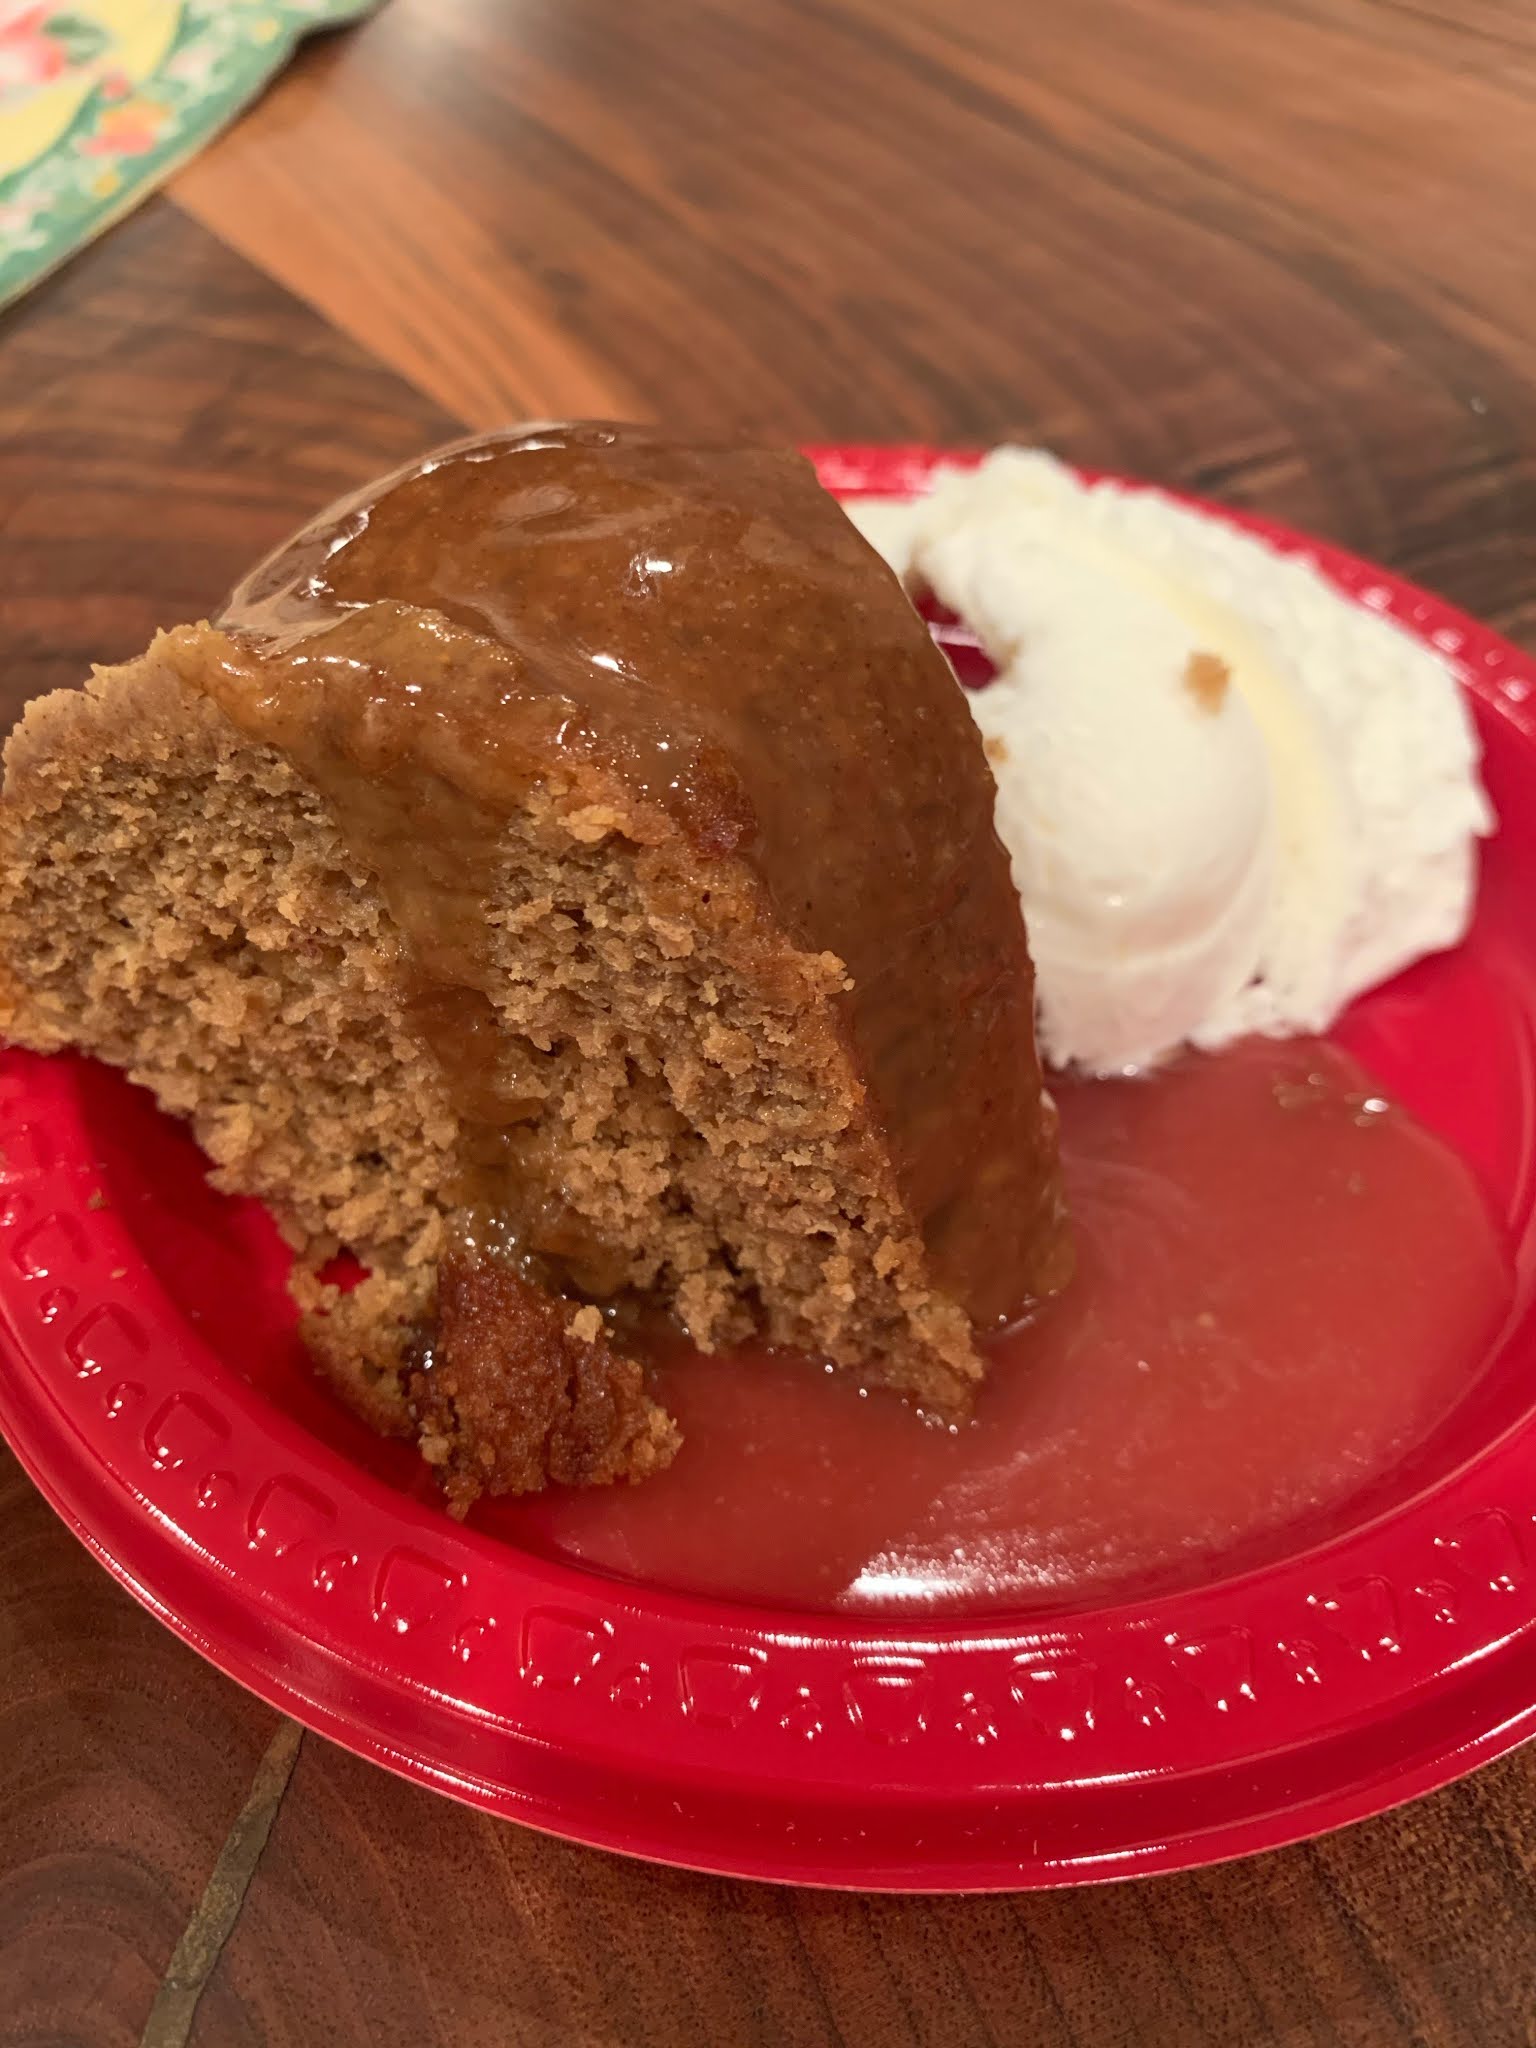
Spice Cake with Brown Sugar Caramel Glaze

True story. My niece requested some kind of spice or gingerbread cake for her birthday, instead of making it from scratch I thought I'd try a recipe I have from the Cake Doctor cookbook to boost a store-bought spice cake mix. I go to the grocery store where my only choices are yellow, chocolate, or carrot cake mixes. What the? The shelves are literally bare; I asked someone stocking shelves nearby if she had any in the store and she said no, they are having problems with supplier. Great, are we hoarding cake mix now I asked? Another shopper overheard me and goes "well I better grab a couple while there's still at least some  here" 🤦‍♀️ Good grief people.

So I winged it and doctored up a yellow cake mix and guess what? Totally worked. You do not need to buy spice cake mix in order to make a spice cake. You're welcome (when you want to make your famous yearly pumpkin spice cake you'll be thanking me hahaha). 

  • yellow cake mix
  • 3/4 cup applesauce
  • 1/2 cup buttermilk
  • 1/2 cup melted butter
  • 1/3 cup molasses
  • 3 eggs
  • 1 teaspoon vanilla
  • 2 teaspoons pumpkin pie spice
Mix all together and pour into a greased bundt pan. Bake according to box directions, about 25 minutes.


The cake is moist and very flavorful all on it's own - but topped with brown sugar caramel glaze? Delish!

  • 6 T. butter
  • 6 T. packed brown sugar
  • 6 T. white sugar
  • 6 T. heavy whipping cream
  • 1 t. vanilla
Bring the mixture to a boil in a medium-sized saucepan over medium heat. Let boil for 1 minutes, stirring often. Spread over the cake, or spoon over individual pieces of the spice cake (we spooned over individual pieces and it was heaven). 


Thursday, October 22, 2020

Spiderweb Eye Makeup by Grace

Grace sent me a couple fun eye makeup ideas for Halloween (or really, any time you want spiderweb eyes haha). She included lots of photos so I'll post them separately. 1st up, in her words:


Here's a spider web eyeliner look

First I prime and put on a thick layer of concealer


Then I put a light orange all over my lid and put dark orange in the crease and a red in the outer corner going into the crease 


Then I draw a thin line coming from every edge of my eye


Then I connect the end to middle of my lid


Then I fill it and make it thicker


Then I add lines going into the liner


Make 3 curved lines connect each line


Then at the end you get an easy spooky look


Wednesday, October 21, 2020

Cracked Sugar Cookies

Made these sugar cookies waaaaay back for the 4th of July to take to the lake and give to our camping neighbors (hence the red, white, and blue sprinkles!) but I've made twice since then without sprinkles because they are so good everyone wants more hahaha. Dave says they remind him of shortbread cookies, I'm assuming that's because of the lack of egg whites (?), and oddly enough the older the cookies get the more they taste like shortbread and the better he likes them. He wanted to give the neighbors another baggie of them last weekend and I said no way, they are like 3 weeks old at this point! He argued that they are still great but I'm not giving out old cookies...having said that - if you want a cookie that tastes great fresh or weeks old, you're going to love this one LOL. 


  • 2 1/2 cup flour
  • 1 t. baking soda
  • 1/2 t. cream of tartar
  • 1 cup butter (2 sticks), softened
  • 1 1/4 cup sugar
  • 3 egg yolks
  • 1 t. vanilla
Sift 1st 3 together and set aside. 

Beat butter and sugar together until fluffy. Beat in yolks and vanilla. Gradually add flour mixture in 4 parts, until well blended.

Shape into tablespoon sized balls (I use my small cookie scoop), put on greased cookies sheet (or line sheets with parchment paper) and do not flatten. Bake at 350' for approx 8-10 minutes.

makes 36 cookies (note: the recipe says it makes 36 but using my small scoop I get a lot more, more like 48)


note: I added sprinkles to the batter to make them 'patriotic' - you could add other colors and shapes if you want, or just leave them as plain old white yummy sugar cookies. Mmmm, you could frost too! 


these are slightly puffy when you pull out of oven, they'll flatten as they cool

Obviously it took me a while to get around posting these, now it's almost time for black and orange sprinkles for Halloween, brown and yellow for Thanksgiving, red and green for Christmas! See, these cookies are perfect all year 'round ;) 

Tuesday, October 20, 2020

Tipsy-Tuesday: organizing fabric

So, let's be clear here. I am usually organized and neat, I like things to have a home so I know exactly where they go, and I don't like clutter. But...when I'm working on a project things tend to spread out and get out of hand and the next thing I know my house is a disaster. And then I get a wee bit cranky because I am usually organized and neat, I like things to have a home, and I don't like clutter. It's a problem.


Today's tip is how to organize fabric because I literally had a pile of fabric on the floor in the middle of my craft room from making masks - I'm not talking about a neatly folded pile of fabrics, nay, I'm talking a mountain of wadded up fabric that was so big I couldn't even step over it - and I knew I had to reign it in somehow. Which naturally led me to googling solutions instead of just folding the fabric, because it was much easier to play on the computer then get up and actually get shizzle done. My favorite idea is wrapping the fabric around comic boards and standing them up on a shelf - organized, I can easily see what I have, and it looks beautiful. 


And then my project was delayed a couple more days because I had to order comic boards from Amazon, and then a couple more days because I couldn't figure out how to fold the fabric around the boards which led to more googling of solutions. In case you're still reading and you want to know, fold the fabric in half with the selvage edges together, then fold in half again. That should give you a rectangle about 10" tall. Put a comic board (btw, I had to research what a comic board is - thin paper boards that are meant to support collectable comic books that are then placed in protective bags) on top and wrap the fabric neatly around. Some people use plastic clips to keep the fabric from unwrapping, don't use pins or metal clips because in time they might rust and ruin the fabric; I didn't clip them and so far just being wedged together is keeping the fabric in place. 


Finally I got the technique down, wrapped all the fabric, and found a basket big enough to file them in. Ahhhhhhh, I can't even tell you how happy this makes me - I keep going into the craft room just so I can look at them. And it'll be so easy now for people to pick their mask pattern, love that too!