Thursday, January 18, 2018

Birthday Card Gift Box

Today is our nephew's birthday - I'm fairly certain a 17-year-old boy is not checking his aunt's blog but just in case...Happy Birthday Gavin!!! It's pretty tough to know what to give a teenage boy for his birthday so we played it safe with a gift card - but that's kinda boring so I jazzed it up with this cute gift box/slash/birthday card. In addition to the gift card it also holds a few pieces of chocolate which I'm sure will be appreciated hahaha!

This was pretty easy - you need a piece of cardstock that is 6 1/2" x 5 1/2" for the bottom, and 6 1/2" (plus 1/16") x 5 1/2" (plus 1/16") for the top. Note the reason for adding just a smidgen to the top is so the top will fit over the bottom - if they are the same exact size they won't fit together.

Score both pieces at 3/4" on all 4 sides. Cut on the score lines like I've posted before here, then fold and adhere the tabs in to make the box. Before gluing the top tho, I ran it thru my big shot die cut maker thingy to punch out this cute balloon pattern. I stamped onto the balloons with a matching kit from Stampin' Up, you could also just color them in with a marker. Stamped the date on the front, but if you have a little stamp saying that fits you can just use that (I don't have one!). I realize I'm not being very specific here - if you want more details just holler!

I put a piece of coordinating paper into the bottom of the box making a little ridge in the center to act as a divider. Put the little chocolates in to fit, add the gift card, then put on the lid. Oh, one more thing - I cut a piece of coordinating paper to fit into the top of the box and wrote a message on the back side. Put the patterned paper in so you can see it thru the balloon top.

I took lousy pictures of this project - here it is with the bottom liner in that will hold the chocolates. In the top photo I've added this to a blue base because the white box wasn't big enough to hold the candy! I just cut out the white balloon top and glued it to a bigger blue one. Then I put the striped paper in the top portion with a note on the back, so when he opens the lid he'll see the note underneath the top and the gift card and chocolate on the bottom.


Two years ago: make a parachute cord dog collar


Wednesday, January 17, 2018

Baked Eggs in Avocado

I'm a member of a closed group on Facebook that's all about healthy eating, and get lots of good ideas from the other members. I loved this idea that someone recently posted and thought I'd give it a try - 'cuz what's not to like about eggs baked in an avocado for breakfast?! This is very easy - crack an egg into half an avocado and bake it at 350' until the egg is set, it took me about 20 minutes. It turned out ok, but just like when I make my baked egg cups (click here for that post) the top was a little dry which I didn't love, next time I'll add a little shredded cheese to fix that.

I googled other recipes to make sure I was doing it right, I never did figure out if you bake the avocado with the shell on or not...so I left it on. I should have thought it thru a little bit more - how are you going to eat the egg and avocado out of a shell thats been baked for 20 minutes and is piping hot? You can't! So I scooped the whole thing out of the shell, which made it not very pretty. Tasted good but it's a mess to eat. So my advice, right or wrong, is to bake it out of the shell.
I made a little nest out of aluminum foil to hold the avocado while baking. 
I'm a "dipper" so added some salsa...yum.


one year ago: tuna-egg salad...what?
two years ago: best meatballs ever. For real!

Tuesday, January 16, 2018

Beading Basics

I found this short guide to beading basics for beginners on Hobby Lobby's website - I'm still working on my technique to form a plain closed circle and their directions with photos are helpful. If you are just starting out, or like me have been doing it awhile but haven't mastered it yet - or you haven't tried beading yet because you don't know what to do - check this out. I wasn't able to insert larger pictures and it's a little hard to read, click here for the original post on their site to see it bigger if you can't read this!


Monday, January 15, 2018

Bird Cage Slipcover


Lucy has a small cage for traveling that has an elaborate cover with snaps and zippers, it isn't easy to take on and off so when we are in the RV I usually just open up one side and she stands on top of the cover...which sounds good in theory but she's a bird. A messy bird that takes her food out of the cage and eats it on top of the elaborate cover and then wipes her beak on the cover. And then of course poops on it. The cover that can't be washed. 

Note: who designs a bird cage cover that can't be washed? Someone who doesn't own a bird, that's who. 

Anyway - after trying to remove the ground in blackberry from the cover I decided to make her an easier cover that slips over the top, and can be washed. I totally jerry-rigged this but it turned out good...and useful.


I had this no-sew fleece with a cute bird pattern on it from when Brooke and I were going to make tie-blankets (click here for that post), she made her blanket but I just put my fleece in the stash and forgot about it. Seems perfect for making a bird cage cover.


I measured the cage dimensions and cut out 4 rectangles of the patterned fleece for the sides (adding 2 1/2" to each side to make the ties) and one in dark gray for the top.


Leaving a 2 1/2" edge all around, sew each side panel to the top, just along the top edge leaving the sides open.


Then make one inch slits along the side panels
(1" wide x 2 1/2" deep) and tie the sides together. Do this on all 4 corners.


Before and after cutting the door opening:


After cutting the opening (that just flips up on top of the cage) I realized it was going to let too much light in which means as soon as she can see out in the morning she's gonna start hollering to get out. I cut another piece of the gray fleece and sewed it overtop of the door opening to make it darker. Her own little black-out shade.

I showed the cover to Dave and he pointed out that she didn't have any "windows", so when we are traveling down the road she'd only be able to look forward. Oops. So I cut a square out of the side and attached another side panel overtop so it can be closed at night.


maybe I shouldn't have bothered with a new cover -
she seems happy to be in a cooler instead of her cage! 


Sunday, January 14, 2018

West Coast Chili

I'm sure everyone has their own recipe for chili - here's one that's maybe a little different than your normal ...I've been making chili this way for years. It's not too spicy (although this time it had a little "kick" thanks to not measuring the red pepper flakes) but you can adjust the seasonings if you want it hotter. The original recipe calls for green pepper, onion and garlic which I don't do; and the "West Coast" part is using diced turkey (but I put whatever meat I want in - this time I chopped up leftover grilled chicken breasts, sometimes I put in leftover pork loin) and wine. I've always used pinto beans that have chili seasoning added - I despise red kidney beans - and add a small can of diced tomatoes that have seasoning added (fire-roasted ones are good).

A little tip: if the chili is too acidic (sometimes the tomatoes just don't taste right) I'll add a spoonful of brown sugar to mellow it out. Taste it first and see if it's good before adding sugar tho! I only do this every once in a while...

Of course over the years I've changed the original recipe and made it my own - here is my version and you can just google "west coast chili" to find the original recipe with peppers, onions, and yucky kidney beans.

  • 28 oz. canned diced tomatoes
  • 14.5 oz. canned fire-roasted (or some flavor that goes with chili) diced tomatoes
  • 2 (14.5 oz.) cans chili-flavored pinto beans, undrained
  • 1 cup red wine
  • 3 cups chopped turkey meat (or cooked chicken, leftover pork roast, etc)
  • 2 teaspoons chili powder
  • 2 teaspoons coriander
  • 1/2 teaspoon cumin
  • 1/2 teaspoon red pepper flakes
  • 1/2 teaspoon salt
Add all ingredients to a big pot, bring to a boil and the reduce heat to a simmer. Stir occasionally and cook on low for about half hour. Like most chili, this tastes even better the next day - or I'll make it in the morning and put it in the fridge until dinner to let the flavors develop.

Serve with shredded cheese and sour cream (and sometimes diced onion if I have it). Sorry I don't have a picture - it looks like chili!

*click here to read my sisters review and a funny story! 

Saturday, January 13, 2018

Lentil "Gravy"

I downloaded a free cookbook on Kindle the other day - 'Thug Kitchen: Eat Like You Give A F(bleep)'  - even before trying any of the recipes it's my new favorite cookbook just because of how funny it is! Warning: if bad language and swearing bother you, you are absolutely not going to like this book - if you read it anyway I don't want to hear about how offended you are. Because you will be. I, however, live with Dave and I'm pretty sure there isn't a swear word that I haven't heard so I can take it LOL - and once you get past the language it's just a funny book. They tell it like it is and I laughed out loud numerous times just reading the intro!

I made their recipe for lentil gravy - because gravy. I was super excited to make "gravy" out of lentils thinking some genius has discovered a way for me to eat gravy and have it be good for me. Wrong. This is not at all "gravy"! What it is though is really good lentil soup, so I do recommend making it...just don't be fooled into thinking you're spreading this on top of biscuits and it's going to taste like actual biscuits and gravy.


Lentil Gravy Soup (their recipe minus the swear words!)


  • 1 1/2 cups green or brown lentils
  • 5 cups water
  • salt
  • 1/2 small onion, diced
  • 1 teaspoon olive oil
  • 1 teaspoon dried thyme
  • 2 cloves garlic, minced
  • 1/8 teaspoon ground pepper
  • 1 Tablespoon flour
  • 1 cup vegetable broth
  • 1 teaspoon soy sauce or tamari
  • 1 teaspoon paprika
  • 1/2 teaspoon sherry or red wine vinegar
1. In a pot, bring the lentils, water, and a pinch of salt to a boil. Let those (bleep) simmer until they are tender and falling apart, about 40 minutes. Prep everything else while you wait, or you can to this (bleep) step the night before and refrigerate. 

2. In a small skillet, saute the onion in the olive oil over medium heat until golden around the edges, about 3 minutes. Add the thyme, garlic, and pepper and cook for another 30 seconds. Turn off the heat.

3. When the lentils are done, drain them of whatever water is left in there and throw them back in the pot you cooked them in. In a small bowl, mix the flour into the broth. Then add the broth mixture to the lentils along with the onions, soy sauce, paprika, and vinegar. Grab an immersion blender and blend until smooth or throw it all in a regular blender and go to town. Heat it all back up on the stove in that pot again and let it simmer to thicken, 2 to 3 minutes. 


Friday, January 12, 2018

Update: Dad Leonard's Sweet Dill Pickles

My friend Mark loves these pickles and every time he does me a favor (or just cuz I'm feeling nice) I make him a little jar full. The other day he gave us a ride to the Rose Parade and wouldn't take gas money or let us buy his breakfast, but he eagerly accepted a big jar of pickles (actually his text was "ride for pickles",  I took that as he eagerly accepted my offer hahaha).

 I played around with cutting them super thin this time and took him a little sample to see which ones he prefers (the original recipe is large chunks), since they taste the same and it's just a textural difference he said he didn't care. So I mixed them together and am loving this new version. The thin ones are a little crunchier and the large ones take longer to chew (which is a good thing - savor them!) so you get a nice balance this way. Try it. I'm telling ya - if you like pickles you really really need to make this easy recipe. Cut some thick and some thin and see which you prefer. My mouth is watering now...

Boil 2 cups sugar, 1 cup water, 1/2 cup white vinegar for a couple minutes. Meanwhile rinse and drain a big jar of whole dill pickles (rinse the jar and the pickles). Cut them into thick or thin slices (or both) and put back into the clean jar. Pour the hot sugar/vinegar mixture over the pickles, seal tightly, turn upside down and refrigerate (once they've cooled off). After 24 hours turn them right-side up and enjoy!

click here for the original post.

Thursday, January 11, 2018

Chair Cover

Dave and I went to a store looking for new barstools and came home with a little video game table instead :). It's in the dining room which I know sounds weird but the condo isn't very big and the dining room is the best place for it - and we can use it as a cocktail table and extra seating when we have lots of company (that makes it sound less crazy than 'a grown woman just put a video game table in her dining room' - right?). It needs a couple small chairs for when we want to play (hello Frogger competition every night since we got it!), but until I find something better I pulled out these IKEA white chairs from the way back of the closet that we rarely use...mostly because they are very white melamine cheap chairs and don't really go with anything...until I remembered that I just bought a whole fresh roll of wood-grain looking contact paper. You remember my motto "if it sits still long enough it's going to get decorated"? Too white chairs + contact paper = better looking chairs. Yes it's a temporary fix but for now they look good!

I started the hard way and tried to make a template of the back rests by laying the chairs down and trying to trace around - unsuccessful - then it occurred to me that just about everything from IKEA is put-together-yourself and I could just easily remove the backs. Much easier that way! Trace around the back on plain paper, lay it down on the contact paper and cut it out. Hardest part was sticking it in place but with a few tries I got it. Screw the backs back on and voila - much better.

I only did the backs, not sure how the paper would hold up if I put it on the seats - and for now doing the back only is enough to tone down the whiteness.


Wednesday, January 10, 2018

Savory Monkey Bread

You guys know what 'monkey bread' is, right? Little balls of dough coated in either sweet stuff (sugar, cinnamon, etc.) or herbs and cheese, baked together in a bundt pan - once it's baked you just pull off the individual balls of dough to eat. Not too exotic, right? Well I made a savory monkey bread with herbs, spices and cheese for Dave to take to a ukulele party and he said no one knew what it was or how to eat it...hmmm...it seems pretty obvious to me but whatever - maybe it's a midwest thing?

This is super easy to do, looks great, and tastes even better!

Ingredients:

  • 2 (16 oz.) cans of refrigerated buttermilk biscuits (you know, the kind in the exploding can!)
  • 1/2 stick butter, melted
  • garlic salt
  • different finely chopped herbs, spices, and cheeses. I used chopped cilantro, 'everything bagel' spice, grated parmesan mixed with paprika, shredded cheddar, chopped sun dried tomatoes. Use your imagination!
Directions:
  1. preheat oven to 350'. Generously grease a bundt pan.
  2. stir a little garlic salt into the melted butter.
  3. cut each biscuit in half and roll into a ball. Brush each ball with the garlic butter, then roll in different coatings. Arrange balls in the pan so that the different toppings are alternated. 
  4. Bake for 30-35 minutes until biscuits are done and surface is golden. Make sure the bread doesn't brown too quickly - if it does just lay a sheet of aluminum foil on top while it finishes baking.
  5. Cool in pan for 5 minutes. Run a rubber spatula or knife around the edge and down the sides of the pan to loosen. Invert onto a plate, then lay your serving plate on top and flip the whole thing over so the pretty top side is up.


one year ago: date your spices and herbs to know when you opened them
two years ago: french bean and vegetable soup

Tuesday, January 9, 2018

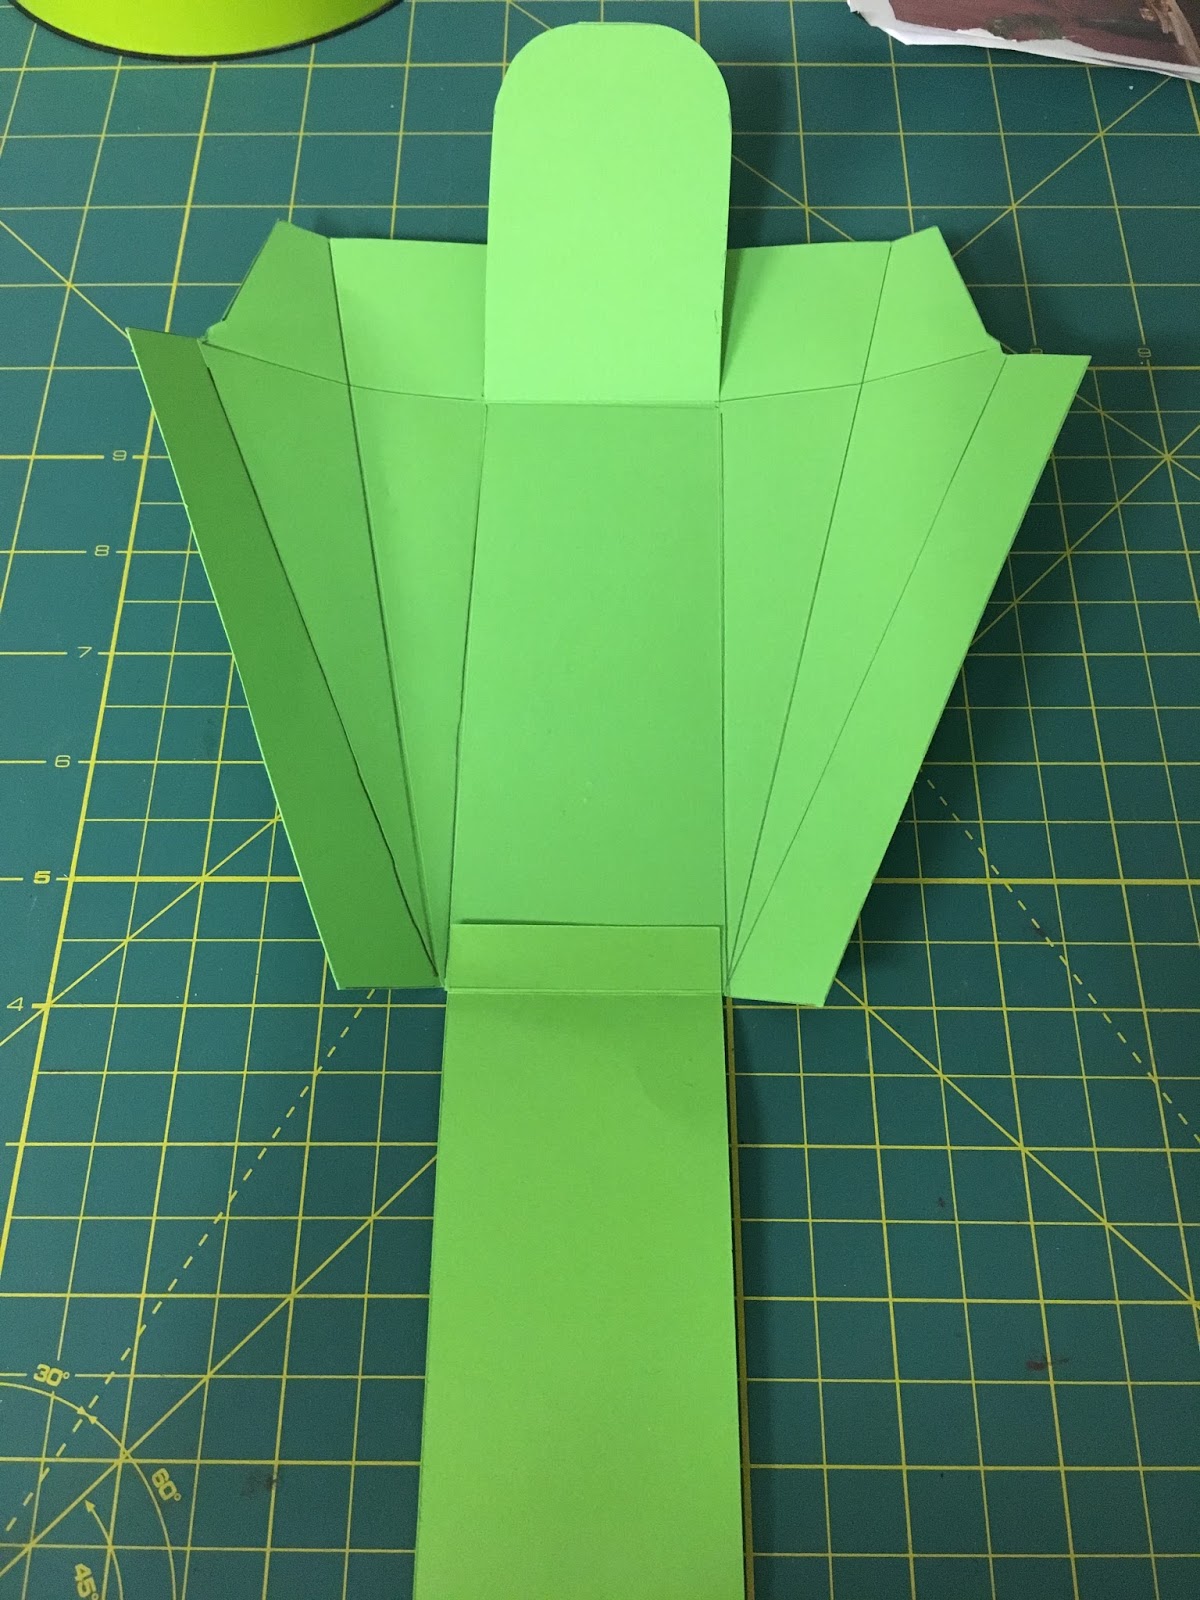
Wedge-Shaped Paper Box

It might be a little weird that I noticed the shape of a hummus wrapper, but I looked at it and thought it would make for a good (and unusual) gift box - working for Ronda has made me have packaging, boxes, and pouches on the brain I guess! - so I took the wrapper apart and used it as a template. Trace around, score and fold, cut where needed, then add some double stick tape (or glue stick) and done - easy! And look how cute this little box turned out! I made it in plain green cardstock so I wouldn't waste paper if it didn't turn out - this will be so cute in patterned paper, and I'll add some kind of tag and ribbon - maybe a big curly bow. Cute.