Sunday, May 31, 2020

Around the Campfire 🔥 (week 22)

Dear Campers ~

A quick recap in case you missed anything at MMDC last week:

Posts ~

5/25: potato salad
5/26: tip-sy tuesday: instant pot filler
5/27: dill pickle soup
5/28: TBT: pigs in a blanket
5/29: flower seed bombs
5/30: chicken vesuvio

What's cooking ~
  • grilled pork chops, roasted butternut squash, kale salad
  • bbq salmon, sticky rice, roasted whole broccoli
  • grilled chicken breast, spinach ravioli with pesto
  • steak, caesar salad
  • pizza (last minute because of an unexpected thunderstorm while camping!)
  • bbq ribs, chopped salad
  • grilled chicken sausage, white beans baked in marinara sauce with feta
Miscellaneous stuff keeping me busy ~
  • cleaned out the laundry room and cleaning closets - have you ever done that and wondered what the heck some of the stuff is in there? LOL I'm afraid to throw some things out but can't figure out what they are for! 
  • took the RV up north and did deep clean and set-up. Camping is supposed to be relaxing but not this time. 
  • read 'Undone' by Karen Slaughter, #3 in her Will Trent series. Man, can she ever write disturbing, graphic, violent, creepy storylines. I like it and dislike it at the same time, if that makes sense! But she keeps me coming back for more so...⭐️⭐️⭐️⭐️
    That's it - this week flew by for me. How are all y'all doing? Staying busy? Hope you liked everything that happened at camp and will join me next week for whatever fun projects, recipes, and more I find to make (or get my friends to make and share with me so I can share with you hahahaha! For instance, I can't wait to show you Al and Cathy's latest project and only wish I had a blank wall and could do it too!). Bye!

Sincerely ~


Jill
camp counselor and tired camper


Saturday, May 30, 2020

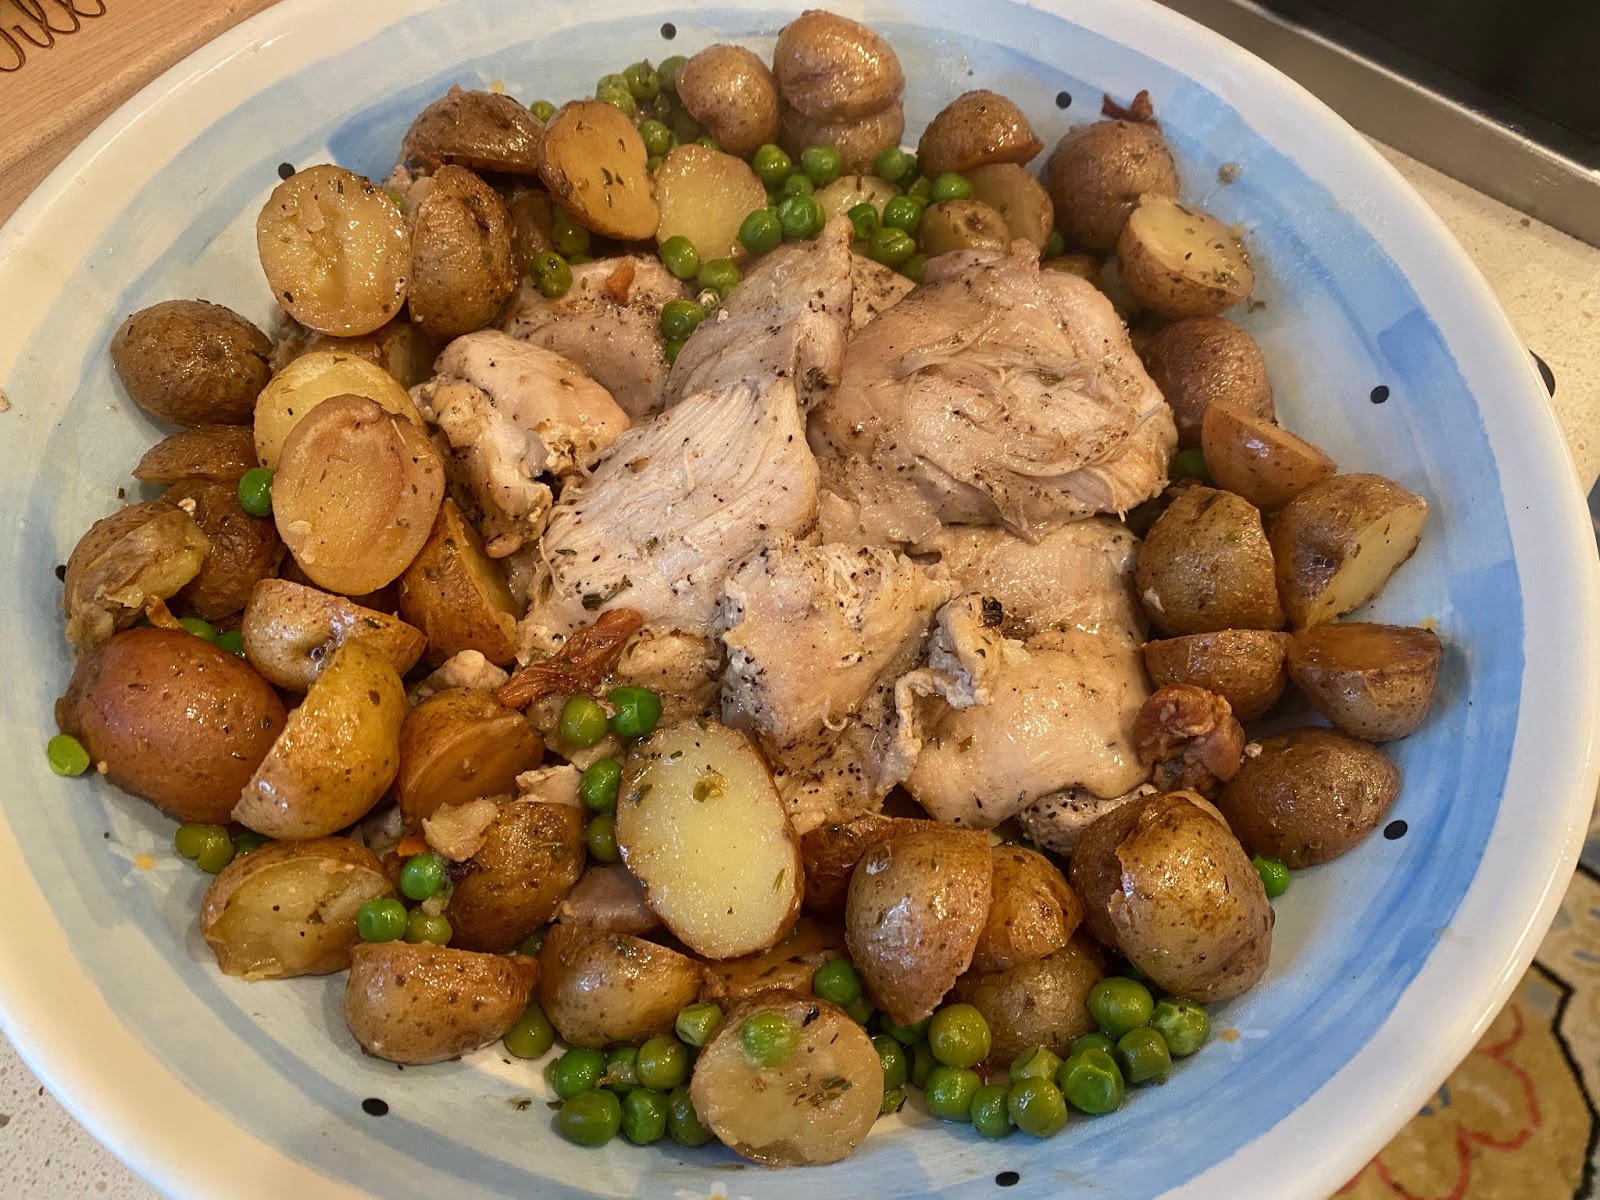
Chicken Vesuvio

I follow Giada DeLaurentis's "Giadzy" site and this recipe for chicken vesuvio looked good (well, at least the picture looked good hahaha) - and I had a package of boneless skinless chicken thighs so thought I'd make something different. I did change it a little bit, her recipe calls for bone-in skin-on thighs; and after reading other recipes I added some frozen peas to the dish - which it actually needs from a aesthetic point of view, otherwise it's just brown on brown on brown (of course her picture looks much more appetizing LOL). I also drained some marinated artichoke hearts instead of using plain. We really liked how this turned out, very flavorful and homey (in a good way); can't say how it'll be following her recipe 100% but it's really good made like I did! 


I'm sharing her recipe below since she's Giada and no one cares how I made it hahahhaha, I told you my changes above if you want to go rogue like I did ;) One more thing - mine had a lot of sauce, like swimming in sauce, so I'd recommend putting the vesuvio in a shallow bowl or platter with a rim. The sauce tastes good, there's just a lot of it - if you don't like that just don't put on as much!


Mediavine

INGREDIENTS:

  • 3 tablespoons olive oil
  • 4 chicken thighs with skin and bones
  • Salt and freshly ground black pepper
  • 1 1/2 pounds small red-skinned potatoes, halved
  • 4 large garlic cloves, minced
  • 3/4 cup dry white wine
  • 3/4 cup chicken broth
  • 1 1/2 teaspoons dried oregano
  • 1 teaspoon dried thyme
  • 8 ounces frozen artichoke hearts or 1 cup frozen lima beans, thawed
  • 2 tablespoons unsalted butter

INSTRUCTIONS:

Preheat the oven to 450 degrees F.
Heat the oil in large ovenproof pot over high heat. Sprinkle the chicken with salt and pepper. Working in 2 batches if necessary, cook the chicken in the pot until golden brown on all sides, about 10 minutes. Transfer the chicken to a bowl. Carefully add the potatoes to the same pot and cook until they are golden brown, stirring occasionally, about 10 minutes. Add the garlic and saute for 1 minute. Add the wine and stir to scrape up any brown bits on the bottom of the pot. Add the broth, oregano, and thyme. Return the chicken to the pot. Stir to combine. Bring to a boil over medium-high heat.
Cover and bake in the oven until the chicken is cooked through, about 20 minutes. Transfer the chicken to a platter. Arrange the potatoes around chicken. Add the artichoke hearts to the sauce in the pot. Cover and simmer over high heat until the artichokes are tender, stirring often, about 4 minutes. Turn heat to low. Stir in the butter. Pour the sauce over chicken and potatoes, and serve.


Friday, May 29, 2020

Flower Seed Bombs

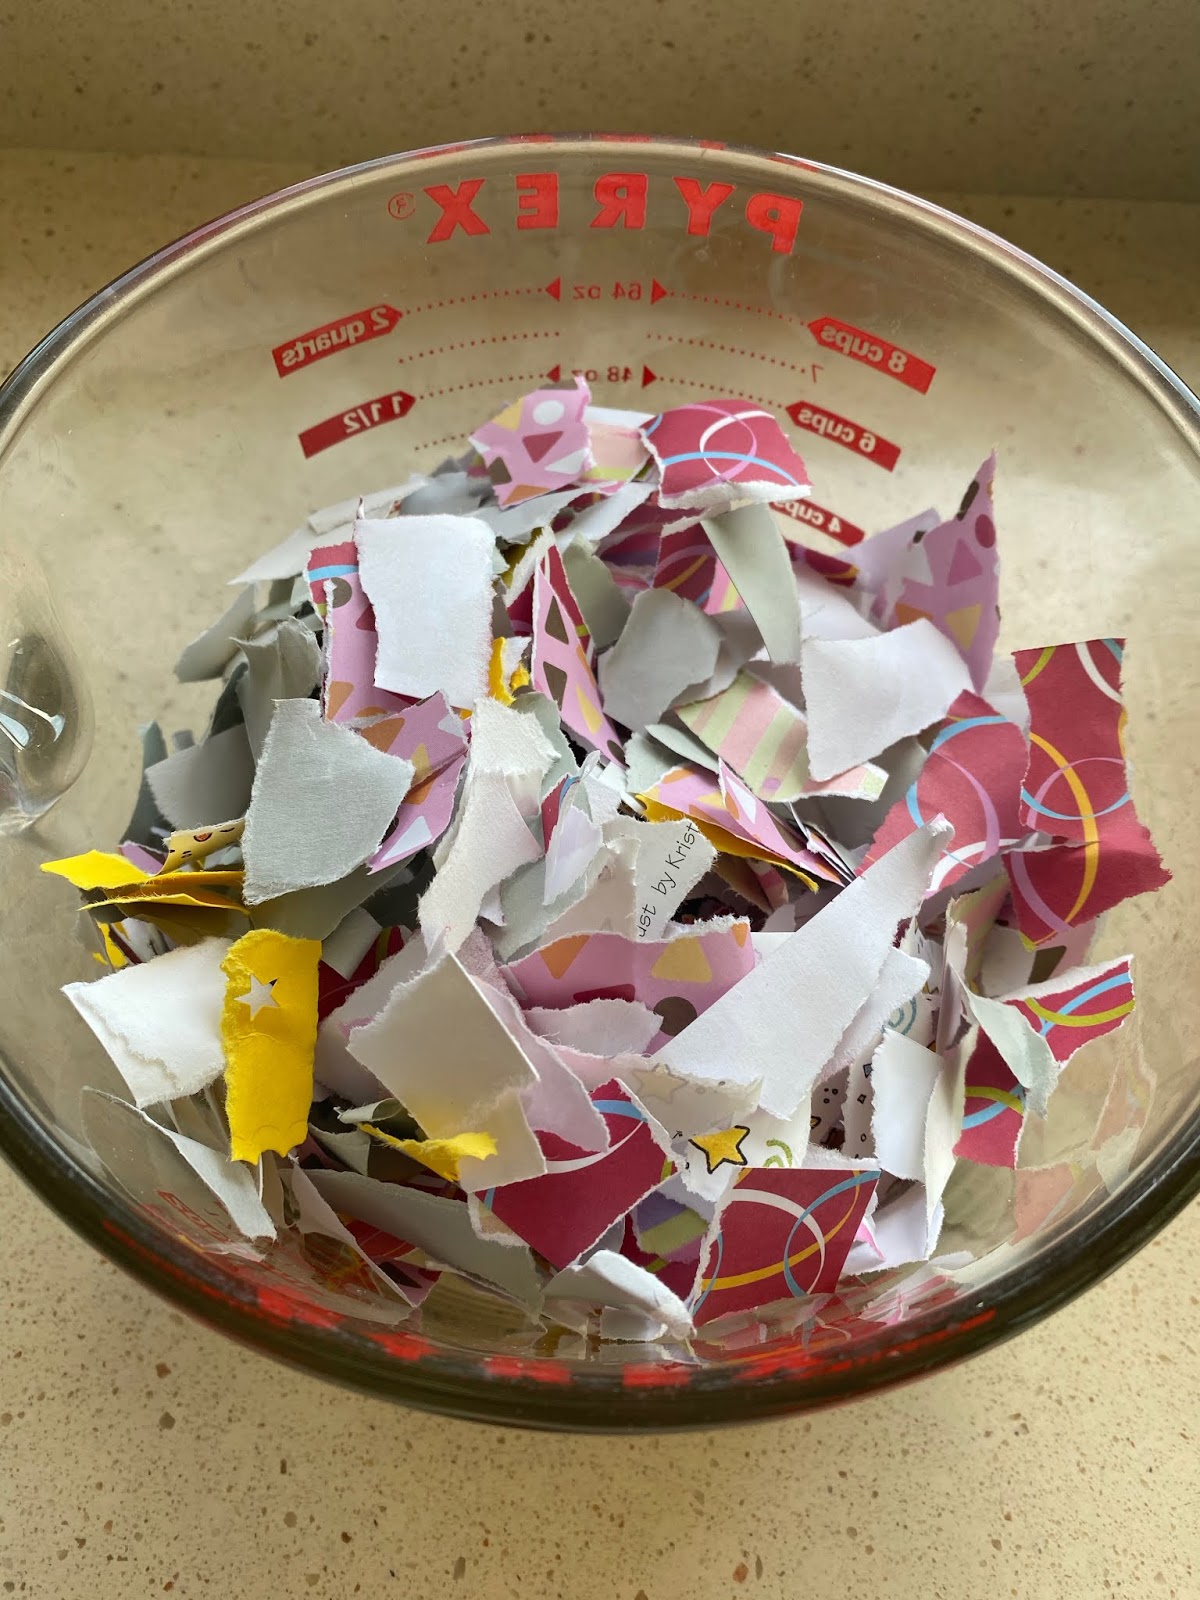
I've never made seed bombs before, and I have no idea if they'll work - but after seeing lots of ideas for these online I thought I'd give it a try. Because who hasn't wanted to blend up mushy paper in their food processor? Hahahhaha, nothing bad happened to my machine (yep, I was a bit worried), these were fun and easy to make, and turned out so cute! Now let's just hope once planted they will germinate - if it works I'm so making these as gifts in the future, perfect for my non-gardening friends and family!


One thing I read is that once the seeds get wet they germinate, so you want to get the pureed paper as dry as possible as quickly as possible. Dave got me a variety of seed packets, ultimately I went with wildflower mix because I like the shape of the different seed mix and they are pretty hardy so will be fitting for different climates and soils. Also, every article I read about these just says to use paper - but not what kind. I did a bunch of different scraps from my vast (hoarding) scrap folder - cardstock, colored paper,  and decorative scrapbooking paper. Other people even used newspaper and toilet paper (in light of the TP scarcity tho I'm not wasting it on crafting hahah). I mixed a bunch of colors and patterns; after pureeing it together it pretty much came out light gray with little flecks of color. If you want a more vibrant color for your bombs I'd recommend using all one color paper. 


I ripped up paper into small pieces, about 5 cups worth, put in a big glass measuring bowl and added warm water to cover. Let it sit for a few minutes to get the paper soaked. 


Put the wet paper in a food processor or blender with enough water to blend it. Initially I drained off most of the water but the processor did not like that and that's when I started to worry I was hurting it - but once I added water back in it worked like a charm. You'll know, the blades stuck in place without enough water to blend the paper.


 Once it's mushed up (see the photos, has the texture of dough) put it in a colander and press out as much water as you can. I squeezed balls of it in my fist to get even more water out, then add the seeds and knead them into the paper. Pack the mixture into molds - as you can see in my pics the more detailed molds didn't work as good, they were hard to get out of the molds. I found the small circle molds to work great. 


Once you've tightly packed the molds press on the tops with dry paper towels and even more water will be released. Set in the sun for an hour before unmolding. 


After removing from the molds, put them on a wire rack and set back outside until they are dry. I left mine out for a couple hours and then just left them on the rack on the kitchen counter until the next day. 


Now they're ready to be planted! Can't wait! 


found here at onelittleproject.com

 Print

5 from 1 vote

DIY Seed Bombs

These adorable little seed bombs are so easy to make and would make a lovely Mother's Day or teacher gift! Kids of all ages will love helping with this DIY garden craft!
Author: Megan Kapple | Homemade Ginger

Materials

  • Seeds
  • Colorful Paper
  • Silicone Mold
  • Blender

Instructions

  • Tear the paper in small pieces.
  • Soak the paper in water for about 15 minutes.
  • Squeeze out the water and place the paper in a blender and blend until it is a pulp consistency.
  • Squeeze out any excess water out of the pulp.
  • Fill the molds up half way with pulp, pressing down firmly.
  • Sprinkle seeds on the pulp and fill the rest of the way.
  • Allow the bombs to fully dry, about 2-3 days before removing them from the molds.

Thursday, May 28, 2020

TBT: Pigs in a Blanket

This might not be an actual throw back recipe because when do pigs in a blanket ever really go out of fashion? It didn't come from my new/old cookbook tho, it's from my sissy - she made them for dinner one night and made me some extras that I ate for breakfast. Normally I make mini pigs in a blanket for party appetizers, and I can't even tell you how fast they get devoured! The full sized ones have cheese in them, I don't do that with mini's (for the little guys I use cocktail sausage and cut the crescent roll in about 7 pieces per roll), otherwise these are the same big or little. Mmmmmm. I love these  :)

-
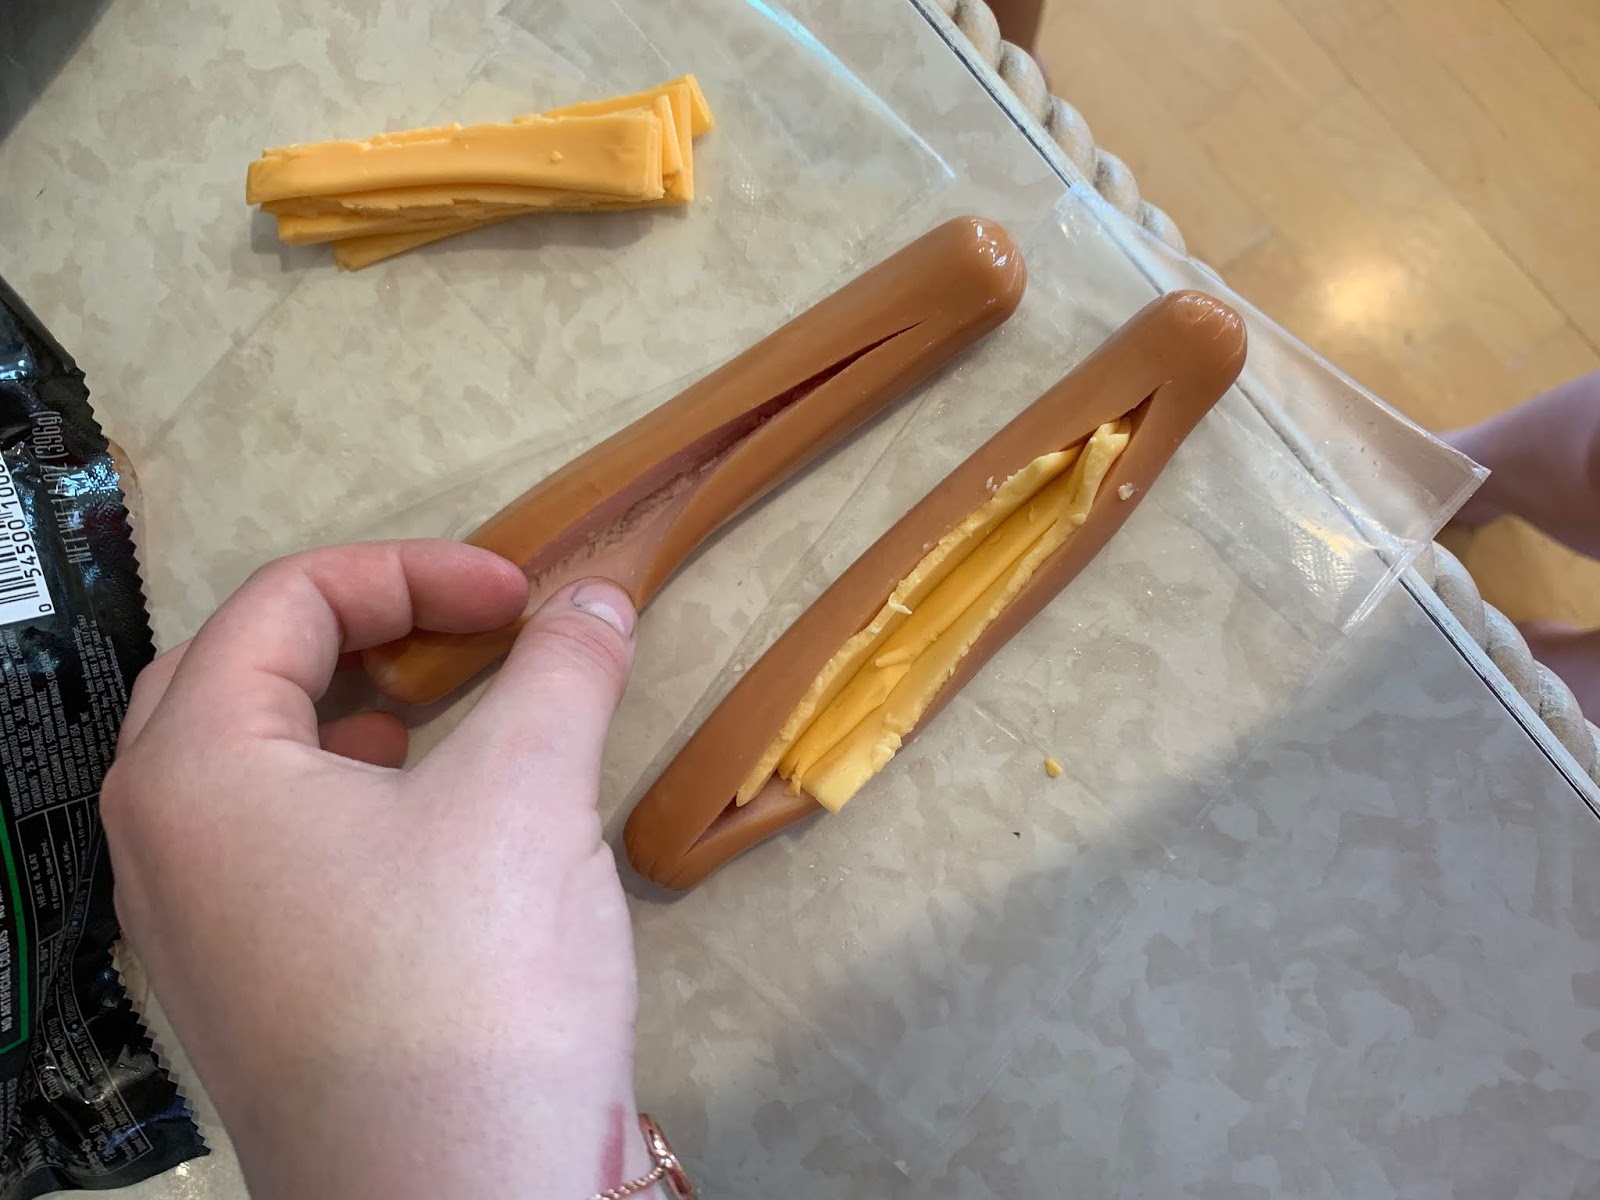
Jen made them using low calorie turkey dogs and light crescent rolls, you can certainly use the dog and dough of your choice. Slice the hotdog lengthwise about 1/2" from each end and about 3/4ths of the way thru, don't cut all the way or the cheese will ooze out the bottom (she says 'don't ask me how I know') Cut the cheese in narrow strips (thinner than the first picture below) to stuff into the hot dogs. Wrap a crescent around each cheese-stuffed hot dog leaving the ends free, place on a baking sheet. Bake until golden brown. 


disclaimer * we both forgot to take a photo of the baked hot dogs after they came out of the oven and found this one online somewhere! But this photo looks exactly like hers look, promise!

Here's what the little ones look like, except I don't have a picture of the finished product for these either 🤦‍♀️ hahahah:


Wednesday, May 27, 2020

Dill Pickle Soup

Al gave me some of the dill pickle soup he made, he thought the pickle flavor was too strong but I think it's great. Honestly, I know it sounds weird but this soup is so good!! You could lighten up on the pickle-ness by substituting broth for some of the pickle juice, but he followed the recipe and I thought it was perfect. It's like potato soup with chunks of pickle here and there, with a background flavor of pickle because of the juice - if you didn't know there's pickle juice in it I think you'd guess vinegar. Yum. I know it's an odd one, and I didn't ask Al why he decided to make it (probably just like the pickle cupcakes I made last year, it sounded just strange enough that he had to try it! Click here for the cupcake recipe - which is also delish by the way) but I'm glad he did and I hope you'll try it!


DILL PICKLE SOUP

Prep Time: 10 mins | Cook Time: 30 mins | Servings: 8 people

Ingredients:

5-1/2 cups chicken broth
1-3/4 lbs russet potatoes, peeled and quartered
2 cups chopped carrots, smaller dice
1 cup chopped dill pickles (smaller dice ~ about 3 large whole dills)
1/2 cup unsalted butter
1/2 cup all-purpose flour
1 cup sour cream
1/4 cup water
2 cups dill pickle juice*
1-1/2 teaspoons Old Bay seasoning
1/2 teaspoon table salt
1/2 teaspoon coarsely ground pepper
1/4 teaspoon cayenne pepper
Optional garnishes: sliced dill pickles, fresh dill and black pepper

Directions:

In a large pot, combine broth, potatoes, carrots and butter. Bring to a boil and cook until the potatoes are tender. Add pickles and continue to boil.
In a medium bowl, stir together flour, sour cream and water, making a paste. Vigorously whisk sour cream mixture (2 Tablespoons at a time) into soup. (This will also break up some of your potatoes which is okay. You might see some initial little balls of flour form, but between the whisking and boiling all will disappear. Don't panic.)
Add pickle juice, Old Bay, salt (*see below), pepper and cayenne. Cook 5 more minutes and remove from heat. Serve immediately.

Notes:

*All pickle juice is not created equal. Some is saltier than others. Taste your soup after adding the pickle juice and final seasonings. It's possible you will not need any salt or would prefer more or less.

Nutrition:

Saturated Fat 11.5g
Cholesterol 50mg
Sodium 537.6mg
Potassium 104.3mg
Carbohydrates 28.2g
Fiber 2g
Protein 4.8g
Calcium 161mg
Iron 1.2mg

Tuesday, May 26, 2020

Tip-sy Tuesday: Instant Flower Pot Filler

Today's tip came after my neighbor Midge and I were talking about filling our flower pots, I said I didn't really want to spend as much time as I usually do in the nursery designing and picking out the plants to put in my 2 big flower pots ('cuz even tho I know we need to be careful and wear masks in public, the thought of wearing it in a greenhouse when it's 90' out is not appealing!), and she said this year instead of designing her pots she's going to buy a large hanging flower basket that is already full and blooming, take it out of the hanging container and plant directly into her flower pots. Uh, hello - that's a great idea! I wondered if we couldn't just remove the hanging part and plop the container directly into the flower pot but she said taking it out of the original container and planting it into the dirt will keep the plant healthier longer, it'll be able to spread out and grow longer roots.


So that's what I did - for less money and less time waiting for my plants to fill in and grow, I have instant gorgeous flower pots. Sure it's taken away some of the 'creative' part of designing the pots (which I love to do, looking for inspiration photos and then finding plants to create the look I want), but I've decided this year to not try to re-invent the wheel and go with someone else's design that is beautiful.


I bought a very full 12" basket and look how great it's filled up my 18" pot. This is a "Proven Winner" combination of super petunias and million bells (solid and striped). So pretty!

2021 update: these flowers did amazing! They thrived in the pots, stayed full and I didn't have to fill any holes. I did the same thing this year and hoping for equally great results! 


5.26.19: 🔥
5.26.18: tuna orzo salad
5.26.17: travel blog: Edinburgh, Scotland
5.26.16: herb pallet garden (I still use this and it's held up great!)

Monday, May 25, 2020

Potato Salad

I stumbled on this post from 3 years ago for Brooke's cheese, spinach, and bacon stuffed mushroom caps (click here for the recipe) mentioning that I would post my potato salad recipe and I was positive I did...but I can't find it and it's so so good that even if I did post it and am just not seeing it, it's worth a repeat. I adapted it from The New Basics Cookbook and have been making it this way for years.


Because I've made it so many times I don't measure any of the ingredients - but I can easily tell you how to make it. All the measurements will depend on how many potatoes you start with, you will just eyeball everything. I keep it simple, the original recipe calls for onions and cucumbers but I don't add them. This is pretty standard potato salad but what makes it different is adding olive oil, vinegar, and coarse salt to the potatoes while they are still hot after boiling them; after it cools I add the remaining ingredients.

Boil whole potatoes until they are just fork tender, you don't want them too soft. I like the skins so I don't peel but you can if you want. Drain, break into rough pieces in a big bowl, drizzle with olive oil and apple cider vinegar, sprinkle with coarse salt and toss together. Let cool completely, then stir in finely diced celery; add mayonnaise and dijon mustard to taste, stir until the potatoes are coated. If the potato pieces are too big at this point I break them up with a fork - usually all the stirring and adding ingredients causes the potatoes to break apart on their own. Add chopped hard boiled eggs, gently stir to incorporate, add more mayo if it needs it, then season with salt and pepper to taste. If I have flat Italian parsley on hand I usually add some, it's fine without it.


I made it this morning for dinner later and tried to pay attention to amounts to give you an idea - I boiled 7 medium to large red skin potatoes, drizzled with about 1/4 cup olive oil and 2 Tablespoons vinegar, and about 1 teaspoon coarse salt. I chopped about 1/2 cup celery in very small pieces. Used 1/2 cup plain yogurt and 1/2 cup light mayo, 2 Tablespoons dijon. 4 chopped hard boiled eggs. It needed a bit more mayo once everything was mixed together, another big spoonful.


Saturday, May 23, 2020

Tomato Cage Hack

Well you know you're in Michigan in the spring when in the same week you have to worry about frost and then it feels like 90 and humid! For real, I cleaned the house this morning (that's when I become "Cinder-Jill-a" LOL) and have sweat dripping off my face 🤦‍♀️. Anyway, it's definitely warm enough to plant my garden so I've been busy pulling out all my fun garden stuff; I have a few tomato cages that I'm not going to use this time around and I remembered a hack I recently read and am going to give a try. Thought I'd share in case you are also playing in your garden/yard:

Turn conventional round tomato cages upside down. Pull the three or four legs together and hold them in place with a small, overturned clay pot. Use the cages for dahlias, clematis, morning glories, black-eyed susan vines, and mandevillas, not to mention tomatoes.

I don't have a photo but I'm sure you know what a traditional tomato cage looks like, right? Have fun planting!

Friday, May 22, 2020

Patriotic Fruit Pizza

Made this for dinner tonight - perfectly patriotic for this Memorial weekend. It was very easy to make, and I'm sure it's going to taste good since it's basically a giant sugar cookie with cream cheese frosting and berries - what's not to like?

Ingredients:
  • 16.5 oz tube of refrigerated sugar cookie dough
  • 8 oz. cream cheese, softened
  • 1/3 cup sugar
  • 1/2 t. vanilla
  • 1/4 cup orange juice
  • 2 T. water
  • 1 T. lemon juice
  • 1 1/2 teaspoons cornstarch
  • sliced strawberries and blueberries
Directions:
  1. Heat oven to 350'. Spray 12" pizza pan with non-stick cooking spray. Place cookie dough in pan and press evenly in bottom of pan. Bake 12 minutes or until golden brown. Cool completely.
  2. In a bowl, beat the cream cheese, sugar and vanilla with a mixer until fluffy. Spread over the cooled cookie base. Arrange the fruit over the cream cheese mixture.
  3. In a small saucepan, combine orange juice, water, lemon juice and cornstarch. Bring to a boil and stir constantly until the mixture thickens, 1 to 2 minutes. Let it cool a bit and then brush over the fruit. Chill. Store in refrigerator. 


original recipe found here

Thursday, May 21, 2020

TBT: stuffed potatoes

Today's experiment came from my new/old cookbook and you might be wondering what's so 'throw-back' about a stuffed potato but wait for it...

are you ready to hear what it's stuffed with?...

PEANUT BUTTER!!!

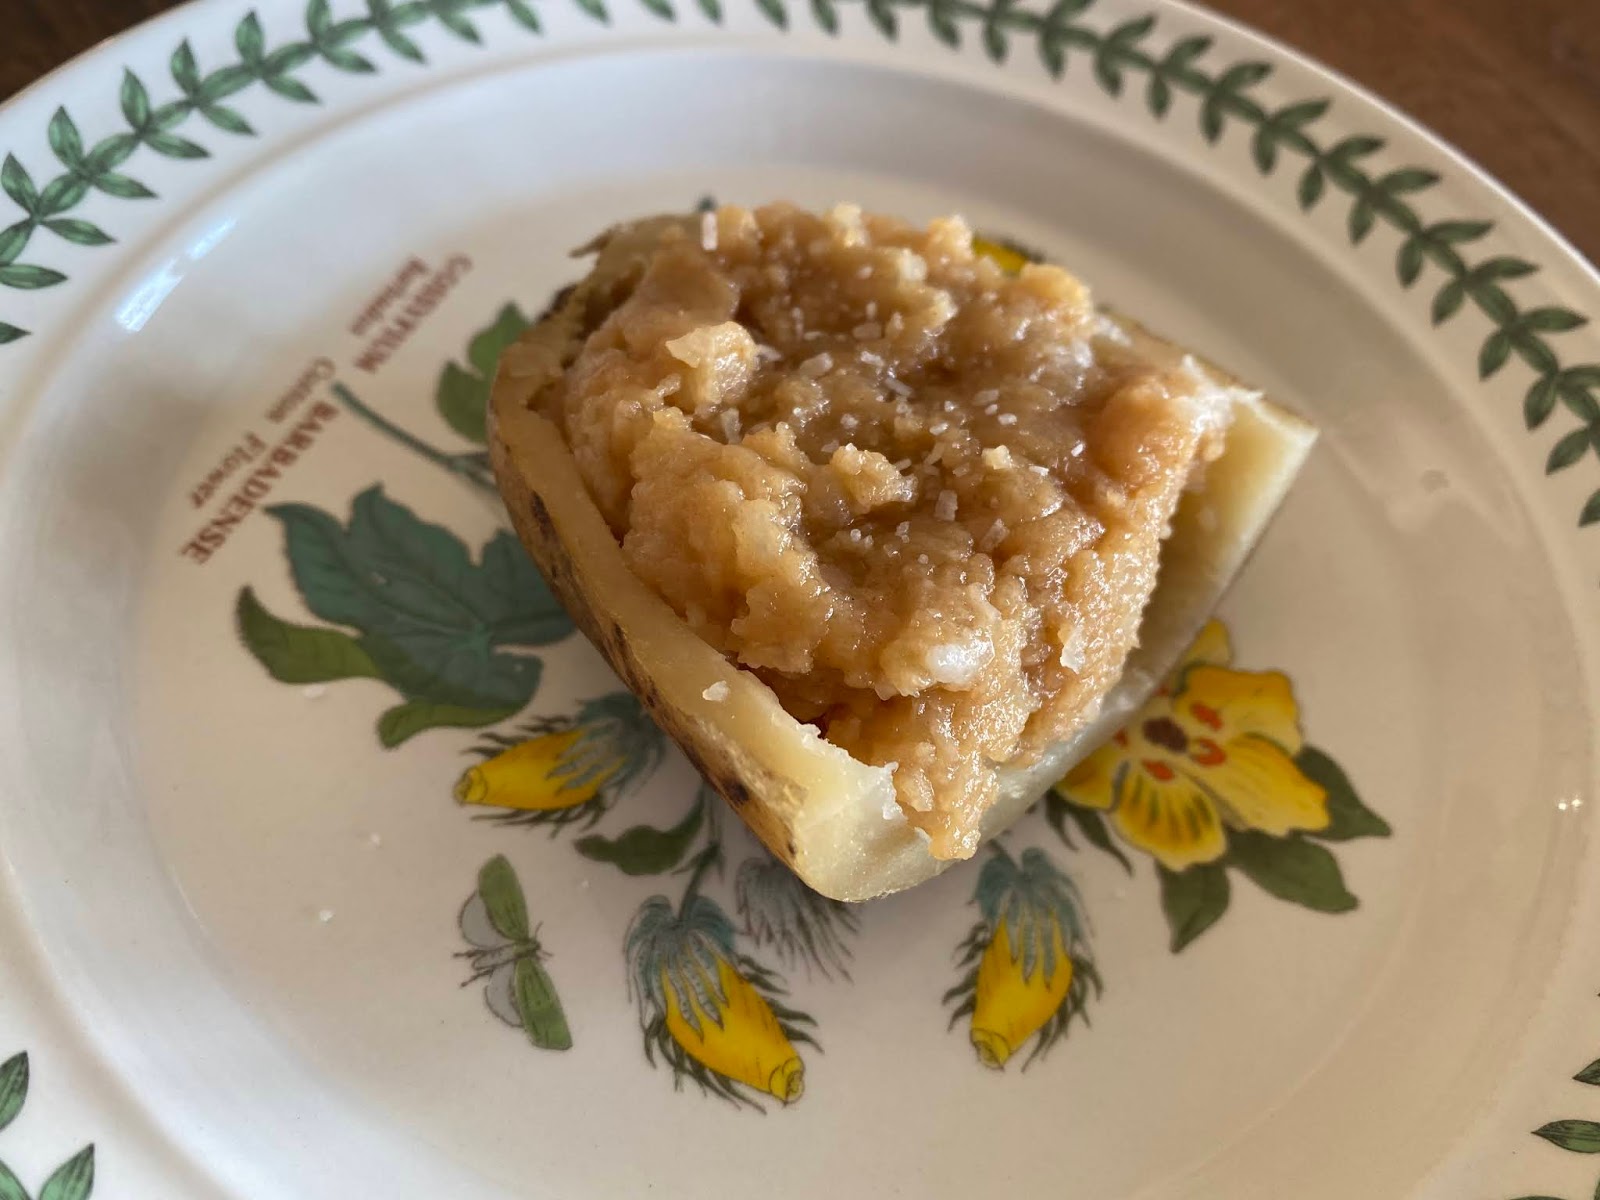
I was flipping thru the cookbook when this caught my eye, I happened to have a leftover baked potato in the fridge so didn't do exactly like the instructions said but tested it with half of the potato just to taste what a peanut butter stuffed potato would taste like. Guess what? It's really good!!


STUFFED POTATOES ON THE HALF-SHELL

Select large potatoes; scrub and bake. Remove from oven and cut potatoes in two lengthwise. Scoop out the inside, being careful to not break the shell. Mash very thoroughly or put them through the rice -- add butter, salt and milk, and beat well. Pile the mixture lightly back into the shells. Do not smooth down the top. Stand the filled shells in a shallow pan, return to the oven (400') and brown lightly on top. Tuck in small wieners before serving if desired, or add 1/2 cup peanut butter and 2 eggs whites to the potato mixture.

from 'The American Woman's Cookbook'

note: I didn't beat the potato filling, just mashed with a fork; it would be prettier if the filling was light and fluffy like mashed potatoes. I also didn't add egg whites, just the peanut butter.