Monday, August 10, 2020

Hello Doormat (rerun)

originally posted 8/8/16:

Mickey had the idea to stencil a mat for in front of her new front door - she wanted it to say "well hello there" and asked me to help (yay, I love to help!) We found a plain coir mat at Home Depot for 9.99 and I already had stencils and black paint so this was an inexpensive project...note, I didn't say it was a quick easy project though!


Problem started when we used a permanent marker to trace "well" in block letters in the top left corner and then tried to fill it in with paint. Yeah, that didn't work. The material of the mat is rough and too long so it just made a blobby mess, it wasn't crisp and clean like we had envisioned...I had the thought that we could just wash the paint off and start over but since we used the permanent marker to outline the letters that didn't work (fortunately we didn't outline all of the words before realizing it wasn't going to work)!

this is after she washed off the paint in the upper
left hand corner - you can still see the outline though
At that point we had some options (a) scrap the project and chalk up the $10 to an experiment (b) cut off the top that was messed up and just have a narrower rug (c) well there was no c at that time. So she continued decorating the rug by using a big fat sharpie and freehand wrote "hello" at the bottom of the mat figuring if it didn't work she wasn't making it worse and if it did work she'd cut off the top where we messed it up. The hello turned out great! She had to go over it a few times to get it nice and dark.

We then had the idea that maybe we could cut off the outline out of the coir material - it wasn't easy but she ended up getting it out with tiny scissors and tweezers basically pulling the fibers out and cutting other parts of it down. It did remove the outline so we ended up with a plan (c) after all.

plucking and cutting out the outline
Here is it in front of her house, love it!


Sunday, August 9, 2020

Around the Campfire 🔥 (week 32)

Dear Campers ~

A very quick and brief recap of what happened at camp last week in case you missed anything:

Posts ~

8/2: 🔥week 31
8/3: watermelon wreath
8/4: tip-sy tuesday: magic shell
8/5: milk dud ice cream cake
8/6: Cathy's vase re-do
8/7: baked tortellini by Brooke
8/8: caesar-inspired side dish

By 'quick and brief' I mean that's it for this week! I've had the busiest few days (guys, my niece Mickey got engaged!! We had a surprise engagement party right after the proposal - that was lots of planning and work leading up to it, and so worth it!) so didn't really cook much, didn't read anything, and no time for making stuff. I'm going to do at least a couple days of repeats this week until life calms down a bit and I can get back to 'normal'.

Have a great week - stop by to see more fun projects and recipes, I'll find some good ones to re-post!

Sincerely ~


Jill
harried camp counselor

Saturday, August 8, 2020

Caesar-Inspired Asparagus Side Dish

This is our new favorite side dish, super easy and is SO good! The recipe title might say asparagus but I've also tried it with green beans and broccolini and all are equally delish.

Cook the veggie however you like  (we like roasted but do it however you want - Dave has made himself asparagus in the microwave a couple times now and also likes it that way); to serve, toss lightly with a bit of olive oil, coarse salt and pepper; top with shaved parmesan and homemade croutons. Of course you can also use grated parm and store-bought croutons and that's good too, if you have the time tho homemade croutons make it crazy good.


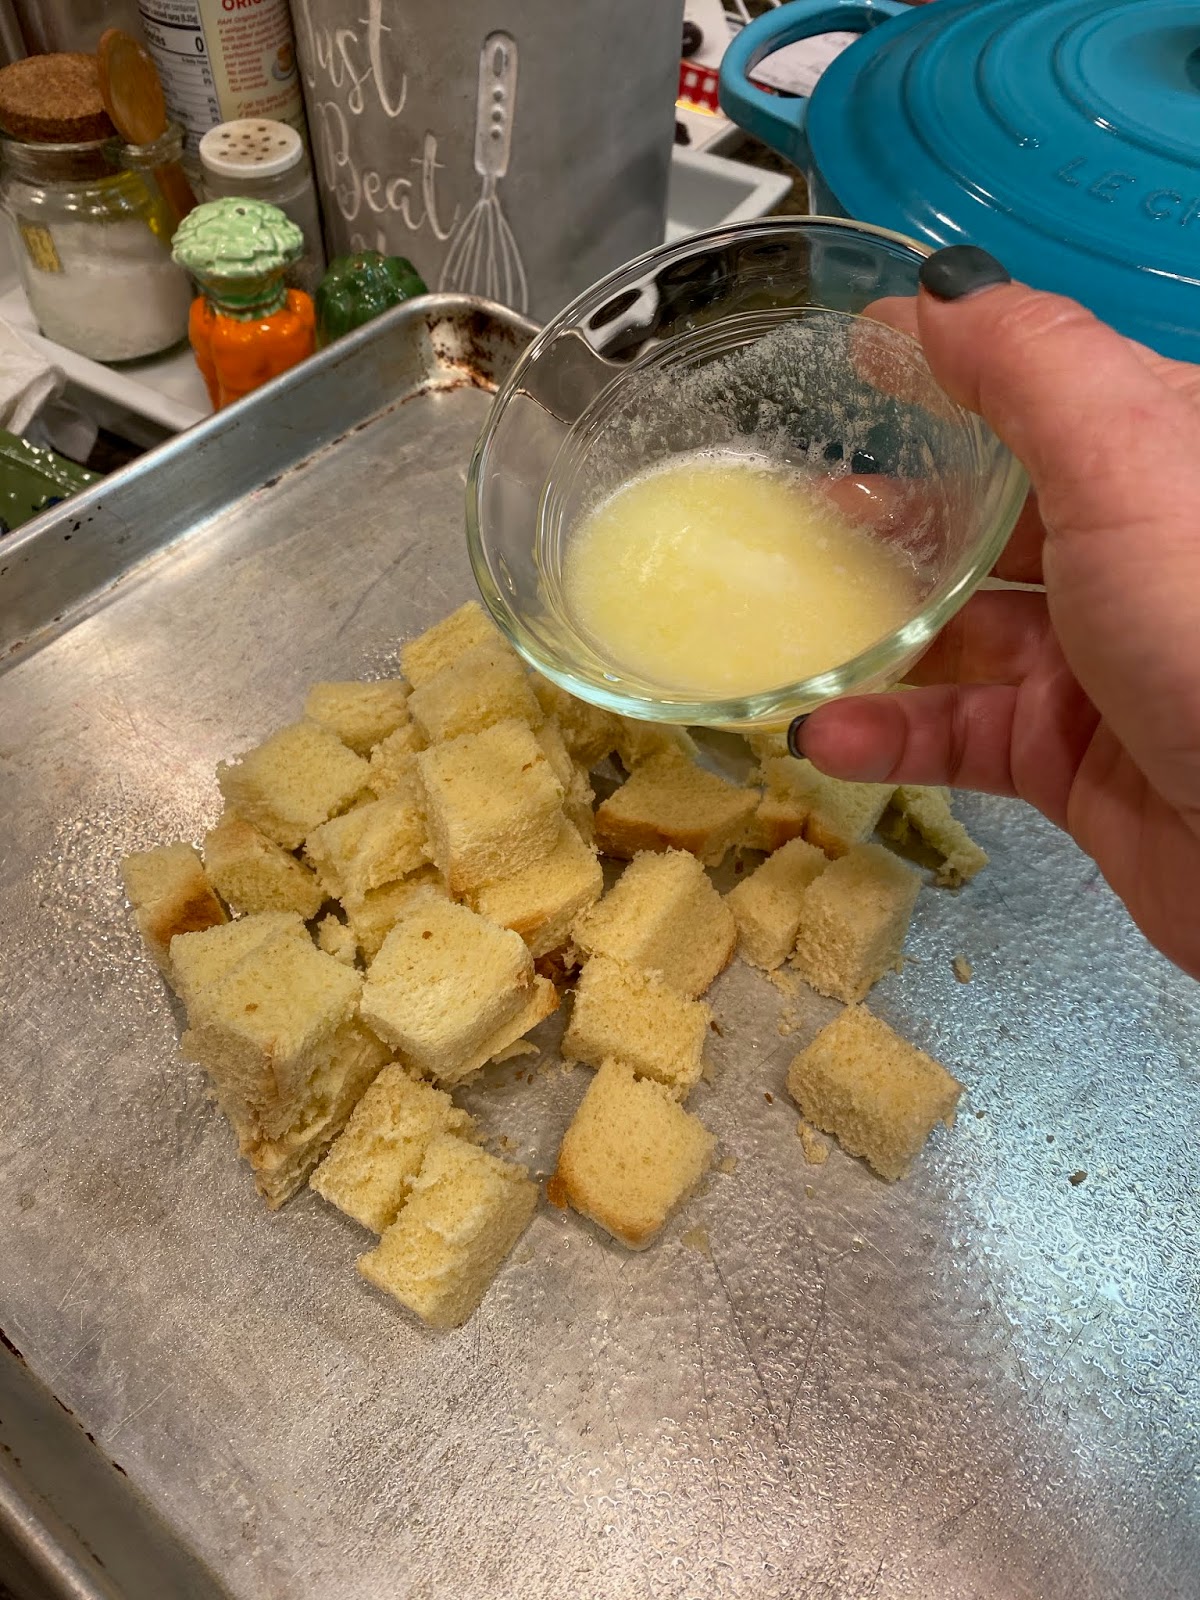
Homemade croutons are just cubes of bread, I cut the crusts off, toss with melted butter, sprinkle with salt and pepper (other spices work good too). Bake at 350' for 5 minutes, turn or toss with a spatula and continue baking for another few minutes until golden brown. Watch carefully, they go from not-quite done to burned quickly. Remove from pan and cool on paper towel or wire rack. 


Friday, August 7, 2020

Baked Tortellini with Turkey Sausage

This recipe is courtesy of Brooke, she sent it to me and I said she needs to have a name for it but she couldn't come up with anything catchy, so I named it for her. I was going to go with 'Brooke's mom's weird concoction' but I don't want to discourage my sis from cooking so...;)

Here's her post:


hey guys! this looks weird i know. and i normally judge my moms cooking because she's no aunt jill but she recently made this and it was super good! i have no idea what to call it but you need these ingredients! 

One box tortellini
One can mild enchilada sauce
One jar spaghetti sauce
1/2 block low fat cream cheese
One ring turkey sausage sliced
1 cup sliced mushrooms

First she fried the sausage and mushrooms together until just slightly browned. Then added the remaining ingredients until cheese melted and sauces hot. 
In the meantime boiled the tortellini just until slightly soft. 
Mixed the sauce and tortellini together, placed in Dutch oven and heat 20 minutes until sauce soaked into the tortellini. 

Thursday, August 6, 2020

Cathy's Vase Re-do

I love that Cathy has the creativity and lack of fear to change existing items in her house if she wants them a different color, different style, different feel, just different. She's been on a roll lately - she's taking apart faux-floral arrangements to make them more modern; painting or staining side tables; she made hanging light shades (I will post that later, they turned out great); she even painted over an enormous painting - yikes, that one would have scared me! I'll find the before and after for that and show you later. Such good, inventive, creative ideas.

This is an easy project to show you what I mean,  and maybe cause you to look around your house and change something you no longer love - she had this red and brown crock vase in her kitchen, and while there's nothing 'wrong' with it she wanted it more neutral to go with the new wall color they painted, so she painted it and now it looks like a stone vase. Cool, right?


Wednesday, August 5, 2020

Milk Dud Ice Cream Cake

I volunteered to make dessert for Jeff's birthday a couple days ago; a couple things I know for sure is that he doesn't like regular cake, he does love my ice cream cookie sandwiches (click here for last year's ice cream cookie cake) and milk duds are his favorite candy - so I thought I'd make a milk dud ice cream cake this year. I couldn't find anything like that when I googled for ideas, hmmmm - am I onto a new thing? The fact that I couldn't find any milk dud ice cream cake recipes should have given me pause, but I charged ahead.


First of all - the ice cream cake part was delicious. The problem came when we tried to eat the frozen milk duds - the term 'rock candy' comes to mind! Also, between the rice krispy base and the magic shell topping it was not easy to cut. So I'll tell you how I made it, then add a couple notes on what I'd change to spare you a little trouble.

  • 1.5 quarts vanilla ice cream, divided
  • 2 cups cocoa rice krispies (regular flavor would be fine but our store was out)
  • 1/2 cup chocolate chips
  • 1 bottle caramel sauce (I used Saunders)
  • magic shell (click here for my homemade version that was great)
  • 3 boxes milk duds
1. Let the ice cream sit on the counter for a few minutes to soften. 
2. Spray a springform pan with non-stick spray. Cut 2 long pieces of saran wrap, long enough to wrap up over the cake, and line the pan with the long ends hanging over the edge of the pan.
3. Melt the chocolate chips in the microwave until smooth, stir in the rice krispies. Reserve about 1/4-1/3 cup and press the remainder in the bottom of the pan.
4. Put a layer of ice cream on top of the base, press and smooth into an even layer. Add caramel sauce to cover, top with the remaining rice krispies and 1.5 boxes of milk duds cut in half. Freeze until solid. 
5. Top with more softened vanilla ice cream, return to freezer. Once solid, pour magic shell over the entire top, letting it run down the sides. Once it's hardened drizzle with caramel sauce and top with the remaining 1.5 boxes of milk duds cut in half. 

notes: 
1. Initially I melted 1 cup of chips and added 4 cups of rice krispies but that made way too much. The thinner the better since it was a little hard to cut thru the frozen base. For this recipe I cut the amount in half but you might still have too much (or too little) so use your judgement and make more or less. Same with the bit I reserved out for the middle layer, I just put a handful of crumbled rice krispie/chocolate mix on top of the caramel. Use more or less as you want.
2. The magic shell topping looked and tasted great - but when I sliced the cake it shattered (like magic shell does!). I didn't think that out before topping the entire cake with it. It looks good tho, so if you want to add it just let everyone see the cake before you start cutting it - it's not pretty after the top cracks apart.
3. The milk duds looked great but frozen they're hard to eat. Next time I'd add the candy right before serving instead of putting in on top of the cake and then freezing them! Didn't think that thru either hahahha. 


Tuesday, August 4, 2020

Tip-sy Tuesday: magic shell

I had no idea how easy it is to make homemade magic shell - and it tastes great too. I did a blind taste test before deciding if I wanted to pour it all over an ice cream cake I made for Jeff's birthday (stop back tomorrow for that recipe); by 'blind taste test' I mean I gave Dave 2 small bowls of ice cream, one with a spoonful of store-bought magic shell and the other with a spoonful of homemade and asked him to tell me which he preferred (and to not just eat them without paying attention like usual hahahaha). The homemade easily won.

Put 1 cup of chocolate chips (I used semi-sweet) and 2 Tablespoons coconut oil in a glass measuring bowl (or another microwaveable container), microwave on high for 30 seconds, stir, microwave for a few additional seconds until the chips are totally melted and smooth. Cool to room temperature.

That's it! Just chocolate chips and coconut oil. I had my doubts but sure enough, it hardened on the ice cream just like store-bought.

I didn't take a picture because it just looks like chocolate sauce - here's a sample of what it looked like on top of the cake, can you see that it's hardened? Even the drips are frozen in place.


Store at room temperature or in the fridge, it will harden but a few seconds in the microwave makes it smooth and pourable again. 

Monday, August 3, 2020

Watermelon Wreath

Saw this idea on the dollar store craft blog - so easy and it turned out cute! A little time consuming but zero thinking required, so I turned on the tv and it came together in no time.


You need a wire wreath form, 1 green and 1 red plastic tablecloth, scissors, and a black sharpie. You can find all the supplies at the dollar store - and assuming you already have scissors and a sharpie the whole wreath only costs 3 bucks.


Cut 2"x6" strips of tablecloth. Tie onto the wire form using a larks head knot (fold the strip in half and put the loop under the wire, wrap the two ends over the wire and thru the loop, pull gently to tighten - don't pull too hard or the plastic will stretch out of shape...ask me how I know...).

The wreath form has 4 rows - add the green strips to the outermost ring, then red strips on the other 3 rings. The instructions say to draw on the 'seeds' after tying to the wreath, but I drew them onto the strips before adding to the wreath.


Sunday, August 2, 2020

Around the Campfire 🔥(week 31)

Dear Campers ~

Here's a quick recap in case you missed anything last week at camp:

Posts ~
7/26: 🔥week 30
7/27: gourmet s'mores
7/28: Tip-sy Tuesday: float anchor
7/29: smashed potatoes
7/30: beef wellington
7/31: Brooke's album cover t-shirt
8/1: grilled romaine with blue cheese dressing

What's Cooking ~
  • grilled tuna, chopped wedge salad
  • grilled marinated chicken, caesar-inspired asparagus (my new fave thing, will post soon)
  • burgers, potato salad, sliced tomatoes
  • marinated pork tenderloin, kale salad, parmesan couscous
  • steak, mashed potatoes, roasted broccoli
Miscellaneous stuff keeping me busy ~
  • read "The Giver of Stars" by Jojo Moyes and loved it. It's a historical fiction about packhorse traveling librarians in the Kentucky mountains and such an interesting story. ⭐️⭐️⭐️⭐️⭐️
  • made a big mess with glitter in my craft room, I was actually dumb enough to apply glitter to a project and then blow on it. What the...🤦‍♀️ I saw these tags and decided it's my new life motto:

That's it for now - stop by this week to see more recipes, projects, and whatever else I can think of to make! Bye!

Sincerely ~


Jill
your camp counselor

Saturday, August 1, 2020

Grilled Romaine with Blue Cheese Dressing

Al made this to go with our Beef Wellington dinner (along with smashed potatoes); the romaine is simple - cut whole romaine in half lengthwise, drizzle with olive oil, sprinkle with ground pepper and coarse kosher salt and grill until there are marks but not so long it gets mushy. I've had grilled romaine before and this is the best I've had...maybe the blue cheese dressing is what it made it the best?


We had some leftover and LeDonna told me later how addicted she is to the dressing, that she could eat it straight out of the jar with a spoon - when Al gave me the recipe I had to laugh since it's name is 'The Best Ever Homemade Chunky Blue Cheese Dressing', with a name like that it makes sense that she loved it so much LOL!


  • 1/3 cup milk
  • 1 teaspoon white vinegar
  • 5 oz. blue cheese, crumbled
  • 1/3 cup + 1 Tablespoon sour cream
  • 1/4 cup mayonnaise
  • 4 teaspoons white wine vinegar
  • 1/2 teaspoon sugar
  • 1/4 teaspoon garlic powder
  • 1/8 teaspoon pepper
  • dash of salt
1. In a medium bowl mix milk and 1 t. white vinegar; let sit for 5 minutes, stir. Add crumbled blue cheese to mixture, and mash with a fork until they are well combined.

2. Add sour cream, mayo, white wine vinegar, sugar, garlic powder, pepper, and salt; mix with fork to combine well.

3. Pour into mason jar or other container and seal tightly. Let set in fridge for at least 4 hours. Stir before serving. 

Makes just under 2 cups. Keep in fridge for up to 30 days. 

recipe found at domesticsuperhero.com