Saturday, September 14, 2019

MMDC 4th Anniversary

4 YEARS? Whaaaaaat? Seriously, Monday is the 4th anniversary of Make My Day Camp - and to my knowledge I've only missed one day in 1458 days. That means 1457 ideas for you to get crafty and creative!  I can't even thank you guys enough for continuing to read about my adventures, crafting, recipes, all the stuff that keeps me busy; you've looked at the blog over 43,000 times, not counting FB - when I started blogging it was just a way to share all my projects with someone other than my family (who get sick of my texting them my craft photos LOL) and I really, really hope you've been inspired by the ideas you see here (and if not inspired at least entertained haha).


To celebrate and say thanks, I'm going to have another drawing - this year I'd like you to leave me a comment and/or just your name, either here on the blog or on the blog's facebook page. Once you do, you'll be entered into the drawing for a $25 Michaels gift card. Remember I can't comment back if you leave me a note below, but I can read them! Many times your name appears as "anonymous" so make sure you tell me who you are :).

You can enter until Monday 9/16 at midnight est, drawing will take place Tuesday morning. Good luck - and thanks for the (blog) love!

I know, I know -  but couldn't help it!


Friday, September 13, 2019

My Sis is Hungry: battle of the zucchini breads

For 'my sis is hungry' review this week I made the zucchini bread posted here, and lemon zucchini bread posted here (click for the recipes) - here's what she has to say about them:


AHH Bread.. how I love you.  Refraining here from channeling my inner Oprah and yelling I LOVE BREAD! Haha.. but seriously.  Bread.
So my sister made me not one but 2 loaves of bread.  One “regular” and one lemon.  Both Zucchini. 

The “regular” zucchini bread was pretty traditional I thought.  Great flavor, classic, moist just delicious.  She did tell me it had wheat or something in it to healthy it up – but maybe she just told me that so I would like it more and give it a higher rating? Possible. 
I ate the first half without butter- didn’t need it at all.  Second half I did put butter on just to see.. and that was great too but didn’t need it.

Second loaf was Lemon zucchini bread and that was good too.  For me though that didn’t taste like bread at all.  It really tasted more like a coffee cake (a lemon flavored coffee cake), not like bread at all.  Couldn’t really taste the zucchini at all either so if you were trying to get your kids to get some hidden veggies this would be the way to do it.  The yummy glaze on the top also made it clear it wasn’t healthy so I couldn’t even pretend to be.  I did love it though - but delicious as a cake, not as a bread.


*Jill here - she's right: the regular zucchini bread is very moist and doesn't 'need' butter (but really, butter makes everything better doesn't it?!) and I did not tell her it's healthier so she'd rate higher hahah, it really does have whole wheat flour and applesauce in it. The lemon bread has a much 'blander' flavor without the cinnamon and nutmeg - I might experiment with leaving them in next time. It is indeed an awful lot like bread-shaped cake, which is delicious if you want cake instead of bread!

Thursday, September 12, 2019

Lemon Zucchini Bread

I have a very large zucchini from Cassandra so you can guess what that means...it's zucchini bread week! This recipe is virtually the same as my regular zucchini bread (posted yesterday), but I add lemon juice to the batter, omit the spices, and drizzle with lemon glaze.


bread:

  • 3 eggs
  • 1 cup oil
  • 2 c. sugar
  • 2 c. grated zucchini
  • 2 t. lemon juice
  • 1 t. vanilla
  • 3 c. flour
  • 1 t. salt
  • 1 t. baking soda
  • 1/2 t. baking powder
glaze: 
  • 1/2 c. powdered sugar
  • lemon juice 
Preheat oven 325'. Grease and flour 2 (8x4") bread pans.

Beat eggs, mix in oil and sugar and beat to combine. Stir in zucchini and vanilla. 

Combine dry ingredients, stir into egg mixture just until combined. Divide batter evenly between the 2 prepared pans. Bake about an hour until done (insert a toothpick or bamboo skewer to check for doneness). 

Mix the powdered sugar with enough lemon juice to make a pourable glaze, drizzle over the baked bread. You can pour over while the bread is warm, in which case it'll soak into the bread and you won't really see it; or drizzle after the bread is cool and you'll see the white glaze on top. 
Either way = delicious.

*note: in the above photo I made one full size loaf and 6 mini loaves - obviously you don't bake the mini size as long as the full size, mine were done in about 25 minutes. And I drizzled the glaze after the bread had cooled.


9.12.18:  how to make 'perfect' cheesecake
9.12.17: road trip - eclipse hunting
9.12.16: wood canister holder (junkin' with Candy)


Wednesday, September 11, 2019

Zucchini Bread

It's that time of year - the zucchini (what's the plural of zucchini? Zucchinis?) are plentiful and getting larger and larger (that reminds me of a post I did a long time ago - 'the hulk sized zucchini' hahahah) and what better thing to do with them than make bread? Yes I like zucchini noodles as much as the next girl but mmmm, bread is still better...


I have had this recipe for years, tried and true and delicious. This time I decided to make it a little 'healthier' by swapping one cup of regular flour with whole wheat flour. Then I worried it might be a little dry (it is very moist when I use all regular flour) so I added a big scoop of applesauce just in case. If you don't want to use whole wheat flour just do all 3 cups all-purpose white flour! The bread is moist and very flavorful with the addition of the cinnamon and nutmeg - plus the house smells fantastic while it's baking ;)

  • 3 eggs
  • 1 cup oil
  • 2 c. sugar
  • 2 c. grated zucchini*
  • 2 t. lemon juice
  • 1 t. vanilla
  • 3 c. all-purpose flour (or swap some for whole wheat - I did 2 c. white flour, 1 c. whole wheat)
  • 1 t. salt
  • 1 t. baking soda
  • 1/2 t. baking powder
  • 3 t. cinnamon
  • 1 t. nutmeg
Preheat oven 325'. Grease and flour 2 (8x4") bread pans.

Beat eggs, mix in oil and sugar and beat to combine. Stir in zucchini and vanilla. 

Combine dry ingredients, stir into egg mixture just until combined. Divide batter evenly between the 2 prepared pans. Bake about an hour until done (insert a toothpick or bamboo skewer to check for doneness).

*note: click here to see how to use the shredding disk of your food processor if you have one.


9.11.17: "sweet" candy gift
9.11.18: blueberry sauce

Tuesday, September 10, 2019

Tip-sy Tuesday: How to use a Shredding Disk

Since I had to get the manual out to figure out how to shred my giant zucchini, I took a bunch of pictures to save you the hassle of locating the manual and figuring out to use the shredding disk of your food processor! Not hard but (at least on mine) a little tricky to figure out on my own. You might want this info before the next two posts this week - you'll see why tomorrow.

Normally when using my food processor I use the blade shown in the bowl to chop or blend ingredients, to shred you need to remove that blade and will replace it with the shredding disk and adapter thing:


I put the adapter piece in the bowl so you can see where it's going to go - but first you need to attach it to the shredding disk:


It's a bit of a puzzle - the notches on the adapter align with notches on the back of the shredding disk:


 Place the adapter notches in the notches on the shredding disk as shown:


Twist the adapter to lock it in place (the adapter notches are under the metal tabs in the picture below:


 After it's locked on, slide the adapter into the center of the food processor bowl:


Put the top of the food processor in place and lock it on like normal. Cut the food you want shredded into pieces that will fit into the feeder tube as shown (I did wedges of zucchini):


Use the pusher thing to help get the zucchini down onto the shredding disk:


 In a few seconds you'll have a bowl full of shredded zucchini:


Stop back tomorrow for a recipe using shredded zucchini!

Monday, September 9, 2019

DIY No-Sew Tutu

Tell me if this has this ever happened to you - waking up remembering that you said you'd do something and then completely forgetting about it, only to realize that you now only have a couple days to make it happen when you had an entire year to do it? Good grief. Last year a bunch of us ran/walked a 5k together and joked that for the next year we should do something silly as a group like matching socks or wearing tutus...and naturally I volunteered to make the tutus. And even more naturally I completely forgot until 3 days before the race! 3 days! To make 10 tutus!! Yikes.


Fast forward to that same afternoon when I had 5 done in a couple hours. Probably not even that long actually - these came together so quick! (A few people had to back out of the race this year so ended up I only needed to make 5 - whew). I am very happy to report that making tutus is extremely easy, doesn't cost much, and guess what? They are adorable (but you already knew that because - hello - tutus!).


Granted I did not make amazingly professional tutus measured to fit each person - I made them adjustable by tying strips of tulle to a length of paracord so one size fits all. That's all there is to it! Seriously, so easy.


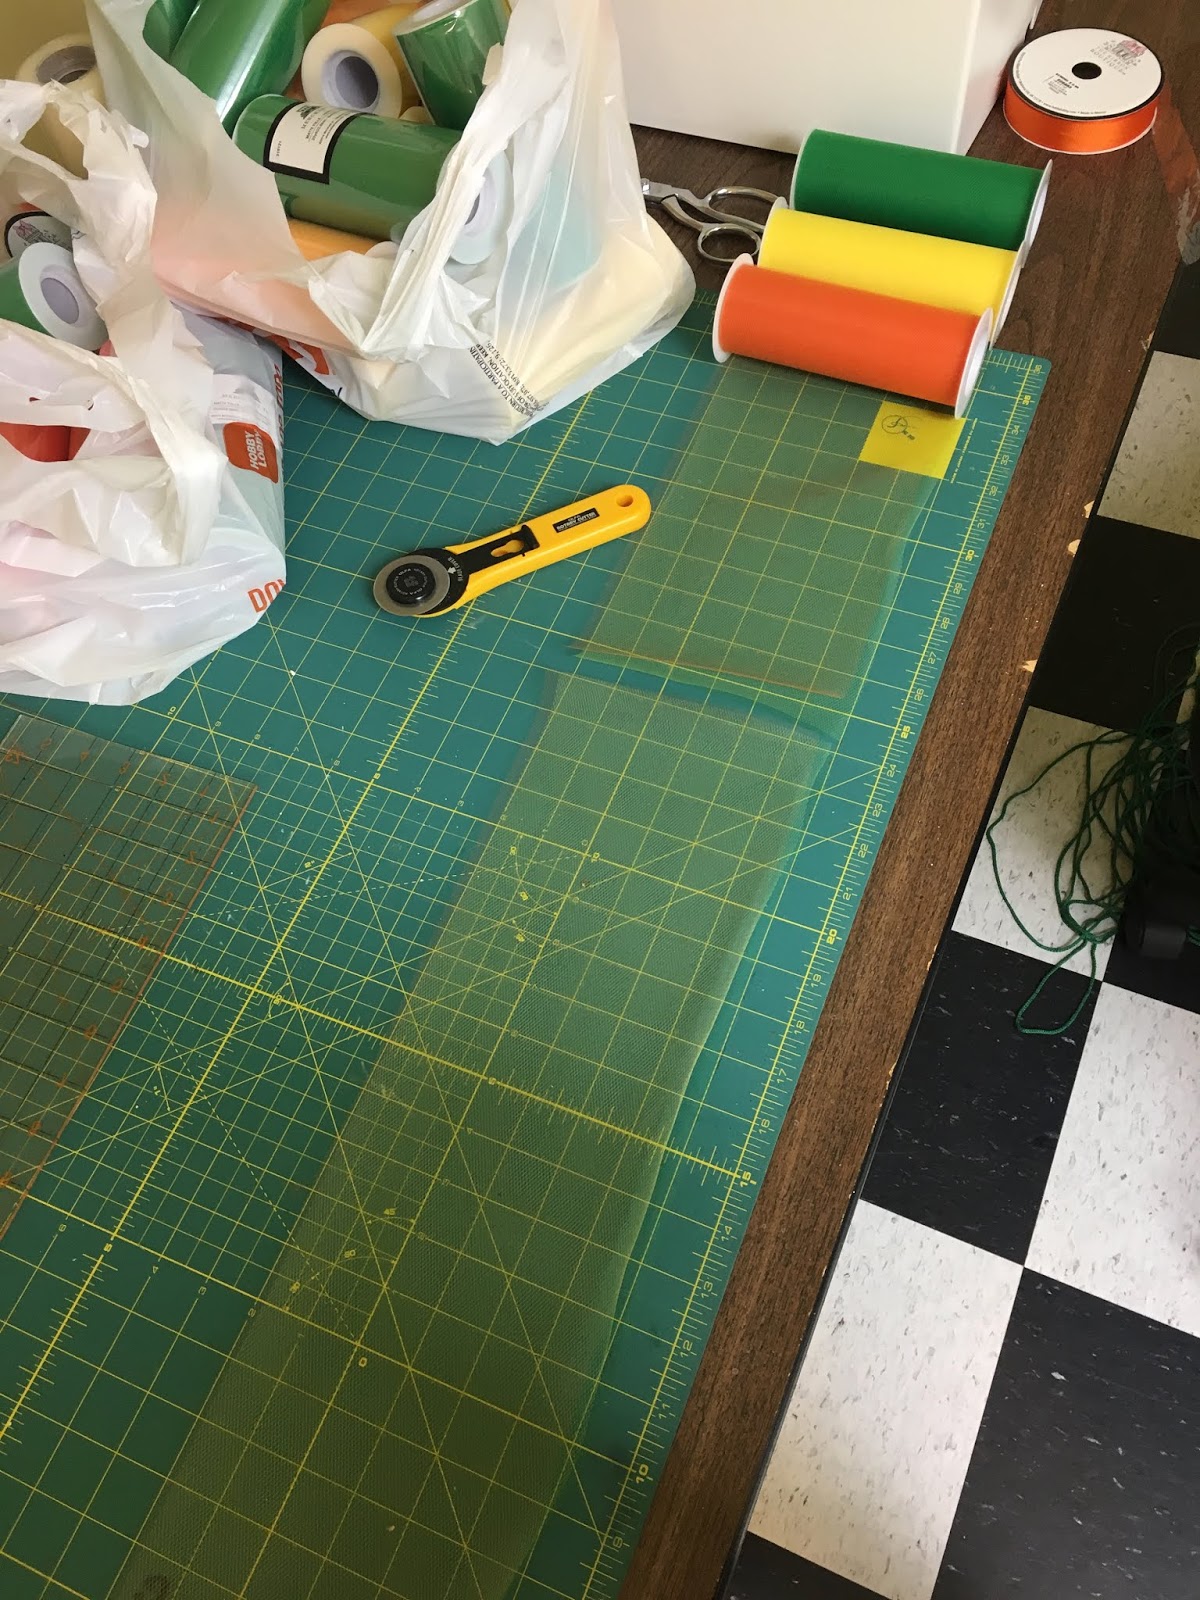
I bought tulle at Hobby Lobby on spools 6" wide by 25 yards long and used 3 spools per tutu (for a total of 75 yards), regularly priced 2.99 per roll but it was 1/2 off - so each tutu cost me less than $5. I debated making them on elastic bands or ribbon, I bought ribbon thinking it'd be easier to size them for everyone that way; but back home I saw that I had a full skein of paracord so I used that instead of the ribbon.

Cut the cord about 66" long, I attached both ends to closet handles so it stretched out and I could tie the tulle on easily.


To make the tulle strands I layered 3 rolls on top of each other - initially I cut individual pieces and stacked them together but that took too much time and it was hard to get them to stay together; by laying 3 rolls next to each other I could feed the tulle out together and then cut all three at once. Make sense? I took pictures to help with the directions:


Cut the layered tulle into 24" long strips; for each bundle you're tying on, fold in half the long way so it's 3" wide x 24" long, then fold in half so it's 3" wide x 12" long - feed the fold under the paracord, bring the ends up thru the fold and pull making a lark's head knot. That makes the tutu about 11" long. You can easily change the length by making the strips longer or shorter. Also, I used 3 different colors of tulle but it could be all the same color, or 3 shades of the same color - whatever!


Continue cutting, folding, and tying the tulle strips onto the cord until all of the 75 yards is used - I got about 40 strip bundles in all. I went thru each bundle and separated the layers making it much fuller and more colorful.


Then just tie around your waist and go run (or be a princess, whatever).


One note: the tulle stuck to our leggings while running - I doubt this will happen if you're wearing it as a costume hahaha. If that happens to you, just wear them higher around your waist - problem solved.


Sunday, September 8, 2019

Around the Campfire 🔥 (week 36)

Dear Campers ~

Here's a recap of what you might have missed at MMDC this week, the holiday weekend really messed with my mind and the week just flew by!

Posts ~
9/1: 🔥 (week 35)
9/2: Labor Day
9/3: Tip-sy Tuesday: clear vanilla
9/4: chocolate cupcakes with p.b. cream cheese frosting
9/5: Jen's insta-pot tortellini
9/6: Brooke shows how to make a gimp keychain
9/7: the most disgusting looking soup ever

What's Cooking ~
  • bbq ribs, veggie tots, cole slaw
  • grilled pork chops, baked summer squash, wedge salad
  • chicken caesar salad
  • steak, breaded eggplant (recipe to follow, so good!), arugula salad
  • chicken sausage, pasta with red sauce, roasted asparagus
  • dinner at Al and Cathy's - Al made pasta with meatballs, sausage, and hard boiled eggs (does anyone else make sauce with whole hard boiled eggs? I love it)

Miscellaneous stuff keeping me busy that isn't worth a blog post ~
  • read 'Present over Perfect',  gave me really good things to think about and work on ⭐️⭐️⭐️⭐️ 
  • helped throw a surprise party for Brooke's 16th, she was not a fan of the whole 'surprise' part
  • did a 5k run/walk with a bunch of friends (check back Monday to see what I made for us to wear)
  • worked on getting the house ready for upcoming guests next week - I'm so excited they are visiting! 
We were super worried about 2 of our nieces that live in the path of hurricane Dorian - they chose to not evacuate, boarded up the windows, stocked up on provisions, spent time in the bathtub during tornado warnings...so scary. 100 MPH winds is just crazy to think about. But they are all good and their house held strong. Hope you had a great (short) week - check back to see lots more projects, crafts, recipes, and whatever else I think of to make!

Sincerely ~


Jill
camp counselor and thankful relieved aunt

Saturday, September 7, 2019

Wild Mushroom and Thyme Soup

Wild Mushroom and Thyme Soup, sounds delicious right? Well here's the scoop peeps - it's just about the nastiest, most un-appetizing thing I've ever made (or even seen, for that matter) but it does taste good. It tastes really good. IF you can get past how awful it looks it is definitely worth it flavor-wise. I might suggest not blending it up as much, it looked way better before I blended it - once blended it looks like mushroom soup, only replace the word mushroom with a word that rhymes with 'goop' but starts with a p - I'd use another word if I could think of one that rhymes with diarrhea other than maybe gonorrhea, so I'm going with "goop" if ya get my drift...


...and I can't believe I just wrote both diarrhea and gonorrhea in a post about soup. Sorry. I know I just lost everyone and no one is now going to continue reading this post and actually make the soup. My bad. However; for you die hards that still have an appetite, here's the recipe:

2 tablespoons (1/4 stick) butter
1/3 cup minced shallots
1 1/2 pounds fresh wild mushrooms (such as stemmed shiitake, oyster and crimini), coarsely chopped
1 tablespoon minced fresh thyme
3 garlic cloves, minced
8 cups (approx) canned low-salt chicken broth
1 pound russet potatoes, peeled, cut into 2 inch chunks
1/4 cup dried porcini mushrooms, brushed clean of any grit
5 tablespoons Madeira

Melt butter in heavy large pot over medium-high heat. Add shallots, saute 1 minute. Add fresh mushrooms, saute until tender, about 5 minutes. Add thyme and garlic, saute until mushrooms are golden, about 8 minutes. Stir in 6 cups broth, potatoes and porcini. Bring to boil, reduce heat, cover and simmer until potatoes are very tender, about 25 minutes.

looks good before blending it!

but after blending - yuck. 

Working in batches, puree soup in blender. Return soup to pot. Mix in Madeira and enough chicken broth to thin soup to desired consistency. Season with salt and pepper. (Can be prepared 2 days ahead. Refrigerate.)

Bring soup to simmer before serving. Makes 12 servings.

*notes: I followed this recipe other than substituting white wine for the Madeira, and I didn't peel the potatoes.  I think substituting vegetable broth would be fine if you want to make this vegetarian.

For the record, I know I didn't do a good job selling this one, but it does taste really good - I wouldn't share an ugly dish that didn't at least taste good!

PS: backstory if you're still reading - I found this recipe in a brochure selling cabinets that I found when cleaning out some old files. Don't ask why I decided to make a recipe from a cabinet brochure instead of one I found online that has a million reviews. Possibly a life lesson right there.

9.7.18: tomato tart
9.7.16: brownie, oreo, reese's ice cream cake


Friday, September 6, 2019

Plastic Lacing Gimp Keychain

Brooke was hanging out in the craft room and came across a bunch of plastic lacing - she started making an old-school-classic-kid-camp-craft keychain before I could take pictures (you'd think she'd know better by now hahaha). I swear she has teenager a.d.d. (you know, the teenager kind of a.d.d. that is just boredom and moving from one thing to another and leaving a mess behind for her aunt to clean up after she's gone without actually finishing any of the things she starts hahahah!) and stopped making this before showing us how to end it! Good grief. Anyway, if you're interested, check out her short video showing how to make a box stitch using plastic lacing - I at least got her to demonstrate making the keychain after she started it - there's lots and lots of instructions online if you want to see how to start and finish the keychain.

Thursday, September 5, 2019

Insta-Pot Tortellini...by Jenny

I guess 'my sis is hungry' enough to cook for herself this week - hmmmm...you'd think she would have made some for me and I could review her recipe this time hahaha! What a chicken - maybe I need to yell more á la Gordon Ramsey.  Here's what she made, in her words:


I DID IT!! I MADE UP SOMETHING MYSELF FROM SCRATCH AND IT WAS FANTASTIC!!
Maybe my sister is right and this whole cooking thing has merit? 

I am ashamed to say I watched a few episodes of Master Chef this season when someone we know was a contestant on it.  Since then I have been inspired thinking “how hard can this be?”  Don’t tell my sister it wasn’t her cooking that inspired me - it was Chef Gordon Ramsay and his yelling.  Anyway…. 
So I made a yummy instant pot tortellini and everyone in the family loved it.  There.. I reviewed it myself.  Done.  Whatever rating I would have given my sister you can jack that up a couple points. ðŸ˜Š

1 package fresh tortellini pasta
1 can Medium Enchilada Sauce
2 cups water
2 cups rotisserie chicken cut up in cubes
½ block light cream cheese
1 ½ cups cheddar cheese
Optional: 
1 ½ cups broccoli
1 cup fresh mushrooms

So easy.. 
Put the pasta, sauce, water, veggies, and chicken in the instant pot. Cook on manual pressure for 2 minutes.  When 2 minutes has went off quick release the steam. Don’t cook it longer or pasta and veggies will be mushy!
Stir in the cream cheese and cheddar cheese until melted. 

Honestly the family loved it and it was so easy and delicious.


Jill here - I questioned enchilada sauce over tortellini but she swears it was amazing! I don't have an insta-pot but don't see why you couldn't make this on the stovetop (it'll just take longer obviously!).