Thursday, November 30, 2017

Golf Glove Counter

I shared a while ago the golf counter bracelets I made (click here for that post) and mentioned I'd share a different type of counter but then forgot to show you! Ay yi yi I have such a bad memory! So here it is - a stretchy bead counter that goes around the velcro flap on a golf glove.  

Note: I gave these to Ronda and Jenny along with the bracelet ones and they both had a problem with the flap pulling up because of the tension of the stretchy cord. I made them based on my golf glove tho and it works perfectly for me - so there must be different sized flaps on everyones gloves, whodaknew? - if you are making this for a gift you might want to either (a) size it to the recipients glove or (b) buy the person a brand new glove and fit it to that - 2 presents in one!


This is easy - I just cut a length of stretchy clear cord, tie a small tight knot and then add 9 or 10 medium size seed beads (think about how small the flap is on a glove, the beads need to be pretty small). Measure the top of the flap to see how much space you have and then tie a tight knot on the other side of the beads leaving space to be able to move the beads up and down to keep track of the golf strokes. Wrap it around the flap and tie the two ends together (stretchy cord is a little hard to knot, I knot it a couple times pulling pretty tight) then transfer it to a piece of cardboard add a dab of clear glue to the knot (I didn't want the glue to stick to the flap). While waiting for the glue to dry I just clipped it to a piece of cardboard pulling the ends apart to keep the knot tight; once dry snip the ends and put around the velcro flap. Cute easy stocking stuffers if you have any golfers on your list!


you can see there is a knot on the left, then 10 beads (I did 4 of one color then 1 of an alternate color and repeat for a total of 10), a space to move them and another knot. From knot to knot is how long my velcro flap is across the front.

while the glue is drying I stretched the ends to keep the knot tight. 


what it looks like on the underside of the flap


I made different colors for different people - I didn't know what color their
gloves are so I did the color of golf balls I know they use...Jen got pink, Ronda got orange. 


I gave these without being there in person to explain what the heck the small stretchy band with beads is and where it goes - so printed off a picture of a golf glove, cut the flap open with small scissors, then put the band around the paper flap for example and explanation! 


Wednesday, November 29, 2017

Smoothie Bowl

On my quest to find healthy breakfast options I read something about a "smoothie bowl" - basically a thick smoothie poured into a bowl and eaten with a spoon - so I tried it this morning just making my usual boring smoothie (frozen banana and strawberries, spoonfull of peanut butter, skim milk) but didn't put in as much milk so it was super thick. Using a spatula I scraped it into a bowl and topped with fresh berries. I am in love with this! 


It feels so much more like a "meal" then gulping down a smoothie in a glass - it takes a little longer to eat which also adds to the whole "meal" feeling. I snapped a picture and was super happy with myself - and then I googled smoothie bowls and saw some amazing pictures and was annoyed with myself over my not so pretty smoothie bowl - I didn't garnish, or arrange the berries in a pattern, or sprinkle with seeds or nuts... I felt bad for about 2 seconds before reminding myself that I'm not a food blogger, I don't post my gorgeous professional food shots on instagram, and this tastes dang good - why make things harder than they need to be in the morning just to get a glamour shot of my food LOL! I'm not going to be shamed into thinking that if the presentation isn't professional and instagram worthy then it isn't good! And this is really good :)

Obviously just make your smoothie bowl using whatever ingredients you like - there are hundreds of ways to make a smoothie - and by all means, if you have the time and inclination in the morning to jazz up the presentation go for it!

I told Cathy about my smoothie bowl and she says it reminds her of ice cream and fruit - hey, that'd be a great after dinner treat...smoothie bowl, not just for breakfast!

one year ago: make a pocket towel for the guest room
two years ago: mini pineapple-upside-down cakes


Tuesday, November 28, 2017

Stain Remover...Fail!

I was super excited when I saw this "tip" for removing stains, but it didn't work! Hate that. Thought I'd share my "fail" to save you the time ;). If you've tried it and had success let me know and I'll attempt it again - for now it stays in the "fail" category. 

The idea is to dampen the area that is stained and pour salt on to theoretically start "soaking" up the stain. Stretch the stained item over a bowl and stream hot water over it from a few inches above (being careful to not splatter yourself with hot water). Hmmmm...yeah, totally didn't work. 


So for today what I "made" at Make My Day Camp is a salty wet mess that didn't remove the stain. Oh well, they can't all be winners LOL!!!


one year ago: felt feather hair clips
two years ago: make a purse charm


Monday, November 27, 2017

Styrofoam Snowman

Mickey and I made this snowman a couple years ago - when she was decorating for Christmas today she sent me a picture of him so I have to share! I love that she still has him :). She said he was missing his arms this year but that was an easy enough fix hahah...note in her picture that she has him in a bowl surrounded by more styrofoam balls - cute idea!


These aren't hard to make: paint the styrofoam balls and add glitter if you want. For the snowman we painted them white (obviously) and for the extras in the bowl we did red, green, and gray. Once the paint is dry thread 2 or 3 onto a bamboo skewer (you could add a little glue to keep them from separating but they should stay put without it). Glue on a couple buttons, 2 beads for eyes, a piece of orange felt cut into a "carrot" shape and a paper hat (click here to see how to make a paper hat). Insert 2 twigs for arms and stand him wherever you want! 


Sunday, November 26, 2017

Birds On A Wire

Cathy and I were in a little gift shop in Ireland last spring and a display of artwork caught both of our eyes - we had one of those classic "well I can make that" crafter moments... and then I promptly forgot about it! Fortunately I was sorting and arranging my beads into an embellishment holder that Ronda gave me and these small black beads triggered my memory ;)

I made this using a couple sticks, a short length of lightweight wire, and small black beads. Glue everything in place then draw beaks and feet on with a thin black marker. I love how this turned out - simple, easy, and cute!


Ronda gave me this embellishment
holder and I'm using it to keep my
beads organized - using a big circle punch I
cut out paper circles in the same colors as
the beads so I can see what's in the
containers a little easier...

Saturday, November 25, 2017

Oatmeal Scotchies

So Sarge was not very...um...let's just say not very neighborly to our neighbor and because of it I made the neighbor some cookies (sugar helps everything!). We haven't been at the condo long enough for me to stock up on my usual baking supplies so I made do with what I had - oatmeal and butterscotch chips. Not really knowing what to do with my limited ingredients I just followed the recipe on the butterscotch chip package and guess what? They turned out really good! Whew - thank goodness...since I really really wanted to get them to our neighbor asap I'm glad they were yummy and I didn't have to go get more ingredients to make something better hahaha. I made them using my 1 Tablespoon cookie scoop and a few of them with my really big cookie scoop - the little ones are really good but the giant ones are even better (just had to bake them for a couple more minutes). These are so good the neighbor came over and said his son asked if Sarge could repeat his bad behavior so they could get more cookies :)

Ingredients:

1 1/4 cup flour
1 teaspoon baking soda
1/2 teaspoon salt
1/2 teaspoon cinnamon
1 cup (2 sticks) butter, softened
3/4 cup granulated white sugar
3/4 cup packed brown sugar
2 large eggs
1 teaspoon vanilla
3 cups oats
1 2/3 cups (11 oz. pkg) butterscotch flavored chips

Directions:

Preheat oven to 375'.

Combine flour, baking soda, salt and cinnamon in a bowl. In a large mixing bowl beat butter, sugars, eggs and vanilla together. Gradually add the flour mixture, then stir in oats and chips. Drop by rounded tablespoon onto ungrossed baking sheets. Bake for 7 to 8 minutes, let them cool on the baking sheets for 2 minutes then move them to cooling racks.

Makes approx 4 dozen small cookies.

Friday, November 24, 2017

Black Friday


What's your Black Friday look like? Did you get up at 5am (or worse, sleep outside of the store?) to shop? Spending the day getting Christmas stuff out? I'm planning to have a nice easy day, steering clear of the mall, making stuff, and hopefully avoid getting in the car! I'm not posting anything I made today - unless I made you chuckle with these funnies in which case I did make something LOL!! Have a good day!


Thursday, November 23, 2017

Happy Thanksgiving 2017


Reposting this from last year 'cuz there are only so many ways to say the same thing!


I'm thankful and grateful for so many things - among them are my faith, my family and friends, my furry and feathery kids, gravy, the ability to live my life the way I want (filled with making stuff!) and you guys reading my blog of course! Happy Thanksgiving - I hope you enjoy your day whether it's at home, with family, or having "friendsgiving" with friends that are the family you get to choose :).

Wednesday, November 22, 2017

Thanksgiving Turkey Cheeseball

We've been invited to Ron and Janis's for Thanksgiving (yay - thanks guys!) and I'm bringing green bean casserole (I'm going to follow a recipe I found at melskitchencafe and try a from scratch version this time that doesn't use cream of mushroom soup - wish me luck! see below for the recipe); Zehnders cranberry relish (see below for recipe); and a cheeseball that looks like a turkey. I haven't made the turkey cheeseball recipe before but here is the picture I'm following (I found it online at Crafts a la mode) and I wanted to share it in case you need a last minute appetizer! I'm going to use one of the  cheeseball recipes I've made before (click here and here for those posts) and then decorate it like this picture - looks simple, and it's so cute!


---------------------------------------------------------------------------------------------------------------------

Zehnders Cranberry Relish:

Ingredients:
  • 3 medium sized apples like Northern Spy or Granny Smith, cored but keep the peel on 
  • 1 pound frozen cranberries (you want them frozen so they chop easier)
  • 2 naval oranges, with the peel on
  • 2 cup sugar
Instructions:
  • Chop the apples, oranges (including peel), and cranberries into 1/4" pieces.
  • Add sugar and mix well. 
  • Let set one hour before serving. 
-------------------------------------------------------------------------------------------------------------------


Green Bean Casserole (from scratch):

FROM-SCRATCH GREEN BEAN CASSEROLE WITH EXTRA CRUNCHY TOPPING

INGREDIENTS:

TOPPING:

  • 1/2 cup panko bread crumbs
  • 1 tablespoon butter, melted
  • 2 1/2 cups canned fried onions

CASSEROLE:

  • 2 pounds fresh green beans, trimmed and cut into 1-inch pieces
  • 3 tablespoons butter
  • 1 pound cremini or baby bella mushrooms, chopped
  • 1/4 teaspoon dried thyme
  • 2 garlic cloves, finely minced
  • 1 teaspoon salt
  • 1/4 teaspoon black pepper
  • 1/4 cup all-purpose flour
  • 1 1/2 cups chicken broth (I use low-sodium)
  • 3/4 cup heavy cream
  • 3/4 cup milk (1%, 2% or whole)

DIRECTIONS:

  1. Preheat the oven to 400 degrees. Lightly grease a 9X13-inch baking dish and set aside.
  2. FOR THE TOPPING, in a medium bowl stir together the panko bread crumbs and the melted butter. Add the fried onions and toss.
  3. For the casserole, in a microwave-safe bowl, combine the green beans and 1/2 cup water. Cover and microwave for 6-8 minutes, stirring once, until the green beans are slightly tender (they’ll cook longer in a later step).
  4. Drain the green beans and transfer them to the prepared baking dish.
  5. In a 12-inch nonstick skillet set over medium heat, melt the butter. Add the mushrooms, thyme, garlic, salt and pepper, and cook, stirring often, until the liquid is mostly evaporated and the mushrooms are tender, 5-7 minutes.
  6. Stir in the flour and cook for another minute or two, stirring constantly. Slowly whisk in the chicken broth until it is all incorporated and the mixture is smooth. Add the heavy cream and milk, and whisk until well-combined. Bring the mixture to a simmer, and cook, stirring occasionally, until the sauce has thickened, about 5 minutes. Add additional salt and pepper to taste, if needed.
  7. Pour the sauce over the green beans and toss to combine.
  8. Bake the casserole for 20 minutes, until the green beans are mostly tender. Remove from the oven and sprinkle the topping mixture evenly over the top. Bake for another 5-10 minutes (watch carefully so the topping doesn’t burn).
  9. Let the casserole cool for 5-10 minutes before serving.

NOTES:

I think this could definitely be made ahead of time. Store the topping separately, and refrigerate the assembled (but not baked) green bean casserole, covered, for a day or so. Then bake as directed (adding a few minutes to the baking time to account for the chilled casserole). 
All images and text ©.


Tuesday, November 21, 2017

Yarn Wrapped Bottle

Since I had a bunch of leftover yarn still out from my wheat wrapping project (click here for that post) I thought about what else could be wrapped - and decided to try it on a wine bottle...yes I could have used any bottle but an empty wine bottle was handy and asking to be decorated. Again, just like wrapping the wheat, this is very simple - although not as quick as the wheat idea (for obvious reasons).


I started at the top by wrapping the yarn around and knotting, then holding the short tail down I wrapped around the neck (and over the tail) for an inch or so. Then changing color yarn continue doing the same thing until the entire bottle is covered. Once I got down a couple inches on the bottle I added little dots of glue here and there to help keep the yarn in place. Tie off at the bottom and apply a bit of glue to hold the tail tight to the bottle. That's it!


looks cute holding the
wrapped wheat!

I'm thinking I'll make more of these in seasonal colors - how cute will they be for Christmas decor in red, white, and green? And solid colors would probably look nice too...I have tons of corks (no surprise to you guys!) but haven't saved any bottles. You know what that means...how ever will I find some empty wine bottles? ;)


one year ago: foolproof turkey gravy recipe
two years ago: Sarge's birthday pupcakes

Monday, November 20, 2017

Yarn Wrapped Wheat

Ok, this is beyond simple and looks so good - you can whip out a few of these in just a couple of minutes! I can think of lots of ways to display these wheat bundles - lay them on the table, stand in a vase, group together with some sticks...just in time for decorating for Thanksgiving!

All you need is wheat stalks (wait, are they called stalks? are they sheaths? hmmmm, I don't know - whatever, you know what I mean), craft glue, and bits of yarn. Take a few stalks (I did most of them in bundles of 3 or 5), starting at the top underneath the wheat spray part, wrap with yarn however far down you want (I varied from a couple inches to 5 or 6"), tie the yarn in a small knot, cut the tail as close to the knot as you can, and apply a dab of glue to hold the end down.

Really, it took me longer to type this than it did to make them!
I bought a wheat bundle at the craft store for under 5 bucks.
Yarn is random leftovers in fallish colors I had on hand

wrap a few stalks together 


in a vase with my beloved random sticks :)

I like how they look laying on my dining room table with the adorable knitted pumpkins
(or are they apples? I say it depends on the season!) my friend Mary made me!

Sunday, November 19, 2017

Al's Texas Style Smoked Brisket

Al and Cathy go to Texas often and are always talking about the amazing brisket there; we have been with them multiple times when they've ordered brisket outside of Texas and so far nothing has been  as good as far as they're concerned. So when Al recently bought a smoker he made us an "authentic" Texas brisket" dinner - I've never had "authentic Texas brisket" so I don't have anything to compare it to but this was down right delicious. My favorite part of the meal tho was the presentation - Cathy wanted us to have the real experience so she served it like her favorite Texan place by putting down large pieces of paper on the table to put the meat on (she put big cookie sheets underneath to protect her tablecloth - but no plates!); and served the homemade potato salad and creamed corn in individual plastic bowls. For dessert she made banana pudding and served it in small styrofoam cups. Love! I won't be able to recreate this meal because (a) I don't have a smoker and (b) if I did have a smoker there is no way I'd be tending to this meat every 30 minutes since 4:30a.m. like Al did!! 4:30 IN THE MORNING!!! That's crazy. But so flavorful and juicy I very much appreciate that he did it for us :) What I can recreate is the fun presentation - I'll be doing it with bbq ribs though that I just pop in the oven or Dave grills. And we will most definitely have homemade potato salad, creamed corn, and 'Nana pudding in styrofoam cups.


Saturday, November 18, 2017

DIY: Paper Boxes

I signed up for one of Ronda's classes and received this big bag full of different projects to be assembled. Now here's the funny part - I spend hours and hours cutting, stamping, sorting, and packaging these exact projects for her... so you'd think I know what I'm supposed to do...but I don't. Fortunately she has tutorials online to help but still, it's a bit overwhelming to have all these little bits of things hahaha! I had a cold last week and was a little bored, so decided I'd crank out all these projects...uh yeah, no. But the reason I didn't is because once I learned how to make these paper boxes I became obsessed and started making tons of them! I never realized how easy it is to make your own box! And just like what happened when I learned how to make my own paper bags out of wrapping paper (click here for that post) knowing how to make paper boxes in whatever size I want is going to change my gift wrapping game.

For this 6" box you need a 12"x12" and a 9"x9" piece of patterned paper - it's fun to make them out of coordinating patterns and colors but you can make them all the same, or do both pieces in a solid color.

Starting with the 12"x12" paper, score 3" from the edges on all 4 sides. Cut up on the score lines 3" on 2 opposite sides of the box. Don't cut all the corners or you won't be able to build the box, I made that mistake the first time! Gently fold at the score lines, turn the paper over and put glue on all 4 corners (there are 3" squares at each corner where the score lines overlap, that is where you'll glue) turn the paper back over and fold so the glued corners overlap and attach to the straight sides of the box. There's your bottom half of the box.

For the top, do the same thing to the 9"x9" paper only make the score lines at 1 1/2" in on all four sides. Cut up on 2 opposite sides, glue the corners and fold in to form the top.  I probably made this sound harder than it is!! It's quick and easy once you see what I'm talking about...

12x12" paper, scored 3" in on all 4 sides. Cut on the score lines 3" up on two of the sides.
See the above picture for example of what I mean for where to cut. 

turn the paper over and apply glue or double sided tape to the four corner squares

turn back over and fold as shown. the glued corner squares come to the
inside of the box then the straight sides come up and stick to them. Repeat the steps using a 9x9" piece of paper for the top of the box. 
then decorate! 
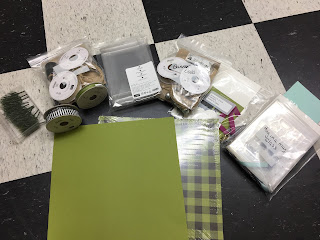
the contents of my fun bag of projects from Ronda...now if I can just figure out how to put them all together!


Friday, November 17, 2017

Planting Tulip Bulbs

When we went to Amsterdam this past spring, Cathy and I ordered a package of 105 mixed tulip bulbs to split (note: I didn't think at the time how many tulips I'd be planting come fall...52 doesn't sound like many until you're digging 52 holes in the cold!). They were delivered to us at the end of October and of course I procrastinated a couple weeks before getting them in the ground! I thought about maybe planting them in some sort of pattern or shape but then realized I just needed to plant them already and hope for the best...knowing Cathy she has arranged them to make some cool pattern and I'll feel bad for not taking the time! But really, even tho 52 individual holes sounds like a lot it isn't really enough to make an actual tulip statement like they do in Amsterdam - check out this picture of tulips planted in a giant tulip shape:

yeah, I'm gonna need way more than 50 bulbs to do something like this!
Unless you live in a warm climate, tulips bulbs get planted in the fall so they're cold and in the ground all winter. It's nice to dig with a bulb planter (a hand-held cone-shaped tool that you stick in the ground and remove dirt creating a narrow deep hole) but I don't have one so I used my hand shovel to dig small (at least) 4" deep holes. Insert the bulb with the root side down and the pointy end up. Cover with dirt and say a little prayer that you haven't killed it because your thumbs aren't very green and move on to do the other 51 :)

this is how it should go into the ground, root end down and pointy end up
One thing I did try to plan for is how tall the different tulips will get. My initial thought was to put them all in a big bag and throw them on the ground in a random order - but then I realized that they will grow 24" tall all the way down to 8" tall, and I didn't want the little ones to get dwarfed by the tall ones. So I staggered them with tall in the back, graduating down to short in the front. 


I laid them out according to height but didn't do them all in rows, so it won't look too "planned" 
 Wish me (and my tulips) luck! I'll show you pictures in the spring - can't wait to see them and have a super cool souvenir from our fun Holland trip :)

Thursday, November 16, 2017

Doggie Pupcakes

I posted this on Sarge's 3rd birthday - he's going to be five in a few days and I'll be making him a "pupcake" to celebrate for sure. He's 5 but still acts like a puppy - I keep waiting for him to outgrow the puppy stage but apparently this is who he is hahahah!

From 11/21/15:


Happy Birthday to Sarge - he is 3 today.


To celebrate I made him "pupcakes" - I thought he would gulp this down faster than I could take his picture, but he was quite confused actually...we don't give him people food so when I set this down he just stared at it, the only thing he really wanted was the "candle" (he recognized the crunchy stick) and when he accidentally licked the yogurt he sat down and had to think about what to do haha!!

The "cake" base is my regular meatloaf recipe that I divided; before adding the chili sauce, salt and pepper I held out enough meat, bread crumb, egg mixture to make 4 pupcakes and with the remaining mixture I added all the other ingredients (I shaped a few into cupcake portions and the rest I put in a 9" round cake pan like I usually do), topped the people version with glaze made from chili sauce and ketchup (leave that off of the pupcakes tho). I put a baking sheet under the cupcakes to catch any grease and baked them at 350' for about 25 minutes. The 9" pan bakes for 50 minutes or until done.

doggie cakes without glaze
the finished cupcake has plain greek yogurt "frosting", bacon
 bit sprinkles, and a crunchy stick for the "candle"