Sunday, April 30, 2017

Hasselback Potatoes

Have you ever made Hasselback Potatoes? Basically they are just potatoes that you cut little slits in and sprinkle with cheese, herbs, sometimes breadcrumbs...then bake. They get kind of crunchy because of all the slices - so good and a nice alternative to a plain ol' baked potato. They look like you got all fancy and spent lots of time on them but nope, it's easy!

I forgot to take a picture after they baked! Here's the
one from the recipe :)

There are many variations of topping you can sprinkle on - this is my standard way to make them:

For 4 servings you will need:


4 medium potatoes, roughly the same size
1 tsp salt
2-3 Tablespoons melted butter
2-3 Tablespoons chopped fresh herbs such as parsley, chives, thyme or sage (or 2-3 tsp. dried herbs of       your choice)
4 Tablespoons grated cheddar cheese
1 1/2 Tablespoons parmesan cheese


Preparation:
1. Scrub and rinse the potatoes.
2. Cut thin slices in the potatoes, almost but not all the way through. I put down two wooden spoons or something with a flat handle on either side of the potatoes and then make slices to the spoon to stop from cutting all the way (see picture).
3. Put potatoes in a baking dish, fan them slightly open.
4. Sprinkle with salt and drizzle with butter. Sprinkle with herbs.
5. Bake potatoes at 425' for about 50 minutes.
6. Remove from oven, sprinkle with cheeses.
7. Bake potatoes for another 10 to 15 minutes until lightly browned, cheeses are melted and potatoes are soft inside. Check for doneness with a fork.


Saturday, April 29, 2017

Dance Recital 2017

Not sure it counts as "making something" but once again (click for last years post) this is what I'm working on ...yep it's recital time!

All I'm going to say is that tap class is a blast, the ladies are great, and I think everyone should have a creative outlet - whether that's crafts, baking, or dance  ( or all of the above) is totally up to you!


Oh, and life lesson: it's ok to mess up - just keep going and keep smiling! ;)

Friday, April 28, 2017

Slime!!


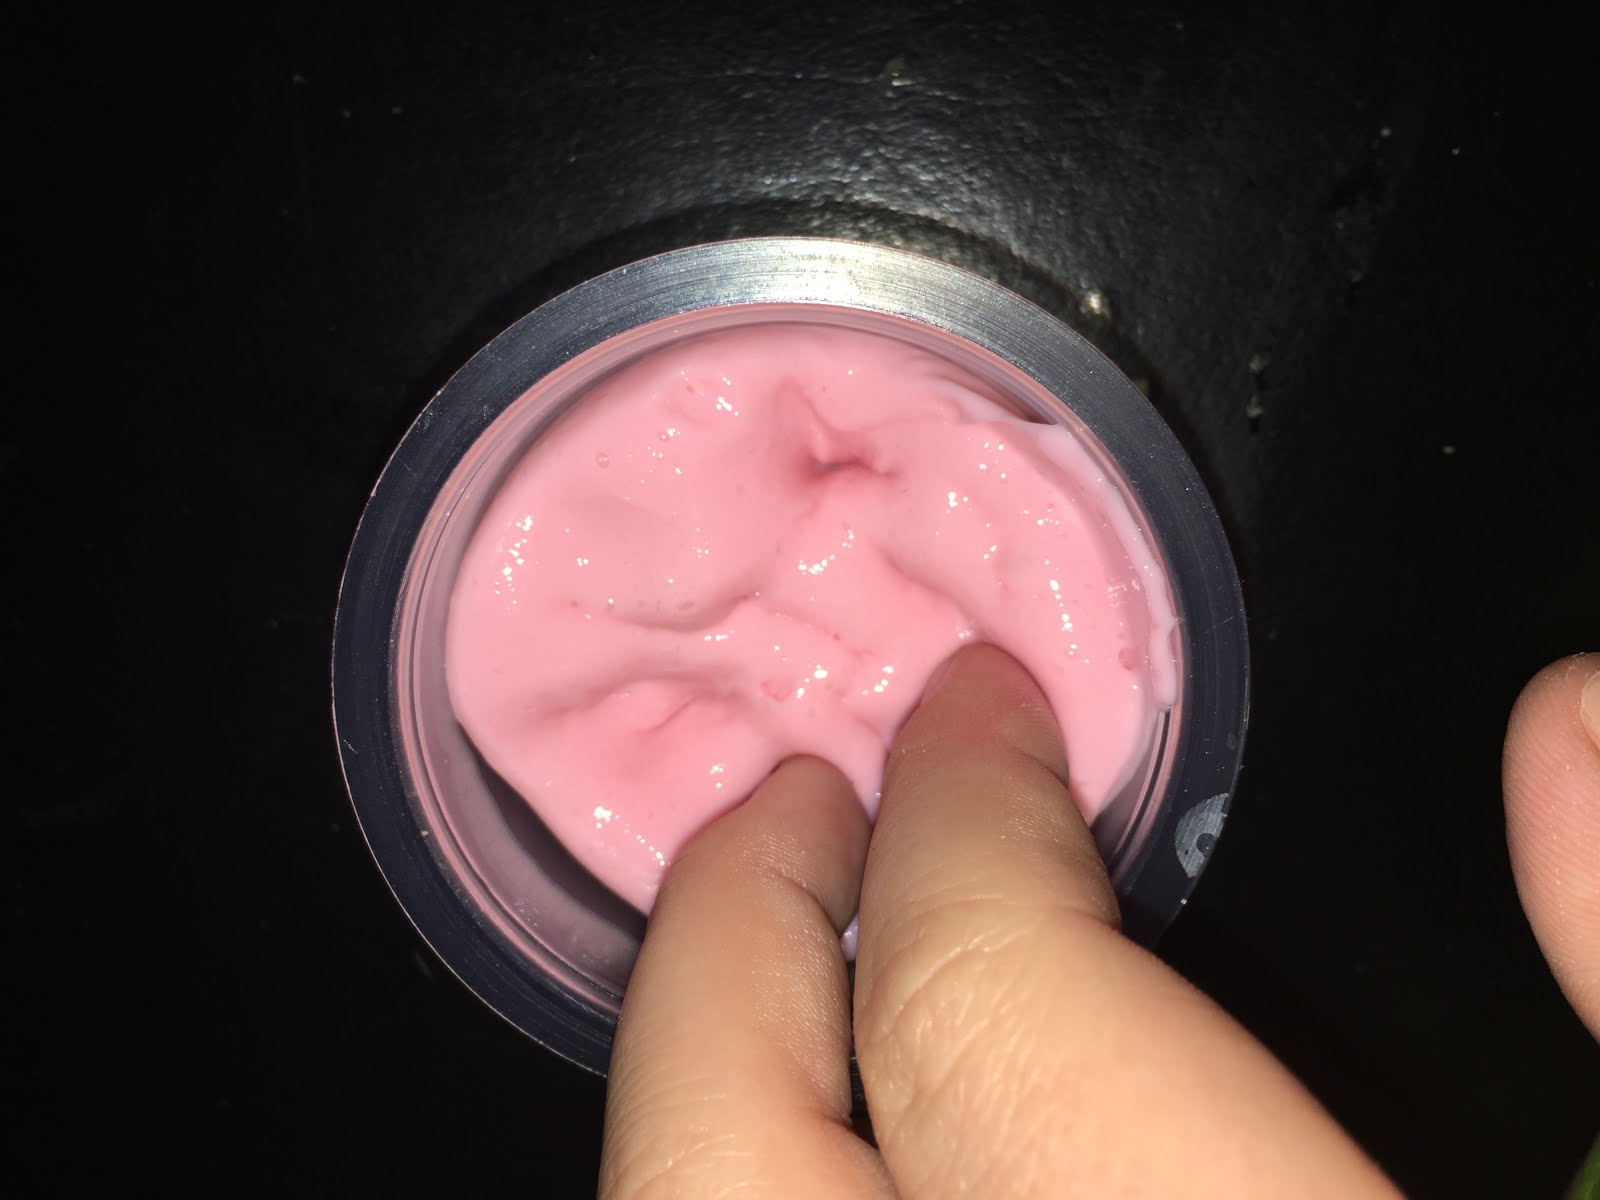
Hello everyone! its Brooke! for todays craft we will be making slime! I know your probably thinking, "brooke why are we learning how to make slime again?" well I have made More slime after that one time and now I have become a slime master!so lets just learn! so first thing you will take is glue and poor that into a bowl. then take a 1/4 cup of water and stir that in. then stir. after that you need to act your activator (1 tablespoon of borax mixed with 1 cup of hot water) then add the borax 2 tbsp at a time. (I haven't tried this, but if you can't find borax my friend said tide laundry detergent works also) then mix until you get the consistency you like. then add 2 pumps of to lotion then knead! then you get the perfect slime!! I love it! well see yah next time!   -brooke :)

Thursday, April 27, 2017

Organizing...Accessories Closet

We have a small closet in the middle of our bedroom that I turned into my "accessories" closet - Our clothes closet is a decent size but not huge and no place to store all my shoes, scarves, purses, and jewelry so this little closet is perfect for that. We put up peg board on the back wall where I hang necklaces and bracelets, along with a few small purses, etc. On one side is cheap put-together-yourself stacking bookshelves that hold my shoes (I either keep them in the boxes they come in or clear plastic shoe boxes and I label them so I can easily find what I'm looking for); and I have stacking plastic drawers to hold scarves, other jewelry, sunglasses, wallets, etc. - and of course the drawers are labeled, duh ;). On the floor is a basket for my stinky tennis shoes, and on the other side wall is a couple fixed shelves where my purses are lined up and boots stand up underneath. The closet has a door so I don't have to look at any mess if things don't get put back exactly in their correct spot thank goodness - this has been a great solution for all my fun accessories, so easy to see what I have and find what I want...and it limits me (somewhat) to not buy any more shoes than can fit on these shelves! By the way, the closet is much taller than the picture shows and I have shelves up to the ceiling. Yep, I sorta kinda have a shoe thing. What's your thing and how do you manage it?


Wednesday, April 26, 2017

Double Chocolate-Oatmeal Bars

If I took "double chocolate" out of the title these might even count as a healthier dessert haha...I feel like they are better for me than they actually are ;). They are delish - call 'em what you want and eat them any time of the day, I really like them for breakfast. There's a couple steps to these and when I look at the recipe I always think "too much work" but then I make them and remember that they are easy, quick, and everyone loves them - make some and see for yourself!

Chocolate Filling
     1 can (14 oz) sweetened condensed milk (not evaporated milk)
     4 oz unsweetened baking chocolate
     1 tsp vanilla extract

Microwave milk and chocolate in a 1 quart glass measure on high until steaming hot. Let stand 1 minute. Stir until chocolate melts and mixture is well blended and thickened. Stir in vanilla. Set aside.

Ingredients for the bars:
     2 sticks (1 cup) butter, softened
     1 1/4 cups packed brown sugar
     2 tsp vanilla extract
     1/2 tsp baking soda
     1/4 tsp salt
     2 cups all-purpose flour
     2 cups uncooked old-fashioned oats
     1/2 cup M&M mini baking bits

1. Heat oven to 350'. Line a 13x9" baking pan with foil, letting ends extend about 2 inches above pan. Lightly coat with nonstick spray.

2. Put butter, sugar, vanilla, baking soda, and salt in a large bowl; beat with a mixer until fluffy. Add flour; beat just until blended. Stir in oats (mixture will be crumbly). Press 2/3 firmly over bottom of pan. Spread evenly with chocolate mixture, then sprinkle with remaining oat mixture and the M&M's.

3. Bake 25-30 minutes until lightly browned on top. Cool in pan on a wire rack. Lift foil by ends to cutting board. Cut into 48 bars.

Per bar: 183 cal, 3g pro, 24g car, 1g fiber, 9g fat. Store airtight with wax paper between layers at room temp up to 5 days or freeze up to 3 months.

Notes: I don't remember where I got this recipe, it's from a magazine and I've been making them a really long time.  2/3 of the mixture goes in the pan first - I measured this time and it's about 2 full cups worth. Press down on the top after you sprinkle the remaining batter and mini M&M's, if the M&M's are loose they'll fall off the bars after baked.

press 2/3 of the mixture into the bottom of a foil lined pan

spread the melted chocolate mixture over bottom layer

top with remaining batter and mini M&M's, press down lightly


Tuesday, April 25, 2017

Organizing Recipes

There are numerous ways to keep track of recipes - here's how I do it:


I have a two folder system that works really well for me. Recipes I want to try go in a large binder - I have all of the loose recipes I rip out of magazines or newspapers, or that I print out to try, or people give me, in plain manila folders labeled with different categories (main dish, desserts, etc.) and they are all in the binder. I have them separated in folders because there are SO many loose recipes that I want to try that I need to keep them somewhat organized or it would take me forever to find one! If I feel like making a new cookie for instance, I only have to flip thru the dessert folder. Once I've made the recipe and I like it enough to make it again it gets moved to my good recipe folder - I love this folder! I think it's by Hallmark, about 7.5 x 10 inches, 3 hole punch, and you can buy plastic dividers, pages, and pockets to fit. And it holds a ton of recipes, mine is full but it'll let me keep adding which is great. I have the recipes sorted by types there as well - it's just the handiest way I've found to keep them organized, I use this folder ALL the time to access my tried and true keeper recipes.


This is just the way I handle paper recipes - all of the recipes that I find online go in a folder on my computer desktop and that's a whole other post... most of them I print off after I've tried them if it's one I'll return to and put it in my actual folder, but I also keep them on the computer as a backup.


Man do I have a lot of recipes!! How do you guys keep your recipes organized?

Monday, April 24, 2017

Curvy Keepsake Lambs and Bunnies

For Ronda's Spring seasonal display table I made these cute animals using the Stampin' Up curvy keepsake die cut thingy (see other examples here and here from her Fall table) - I don't love how the bunny face turned out but his little tail is adorable. And I love the lambs :) I just played around with different punch shapes and colors until I thought they looked cute - if you don't have the curvy keepsake template thing I think just little paper boxes would work, or make them on flat paper and hang them up or make them into a cute Spring card. I had fun with them, just wing it and see what you come up with!


Sunday, April 23, 2017

Spinach and Cheese Stuffed Mushrooms

Brooke and I each made a side dish to go with the steaks her uncle got us for dinner - I did potato salad (I looked on the blog and can't find that I ever posted the recipe I use, I will do that soon - it's the best and I've been making it forever!) and B made these stuffed mushrooms. She found a recipe that looked good to her online - we tweaked it a little bit (of course) and they turned out so good and delicious I had to share - I will definitely be making these again. Yum.


Here is the recipe as she made them, click the link below to see the original recipe.

Ingredients:


  • 12 large mushrooms (1 pound)
  • 4 oz. softened cream cheese
  • 1/2 cup shredded sharp cheddar cheese
  • 1 teaspoon garlic salt
  • 1 cup (more or less) spinach, finely chopped
  • 1/4 cup real bacon bits (more or less to taste)

Directions:

Heat oven to 350'. Remove the stems from mushrooms. Mix remaining ingredients and spoon into the mushroom caps. Place them in a shallow baking pan and bake 18-20 minutes until heated thru and bubbly.


See the original recipe here.


Saturday, April 22, 2017

Cork Wall

Let's see...after all of the cork projects I've made you'd think I would be running out, right? Uh yeah, no. This cork wall took about 250 of them and I still have like 5 big bags left!! Yikes ;)

This is pretty easy to do, just time and hot glue consuming. Make sure you have LOTS of glue sticks on hand to do this. I measured the space I wanted to fill with corks and cut out 2 pieces of cardboard that measure half the length plus an inch or so - I didn't have one big piece of cardboard long enough, if you do then just do it in one piece if you want. You want to cut the cardboard just a bit bigger so when you're done there is a little excess cardboard around the edges to help wedge it into place.

In order to keep the rows straight I made some lines on the cardboard as a guide. Not all corks are the same length and width so before I glued down a row I made sure they were all the same size - lay them out on the board to make sure they will be even and that you have enough to cover top to bottom.


When glueing the corks to both boards I left a little space on one end so the 2 boards would fit together in the middle and sort of interlock (see the picture for example).


For my board I used 15 corks for the horizontal rows and 7 for the vertical - since where I put the finished cork wall is in a big cubby hole I didn't have to have the top edge completely straight which helped a lot, you can't see the top of the board once it's in place. Once you've covered the board push it into place - if you made it the right size it will hold itself in, I didn't need to anchor it at all. 


Friday, April 21, 2017

DIY crayon canvas

Hello, everyone! For todays craft we will be making crayon melted canvases! so the first thing we are going to do is take crayons and hot glue them at the top of the canvas. make sure they are really stuck! then put down newspaper and turn on the hair drier and point the dryer at the top of the crayons to melt the crayons! its looks amazing! then for just a little extra i wrote best friend at the end in a paint marker and gave it to my bestie! hope you guys enjoy this DIY! i see you next time!-Brooke


Thursday, April 20, 2017

Scrabble Tile Messages

Janis has a big bowl of scrabble tiles on her island for people to play with and make messages, sort of like doodling only with letters. Love it - what a simple fun idea and everyone gets drawn into spelling something out. I'm totally going to do this - I think she ordered her tiles online but I might just raid everyones scrabble games that they aren't playing with anymore!

I was the DD one night and ready to leave, but of course my car full was having too much fun and not picking up on my hints...yawn...really tired...probably should head out...HAHA, so I made them a little message:


then one of the smart alecks left me this in return:


Wednesday, April 19, 2017

Caramel Apple Pie with Crumb Topping

I forgot to take a picture until there was only
one slice left! Just trust me that it was pretty :)
Brooke and I had another "Chopped" competition - this time we got to pick whatever we wanted to make for dessert instead of pulling ingredients out of a hat like last time (click here for that post). She made an oreo cheesecake with mousse topping and I decided to make a cherry pie. We went to the store for supplies and what do you know, our little grocery store didn't carry cherry pie filling, or any cherries for that matter - so I switched to apple. Instead of making my own filling I went with store-bought apple pie filling and doctored it a little by adding a bit of lemon juice and some cinnamon. I wasn't being lazy not making my own - I just had the rest of the meal to make and didn't have much time! I will post Brooke's dessert later and you can guess which of us won... for now here is my pie:


Ingredients:

  • unbaked deep dish pie shell
  • 2 cans apple pie filling
  • 1/2 cup caramel topping
  • lemon juice and cinnamon (to doctor the pie filling and make it taste more homemade)
  • 1/2 cup butter
  • 1 cup flour
  • 2/3 cup brown sugar
  • 1 Tablespoon sugar (I used raw turbinado sugar - it's crunchier)

Spread 1/4 cup caramel topping in the bottom of an unbaked deep dish pie shell, topped with the doctored apple pie filling.

In a separate bowl combine 1/2 cup butter, 1 cup flour, and 2/3 cup brown sugar. Mix together with a pastry cutter, food processor,  or your fingers until crumbs form. Sprinkle evenly over the pie filling and then sprinkle on 1 Tablespoon of sugar over top of that.

Bake at 375' for 50 - 60 minutes until done - watch that the crust doesn't burn. If it gets too brown cover the edges with strips of aluminum foil. After you remove from the oven drizzle another 1/4 cup caramel over the top. Let cool.


Tuesday, April 18, 2017

K-cup Bunnies by the Littles

Lisa had craft day with her little nieces and made the k-cup bunnies I posted a couple weeks ago (click here for that post) - I wanted to share how cute they turned out. Perfect example of being creative - don't think you have to copy a project exactly for it to still turn out great. The girls changed the faces a little bit and used some other materials and I think they are adorable bunnies! Thanks for sharing these photos Lisa :). I'd love to see if anyone else is inspired to make any of the projects you see on the blog - send me pics!

Monday, April 17, 2017

Money Origami

I can waste time like nobody's business. I sat down to pay bills, do some office work, clean up my desk...and then I saw the stack of crisp one dollar bills that I traded Sheryl for (she took my crumbled old bills and exchanged them for the crispy new ones). Actually she got them from the bank the other day and before putting them in the till asked me if there was anything I'd like to do with them - money origami hadn't occurred to me until right then, so this next "craft" project is her fault really. Anyway - I saw the bills on my desk and then googled "crafts using dollar bills" and the next thing you know an hour and a half flew by and I'm the proud owner of some folded bills :)


These were all very simple, just follow the directions I found here at craftyjournal.com if you want to make for yourself...except the "dime-in-ring" one (get it? look at the picture), that was a real pain in the you-know-what but I was determined to figure it out. And it's dumb - but click here at helenmade.blogspot.com if you have to try it. I have some bills left and want to make money origami animals but seriously, I need to stop messing around and accomplish something - stayed tuned for more origami time-suckers later.

dollar bill wallet.  tie with something to keep closed (or make a belly band like I did
with the origami gift card holder, click here for that post)

pull the two sides apart to insert your gift

back side of dollar wallet

2 different hearts. "easy" on the left, harder but nicer is on the right.

backside of hearts

awwww a bunny bill. you could double stick google eyes on if you want, - I just used the hole-punch
that is at my desk to punch out paper eyes and nose from paper in my trashcan, then double stick on with tape. Too lazy to walk to craft room for eyes...

framed dollar - once again too lazy to go get colored paper so just used printer paper ...obviously would
be cuter with colored/patterned paper. Maybe write inside "thought you'd like a picture of Abraham Lincoln"
 - or whoever is on the front of the bill you are giving away! 

the "dime-in-ring". This one was confusing and a time-sucker. 

I enjoy the dollar wallet (you can insert a gift card, more dollars, or a note!) and the smaller heart a lot, I'll def make those for gifts in the future. If one of you asks what I got done today I'm gonna smack ya' ;)

Sunday, April 16, 2017

Veggie Fried Rice

I'm not sure how to actually make authentic fried rice but here's my version - an easy way to use up leftover cooked rice and clean out the veggie drawer. It's a non-recipe recipe so just wing the amounts...

In a large frypan or wok add a little oil and whatever chopped up veggies you have on hand. For this batch I used orange bell pepper, carrots, corn, and sugar snap peas - chop them pretty small so they'll cook quickly. Saute for a couple minutes and then add the leftover cooked rice. Once the rice is heated thru and starts to get just a tiny bit crispy but not browned make a hole in the center and crack an egg into it. As the egg starts to cook slowly break it up and stir into the rice until it's totally combined with the rice and veggies and cooked thru. I don't add any sauce because I don't like to use very much soy, but feel free to add now if you want. Once it's done I lightly sprinkle with soy sauce and season with salt and pepper - and this is weird but I also add a little bit of grated parmesan... don't knock it till you've tried it haha. Yum.


Saturday, April 15, 2017

If Only...cork gardening

Hmmmmm - gardening and corks, 2 of my favorite things. Wouldn't this be awesome??

LOL!