Saturday, November 30, 2019

Margarita Cupcakes

Thanksgiving is over and I'm starting to think about Christmas stuff, but I recently made these margarita cupcakes and am posting them before the holiday crafts and food take over and I forget! Or maybe you'll want these for a festive holiday party, another way to get a dose of alcohol LOL!


 (JK, there isn't that much in here, no one's getting tipsy from these hahahah)


I doctored a lemon cake mix by adding 4 eggs, 1/2 cup melted butter, 1/2 water, 1/4 cup tequila, dash of vanilla; bake according to package instructions.
Frost the cupcakes with buttercream flavored with tequila and lime juice:
Beat together 1/2 cup unsalted butter, 4 cups powdered sugar, 1teaspoon vanilla, pinch coarse salt, 1 T. tequila, 1 T. lime juice, and 1 or 2 T. cream, half and half, or milk until you get the correct frosting consistency. Note you can change the liquid ingredients to more or less tequila and lime. I just added a little of each at a time until it tasted good then added cream to get the correct consistency.

After frosting a cupcake I rolled the edges in coarse white sugar to mimic a margarita glass rolled in salt. Then sprinkle lime zest on top. 


Friday, November 29, 2019

All The Green Things Salad

Here's an easy, pretty, healthy, and flavorful salad to counter all the gravy I consumed yesterday!

It's not really a "recipe", I just combine all the green veggies I can think of in a big ol' bowl and toss with creamy mustard dressing. I love this salad, not as much as I love gravy but this is a great way to get your veggies in and it tastes great ;)

For veggies like asparagus, snap peas, broccoli, frozen peas, etc. I steam them for a couple minutes until crisp-tender then put in an ice bath (or rinse under cold water) to stop the cooking, drain well. Other veggies like cucumbers, watercress, arugula, spinach, avocado can be tossed in raw.

Mustard dressing:
Combine 1/4 cup vinegar. 2 T. dijon mustard, salt and pepper in a jar or small bowl. Whisk in 1/2 cup olive oil until completely incorporated. Add a big splash of cream or half and half, whisk or shake until combined.

I don't have a pic of this because we will be eating it later for dinner and I haven't actually made it yet today - it's a bunch of chopped up green vegetables tossed together so use your imagination!


Dave wanted me to run to Walmart this morning to get some blue stuff to put down the RV drain, I said 'no way - it's Black Friday. At Walmart. Do you not hear about the fights and riots at Walmart on Black Friday?'. He said 'no one will be in the RV section you'll be fine'.

Insert eye roll.

No, I did not go get blue stuff.

Thursday, November 28, 2019

Happy Thanksgiving 2019

Yes, you've seen this exact post on past Thanksgivings - it isn't that I'm too lazy to write something new hahahaha, it's just that this still sums up what I want to say :)


I'm thankful and grateful for so many things - among them are my faith, my family and friends, my furry and feathery kids, gravy, the ability to live my life the way I want (filled with making stuff!) and you guys reading my blog of course! Happy Thanksgiving - I hope you enjoy your day whether it's at home, with family, or having "friendsgiving" with friends that are the family you get to choose :).


11.28.18: Cathy's rolled oats cake


Wednesday, November 27, 2019

How to Fold a Turkey Napkin

This is a repost but it's sooooo cute and a fun decoration to add to your Thanksgiving table - turkey napkins!

from 11/15:


Last minute idea for setting your Thanksgiving table. For our Thanksmas dinner I folded some napkins into turkey shapes - I just googled how to do it and found easy to follow instructions from Chinet, click here if these directions are too small....


Each one took 2 dinner size paper napkins and were very easy to do, doesn't take long at all - super cute addition to your table!


11.27.18: pinecone angels

11.27.17: styrofoam snowman

11.27.16: crock-pot green bean casserole

Tuesday, November 26, 2019

Tip-sy Tuesday: Aluminum Foil

Here's a handy little tip...well maybe not a tip actually, more like a useful bit of information about aluminum foil. I read this for the first time the other day and thought 'well, I've always wondered about that' so I'm sharing with you in case you've also wondered. With the big ol' turkey dinner day a couple days away you'll probably be using a lot of aluminum foil and now you don't have to waste any time deciding which side of the foil to use. 

I'm sure you've noticed that aluminum foil has a different finish on each side (if you've noticed but don't care you might as well stop reading this because it doesn't matter to you... looking at you sister), one side is shiny and the other dull. What is the reason - is the shiny side the top side and the dull side goes against the food? Other way around? Simple answer - took me long enough to get to the point - it doesn't matter which side you use, the performance of the foil is the same on both sides. The sides are different only because of how they produce it, there isn't a coating on it.  I wasn't going to explain the milling process because I don't care hahah,  but someone might find this interesting so...

In the factory, the sheets of foil are produced using a process called milling, which heats and stretches the aluminum into the thin layers we buy in-store. They mill two layers in contact with each other at the same time, because if they didn't the foil would break during the milling process. Where the foil is in contact with another layer, that's the dull side. The shiny side is the side milled without being in contact with another sheet of metal. 

I googled for a funny aluminum foil picture to add to this post (cuz just words are boring!) but, surprisingly, there aren't any. I did come across a bunch of things you can do with foil that isn't about wrapping around food tho:

1. if your sponge isn't enough to clean set-in grease and stubborn food from pans, use a wad of foil as a scrubber. This also works to clean the grill.
2. fold a piece of aluminum foil several times, make a few cuts with your scissors to sharpen and clean them. 
3. you'll have crisper celery if you wrap it in foil before putting it in the fridge. 
4. use foil to wrap a present. 
5. crinkle up a big piece of foil to use as a photography background. 


11.26.18: Miss Lori's Christmas wreath


11.26.17: birds on a wire artwork


11.26.16: mulled cider


Monday, November 25, 2019

Cork Turkeys

It's been a while since I've made any cork things, so when I saw these cutie little turkeys online here I immediately went to the craft room and made one - how cute is this? It only took a couple minutes to put together, you have plenty of time to whip a few out before Thanksgiving (I'm sure you're not doing anything else getting ready for Thanksgiving hahaha!), but really - they are quick so if you have a few minutes give 'em a go.

Cut out 5 feathers from whatever color felt you want; you'll also need a little beak triangle and a snood (the comma shaped thing around the beak), and either a couple googly eyes, small felt circle eyes, or you can use pushpins. I also made a little yellow foot sort of thing to stand him on. Glue everything in place and once it's dry you're done.

I'm also thinking if you cut a thin slit in the top of the cork you could set one at each place setting with a name tag card inserted in the slit. Cute, right?


I propped up the bottom of the cork for support while the glue was drying

PS: in the interest of full discloser - the elmer's glue was taking forever to dry so I stuck a pin thru the back of the feathers to keep them in place. If you glue them with regular craft glue and they never end up drying and/or holding I'd hot glue them in place - or stick a pin in them!


11.25.17: oatmeal scotchies

Sunday, November 24, 2019

Around the Campfire 🔥 (week 47)

Dear Campers ~

Here's a quick recap of what happened at MMDC this week in case you need to catch up!

Posts ~

11/17: 🔥week 46
11/18: scalloped carrots
11/19: tip-sy Tuesday: squash
11/20: fall tutu wreath
11/21: my sis is hungry: butternut mac and cheese
11/22: Thanksgiving foods fit for the dog
11/23: how to make turkey gravy

What's Cooking ~

I'm not much help with menu planning this week, I was sick most of it and dinners were pretty boring!

Miscellaneous stuff keeping me busy, other than being sick...
  • I read an old one by Mary Higgins Clark, "Moonlight Becomes You" and was pleasantly surprised - I thought she was more fluffy suspense but this one was pretty creepy. ⭐️⭐️⭐️⭐️
  • getting ready to make like a snowbird, starting to pull the house together and pack some stuff. I like to try to get as much Christmas shopping done as I can, that way I can leave things wrapped here and not have to ship later. It makes November very frantic for me but come December I'm ahead of the game (and can avoid most of the standing in line at the post office drudgery).
  • new roof still. not. done. I plied them with cookies and cupcakes as incentive to work even harder but now I'm thinking maybe that's just made them want to stay longer? HA! This week I'll try being meaner and see if that does it ;) 
  • Sarge's birthday was Thursday, he turned 7! The next day he got all his shots updated and then yesterday he was totally out of it, just slept and did this weird little trembling thing, wouldn't stand up, had to be carried up the stairs....I was really worried - I mean, when the dog doesn't want dinner you know something is wrong. He's bouncing back today tho and I think he'll be fine by tomorrow. 
  • started working on a couple projects that aren't my usual quickie-done-in-a-flash things so I'll share them once I'm finished. 
Hope you had a great week! Stop by often to see more fun happenings at camp, who knows what I'll make but you know it'll be something! 

Sincerely ~


Jill
camp counselor and doggie worry-wart

Saturday, November 23, 2019

How to Make Turkey Gravy

Yesterday I posted about what Thanksgiving foods you should and shouldn't feed your dogs (click here for that post), and I mentioned gravy...and now I'm thinking about gravy...and how much I love it...and that led me to wanting to repost how I make turkey gravy with perfect results. The thought of making gravy used to intimidate and scare me but after I found these instructions in the LA Times newspaper years ago (you know it's years ago because who gets a newspaper anymore?) I've had good luck.  I've posted this before but it's been awhile so I'm sharing again in case the idea of making gravy next week is filling you with dread - follow this and you'll be a (gravy) rockstar!

Ingredients (for 4 cups)
  • 1/2 cup turkey fat and/or melted butter
  • 1/2 cup flour
  • 4 cups turkey broth

To get the turkey fat: after roasting the turkey drain off the drippings and measure out 1/2 cup of fat (it's easiest if you have a fat separator but you can separate by hand - let the drippings rest in a clear measuring cup until the fat rises to the top then spoon it off). If you don't have enough fat add enough melted butter to equal 1/2 cup total. 

To make the turkey broth: put the bits that come out of the turkey before you roast it (you know, the neck and giblets - yuck) in a pot and fill it up with water. If you have the time and inclination you can add other things to the pot for additional flavor - like onions, celery, peppercorns...bring it to a boil then reduce heat to a gentle simmer, cover, let it cook for a couple hours making sure it doesn't boil over or reduce too much  (add more water if it does). Strain the broth into a glass measuring cup (you need 4 cups for this recipe, if you have more than that you can save it for other uses), discard the solids. Reheat the broth when you're ready to make the gravy.

To make turkey gravy: heat the fat in a large saucepan over medium heat. Whisk in 1/2 cup of flour and cook, stirring constantly for a couple minutes to cook off the flour taste. Remove from heat, gradually whisk in 4 cups of warm turkey broth (Note: I do this step very slowly, maybe 1/3 cup of broth at a time stirring constantly until the broth is incorporated into the flour, then add another 1/3 cup... continue adding very slowly and you won't have lumps). After all the broth is mixed in, return pan to the heat and cook until bubbly, thick, and smooth - keep stirring and watch closely that it doesn't stick to the bottom of the pan. Season with salt and pepper to taste. Makes 4 cups and its yummy.


Friday, November 22, 2019

Thanksgiving and Your Dog

I got an email from the AKC with this info about what foods you can and cannot give your dog at Thanksgiving that I think is very helpful - we try to not give Sarge people food but I have given him a bite of these allowed foods on occasion. Funny, this list also looks like a practical list of foods we should be eating and what to avoid too! But I'm not giving up the gravy so....;) 

These food are ok as long as they have no added ingredients (dairy, spices, sugar, salt, etc. - keep them plain)
  • sweet potatoes
  • potatoes
  • apples (don't let them have the seeds tho)
  • turkey meat (unseasoned, no bones or skin)
  • green beans and peas 
  • pumpkin (not pie-spiced)
  • no dessert other than something healthy like a little frozen yogurt.

Below are the items Dr. Richter, Dr. Ochoa, Dr. Klein, and the AVMA caution should NOT be served to dogs at this year’s Thanksgiving feast, due to unsafe or unhealthy ingredients:
  • Turkey bones, skin, and gravy
  • Stuffing
  • Casseroles
  • Mashed potatoes
  • Creamed peas
  • Chocolate, cookies, pies, and sweets (especially anything containing xylitol)
  • Alcoholic beverages
  • Raisins and grapes
  • Onions, scallions, and garlic
  • Ham
  • Yeast dough
  • Fatty foods
  • Foods containing spices

11.22.18: mashed squash I made this same recipe for Friendsgiving last weekend, but added orange juice and maple syrup this time - really good! Then turned it into soup the next day by diluting with fat-free milk, also really good!

Thursday, November 21, 2019

My Sis is Hungry: Butternut Mac and Cheese

So the husband was super excited to try this one.  SUPER excited.  My thoughts on this were less descript – I thought it was “ok”.  like not the best I have ever had but a perfectly ok macaroni and cheese.  I did have a feeling this was some kind of healthy thing so that would make me like it WAY better.  Because if its healthy then its GREAT.  Like a perfectly GREAT alternative to fatty mac n cheese and still getting to eat the goodness.  If it is NOT healthy though then I would prefer to toss some Velveeta in it or something?  Anyway.. my Husband had much more to say about it so I’ll just write his thoughts.


His first question was why the top didn’t melt.  He wasn’t sure it was done.  I told him I didn’t think it was going to “melt” because it was some kind of bread crumb topping or something, not cheese.  LOL.  As he stirred it up he said it looked a little dry to him.  He reminded me that he’s the one who adds way too much milk to his boxed mac n cheese and makes it gross and milky.  So not saucy enough was his next thought.  He said the same as I wrote above.  It was “fine”.  He didn’t mentioning tasting butternut or whatever other weird thing my sister says was in it.  I asked him if It was healthy would he like it better?? He agreed yes.  We eat the weird microwave veggie pasta stuff that isn’t necessarily GREAT but its good and it’s a healthy alternative to real mac n cheese.  I would put this in the same category. It was fine. Ok.  not the best mac n cheese I have ever eaten.  Today for lunch I’ll be adding some Velveeta and I’m sure my review will improve immensely.  ðŸ˜Š


Ingredients:

  • 3 cups cubed peeled butternut squash (about 1-pound size squash)
  • 1 1/4 cups fat-free, lower-sodium chicken broth
  • 1 1/2 cups fat-free milk
  • 2 garlic cloves, peeled
  • 2 T. plain fat-free Greek yogurt
  • 1 t. salt
  • 1/2 t. black pepper
  • 1 1/4 cups (5 oz.) shredded Gruyere cheese
  • 1 cup (4 oz.) grated pecorino romano cheese
  • 1/4 cup (1 oz.) grated parmigiano-reggiano cheese, divided
  • 1 pound cavatappi pasta
  • cooking spray
  • 1 t. olive oil
  • 1/2 cup panko breadcrumbs
  • 2 T. chopped fresh parsley, for garnish
Directions:

1. Preheat oven to 375'.

2. Combine squash, broth, milk and garlic in a medium saucepan; bring to a boil over medium-high heat. Reduce heat to medium, and simmer until squash is tender when pierced with a fork, about 25 minutes. Remove from heat. 

3. Place the hot squash mixture in a blender. Add salt, pepper, and Greek yogurt. Remove the center piece of blender lid (to allow steam to escape); secure blender lid on blender. Place a clean towel over opening in blender lid (to avoid splatters). Blend until smooth. place blended squash mixture in a bowl; stir in Gruyere, pecorino romano, and 2 T. parmigiano-reggiano. Stir until combined.

4. Cook pasta according to package directions, omitting salt and fat; drain well. Add pasta to squash mixture and stir until combined. Spread mixture evenly into a 13x9" baking dish coated with cooking spray.

5. Heat oil in a medium skillet over medium heat. Add panko, and cook for 2 minutes or until golden brown. Remove from heat; stir in remaining 2 T. parmigiana-reggiano cheese. Sprinkle evenly over the hot pasta mixture. Lightly coat topping with cooking spray. 

6. Bake at 375' for 25 minutes or until bubbly. Sprinkle with parsley, and serve immediately.


original recipe and source here

Jill here: I'm surprised this seemed dry to them, when I packaged it up it was plenty saucy - and in case the noodles soaked up the sauce before my sis baked it,  I held out about a cup of cooked noodles. If you make this don't add all the cooked noodles to the sauce at once, put in half and stir to combine, continue to add a bit more, stir to combine - making sure it seems like enough sauce. I will say that Dave and I had a small side of this with dinner the next night and we both thought it was great! Maybe that's because having any kind of saucy noodles is a treat for us hahaha. Other than the pasta itself this is a very healthy sauce - my sis will be happy to hear that (and kick herself for adding velveeta to ruin the healthiness!).

Wednesday, November 20, 2019

Fall Tutu Wreath

I made this using some of the leftover tulle from the tutu's I made for our fall 5K run/walk (click here for that post) - hence the name 'tutu wreath'...plus it just looks like a tutu hahaha!


So easy and quick to assemble; the technique is the same as making the tutu's  - cut 12" lengths of (6-inch wide) tulle, tie them on a 12" wire wreath using a larks head knot (double the tulle strip, thread the loop thru one or two of the wreath rungs, bring both tails up and pull thru the loop going over the rung, pull to tighten). I did two rows (each covering 2 rungs), 16 strips in each section for each row. Make sense? Check out the pics:


backside of wreath - on the left I tied over two rungs, on the right I tied over a single rung.
Way thicker when I did every rung and I prefer the left side. 
All the tulle tied on and pushed flat, you can see the inner circle  and knots this way...
...or fluff it up! 
Once I had the tulle tied on I played around with how I wanted to finish it - big sunflower, different ribbons, fake leaves...I decided on the leaves and an orange ribbon to hang it. If I don't put this on a door and it doesn't get moved a lot, I don't even have to glue the leaves in place - they stick to the tulle. If it's going to get moved I'll quickly tack them down with some hot glue.


11.20.18: make a pumpkin vase
11.20.17: yarn wrapped wheat
11.20.16: Jen's spinach salad
11.20.15: leaf lantern

Tuesday, November 19, 2019

Tip-sy Tuesday: squash

Roasting squash is super easy: I cut the squash in half  (I cut a bit of the top and bottom off first so it stands up straight, sometimes it's hard to cut thru a squash so having a stable bottom helps), scoop out the seeds and pulpy center, cut into big chunks. Put on a baking sheet or in a baking dish, pop in a 350' oven until it's cooked thru and soft. Sometimes I drizzle with olive oil and season with salt and pepper, other people add a little water to the pan, some do cut side down or up - all of that is up to you. I just normally put the pieces on a baking sheet cut side up and put them in the oven. The baking time will depend on how big your squash pieces are, it's usually an hour for mine.

A cool tip I have for you is if you have an ice cream scoop with a point on it, use it to scoop out the squash - it's so easy that way! Otherwise you can use a spoon, and if you have one with a pointed end even better. 


Monday, November 18, 2019

Scalloped Carrots

Cathy made this carrot casserole for dinner last night, and it's so good and different that I asked if she'd share the recipe - she knows the drill by now and already took pictures of the steps for me knowing I'd ask hahahaha. Love that - thanks Cathy!


We loved the carrots done this way - it will definitely be in rotation this fall and winter, and perfect as a side dish on Thanksgiving. Has anyone else ever heard of making carrots like this? I'm wondering why I've been missing out on it all this time - I mean, I love roasted carrots but creamy cheesy carrots? What's not to love.


Ingredients:

  • 4 c. sliced carrots
  • 1 medium onion, diced
  • 3 T. butter
  • 1/2 t. salt and pepper
  • 1 can cream of celery soup
  • 1 c. grated velveeta cheese
  • 3/4 c. Ritz cracker crumbs
  • 1/3 c. melted butter
Directions:
Cook carrots in salted water till tender, drain.
Cook onions in 3 T. butter until soft. Stir in soup, salt and pepper, cheese until well combined. Add carrots and gently mix. 
Pour into a buttered 2 quart casserole dish. 
Toss crumbs with 1/3 c. melted butter. Spoon over carrots. Bake 350' 20-30 minutes. 

*note from Cathy: she microwaved everything (carrots and onions) except baking it at the end. 


11.18.18: 🔥weekly recap
11.18.17: how to make a paper box
11.18.16: silhouette art by Brooke
11.18.15: roasted cherry tomatoes

Sunday, November 17, 2019

Around the Campfire 🔥 (week 46)

Dear Campers ~

Here's a quick recap in case you missed anything at MMDC this week:

Posts ~
11/10: 🔥week 45
11/11:  pony bead Indian corn
11/12:  tip-sy Tuesday: how much turkey?
11/13:  candy corn cone
11/14:  'my sis is hungry' review of pumpkin snickerdoodles
11/15:  green bean salad
11/16:  corny corn bread

Tesha and I went to Frankenmuth and ate at Zehnders restaurant - for the first time we didn't choose the "all you can eat chicken dinner" like we usually do and limited ourselves to the 2 piece plated dinner...which was still seriously too much food btw...and while I pretty much like everything that comes with the dinner (got my eye on you,yucky liver pate thing) we both love, love the cranberry relish - it is so fresh, crunchy, citrusy, a little tart and a little sweet - and I totally just eat it by the spoonful! I've posted the recipe in the past but with Thanksgiving just around the corner I thought I'd share it again; I promise, you won't go wrong serving this!

Zehnders Cranberry Relish:

Ingredients:
  • 3 medium sized apples like Northern Spy or Granny Smith, cored but keep the peel on 
  • 1 pound frozen cranberries (you want them frozen so they chop easier)
  • 2 naval oranges, with the peel on
  • 2 cup sugar
Instructions:
  • Chop the apples, oranges (including peel), and cranberries into 1/4" pieces.
  • Add sugar and mix well. 
  • Let set one hour before serving. 

New roof is still underway (uh, hello bad weather slowing things down!) so Sarge is still barking and I still have a headache! In addition to the headache I woke up a couple days ago with my voice sounding like Batman with laryngitis - ugh. Thankfully I didn't have to be in any singing competitions this week - Teri said I might win tho because I'd be rocking a sexy hoarse Janis Joplin type voice LOL. Uh, yeah - no. 

Read "The Last House Guest" by Megan Miranda - guess what, it's another of Reese Witherspoons book picks (remember I haven't been a fan of her choices to date) and this one I actually really liked! Reese is back in my good graces and l might (cautiously) and I can recommend this one for an easy, entertaining, who-done-it, non- predictable read. ⭐️⭐️⭐️⭐️

Off to Friendsgiving at Al and Cathys, gotta run. My contribution is mashed squash (I'll share that recipe this week), we are looking forward to hanging with friends and enjoying a pre-Thanksgiving dinner.  Have a great week - stop back often for more recipes, crafts, whatever else I can think of to make (hint: more fall and Thanksgiving ideas!). Bye!

Sincerely ~


Jill
camp counselor and Batman sound-a-like


Saturday, November 16, 2019

Corny Corn Bread

We had a get together last night and Mickey suggested we have a 'chili bar' - perfect food for a cold night, I made 2 different chili's the day before so clean up was a breeze, and I bought paper bowls so everyone could try both kinds (and have seconds) without my having to try to find 30 bowls in my cupboards or do tons of dishes. Everyone brought lots of munchies, I made some margarita cupcakes that I'll share with you later, and this cornbread.


I've had this recipe in my files for a really long time, I just scribbled it on a piece of paper and have no idea where it came from. I'm so glad to finally make it and now know how fantastic it is and will definitely be making this one in the future. It's a keeper - very easy, moist, and delicious. Oh, and the house smelled great while it was baking...always love that, especially with it being so cold out!


2 boxes Jiffy corn bread
8 oz. sour cream
2 eggs
1 (15oz) can creamed corn
1/4 c. sugar
1 stick butter, melted

Mix all together. Pour batter into a greased 13 x 9" baking dish. Bake 375' for 30 minutes or until baked thru and golden brown.


               and Jane's white chicken chili - both recipes I've posted before and they're both great!


11.16.18: pinecone wreath
11.16.17: doggie pupcakes
11.16.16: fall circle garland
11.16.15: DIY cookie stand

Friday, November 15, 2019

Green Bean Salad

My brain is thinking ahead to Thanksgiving next week and when I came across this picture in my file I (a) remembered that I never posted this easy salad that I made back when we were getting tons of beans and tomatoes from the garden, and (b) this would be a nice addition to the Thanksgiving dinner line-up if you want a change up from the traditional green bean casserole. It's a simple, fresh, crunchy, delicious side dish perfect for a potluck or dish to pass (in addition to being perfect to eat at home!), it comes together quickly, can be made ahead of time, and is great either chilled or at room temperature. 

Ingredients:
  • 2 pounds fresh green beans, ends trimmed, leave whole or cut into smaller pieces 
  • 1 pint cherry tomatoes, halved
  • 1/4 cup olive oil
  • 3 T. lemon juice
  • 3 T. balsamic vinegar
  • 1/4 t. salt
  • 1/4 t. garlic powder
  • 1/8 t. pepper
  • 4 oz. feta cheese, crumbled
  • 6-8 strips bacon, cooked and crumbled
1. Bring a large pot of water to a boil. Add 1 t. salt, cook green beans until tender, 5-10 minutes. While they cook prepare a large bowl with an ice water bath (that means fill the bowl with water and ice cubes). Once the beans are crisp-tender drain them into a colander to drain then quickly put them in the ice water for a few minutes to stop the cooking (don't want mushy beans!). 

2. Drain the beans and pat dry. Toss them in a bowl with the tomatoes.

3. For the dressing: whisk together the olive oil, lemon juice, vinegar, salt, garlic powder, and pepper. Pour the mixture over the green beans and toss to coat. Cover the bowl and chill for at least an hour or up to 3 hours before ready to serve. 

4. Stir in the feta and bacon right before serving. Serve chilled or at room temperature. 

*note: the bacon gets a little soggy after it sits in the beans overnight (but still tastes good), if you're making ahead of time I'd wait to add the bacon until closer to serving time. 

recipe found on melskitchencafe.com


11.15.18: pinecone birds
11.15.17: Brooke's nutella mug cake
11.15.16: deviled egg short-cut (I do this all the time!)
11.15.15: Thanksmas


Thursday, November 14, 2019

My Sis is Hungry: Pumpkin Snickerdoodles

So. I needed to not go by her title on this one at all.  Pumpkin Snickerdoodle Cookie something or other.  First of all I’m not a huge cookie fan.  I mean, I’ll take a hot chocolate chip out of the oven (who wouldn’t) or I do love a good no bake (except my kids think they are meant to eat with a spoon off wax paper, since mine never firm up.  Story for a different day).  Sorry, lost my train of thought there...back to pumpkin blah blah blah cookie.  Hmmm..


So it looked fine.  A brown weird lump of cookie.  I could smell the pumpkin which did indeed draw me in.  Let me be clear that this did not taste anything to me like a cookie.  It was more like a pumpkin muffin top.  Or a pumpkin bread dollop. (oooh bread dollop.. new invention?).. 

Anyway.. Delicious.  LOVED these.  Not too sweet, loved that it wasn’t a crunchy cookie but was more of a bread texture.  And even a few days later still moist and delicious.  Could taste the pumpkin – so the husband didn’t like them for that reason.  The teen however LOVED them.  Only negative for that is since they were not cookie-like she was eating them for breakfast and pretending it was a health food.  Yes it has pumpkin however its got sugar all over the top.  Come on kid, you can't count that as health food. She did indeed eat them until they were gone.  So please don’t make us more.  Ok make us a few more.. and I’ll hide them.


Pumpkin Snickerdoodles

Ingredients:

  • 2 cups all purpose flour
  • 1/2 t. baking soda
  • 1/2 t. cream of tartar
  • 1/2 t. coarse salt
  • pinch of freshly grated nutmeg
  • 1 stick unsalted butter, melted and allowed to cool
  • 1 cup sugar
  • 1/2 cup canned pumpkin puree (not pie filling, there's a difference)
  • 1 large egg, room temperature
  • 1 t. vanilla
  • 1/3 cup fine sanding sugar (note: I used regular sugar)
  • 1 t. cinnamon
  • 1/2 t. ground allspice
Directions:
1. Preheat oven to 375'. In a medium bowl, whisk together flour, baking soda, cream of tartar, salt, and nutmeg. 

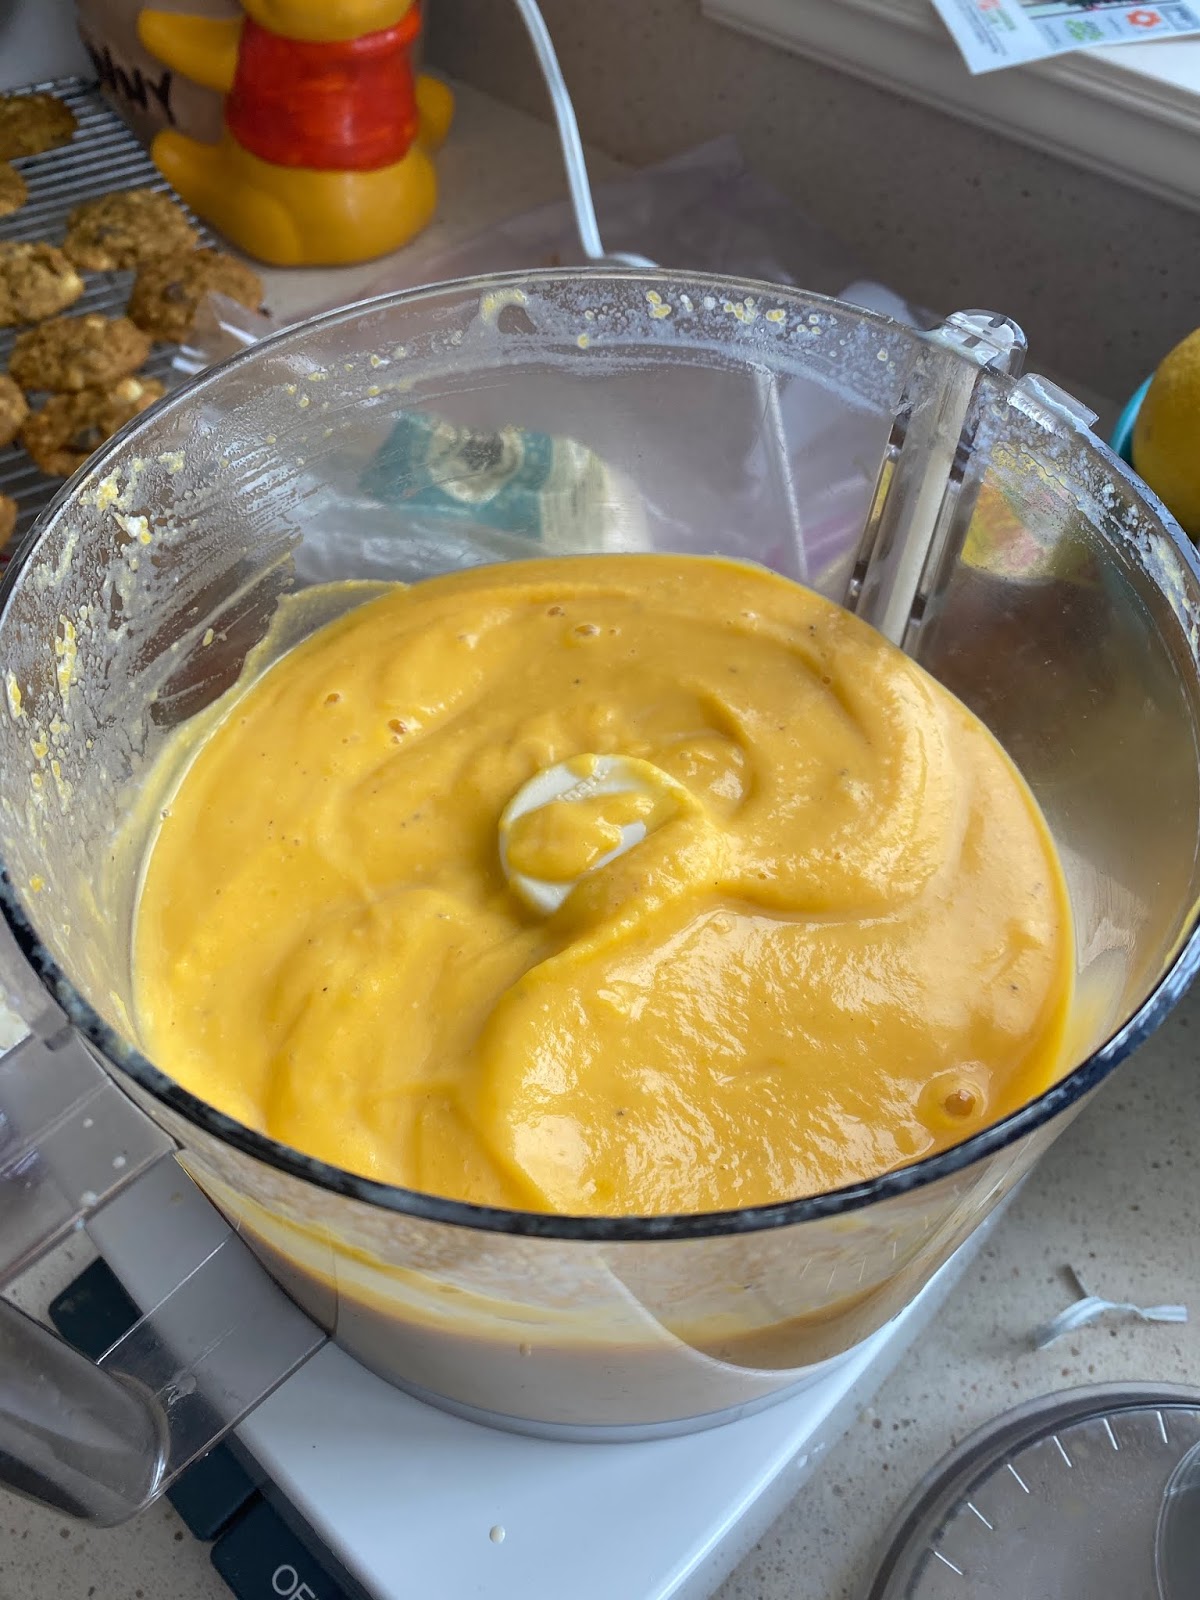
2. In a large bowl, whisk together butter, sugar, and pumpkin until smooth. Add egg and vanilla and whisk to combine. Add four mixture and stir to combine, about 2 minutes. 

3. In a small bowl, whisk together sanding sugar, cinnamon, and allspice. Drop heaping tablespoons of ought into sugar mixture and roll into 1 1/2" balls. Transfer to parchment-lined baking sheets, 3 inches apart. Using a spatula, flatten balls to just under 1/2" thick. Sprinkle with more sugar mixture.

4. Bake, rotating sheets halfway through, until light golden brown and firm to touch, 10-12 minutes. Let cool 5 minutes on sheets, then transfer to a wire rack an let cool completely. Cookies can be stored in an airtight container up to 3 days.


Jill's notes: this dough is very soft, I scooped small balls with my smallest cookie scoop, dropped them into the sugar then took a fork to turn the dough or else they fell apart. They do not taste like snickerdoodles to me, and my sissy is spot-on when she called them pumpkin muffin tops - I might rename these and form them into cookies that look even more like a muffin top! Please note that I'm not even reacting to her "brown weird lump of cookie" comment - what does she expect from a muffin top? ;)

11.14.18: pinecone owls

11.14.17: kid craft: decorating apples

11.14.16: 
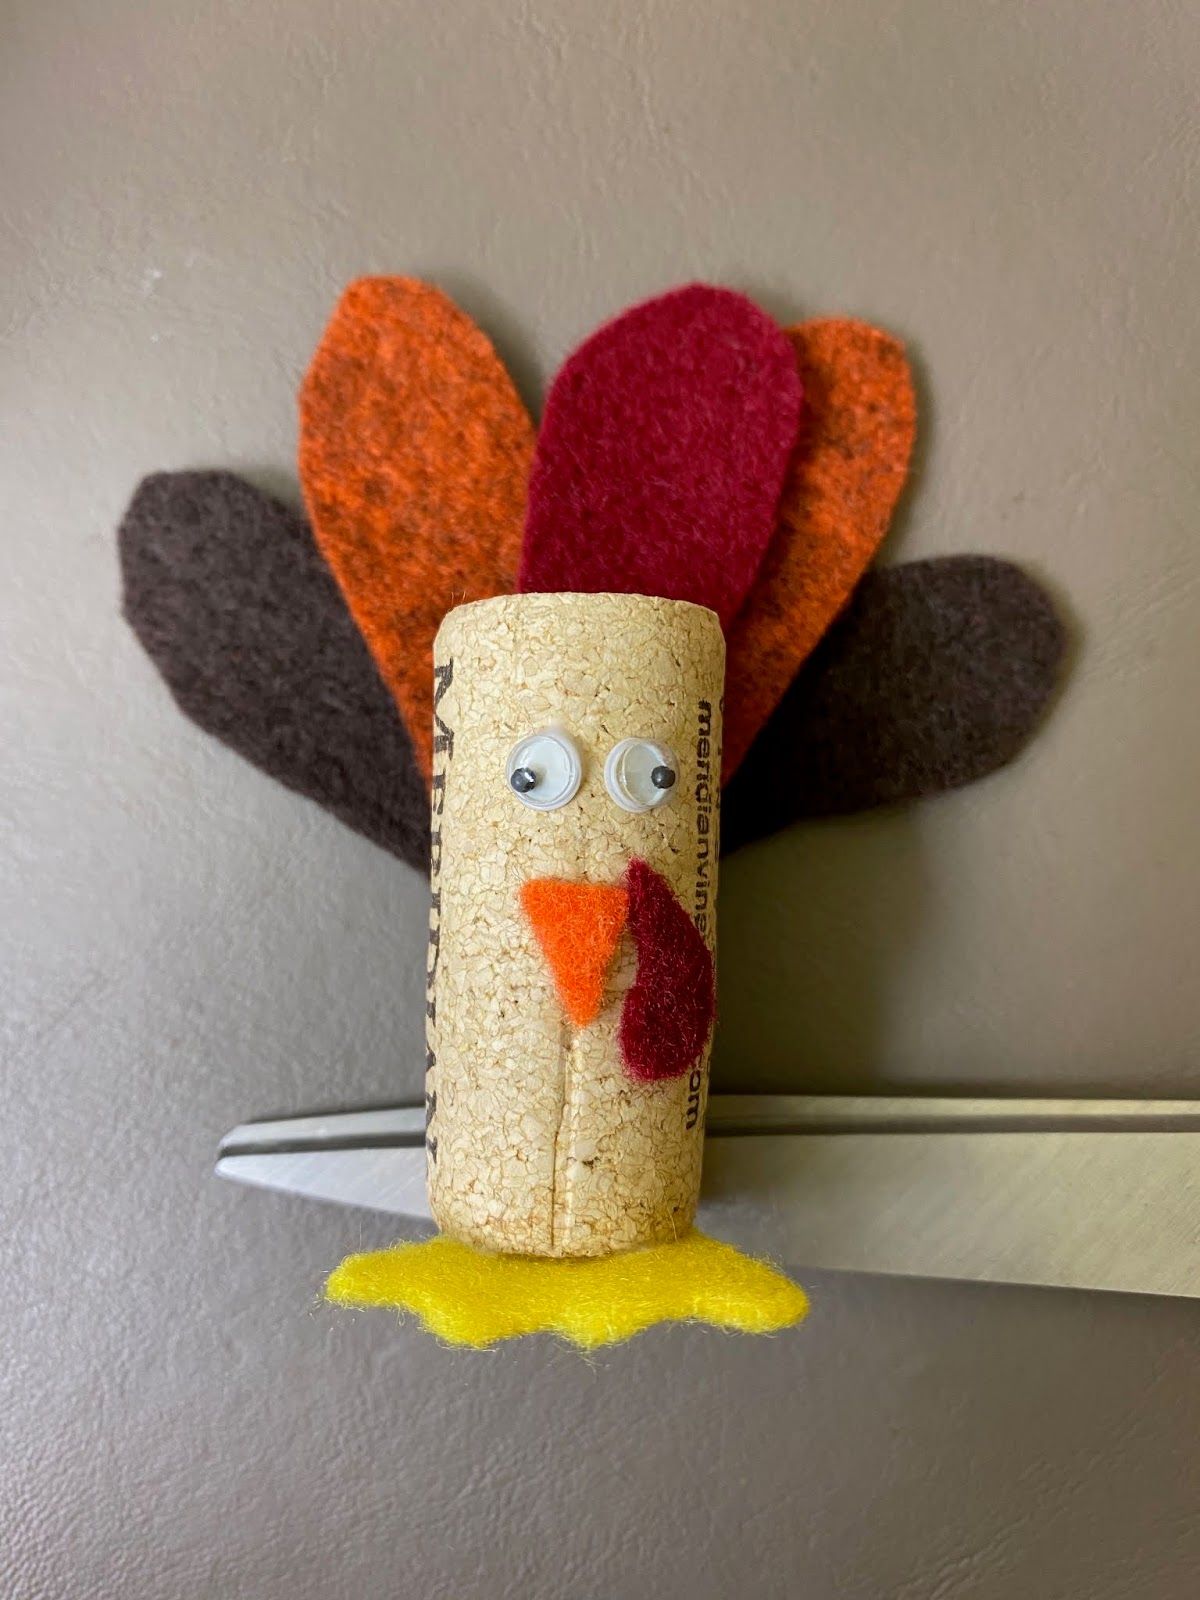
curvy keepsake box turkey

11.14.15: wine and design: fall centerpiece


recipe found here