Monday, October 30, 2023

Crockpot Macaroni and Cheese

Last week I posted my sister's blog about banana bread at a friend gathering we had, everyone brought a dish to pass and I decided to try this recipe for mac and cheese - yes, I have posted macaroni and cheese recipes a few times but not like this one! It has eggs in it, and a whole lot of cheese...and it turned out fantastic (I'm not tooting my own horn since I basically followed the recipe exactly hahha). I did make more than this recipe called for - 2 boxes of macaroni, 4 cups of Mexican cheese blend, 4 cups white cheddar, 3 1/2 cups whole milk, 1 cup melted butter, 5 eggs (only used the 1 package of Velveeta, and 1 can evaporated milk). 


Some of the comments under the original post were that it's too cheesy - insert eyeroll, it's macaroni and cheese! Why would you want it not-as-cheesy haha? So do what you want with that information, I did not find it too cheesy but then again, I did only use one box of Velveeta - maybe that's the difference. 

Here's the original recipe:
  • 3 cups uncooked elbow macaroni
  • 1 package (16 oz.) Velveeta, cubed
  • 2 cups shredded Mexican cheese blend
  • 2 cups shredded white cheddar cheese
  • 1 3/4 cups whole milk
  • 1 can (12 oz.) evaporated milk
  • 3/4 cup butter, melted
  • 3 large eggs, lightly beaten
Cook macaroni according to package directions for al dente; drain. Transfer to a greased 5-qt. slow cooker. Stir in remaining ingredients.

  1. Cook, covered, on low 2 to 2-1/2 hours or until a thermometer reads at least 160°, stirring once.

Nutrition facts: 3/4 cup: 388 calories, 28g fat (17g saturated fat), 122mg cholesterol, 652mg sodium, 16g carbohydrate (6g sugars, 0 fiber), 17g protein. 

recipe found here at taste of home


Sunday, October 29, 2023

🔥 Around the Campfire (week 44)

Dear Campers ~

Here's a quick recap in case you missed anything at camp last week:

Posts ~

10/22: 🔥 week 43

10/23: Brooke's Halloween pumpkin

10/24: TT babies and paint (or should it be 'painting babies' haha)

10/25: Halloween baby footprint art

10/26: Halloween wine bottle candleholder 

10/27: MSTI banana bread 

10/28: words

That's it for this week! See you next week for more projects, crafts, recipes, whatever we can think of to make at camp - bye :)


Sincerely ~

Jill
camp counselor

10.29.20: witch hat cupcakes


10.29.17: Jen's easy spider cookies


10.29.16: brain hemorrhage drink

10.29.15: skeleton pretzels


    Saturday, October 28, 2023

    10/28 ~ Words

    Today's 'Words' is this cute coffee cup that Tesha gave me for my birthday, I love it so much! 🥰


     10.28.22: root vegetable pasties

    Friday, October 27, 2023

    My Sis Tried It: banana bread

    This post is equal parts “sissy tried it” and “who knew”!! 

    When we had our gathering the other night so all of my friends could meet baby Georgie, one of my friends brought banana bread. I absolutely love myself a good bread product so of course I was excited by that. This bread absolutely did not disappoint. It was moist, had good flavor, and I had two slices. 

    Afterwords is where the “who knew” part comes in. When I complimented my friend that it was delicious, she told me that she had found it in the refrigerator section of the grocery store along side the canned rolls and crescent rolls. WHAT? She didn’t home make this? Wow. She told me that she literally just opened it and put it in the pan. I will definitely be purchasing this in the future. AMAZING. And WHO KNEW?! 


    Thursday, October 26, 2023

    Halloween Wine Bottle Candleholder

    Tesha sent me an inspiration photo of painted wine bottles with Halloween labels and battery-powered black taper candles - it seemed like an easy enough project so I fished an empty wine bottle out of the recycle bin and set to making one.

    I glopped extra paint around the top of the bottle
    so it'd look like melted candle wax 

    At first I was thinking I'd paint the bottle white and add big black eyes, with the black candle that'd look pretty cool - but the candles I ordered from Amazon don't fit in the top of the bottle so I switched to a regular wax candle that I could smoosh the bottom into the bottle. My candle is white tho and I didn't want a white candle with a white bottle so I changed my idea to a black bottle with creepy white eyes. 


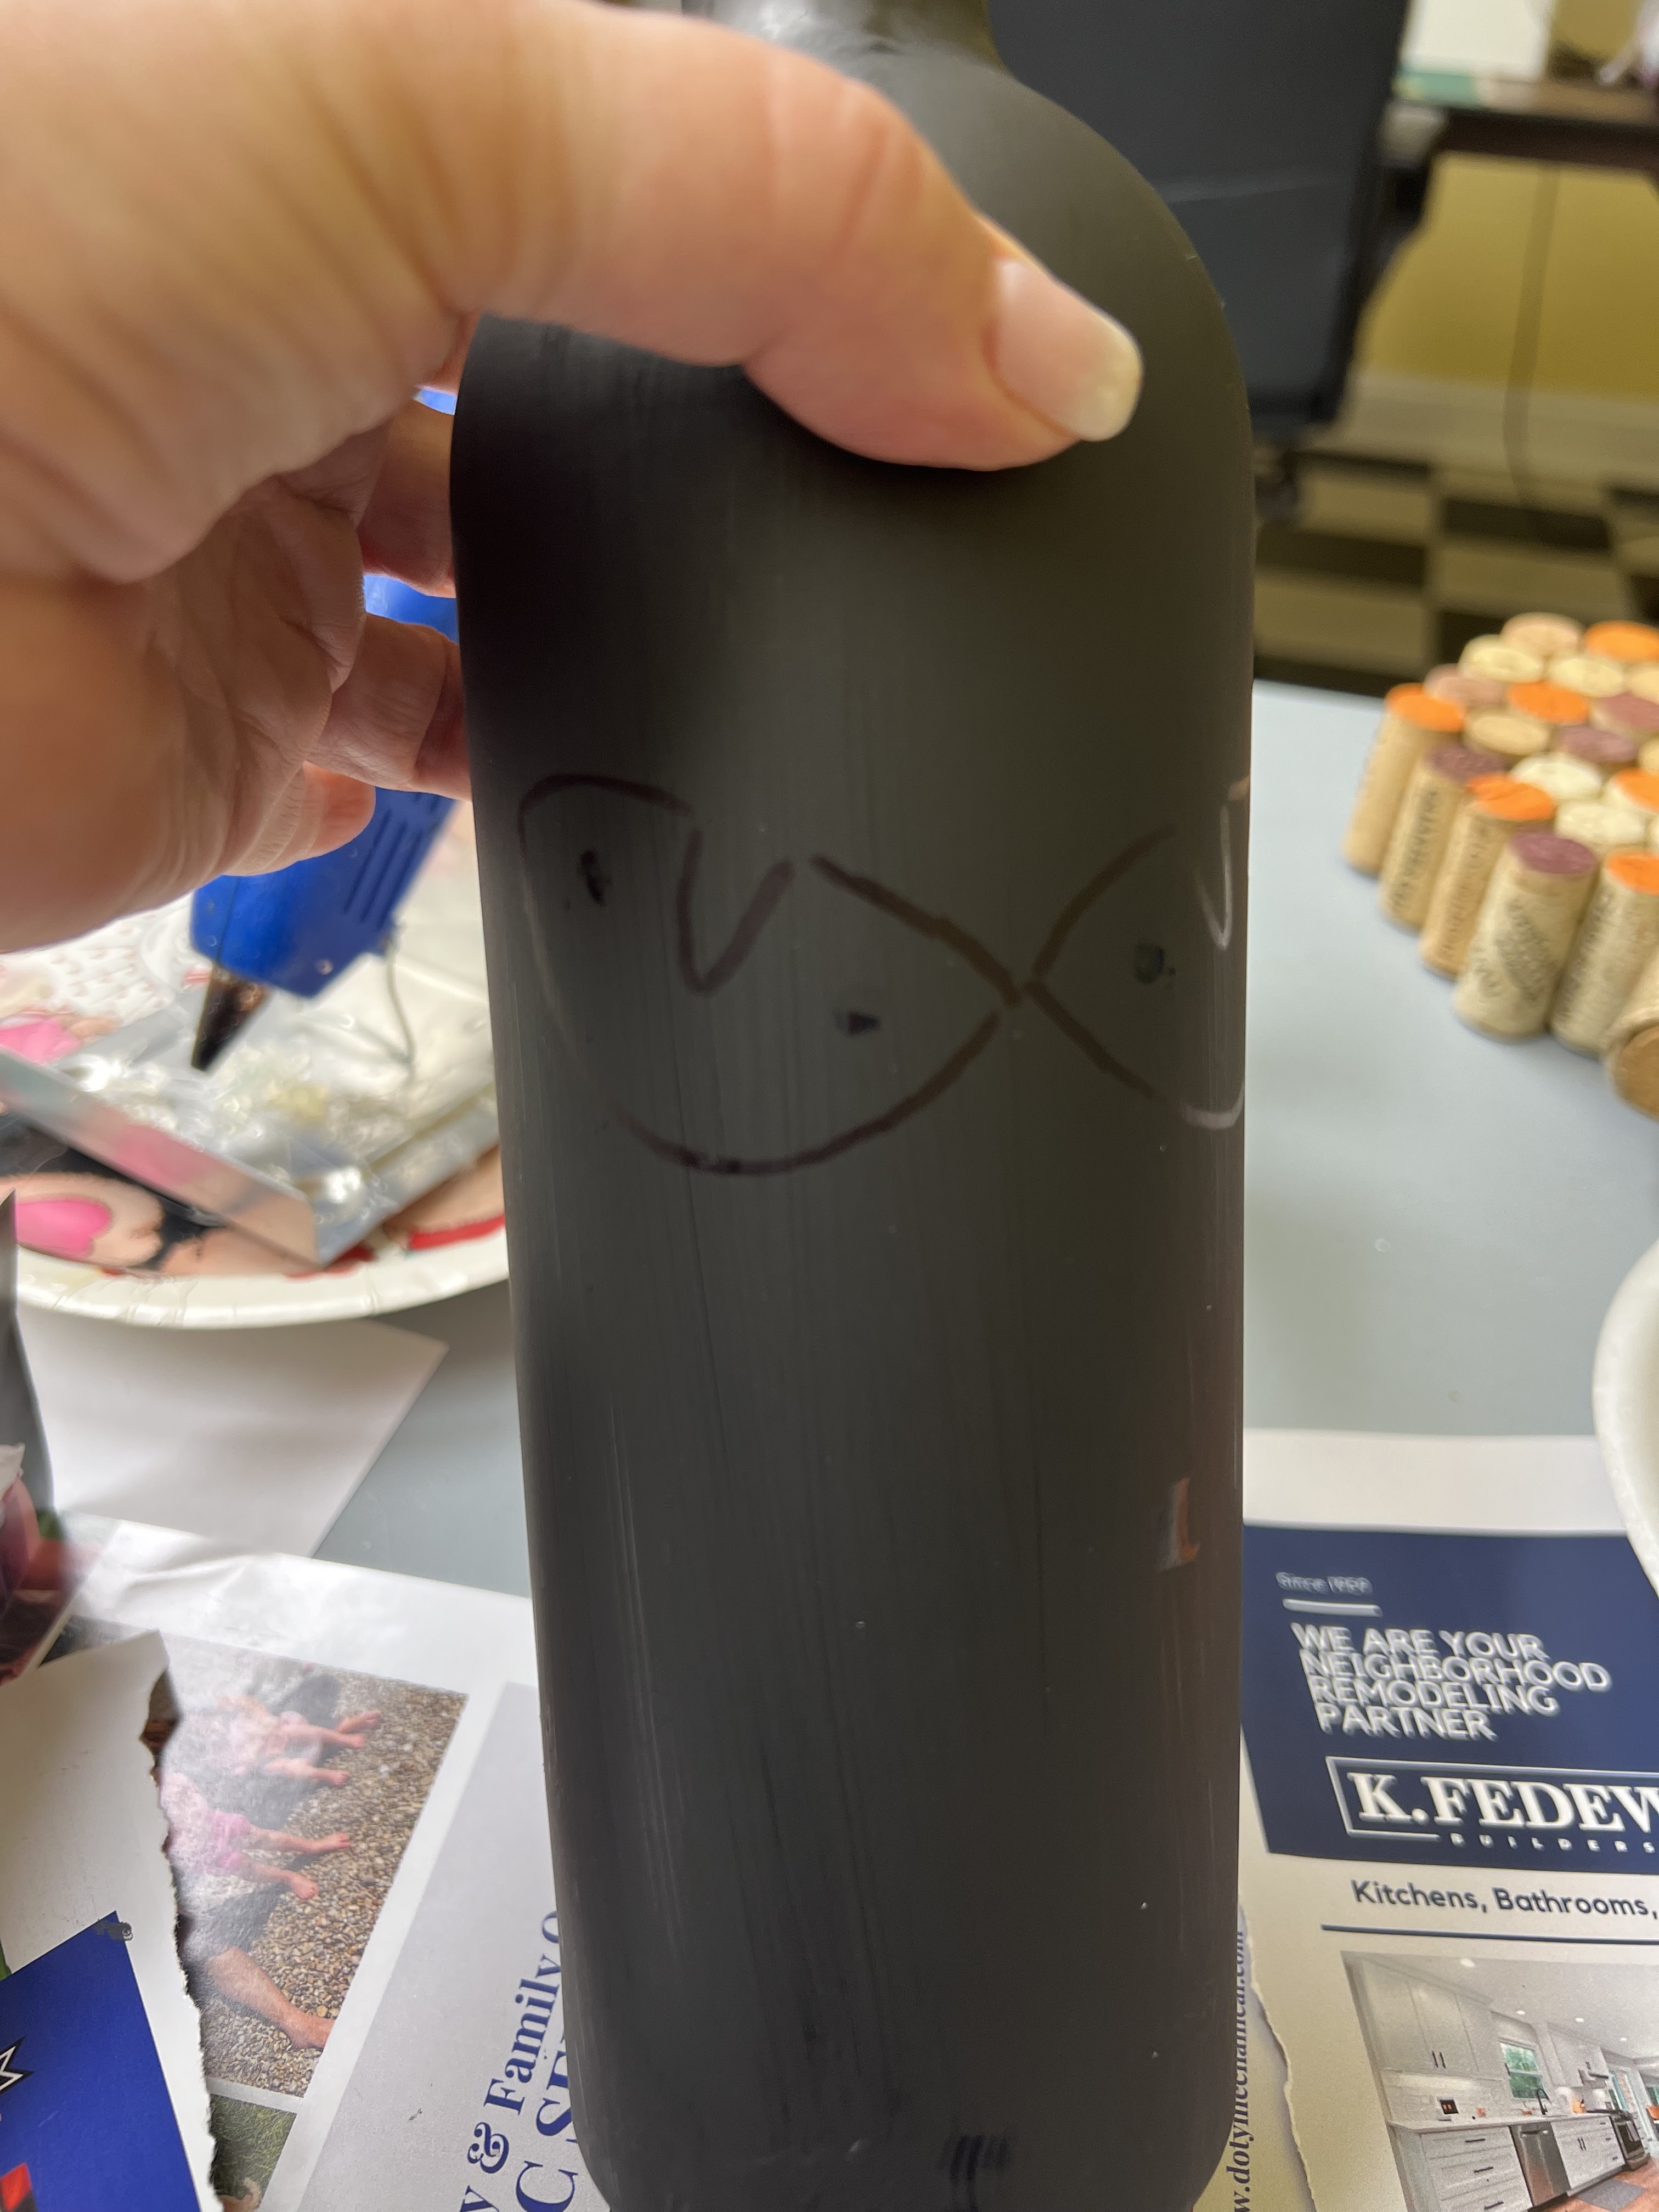
    I made a pattern for the eyes out of paper and stuck them onto the bottle (after I painted it black and it completely dried) as a template. I traced around the pattern with a black sharpie and proceeded to fill the outline in with white paint but didn't like how it looked - hmmmm....now what? All the paint easily washed off the bottle and I started over. This time using my Cricut machine to cut out a spider and spiderweb. Much better! 

    I love how this turned out so much that I've since saved more bottles and think I'll work on ones for Thanksgiving and Christmas - I'll show you after I make them!


    Wednesday, October 25, 2023

    Halloween Baby Footprint Art

    Yesterday I teased this post (click here for a tip on babies and painting) - I love how this project turned out and couldn't wait to share it! 

    Mickey and Kyle brought my new grand-niece Georgia to visit (I finally got to meet her in person and she is as adorable in real life as she is in the photos hahah!!) and she found a couple fun ideas that we could make with baby footprints. I bought wooden pallet signs at the dollar store, and wood canvas frames at Hobby Lobby; before starting to paint on Georgie (!) we prepped by painting the pallet signs orange and the wood frames black and let them dry. Once we were ready for the baby part we did an assembly line - Kyle held her, I held her foot, Mickey brushed washable craft paint on the bottom of her foot, and Jen pressed a sign or a frame onto the wet foot creating these adorable little baby footprints. Wipe off all of the paint, repeat with the other foot.


    For the signs Mickey painted a B next to the 2 prints that look like ghosts when upside down to spell 'BOO' - there was debate about adding eyes to the 'ghosts' but she decided to leave them plain. 

    For the frames I cut out the words 'trick or treat, smell my feet' using my Cricut Joy, and stuck them on the frames.  FYI in case you wonder - I chose the font 'sophia' for trick or treat, and 'apple gothic' for smell my feet. 


    Georgie got a bath as soon as we were done - she was a pretty good sport about having cold wet paint on her feet LOL but like I said yesterday, the more hands the better to help with squirming baby! 

    Tuesday, October 24, 2023

    Tip-sy Tuesday: babies and paint

    Strange title, I know. Today's tip is also a teaser that I'll clear up tomorrow. For now tho I'll just leave you with the tip - when painting a baby's foot, hand, or behind do not think you can do this by yourself. Trust me that you need at least 2 pairs of hands, or 3 is even better. Also wear clothes you don't mind getting paint on, and if your nails are pretty you might want to think about wearing gloves - I cannot get the black paint out from under my nails! LOL - see you tomorrow! 


    10.24.22: bottle display cabinet

    10.24.21: ðŸ”¥ week 43

    10.24.20: spooky eye makeup by Grace

    10.24.19: MSIH: pumpkin pie twists


    Sunday, October 22, 2023

    🔥 Around the Campfire (week 43)

    Dear Campers ~

    Here's a quick recap in case you missed anything at camp last week:

    Posts ~

    10/15: 🔥 week 42

    10/16: Halloween baggie wreath (re-run)

    10/17: TT corner bed headboard

    10/18: spinach maria soup (re-run)

    10/19: chocolate chevron cake

    10/20: turkey, rice, and vegetable dog food

    10/21: words

    What's Cooking ~

    • baked salmon, parmesan couscous, wilted spinach 
    • olive garden crockpot chicken, roasted broccoli (15 mins. at 400', toss with olive oil and s/p)
    • steak, baked potatoes, creamed spinach
    • pizza, chopped salad
    • swedish meatballs, crockpot mac and cheese

    That's it for this week! See you next week for more projects, crafts, recipes, whatever we can think of to make at camp - bye :)


    Sincerely ~

    Jill
    camp counselor

    10.22.22: char-spook-erie 

    10.22.21: pumpkin vase


    10.22.19: orange pumpkins


    10.22.18: Sarge's beanie baby costume (aka cutest Scottie costume ever)


    Friday, October 20, 2023

    Turkey, Rice, and Veggie Dog Food

    Ronda shared this recipe and photos with me, she feeds her dog Lola this homemade formula and says Lola literally goes crazy every time she eats! I've never heard of adding kidney beans; I asked if she adds any additional vitamins or supplements but she said "This is all I give her. She just went to the vet and had blood work done and it all came back good…so they didn’t tell me to give her anything else". I also asked how much she feeds Lola (she's a little dog, I'll have to figure out how much to give Sarge) - then we had this text convo that made me laugh:

    Ronda: it’s a cup a day so I give her 1/2 cup at each serving. I think Eric overfeeds her!

    Me: haha, well since she’s that excited about it I can see why he’d give more LOL.

    Ronda: She has him wrapped around her paw! 


    From Ronda:

    • 48 ounces ground Turkey
    • 1 1/2 cups rice
    • Can of kidney beans
    • Bag of frozen:
      • Spinach
      • Peas and carrots
      • Squash or sweet potatoes
    • 1 1/2 cup water 

    Cook 4 hours on high or 7 1/2 hours on low. I freeze half and refrigerate the other half. Here is the link where I get the containers from amazon, I made the mistake of not getting freezer safe containers to begin with and they cracked! 


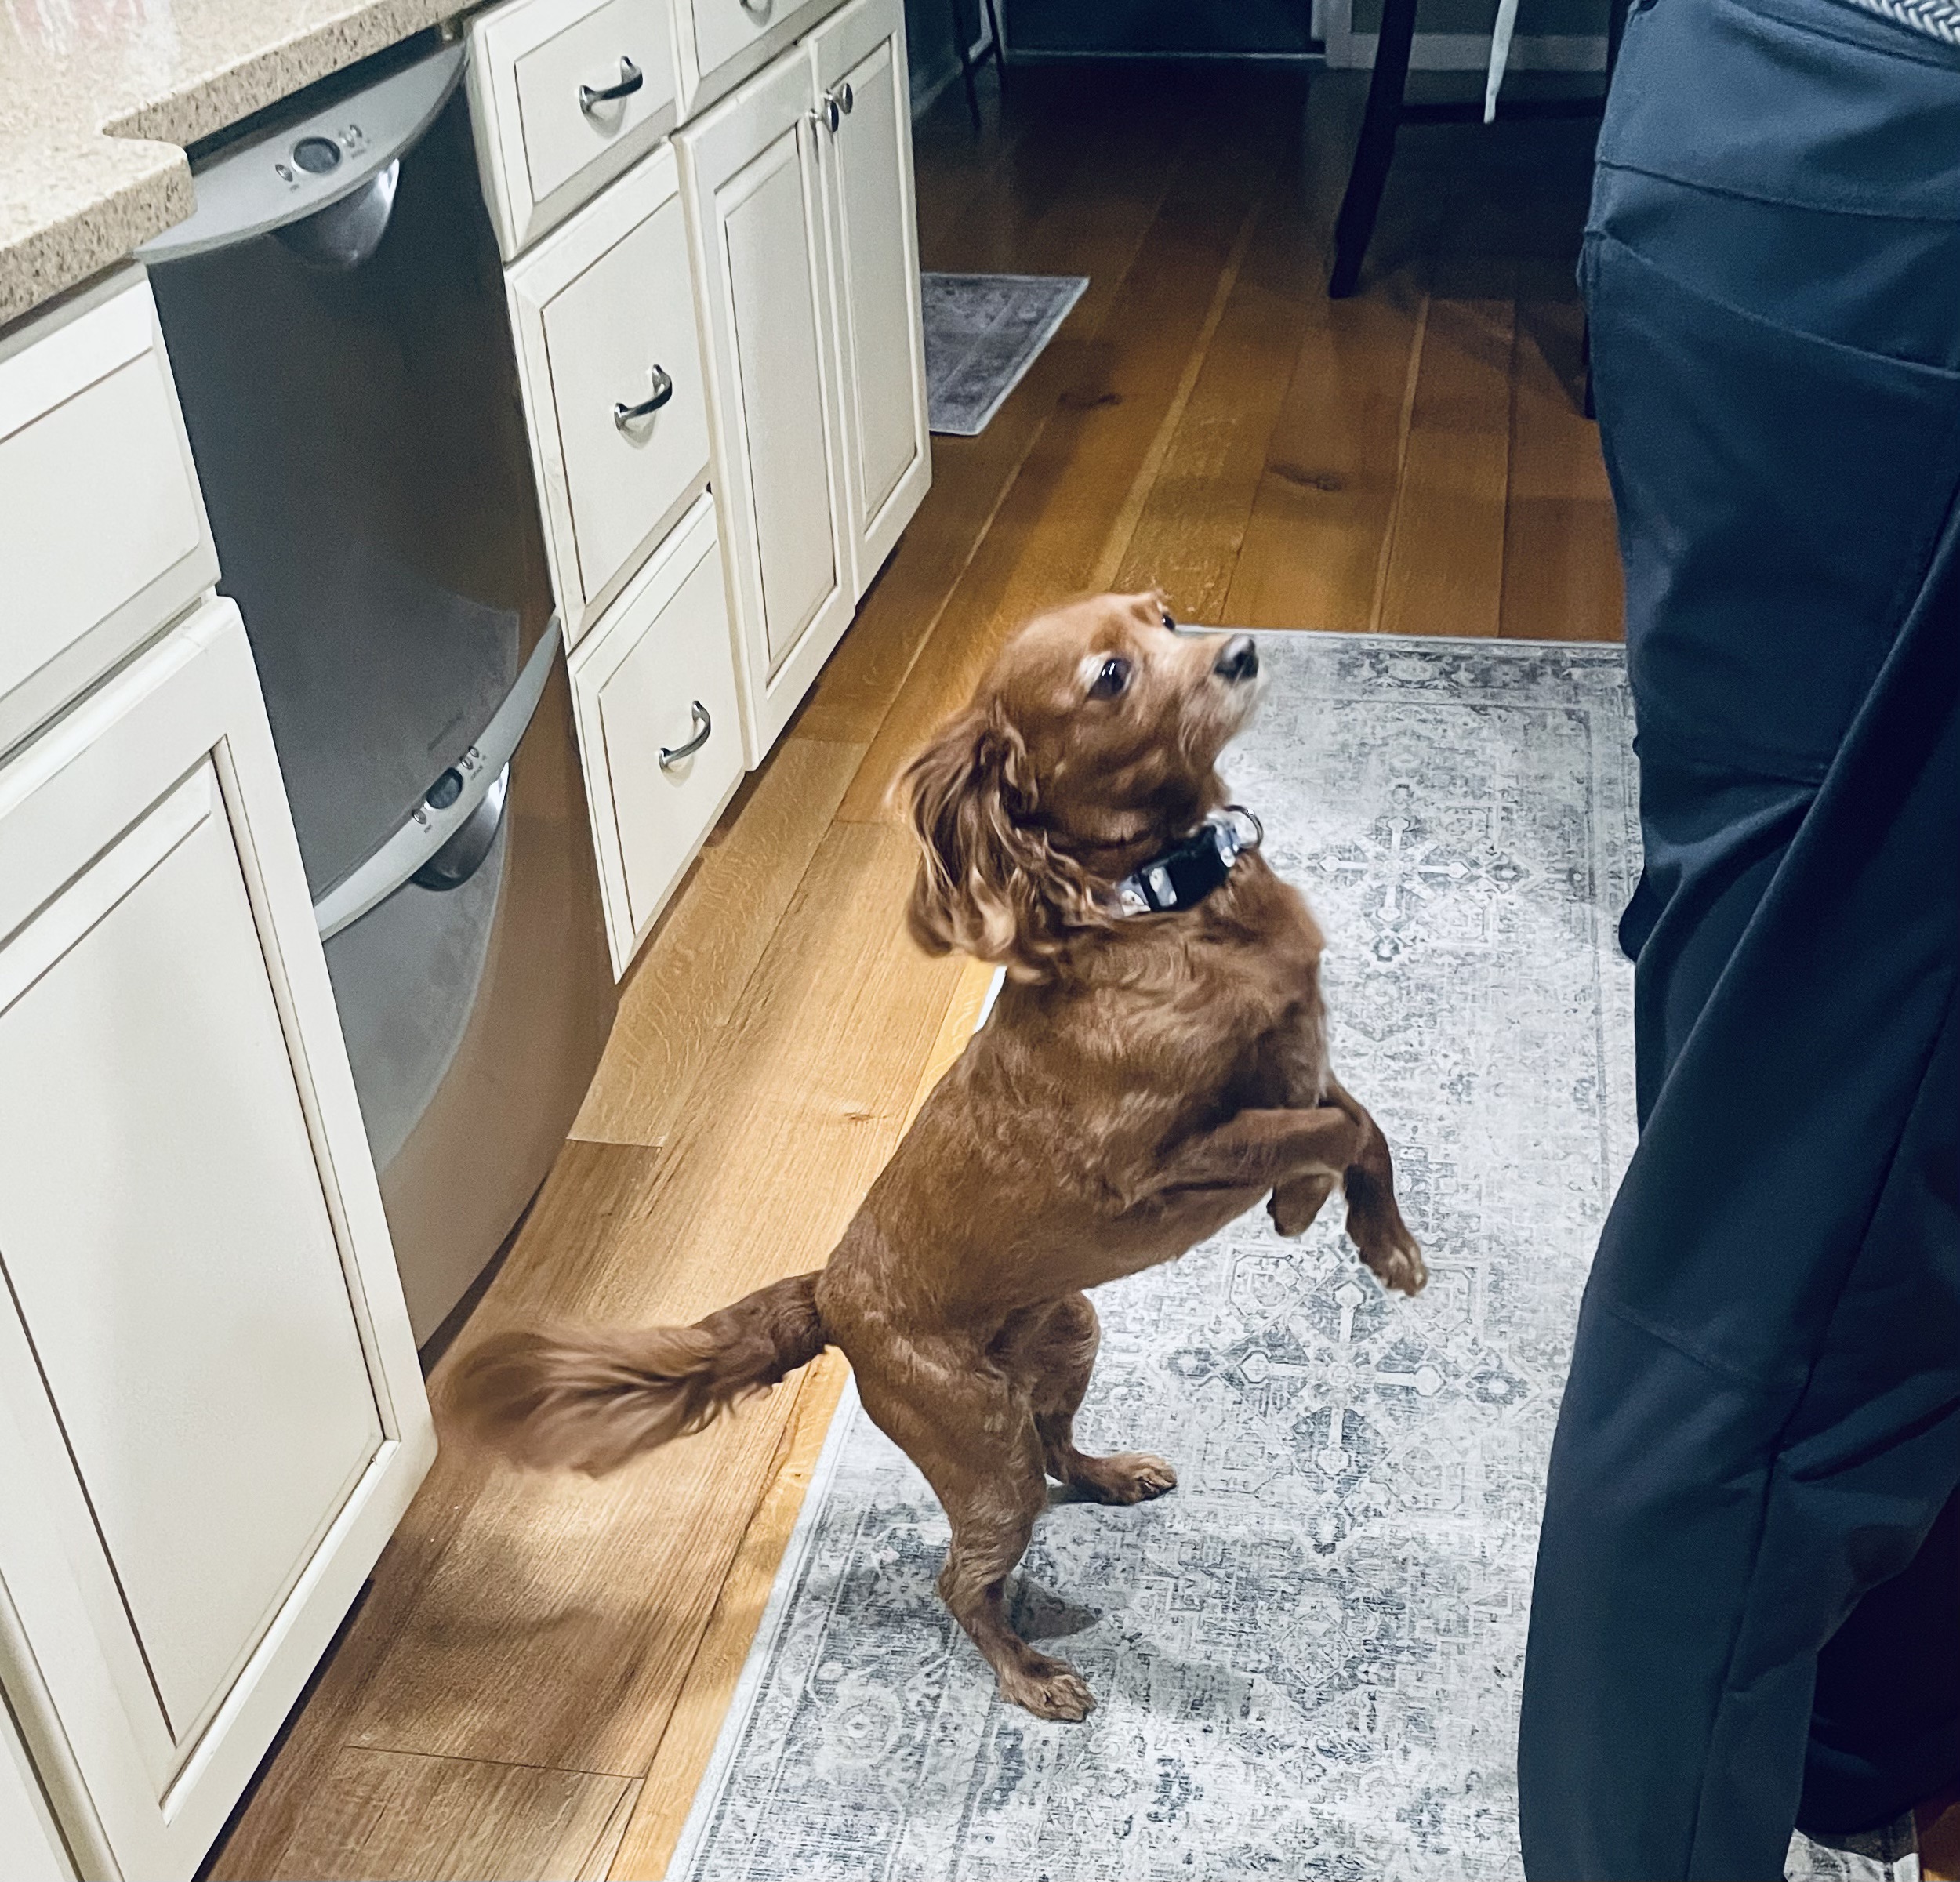
    Jill here - I'm with Lola and think both Sarge and I would love to eat this too hahaha - and I bet the house smells great while it's cooking. Thanks for sharing, Ronda (and Lola)! She sent a short video of a very happy Lola but I can't get it to load - click here to see it on youtube. 


    10.20.20: TT: organizing fabric

    10.20.19: ðŸ”¥week 42


    10.20.17: ghost windsock


    10.20.16: make a Jack O'Lantern candy jar


    Thursday, October 19, 2023

    Chocolate Chevron Cake

    I made this cake for dinner last weekend, it's an Ina Garten recipe (which usually means it'll turn out great haha, I trust her recipes) and it's something different, so I thought I'd make it. There's only 1 layer which I like, we won't have tons of leftovers; it has an unusual ingredient that I was interested in using; and it's pretty - Ina swears it isn't a hard technique and she's right!


    Now having said all that I will add a note: I baked it for an additional 15-20 minutes trying to get the middle to set. I finally pulled it hoping that at least the edges would taste good and have the right consistency, cooled in the pan for 30 minutes before turning onto a wire cooking rack - I could see it wasn't done all the way thru and had the thought that maybe it'd be like molten lava cake? I warned everyone what I expected the outcome to be, but then when we cut into the cake it was perfect! What? I have no idea how that happened - the texture is amazing. Not a crumbly cake texture, not a brownie but close to that texture I guess. It's smooth, dense, rich, thick, and delicious. I don't even like chocolate very much and was blown away by this one! 

    I took a lot of photos, but really it's a very simple cake and you probably don't need any of my pics! 

    for the cake:
    • 8 T. (1 stick) unsalted butter, at room temperature
    • 1 cup sugar
    • 4 extra-large eggs, at room temperature
    • 1 (16 oz) can Hershey's chocolate syrup (1 1/3 cups)
    • 1 T. vanilla extract
    • 1 cup flour
    for the white stripe icing
    • 1 cup confectioners' sugar
    • water
    for the ganache:
    • 1/2 cup heavy cream
    • 8 oz. semisweet chocolate chips
    • 1 t. instant coffee granules

    Preheat oven to 325'. Butter an 8x2 inch round cake pan, line the bottom with parchment paper, then butter and flour the pan, tapping out the excess flour.

    Cream the butter and sugar in the bowl of an electric mixer fitted with the paddle attachment until light and fluffy. With the mixer on low, add the eggs, one at a time, then mix inn the chocolate syrup and vanilla. Add the flour and mix until just combined. Pour the batter into the prepared pan and bake for 40 to 4 minutes, until just set in the middle. Allow to cool in the pan for 30 minutes, then remove from the pan, turn the cake upside down on a wire rack set over a sheet pan, and cool completely.

    For the icing, whisk together the confectioners' sugar with 1 T. water until smooth, thick, and just barely pourable. When you lift the icing from the bowl with the whisk, it should slowly fall back on itself in a ribbon. (You may need to add a few more drops of water.) Fit a pastry bag with a small round pastry tip and fill it with the icing. Set aside while you make the ganache.

    For the ganache, place the heavy cream, chocolate chips, and coffee in a bowl set over a pan of simmering water and heat the mixture until smooth and warm, stirring occasionally. Pour the ganache evenly over the top and sides of the cake, tilting the rack until the ganache is smooth all over.

    Immediately, before the ganache sets, pipe parallel lines about an inch apart across the cake, stopping just short of the edge. Lightly drag the back of a small paring knife through the ganache perpendicular to the white lines also 1 inch apart, alternating directions (first left to right, then right to left, and so on thru all of the lines). Allow the ganache and icing to set. Cut into wedges and serve at room temperature.

    note: you can wrap and refrigerate the cake for a few days, but one it is ganache, leave it at room temperature for up to 8 hours. If you refrigerate it, beads of condensation will form on the ganache and damage the decoration.

    barefoot contessa, cook like a pro 2018

    I made the ganache by microwaving the cream 1 minute until hot,
    then add the chips and coffee granules. Let it sit on the counter until
     the chocolate melts, stir until the cream and chocolate are totally incorporated. 

    put the icing in a plastic baggie, seal the top

    see how the center does not look done? 

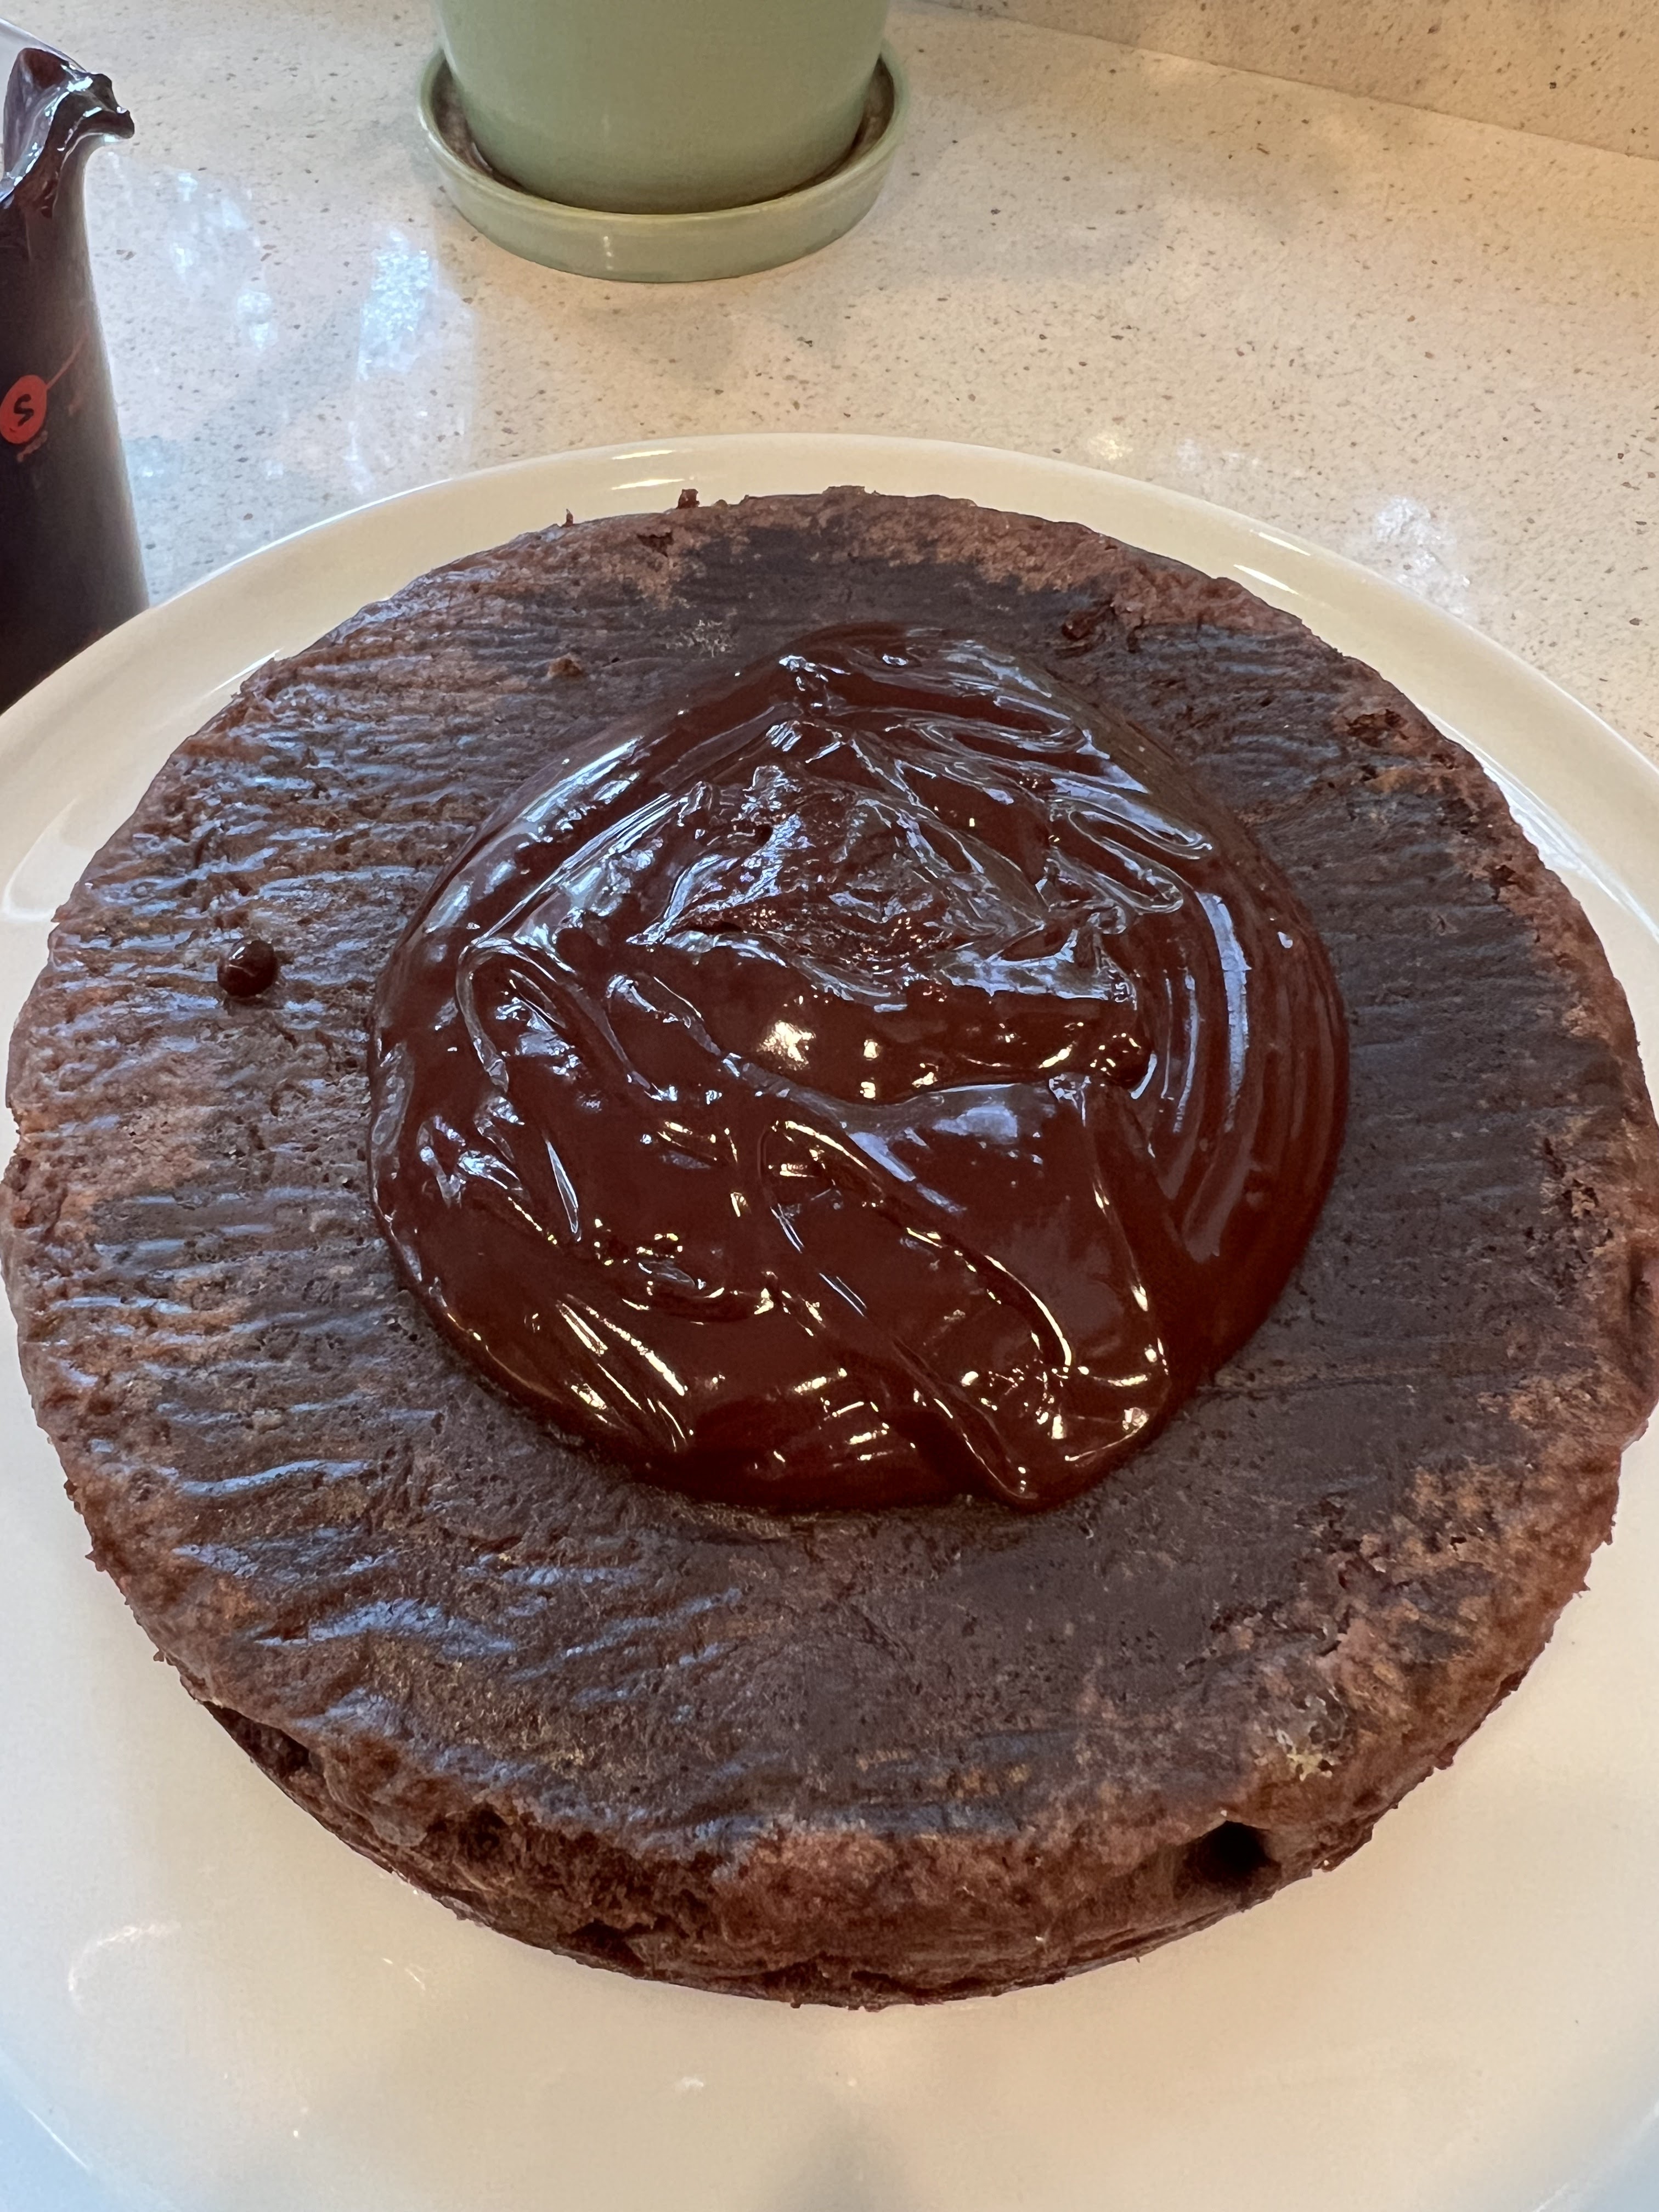
    pour the ganache onto the cake

    spread the ganache across the top and down the sides of the cake 

    smooth the ganache around the sides 

    snip one corner of the baggie of icing

    pipe lines of icing across the top, fortunately this doesn't have to be perfect haha

    lightly drag a knife across the lines left to right


    now drag the knife an inch away from the first line you made,
    this time going from the right to the left

    I pushed too hard on the knife, you don't need to 'cut' into the ganache like this

    repeat dragging back and forth until you've gone thru all of the lines

    in addition to not dragging too deep, it's also prettier if you wipe off 
    the knife after every line (if you don't then you get the chocolate
    mixing into the white like above - still pretty tho!)


    10.19.22: bacon jam re-run
    10.19.21: TT- enchilada sauce


    10.19.19: mummy meatballs


    10.19.18: coffee filter ghost sucker wreath