Wednesday, June 10, 2020

Hidden Painted Rocks

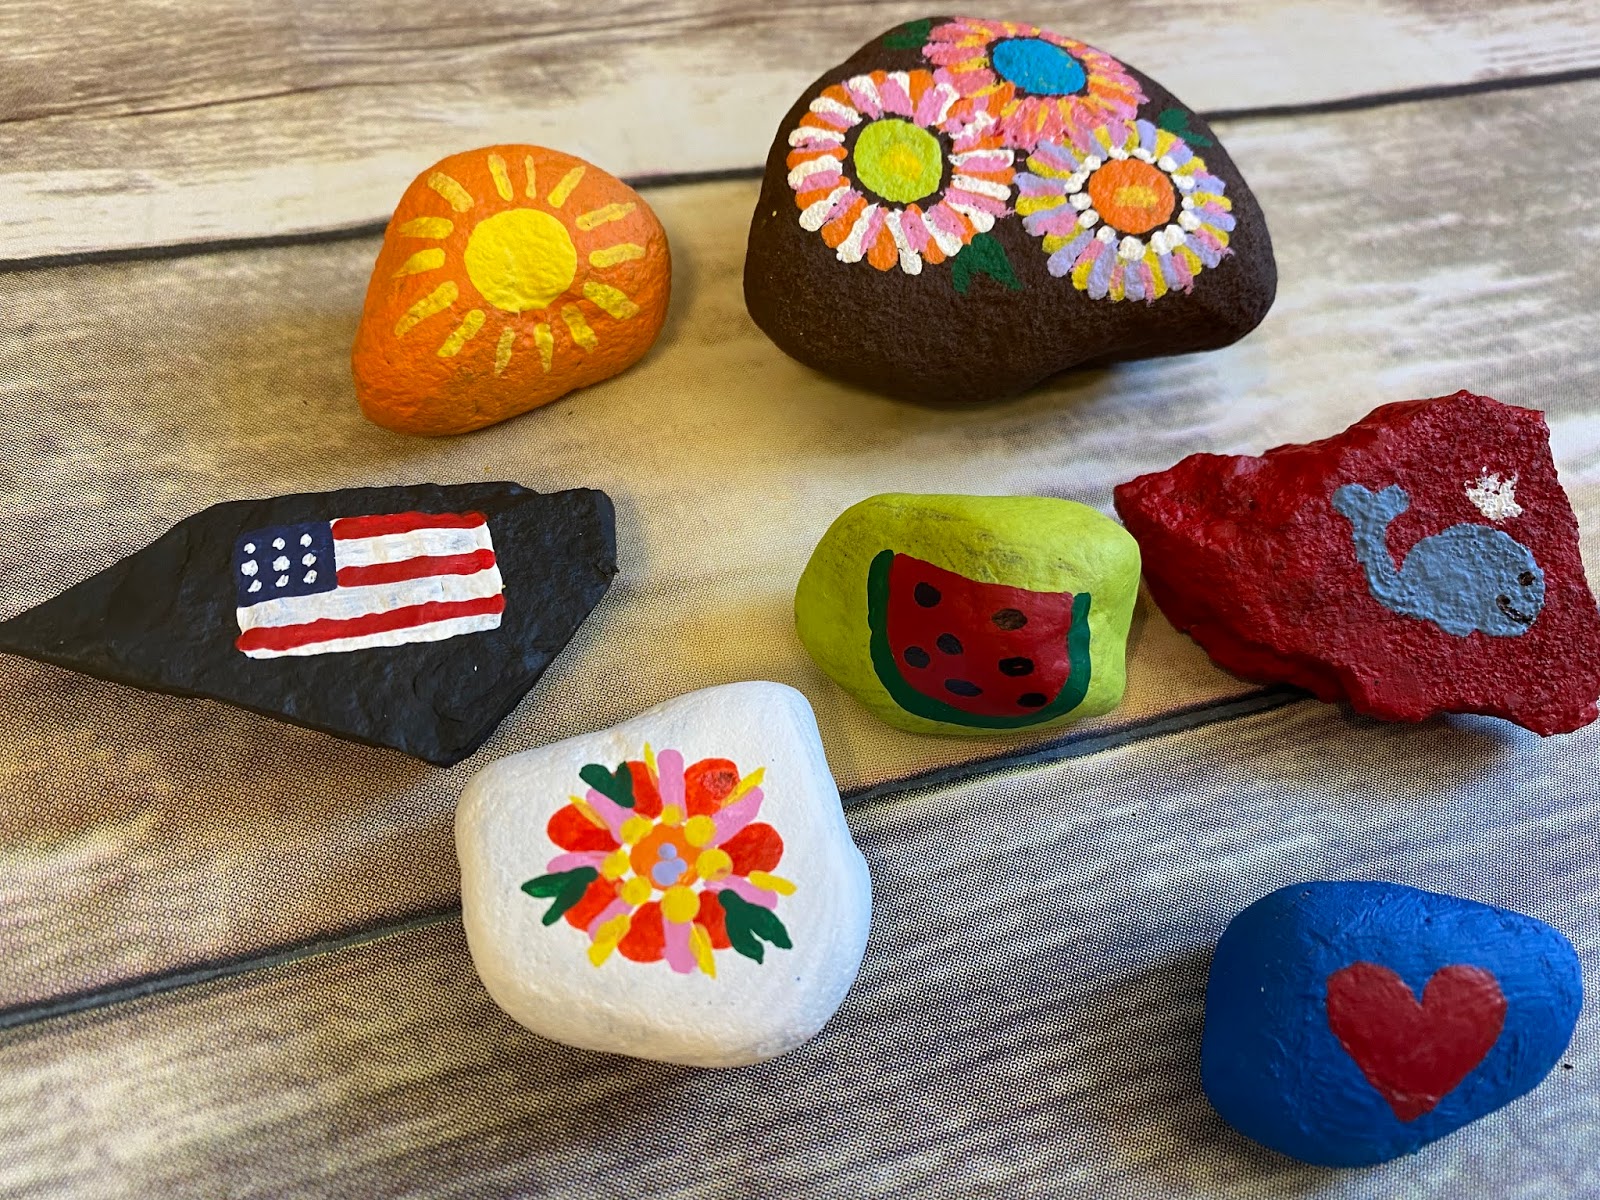
I am new to the 'painting rocks and hiding them around the neighborhood' trend - but better late than never! Tesha told me about a long trail she walks where there are painted rocks tucked into all kinds of places, it makes her happy to walk along and spot them. She painted a few to hide, and to give to her grandkids, I've been saying I'm going to paint some for a couple months now and finally got around to it. My crafting OCD had a hard time letting me just be simple and cute, and very not perfect (!) which actually made this all the more fun. I am not a good artist, so painting simple shapes was the way to go!


Paint the base color all over the rock (I painted the bottoms first, let it dry, then turn over and paint the tops). Once dry, paint on your design - how easy is that?! I just used acrylic craft paints and they might wash off it out in the rain long enough, if I was really serious about them I'd add a clear coat on top but I'm not so...the worst thing that happens is they revert to plain old rocks, no one the wiser, and I had a fun afternoon of painting :)


Now I'll just stash them around the neighborhood tomorrow when we walk Sarge and hope they brighten someone's day!

Here's a couple Tesha made using paint and a sharpie to write cute messages

Tuesday, June 9, 2020

Tip-sy Tuesday: make pesto out of anything

Do you love pesto? I do. But I think I've only ever had pretty standard pesto made from basil, olive oil, garlic, parmesan, pine nuts (occasionally walnuts but I avoid that because of Dave's allergies) - and I make a delish (if I say so myself) citrus pesto (click for that post) that we love on chicken and/or pasta. I recently saw this info on giadzy.com about making pesto out of lots of different ingredients and will be trying some of these suggestions - whodaknew? (Hi Candy!)

*Instead of the traditional basil - try substituting (or a combination of these):
parsley, mint, cilantro, mustard greens, arugula, watercress, spinach, kale, swiss chard, broccoli or broccoli rabe (blanched first), carrot tops, radish tops, beet tops.

*Instead of pine nuts - try walnuts, almonds, cashews, pistachios, pecans, or any nut or seed butter.

*Instead of parmesan - try pecorino romano, grana pasant, gruyere, pave, asiago, manchego, ricotta salt...pretty much any hard-aged cheese. You can even go cheese-less and add more nuts, salt, a dash of soy sauce, or a spoon of miso.

*Instead of garlic - substitute green onion, a small shallot, or ramps. (no, I don't know what a ramp is - hold on, I'll google it...ok, it's a pungent wild onion, sometimes called a wild leek, tastes like a cross between garlic and onion).

*Instead of olive oil - try a neutral mild oil like grapeseed or canola, but it will be lacking a little flavor not using olive oil.

*Additional add-ons - lemon juice, vinegar, green olives, artichoke hearts, peas, sun-dried tomatoes, roasted red peppers.


info found at giadzy.com
Monday, June 8, 2020

Brooke's Copycat Crunchwrap


hey!! it’s brooke!! my mom recently made tacos and i decided to make a taco bell crunch wrap! all you have to do is take a tortilla and put the things you would normally like on your taco in the middle of the tortilla. then you fold the sides over the filling and put it in a pan (folded side down first) and cook it until the outside of the tortilla is golden brown to your liking, then flip it and cook the other side! 


Jill here - I asked a couple questions...she sprayed the pan with PAM first, she didn't do anything to stick the edges of the tortilla together to keep it from coming undone - but it stayed together anyway, and she nuked the filling a bit before assembling her crunch wrap. Oh, and her filling is queso cheese, cooked ground turkey burger, and corn. What a great idea, I'm very impressed! Before knowing B gave this to me to post, Jen texted me that Brooke made a great thing for me to blog and it was delicious :) 

Sunday, June 7, 2020

Around the Campfire 🔥 (week 23)

Dear Campers ~

Here's what happened at camp last week in case you missed anything:

Posts ~

5/31: 🔥week 22
6/1: wine cork plant markers
6/2: tipsy Tuesday: whipping egg whites
6/3: banana, oatmeal, choc chip cookies
6/4: beef and homemade noodles
6/5: family recipe book
6/6: crock pot pork roast

What's Cooking ~
  • tuna melts, potato salad
  • grilled chicken, zucchini chimichangas
  • steak, roasted baby potatoes, spinach
  • grilled pizza, chopped salad
  • chicken tacos, spanish rice
  • grilled tuna, greek salad
Miscellaneous stuff keeping me busy ~
  • read "Ballad of Songbirds and Snakes" by Suzanne Collins, a prequel to the Hunger Games - I really liked it except the ending. After you read it we can talk, no spoiler alert here. Dave said "even I heard she was writing another one, how did you get it so fast?" LOL maybe I have an in with the online library? 
  • planted flowers and my seed bombs on the back deck. gorgeous. I also stuck some bombs in the ground at the campground, I have no idea if planting flowers is allowed hahahah, we'll see if flowers come up and anyone complains!
That's it - we are back north camping for a few days and I've killed my back working on edging our little campsite. Well it seemed little when I started...now, not so much. If you need me I'll be laying on the floor. Stop back this week for more fun projects, recipes, whatever I can think of to make. I forgot to show you Al and Cathy's project that I teased last Sunday, hopefully I'll remember to show you this week!

Sincerely, 


Jill
camp counselor and weekend warrior

Saturday, June 6, 2020

Crock Pot Pork Roast (from frozen)

Here's a very easy recipe that won't heat up your kitchen, is basically hands free, and perfect for when you forgot to thaw a roast ahead of time!


Put a frozen pork roast (we got a costco 4 pack, each approx 2.5 pounds) in a 5-quart crock pot. Add 
1 can cream of mushroom soup and 1 small can mushroom with liquid. Cover and cook on low for 8 hours. Once done, remove the meat to a platter and slice - I didn't use the juice this time, but you can put it in a pan on the stove and add a slurry of cornstarch mixed with water to thicken it up and have gravy. Yum. 

This preparation leaves the roast super moist and flavorful, we love it!


Friday, June 5, 2020

Family Recipe Book

Yesterday I shared Cathy and I having a virtual cooking class making her mom's beef and noodles - Cathy sent me some pictures from the recipe book she made for her family of her mom's recipes, some printed and some handwritten, and I love this idea and how she did it so much I wanted to share: 


Thursday, June 4, 2020

Old-Fashioned Beef and Homemade Noodles

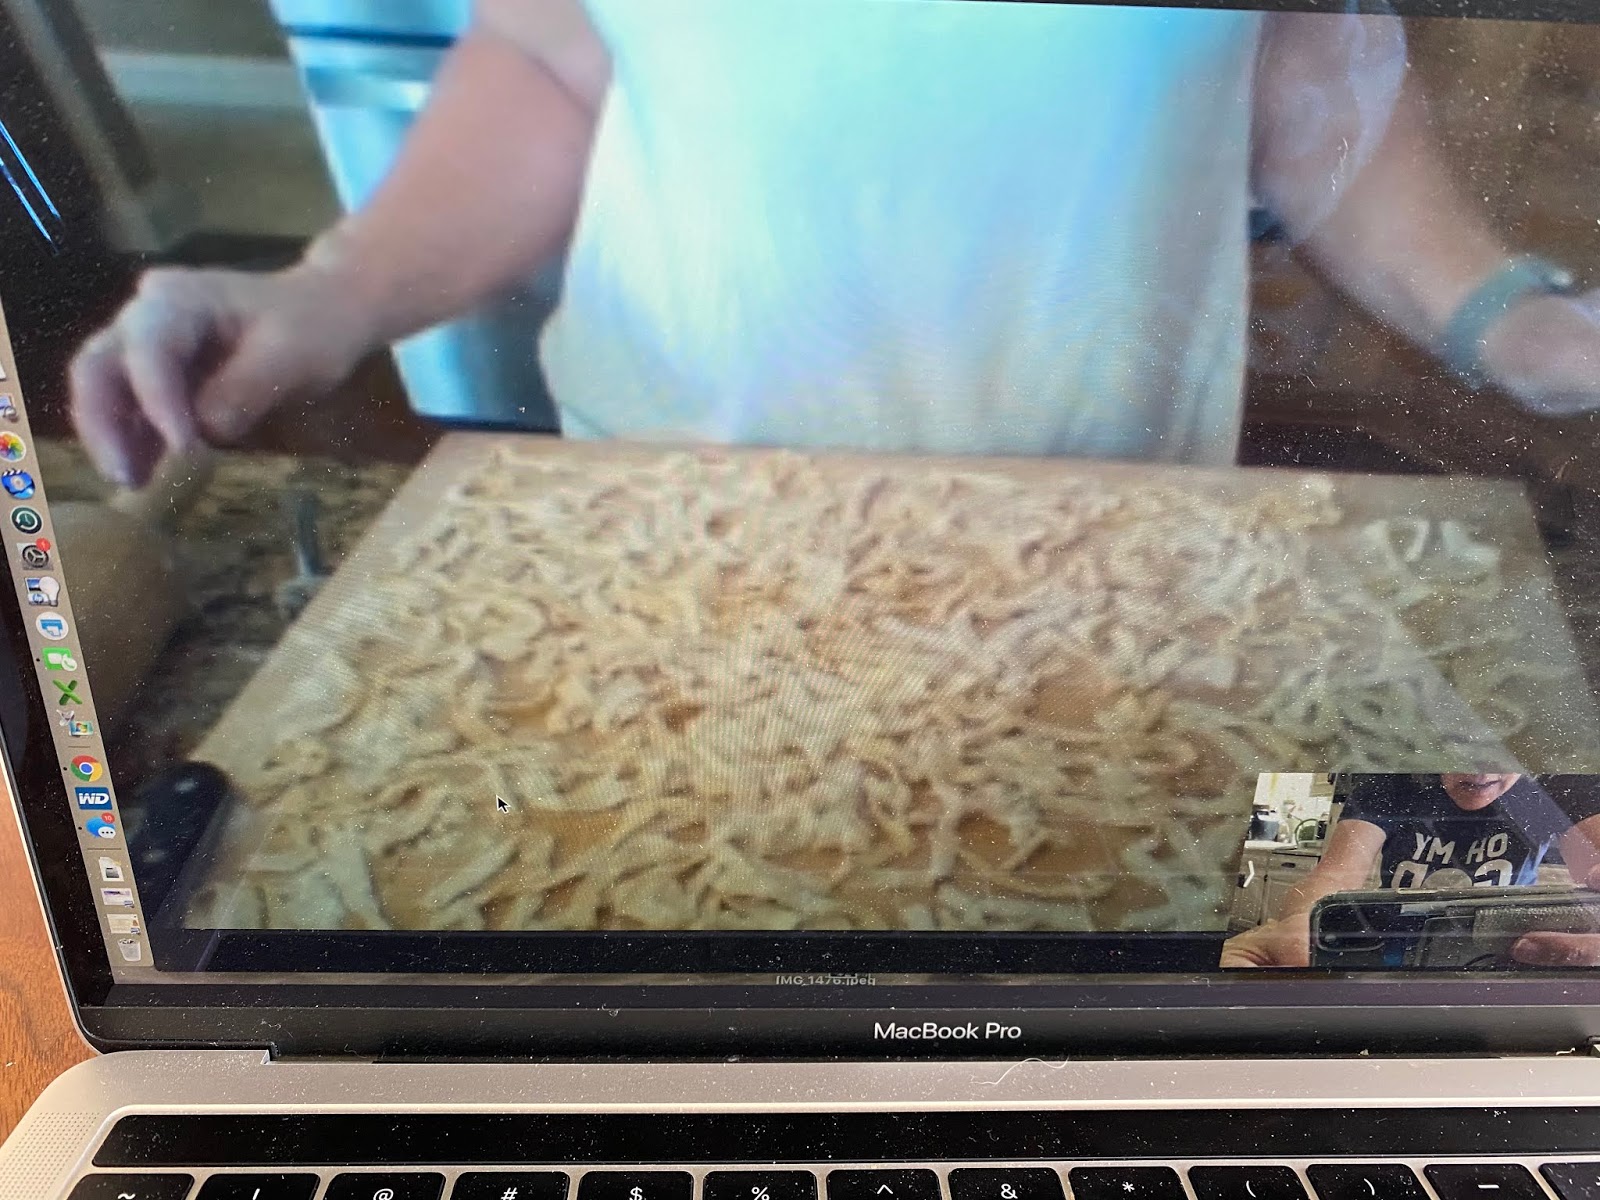
Today's a sort of 'throw back Thursday' recipe even tho it didn't come from the new/old cookbooks I've been using lately - it's an old recipe tho so I'm counting it hahaha. Cathy and I did a very fun thing together - we facetimed making her mom's beef and noodle recipe which was even better than just following the recipe because I got to see the steps in real time with her talking me thru it. It was like watching a cooking show on TV but I could ask questions hahahha which was so helpful. Funny how even tho she was telling me what to do, and I was watching her, we ended up with different sizes - in the end it didn't matter because I don't think you can mess up the recipe by cutting the meat in bigger or smaller chunks (mine were way bigger) or rolling and cutting the noodles different (I had weird little triangle pieces and she had long strands! Also she rolled hers much thinner - Dave said mine were very similar to his moms and he liked them thicker so he was happy. See, can't mess it up!) 

I took lots of pictures, don't let that freak you out about this being hard or very time consuming - I just know it helped me to see exactly what Cathy was doing and what each step was supposed to look like, so I'm including photos of each step. 


2.5 pounds chuck shoulder english roast
onion cut into chunks*
1 can beef consume*
1 can water
flour
salt and pepper

Note, Cathy doesn't use consume, just a cup of water, and adds a packet of dry onion soup mix but I didn't have any so used an onion and consume to boost the gravy flavor instead.

Cut the roast into cubes. Put some flour, salt and pepper in a large ziplock bag, add the beef and toss around until the meat is coated with flour. Remove the meat from the baggie, put in a crockpot along with onion, beef consume and water. Cook on high for up to 4 hours until the meat is cooked and tender.


Homemade Noodles:


A few additional notes:

  • Cathy cut her roast into smaller cubes and it only took a couple hours on high for the meat to be done. Mine were bigger pieces and cooked for 4 hours. 
  • I questioned why the folding of the dough into wedges and slicing on the angles (which is how I got all the little triangle pieces), why not roll out into a big triangle and fold into smaller triangle and cut straight across which would produce more uniform strands? Cathy didn't have an answer so next time I make these I'm trying just straight folding!
  • after you cut and dry the noodles, bring 32 oz. beef broth to a boil in a large deep skillet like the black pan in the picture above. I thought I was going to use the stock pot to the left, but Cathy makes hers in an approximately 4" deep skillet. Add the dry noodles along with all the flour on the cutting board, boil the noodles until fully cooked. Don't drain. The flour on the noodles and the board help to thicken the sauce. 
  • add the beef and gravy from the crockpot (I had about 3 cups) to the noodles and broth. Simmer until the gravy thickens, mine was soupy but after it simmered for a while it thickened up. 
  • we served this in shallow pasta bowls. 


Wednesday, June 3, 2020

My Sis is Hungry: Banana, Oatmeal, and Double-Chip Cookies

Funny, not funny, story about these cookies. My nieces love their grandma's banana oatmeal cookies so I asked if one of them has the recipe, but nope - they just google for one when they want to make them. So I googled and randomly picked a recipe but changed to dark chocolate and butterscotch chip because I had them on hand and it sounded good. Then my sis reviews them (spoiler alert, she likes them!) so I sit down to write up the post and do you think I can find which recipe I used? No I can't! It's driving me crazy. So I made a second batch following the above changes, which seems like a pretty straightforward cookie recipe, just to make sure they are similar if not the exactly the same - what if I told you this is the recipe and then they don't turn out? I'd be a jerk. Oh, and I don't like soft bread-y cookies so these don't do it for me but she loves them so she got her request - for me to make some more and send them over LOL! Good grief. Here's her review:


I got the most amazing cookies.  I can't even tell you how much I liked these cookies.  I will say that’s probably because I LOVE bread. (do I sound like Oprah there?) hahaha... I do love bread.  All forms of it.  And these cookies were very fluffy and thick like bread.  Actually more like a muffin.  Which I also love. HAHA.  Now that said, the husband didn’t love.  He likes his cookies crunchy (weirdo).  And he isn’t a big muffin/bread fan.  But who cares what he likes?  For me the texture was perfect. And I loved the flavor.  Banana maybe and chocolate chips?  Didn’t take the time to evaluate what was inside just scarfed them down. (yes I said scarfed.  Not ladylike but accurate description). 

Delicious.  I think perhaps I should review them again because I’m not quite sure.  Send some more over and I’ll let you know.

BANANA, OATMEAL, CHOCOLATE CHIP COOKIES
  • 3/4 cup (1 and 1/2 sticks) butter, softened
  • 1/2 cup granulated sugar
  • 1/4 cup packed brown sugar
  • 1 large egg
  • 1T. vanilla extract
  • 3/4 cup mashed bananas (about 2 bananas)
  • 1 1/2 cup flour
  • 1 t. ground cinnamon
  • 1 t. baking soda
  • 1/2 t. coarse salt
  • 3 cups old-fashioned oats
  • 1 cup dark chocolate chips
  • 1 cup butterscotch chips
1. Preheat oven to 350' and line baking sheets with parchment paper. 
2. Beat butter and sugar until light and fluffy. Add egg and vanilla, beat until combined and then stir in bananas. 
3. In another bowl whisk together the four, cinnamon, soda and salt. Add to the butter mixture until just combined. Fold in the oats and chocolate chips.
4. Scoop dough in small balls (I use my small cookie scoop, I think it's 2 teaspoons) and drop on baking sheet 2" apart. Bake for approx 12 minutes until set. Cool on wire rack. 

*Jill here - I sent her a plate of the above recipe to see if she thought they were the same - here's our text conversation:  

Tuesday, June 2, 2020

Tip-sy Tuesday: Whipping Egg Whites

I posted how to whip egg whites in the Southern Spoon Bread post from 1/23/20, but reposting it in case the tip got lost in the details. I had some really sweet strawberries the other day and it made me want some angel food cake and whipped cream to go with - you need whipped egg whites to make angel food cake (if you aren't just going to buy it like I always do hahah), or to make meringue pie topping (which I hate - but you do you), or a souffle...it's a good thing to know.

First make sure you don't get any yolk in the egg whites when you separate the eggs. Let the whites stand for a bit to bring to room temperature. You can beat them by hand but I use my standing mixer with the balloon whisk attachment, turn on high and let it go until the whites are stiff and foamy, looks like whipped cream. You'll know they're stiff enough if peaks form when you remove the whisk.


Monday, June 1, 2020

Wine Cork Plant Markers

It's been a long time since I've done a wine cork craft - and not because I stopped drinking wine and have run out corks LOL. Mickey sent me a bunch of plant marker ideas and they got me thinking maybe I could make some out of corks; I googled and got a couple different ideas, by combining a few of them I came up with these. Silly, fun, and of course practical hahaha - I'm enjoying how they turned out!


So easy - stick the pointy end of a bamboo skewer into one end of the cork (I stuck it in the end that the corkscrew hole is already in); using painters tape cover part of the cork - it doesn't stick to the cork itself very good so wrap around until it overlaps itself and then it sticks; paint the exposed cork whatever color you want, light colors are probably best so you can read the words you'll be adding; let it dry. I stood them up in an empty can while they were drying.


Once dry, remove the tape and write on the plant name using a sharpie. You can be done here, or jazz them up a bit more like I did by twisting some thin wire and adding beads, then stick the end of the wire into the top of the cork.


I did a couple with regular corks, and a couple with plastic corks. Both work, the paint sticks to the natural cork better with just one coat, the plastic took 2 coats. I used regular acrylic craft paint, we'll see what happens after they get rained on! If you want to make sure they stay nice and pretty you could spray with a clear coat.