Tuesday, December 1, 2020

Tip-sy Tuesday: making turkey stock

First day of December and it's really cold here. And even tho I'm always a soup lover today I'm especially thinking of having something to warm me up - so when I opened the fridge and saw the big bag holding the turkey bones from last weeks feast I thought aha! I should make stock! So I'm writing this and then I'm off to do just that. 

If you still have the leftover turkey bones on hand I can easily help you make stock - it's simple. Put the carcass along with some veggies in a large pot - halved onions, carrot chunks (no need to peel), and celery stalks are all good choices. Add a tablespoon or two of whole black peppercorns, herbs if you have them on hand  (I don't and that's fine). Cover the whole mess with water and bring to a boil, then turn down to simmer for about 3 hours until the liquid is reduced by half.


Set a fine mesh strainer over a large bowl or glass measuring bowl, pull out the bones and big chunks of veggies using tongs and set in the strainer, then pour the rest of the liquid into the strainer. If you want the stock even clearer, rinse out the strainer and then line it with a piece of cheesecloth and pour the strained stock back thru. 

Divide the stock into smaller containers (unless you are going to make soup or use it right away) and cool completely. Store in the fridge for a week, or freeze it for later. 

I'm posting this before finishing, I'll update with photos when I'm done!

Monday, November 30, 2020

Penne Alla Vodka

I love cookbooks and it's very hard for me to not collect them - I finally ran out of room in the cabinet and had to pare down (just enough so what I kept fits easily in the space allotted to them!). One that I kept, no questions asked, is actually the first cookbook I got as an adult (I say as an adult because chances are I even had cookbooks as a kid but they didn't transition to 'real-life' with me), it's the 'Glamour's Gourmet on the Run: a Busy Woman's Guide to 30-minutes meals and effortless entertaining'. Yes it's a long title haha but pretty much every recipe I've made from this book is good.

I know you don't care about my old 80's cookbook story LOL but I told you anyway. 

I posted the Ina Garten recipe for a different tomato/vodka sauce that Al made us a while back (which is really good, click here for that recipe) and now I'm sharing the one that I've been making forever - well, since 1987 anyway - it's beyond simple to make and much quicker than Ina's version. It has ham and peas in it - which may or may not be traditional in penne alla vodka, I have no idea, but either way this is really good and one of our favorites.

PENNE ALLA VODKA ~
  • 1 (16 oz) pkg. penne, cooked according to label directions
  • 1 medium onion, diced
  • 4 T. butter
  • 1 (16 oz) can tomatoes, drained
  • 1 (8 oz) can tomato sauce
  • 2/3 cup vodka
  • 1 cup heavy or whipping cream
  • 1/4 lb. ham, diced
  • 1 cup frozen peas, thawed
  • 1/4 to 1/2 tsp. crushed red pepper flakes
  • grated parmesan cheese
Cook pasta according to label directions. In the meantime, melt the butter in a large skillet over medium-high heat, add onion and cook until tender, about 5 minutes. Add tomatoes and tomato sauce. Add vodka; cook 5 minutes. Blend in cream; heat to boiling. Add remaining ingredients except cheese and heat through. Toss with hot drained pasta. Serve with grated parmesan cheese. Makes 6 servings. 

sorry I don't have a picture - I was going to copy someone else's photo hahaha but just use your imagination and picture penne coated in a creamy pinkish tomato sauce with ham and peas and you'll have an idea what it looks like! Next time I make this I'll remember a photo and update later...oh, and for all you non-pea and/or ham lovers - you can totally leave them out. 

2025 update: I finally remembered to take a picture! 

So easy - I usually leave out the onions because Dave doesn't like them,
but let's not tell him I sprinkle a little onion powder in with the tomatoes.
After boiling the tomatoes and vodka you just add the cream to make the
sauce, that's it! Also, I like lots of sauce so I only add 1/2 box of cooked penne
to the entire amount of sauce. 


Sunday, November 29, 2020

🔥Around the Campfire (week 48)

 Dear Campers ~

A quick recap in case you missed anything at MMDC last week:

Posts ~

11/22: 🔥week 47

11/23: wait a minute, what happened to monday's post?!!! 🤦‍♀️

11/24: tip-sy tuesday: gravy

11/25: how to roast a turkey

11/26: happy thanksgiving

11/27: the moistmaker sandwich

11/28: cast iron blackened salmon

What's Cooking ~

  • turkey, obviously
  • turkey leftovers, obviously (we put shredded turkey in a saucepan and cover with gravy. Heat up and then serve over leftover stuffing - it's yum)
  • shake and bake pork chops, roasted broccoli
  • steak, mushrooms, caesar salad, baked steak fries, horseradish sauce
  • grilled chicken, roasted baby potatoes, asparagus
  • blackened salmon, couscous, green beans
Miscellaneous stuff keeping me busy - apparently too busy to pay attention to what is being posted and missing Monday:
  • let's see, what could be keeping me busy the weekend after Thanksgiving? Hello, decorating!
  • note to self - check the light strands are working before you spend hours outside only to plug them in and have them not light. good grief. 
  • read 'Anxious People' by Fredrik Backman, who I've loved ever since reading 'The Man called Ove' but this one just didn't do it for me. A simple story told by at least 8 people's perspectives and let me tell you that got a little old. ⭐️⭐️1/2
  • also read '28 Summers' by Elin Hilderbrand and also wasn't thrilled. It was a downer all based on 2 people not just making the right choices. At least the right choices in my opinion hahaha. ⭐️⭐️1/2
That's it - I have to keep moving...let the cyber shopping begin!! Hope to see you next week, stop back often and I'll do my best to not skip days!

Sincerely ~


Jill
camp counselor


Saturday, November 28, 2020

Cast Iron Blackened Salmon

Here's the other cast iron recipe that has become a new staple in my house - blackened salmon. If you need a break from the turkey leftovers this might be the perfect lighter meal hahahah - I cannot eat more stuffing. I'm stuffed with stuffing. Fish seems like a much needed break! 

I learned the method from my sister (gasp, yes that sister, the self-proclaimed non-cook!), and it's simple:

1. Season the salmon filets or pieces with whatever blackening or spices you like - she does a mixture of 2 spice blends that I can't remember, I didn't pay attention because she likes her blackened fish spicier than I do, I season ours with my favorite Paul Prudhomme's salmon seasoning blend. 


2. Heat the cast iron skillet dry over medium heat for a couple minutes, then add a small amount of canola oil and let it heat over medium heat until a droplet of water sizzles. Add the salmon and cook 6 minutes per side, or until it's done to your liking. (I do mine longer, I know it's 'wrong' but I like my salmon cooked well-done). That's it! Easy-peasy, crunchy exterior, quick, and (depending how much oil you use) it's healthy! 


We like to serve it with parmesan couscous and roasted broccoli - yum. This is so good!! 

Friday, November 27, 2020

The One with Ross' Sandwich (the Moist Maker)

The "moist maker". Do you remember this episode of Friends about the Thanksgiving leftover sandwich Ross loves? The secret is a slice of gravy soaked bread in the middle, hence 'the moist maker' layer. I have never made it - and quite truthfully it's sounds a little gross to me hahahah - but if Dave knew about this sandwich I would definitely have to make it for him... so shhhhhhh, it'll be our little secret! Check it out and see if you want to make this with your leftovers and let me know if it really is amazing and maybe I'll surprise him with one ;)


Ingredients:

  • 3 slices sandwich bread
  • mayo (optional)
  • romaine lettuce
  • 1/4 cup gravy 
  • 1/2 cup leftover turkey slices (or deli-style turkey)
  • 1/4 cup cranberry sauce
  • 1/4 cup stuffing
Directions:

1. Lay out a slice of bread. If using mayo, spread an even layer over the slice of bread then top with lettuce. Add half the turkey, and half of the stuffing.

2. Pour the leftover gravy into a shallow dish. Dip a second slice of bread into the gravy and turn to coat. Add this moist maker slice on top of the stuffing. 

3. Add another layer of lettuce, the remaining turkey, cranberry sauce, and the rest of the stuffing, then top with the final slice of bread. Use a large toothpick to hold everything together. 

This recipe is from insider.com and is supposedly the official recipe, the photo is from delish.com (note the photo isn't layered like the recipe states, who knows which is correct hahaha. Just layer your leftovers with a gravy soaked piece of bread in the middle and it's all going to taste the same!).

Thursday, November 26, 2020

Happy Thanksgiving 2020

This is pretty much my standard Thanksgiving day post, but it still says what I'm thinking so I'm doing an almost repeat again :) 


2020 has been a difficult year, and with the stay-at-home and social distancing warnings I doubt very many people are doing the big family dinner or having a friendsgiving party - but no matter where you are and who you are with I hope you enjoy your day! 

I'm thankful and grateful for so many things - among them are my faith, my family and friends, my furry and feathery kids, gravy, and you guys reading my blog of course! Happy Thanksgiving from my house to yours. 


Wednesday, November 25, 2020

So You Are Going to Roast a Turkey...

How many of you are about to roast your first turkey (thanks to the pandemic and everyone staying at home instead of going to Grandma's where she provides the turkey!)? Last year I took lots of pictures of how I do it, intending to share this year (look at me preparing ahead) before knowing that sucky Covid would be in the picture and more people might need some directions! This is not complicated, I keep my turkey prep pretty simple - yes if you Google there are SO many ways to roast a turkey but this is what I do and it turns out great every year. So read thru these steps, change the seasonings if you want, heck you can even omit or add steps if you want to combine recipes (cuz I've never done that hahahha).  

Oh, a couple things before you begin (if you're making it my way) - you need a thawed turkey, herb butter, olive oil, salt and pepper, veggies and fruits to stuff in the cavity and lay under the bird, and an oven bag.

To make herb butter: stir chopped herbs into softened butter. See, easy so far! Think poultry seasoning flavors like thyme, sage, rosemary, etc. 

1. This is my least favorite part but just suck it up and do it, don't think about it! When you take the wrapper off the turkey it'll look something like this. The neck and giblets are usually in bags stuffed in both ends of the turkey. Remove both (if the neck isn't in a bag you'll just have to fish it out with your hand, don't get all wussy on me - just grab it!), empty the contents into a large saucepan. Put aside.


2. Rinse inside and out, pat dry with paper towels. 


3. Gently slide your fingers underneath the breast skin to loosen it, creating a pocket between the meat and skin. Try to not rip the skin, loosen as far down as you can go. 


5. Now it's time to add the softened herb butter underneath the skin. I scoop it up with my fingers and push it into the pocket, press down on top of the skin to smooth and spread it around. 


6. Take a second to make sure your helper is paying attention!


7. drizzle the entire bird with olive oil, season with salt and pepper.


8.  Insert fruit or veggies into the empty cavity - I just use what I have on hand, usually I'll insert an apple cut in half, or halved lemons, or whole herbs, you can also do chunks of onions, etc. This is really just a wing it step, it's fine if you don't add anything but I feel like it helps to keep the meat moist and adds some additional flavors. Note: I don't usually put stuffing in the bird, if you want that tho I'd use a stuffing bag to make removing it easier, and skip the fruit/veggies.


9. Tesha gave me the tip years ago to roast the turkey in a large oven bag - it really works!


10. From now on I just follow the package directions: open the bag and place in a roasting pan fitted with a rack, add a little flour and shake it around, add a few veggies or fruit that you'll rest the turkey on top of - carrots, celery, onions, apple...whatever you have.


11. Tuck the legs under the loose skin at the bottom if you can. Add the turkey to the bag on top of the veggies. Tie according to package directions.


12. Cut a few slits in the top of the bag.


13. Roast according to package directions for the size of your bird. 


14. While the turkey is roasting make turkey broth for the gravy using the neck and giblets you took out in step one. Put them in a pot and fill it up with water. If you have the time and inclination you can add other things to the pot for additional flavor - like onions, celery, peppercorns...bring it to a boil then reduce heat to a gentle simmer, cover, let it cook for a couple hours making sure it doesn't boil over or reduce too much  (add more water if it does). Strain the broth into a glass measuring cup (you need 4 cups for this recipe, if you have more than that you can save it for other uses), discard the solids. Reheat the broth when you're ready to make the gravy. Click here for yesterday's post about how to make gravy. 


You can do it!! Good luck, let me know how it turns out! Happy Thanksgiving!


Tuesday, November 24, 2020

Tip-sy-Tuesday: gravy

I've posted and reposted this before, but with Thanksgiving a couple days away and maybe lots of you staying home instead of going to the big family/friend dinner like usual and you're thinking 'how the heck do I make gravy', I've got you and am reposting how to make gravy for the umpteenth time! Don't worry, follow these directions and you'll amaze yourself that you made gravy from scratch. 

The thought of making gravy used to intimidate and scare me but after I found these instructions in the LA Times newspaper years ago (you know it's years ago because who gets a newspaper anymore?) I've had good luck.  


Ingredients (for 4 cups)
  • 1/2 cup turkey fat and/or melted butter
  • 1/2 cup flour
  • 4 cups turkey broth (directions below how to make it, or just use store-bought!)

To get the turkey fat: after roasting the turkey drain off the drippings and measure out 1/2 cup of fat (it's easiest if you have a fat separator but you can separate by hand - let the drippings rest in a clear measuring cup until the fat rises to the top then spoon it off). If you don't have enough fat add enough melted butter to equal 1/2 cup total. 


To make the turkey broth: put the bits that come out of the turkey before you roast it (you know, the neck and giblets - yuck) in a pot and fill it up with water. If you have the time and inclination you can add other things to the pot for additional flavor - like onions, celery, peppercorns...bring it to a boil then reduce heat to a gentle simmer, cover, let it cook for a couple hours making sure it doesn't boil over or reduce too much  (add more water if it does). Strain the broth into a glass measuring cup (you need 4 cups for this recipe, if you have more than that you can save it for other uses), discard the solids. Reheat the broth when you're ready to make the gravy.


To make turkey gravy: heat the 1/2 cup of fat in a large saucepan over medium heat. Whisk in 1/2 cup of flour and cook, stirring constantly for a couple minutes to cook off the flour taste. Remove from heat, gradually whisk in 4 cups of warm turkey broth (Note: I do this step very slowly, maybe 1/3 cup of broth at a time stirring constantly until the broth is incorporated into the flour, then add another 1/3 cup... continue adding very slowly and you won't have lumps). After all the broth is mixed in, return pan to the heat and cook until bubbly, thick, and smooth - keep stirring and watch closely that it doesn't stick to the bottom of the pan. Season with salt and pepper to taste. Makes 4 cups and its yummy.


Monday, November 23, 2020

🔥Around the Campfire (week 47)

 Dear Campers ~

Here's a quick recap of what happened at camp last week in case you missed anything:

Posts ~

11/15: 🔥week 46

11/16: cast iron skillet pizza

11/17: tip-sy tuesday: caring for cast iron

11/18: loaded cream cheese brownies

11/19: loaded 'lazy girl' brownies

11/20: Brooke's apple pie hack

11/21: maple dijon chicken thighs

What's Cooking ~

  • crock pot corned beef and cabbage; roasted carrots and potatoes
  • maple dijon chicken thighs with butternut squash and green beans 
  • grilled steak, baked steak fries, sautéed mushrooms, caesar salad
  • crock pot chicken stroganoff
  • grilled chicken, spinach ravioli, roasted asparagus
That's it for this week, I've still been working on organizing the basement storage room and started going thru Christmas decorations - no time for anything else! What a mess hahaha. Hope you'll stop by next week to see more recipes, projects, crafts, and whatever else I can think of to make!! 

Sincerely ~


Jill
camp counselor

Saturday, November 21, 2020

Maple-Dijon Chicken Thighs

This recipe came in an email from Parents.com - I'm not a parent (unless you count the dog and parrot) and have no idea how I got on a parents email list but the bigger question I have is what kid is going to eat this? Haha, I might not have a kid but I'm pretty sure my niece wouldn't touch this - however, I made it for Dave and I and we loved it. So kid-friendly or not, it's a delicious simple meal that tastes great! Here's the recipe as written, with my changes noted after.


  • 8 (6 oz) bone-in, skin-on chicken thighs (4 lbs. total)
  • 1/2 t. salt
  • 1/4 t. pepper
  • 3 cups butternut squash, cut into 1" cubes
  • 8 oz. fresh green beans, trimmed
  • 1/4 cup maple syrup
  • 1/4 cup Dijon mustard
  • 1 t. flour
  • 1 t. water
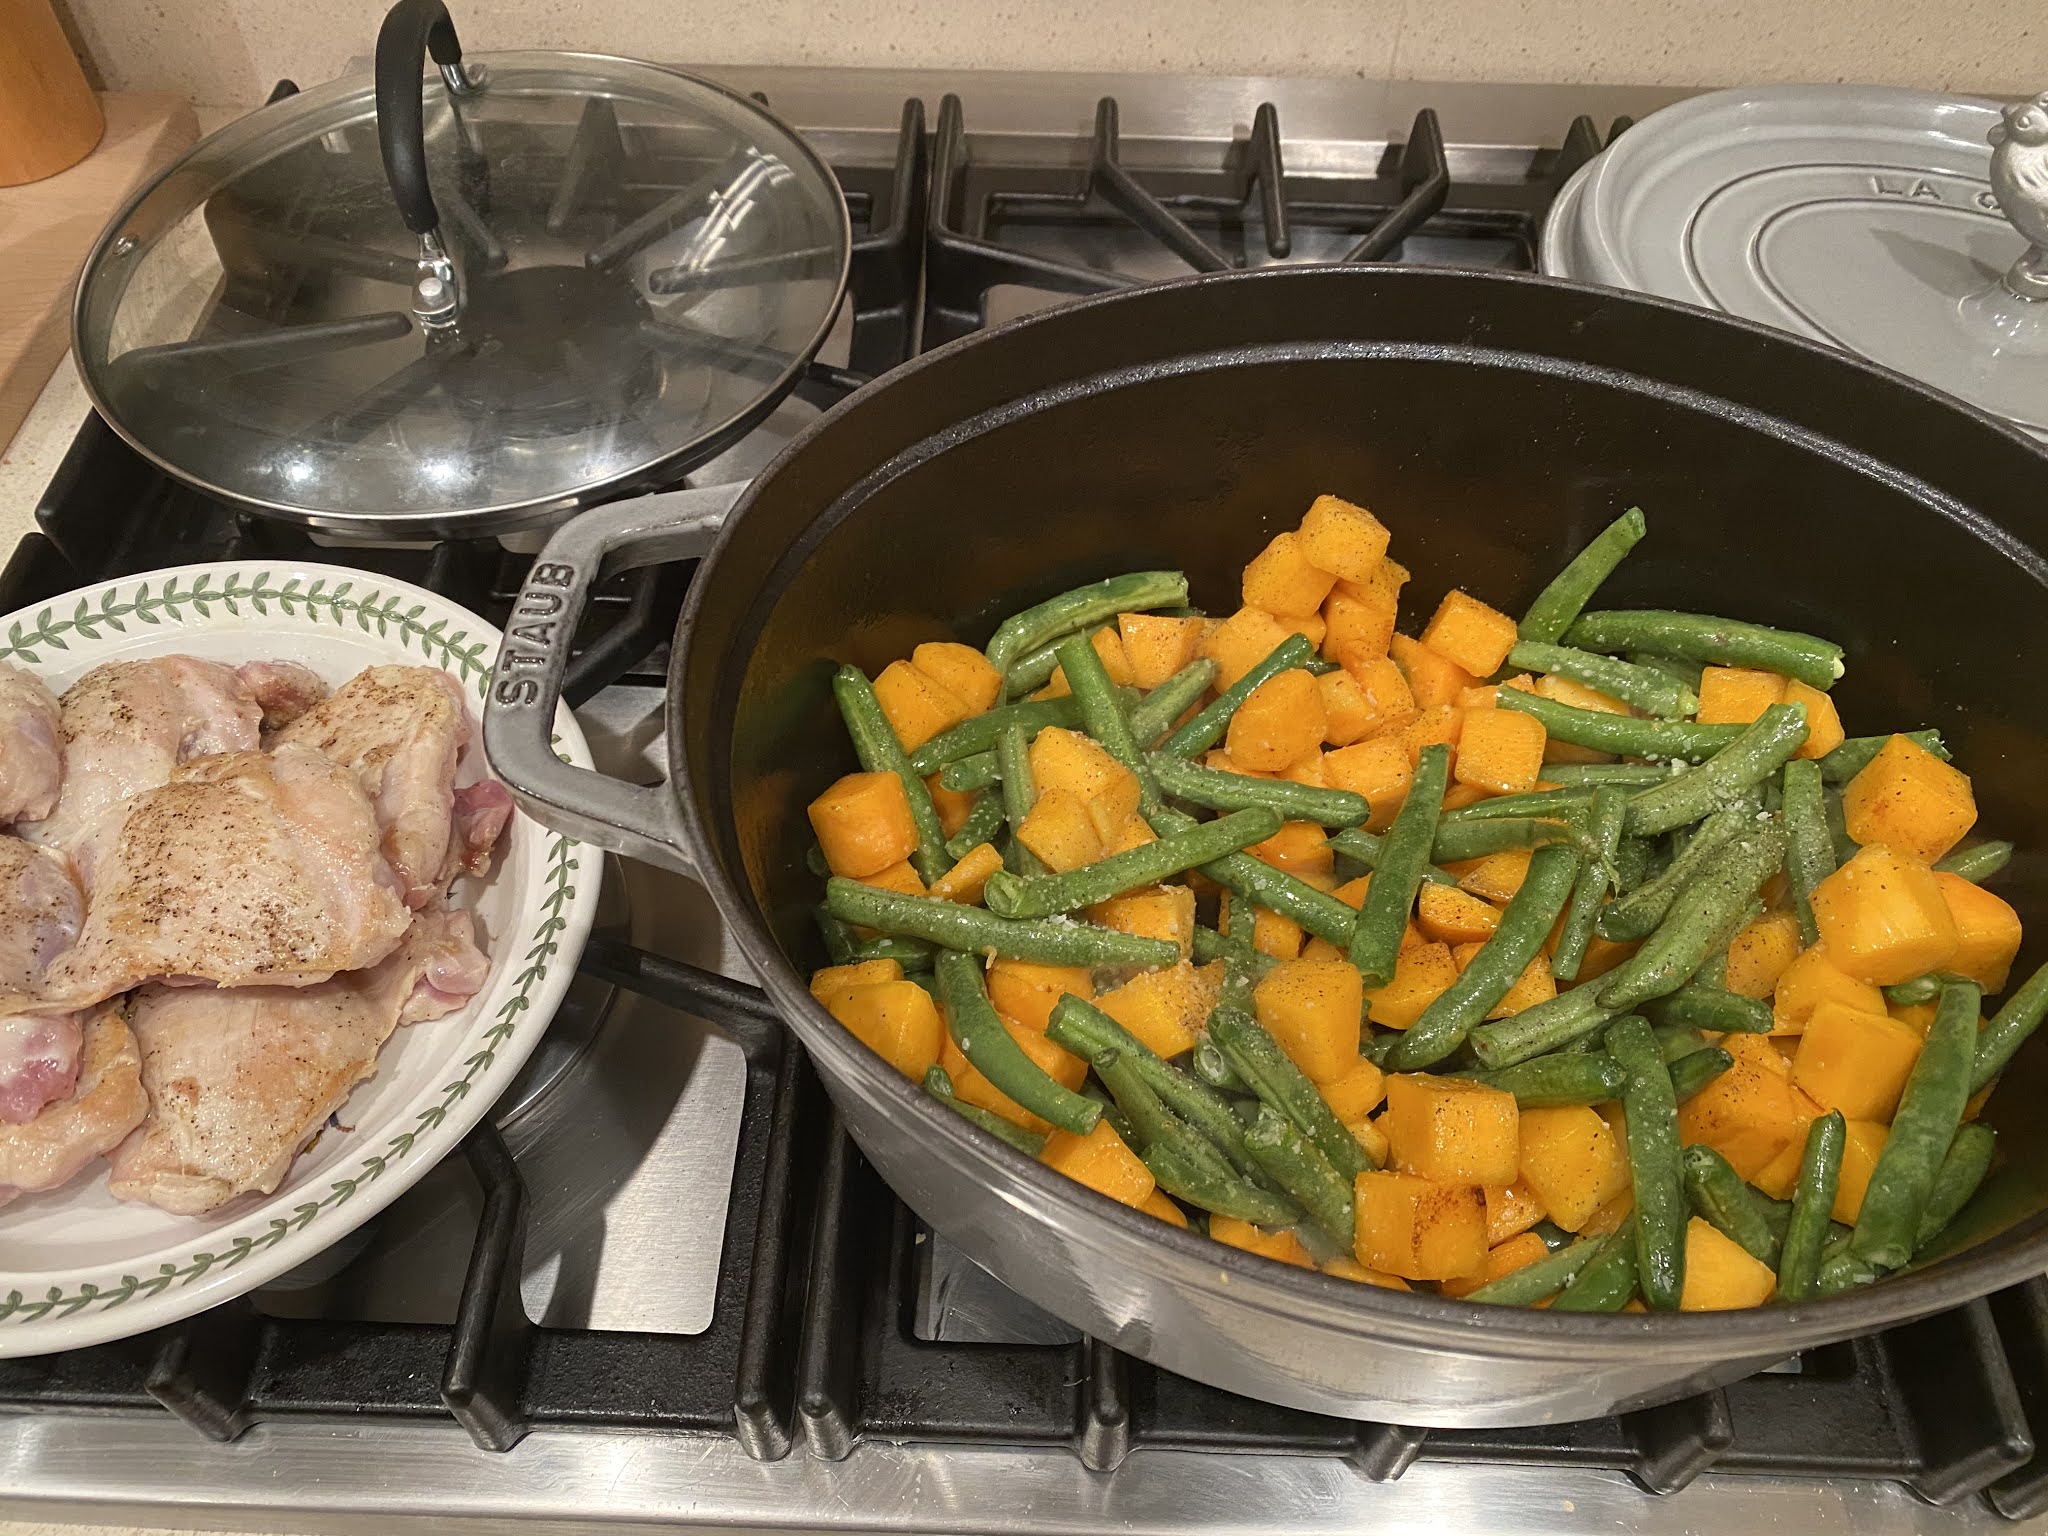
  1. Preheat oven to 400'. Coat a large (5 to 7 quart) dutch oven or other heavy pot with nonstick spray. Season chicken with salt and pepper. Arrange half of chicken, skin side down, in pot. Brown over medium-high heat until skin is golden and crisp, 5 minutes.  Transfer chicken to a large plate. Brown remaining chicken.
  2. Remove pot from heat; coat squash and green beans in drippings. Return chicken, skin side up, and nestle into veggies.
  3. Combine maple syrup and mustard in a small bowl; pour over chicken mixture. 
  4. Bake, uncovered, until a thermometer inserted into the thickest portion of chicken registers 165', 30 to 35 minutes. Divide chicken and vegetables among four plates, reserving sauce in dutch oven.
  5. combine flour and water in a bowl. Heat sauce on medium, and bring to a simmer. Add flour mixture, whisking constantly, until sauce thickens, 2 minutes. Spoon over chicken and veggies. 
note: to create delicious, crackling chicken skin, cook the thighs in a pot that hasn't been preheated.

per serving: 382 calories; 9g fat; 30g carb

original recipe found here

My changes: 
  • I bought boneless skinless thighs, so we didn't have the 'delicious, crackling skin'; to add a little fat and moisture I drizzled a bit of olive oil over the squash and beans in step #2, and scraped the bottom of the pan to incorporate any little bits after searing the chicken. Toss the veggies in the pan for a couple minutes to get a little color on them, then proceed with step #3. 
  • I added a little wondra flour to the syrup mustard mixture and poured it over top of the chicken in step #3, and skipped step #5. We thought the sauce seemed thick enough without that added step. 
  • I'd think that boneless thighs should take less time to cook but I needed 35 minutes for the squash to be tender, the chicken was still very moist so I'm not sure how much less time boneless needs. If your squash is done in less than 35 minutes make sure to check that the chicken is done.