
2. The directions say to stir in 2 cups of water, then adjust the water as necessary for the mixture to be the consistency of cookie batter. Well that confused me - like what kind of batter are we talking because there are many different cookie batter consistencies! HA!. Turns out I think I might have went with a drier cookie batter and the cement started setting up before I realized it. But it still turned out so I'm good.

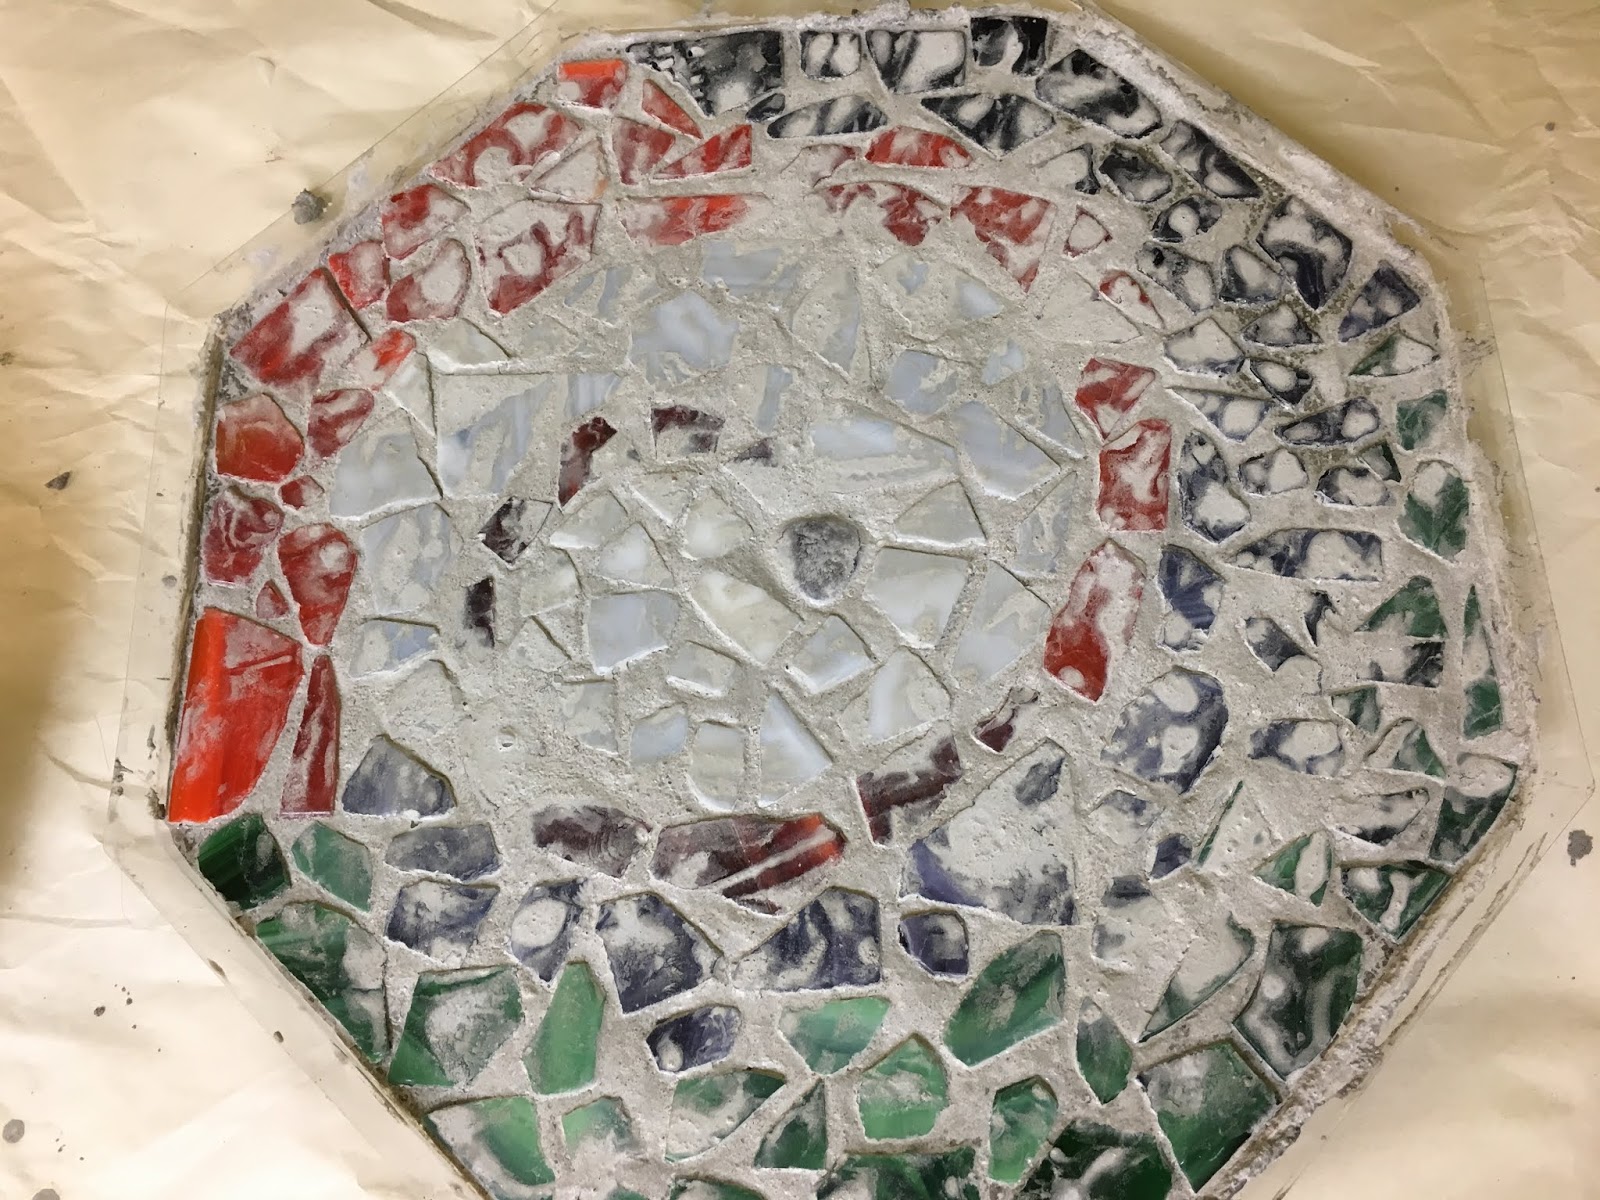
3. Before mixing the cement I wanted to make sure I knew exactly what I was going to do with the glass bits. First, I traced the shape of the stepping stone mold on some cardboard, then played around with where I wanted the glass mosaic pieces to go. That of course took a long time because I couldn't decide what pattern I wanted to make! Once I had what I thought looked good I mixed the cement and poured it into the mold as directed. So far so good.

4. Didn't really think about how I was going to transfer the pieces from my mock-up to the actual stone. Fortunately I took a picture of the practice piece - that helped give me an idea where I wanted the spirals to go but when moving them to the stone the angles got changed and all the sudden it wasn't like I practiced! That's when I realized the mix was setting up - uh oh!
5. To place the pieces on the cement without getting the mix all over my hands I wore a disposable glove on my left hand, picked up a piece with my left hand and placed in on the mix then using my right hand and the "writing tool" (aka: popsicle stick) I guided the piece in place (having a glove on my right hand was too hard using the stick).
6. Once I had all the pieces transferred from the mock-up cardboard to the stone there were some little spaces where I added small bits of glass to fill in. Once the glass pieces are all in place I put on both gloves and pressed the pieces down into the mix - that released some liquid from the mix but it's ok, once it dries you wipe it off with water.
 |
| after drying overnight, use an old toothbrush and water to clean the front surface. Don't remove from the mold for 24 hours. |
 |
| after 24 hours, remove from the mold and wash with dish soap |
 |
| That dog! I'm pretty sure he was going to pee on my new stone, but at the last minute he lifted his left leg on the grass instead - insert eye roll |
No comments:
Post a Comment