One of my favorite little gift stores is in DeTour Village, MI (in the U.P.) called the 'Timberdoodle'. A funny part of that statement is that I've only actually been in the Timberdoodle a couple of times, usually when I go to visit LeDonna the store is closed. But I've received quite a few things from them, thanks to L., and I've also had her call me a couple times to say there's something in the store that reminds her of me and she wonders if I want to buy it and she'll bring it down next time she comes - hello, I do love a personal shopper hahaha. One of the best is the painted cow skull that I showed you a couple years ago, I still love how different and cool it is. Anyway - on to the point of this post.

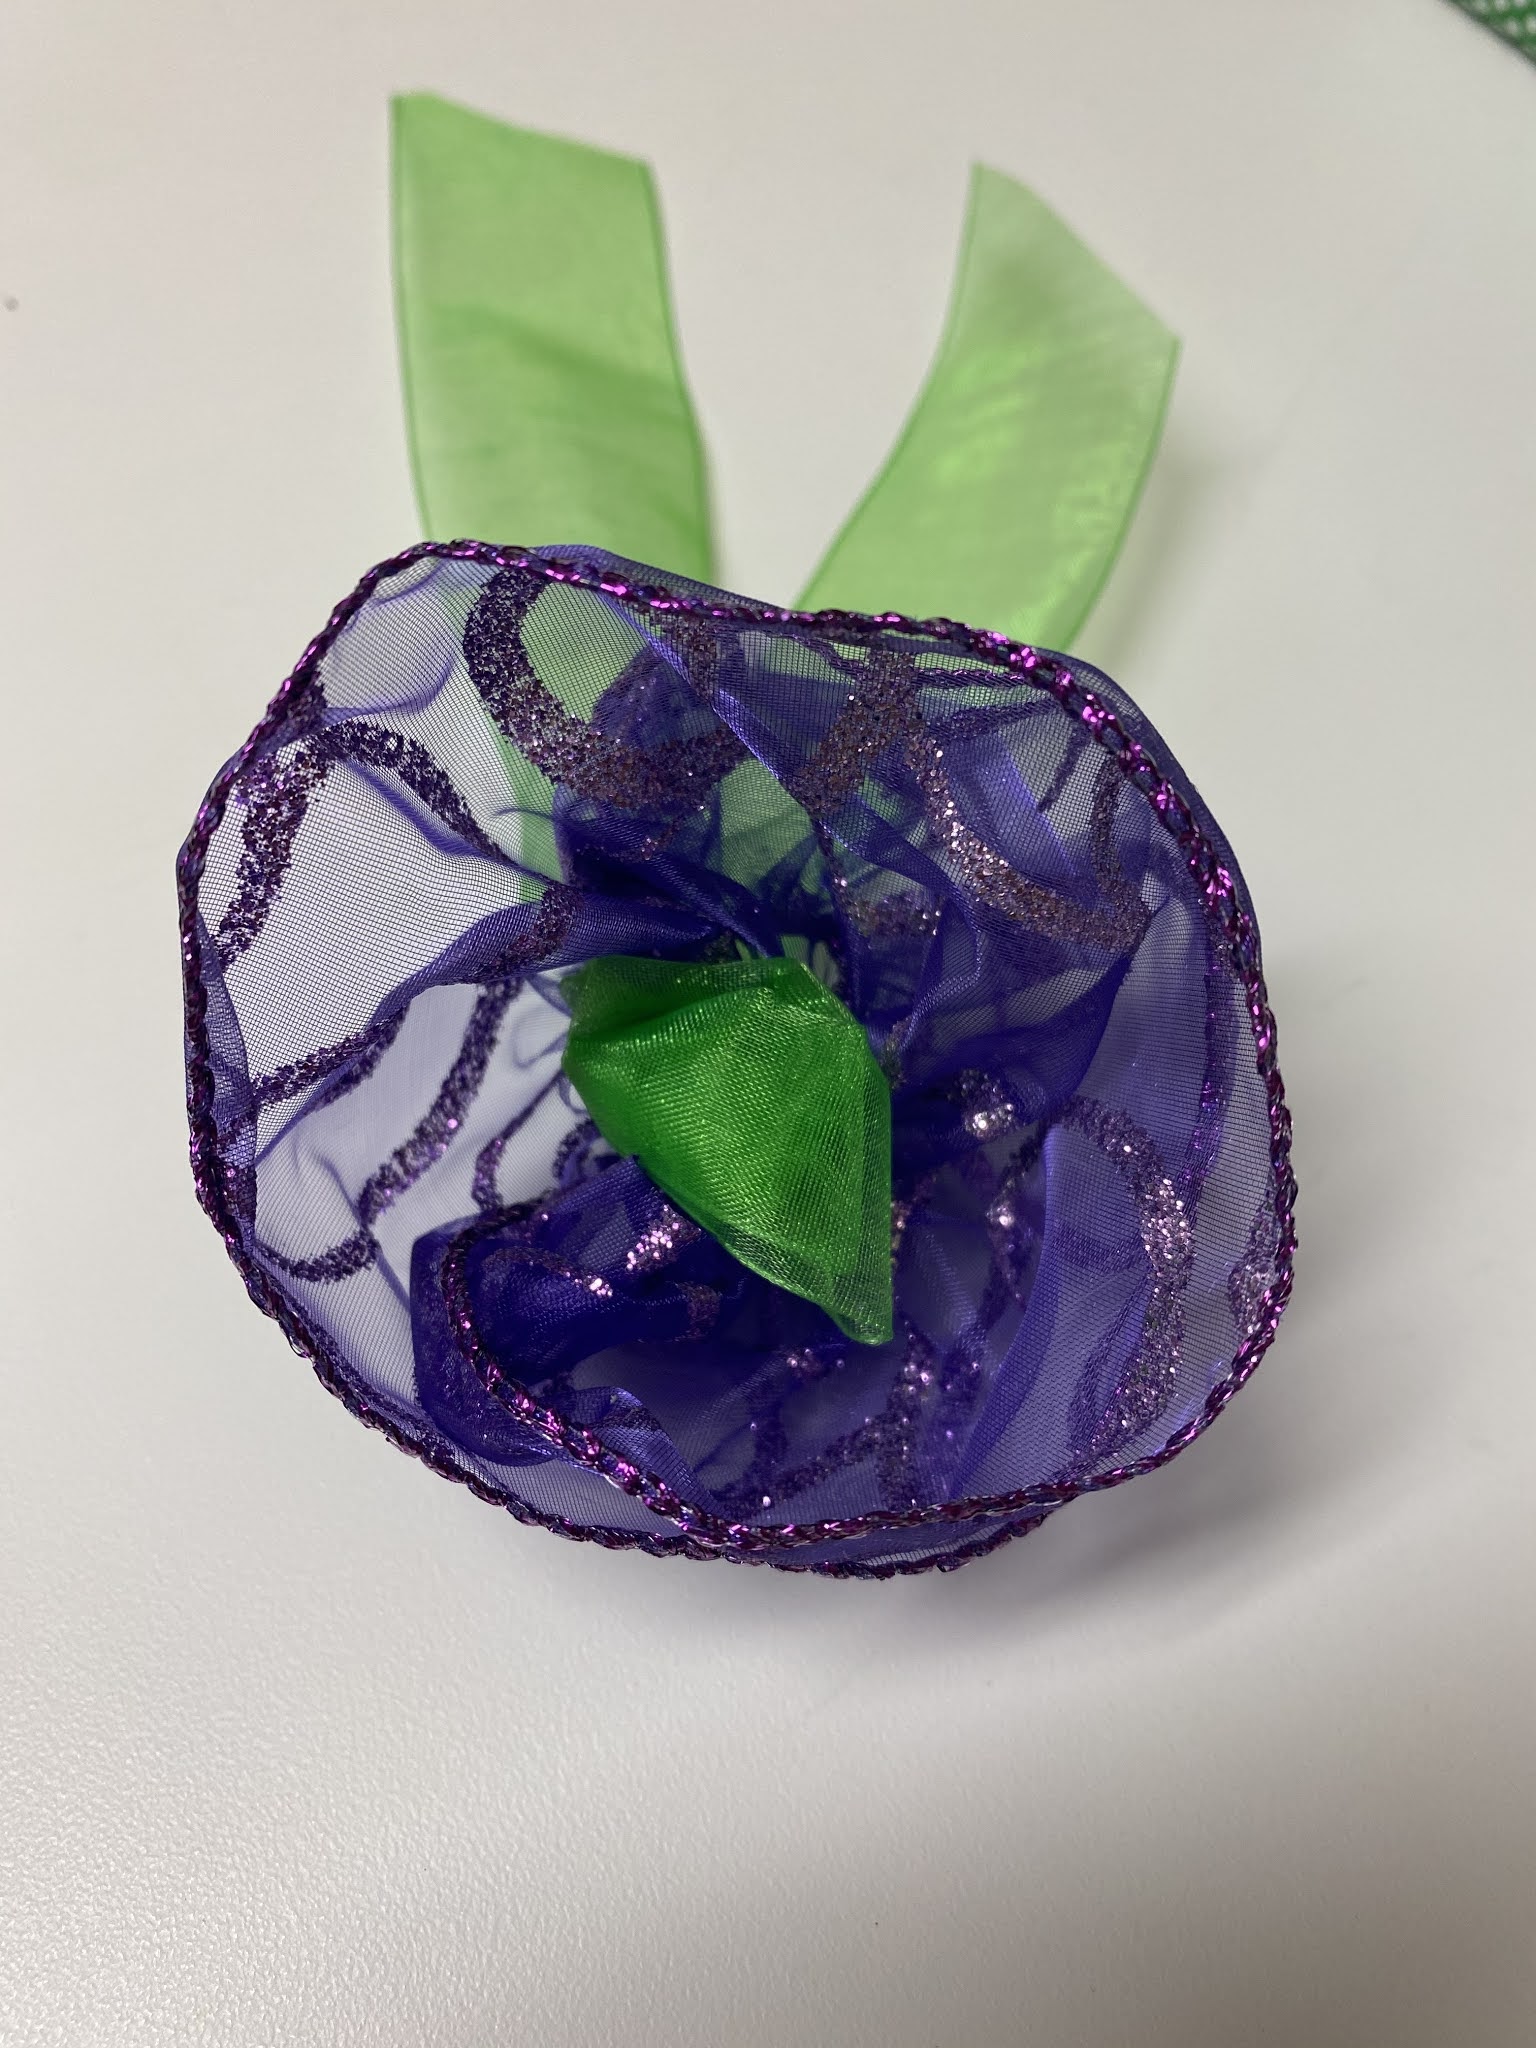
I always know that a gift is from the Timberdoodle because of these ribbon flowers attached to the gift bags. I save them and re-use them they are so pretty and fun - one day L mentioned that she was in the store while one of the employees was making the flowers and I said 'wait, what? someone makes them?'. I figured they were purchased from some supply company. And that got me thinking - how the heck do they make them and can I figure out how to do it? So I took one apart - and took lots of pictures of the process in case I couldn't remember how to get it back together! Check it out:
To make this purple flower they started with 18" length of purple wired ribbon, and 21" of green shirred ribbon. I forgot to measure the width but I'd say the purple is 2" and the green is maybe 1/2 - 3/4".
Find the ends of the wire on the top and bottom of the ribbon - you're going to pull one of the wires from either the top or bottom edge, scrunching and gathering up the ribbon. Make sure you aren't pulling the wire out of the ribbon, push the ribbon towards the middle of the length of wire leaving long tails on both sides. This makes the ribbon curl on itself (it sort of looks like a hair scrunchy to me at this point, but maybe that's because I used the word 'scrunching' above!). Tie a loose knot in the center of the green ribbon. See the photos for help:
Take one of the long wire ends and twist it around the bottom of the knot in the green ribbon. The knot is going to be the center of the flower.
Hold the wire under the green knot and coil the purple ribbon around it forming the flower. Take the other long wire end from thee other side of the purple ribbon and twist it around the base of the flower holding the purple ribbon in place with the green knot in the center, the green ribbon ends will hang down. You can use the tails to tie it onto a package, or leave them hanging and use some of the wire ends to attach to your gift.
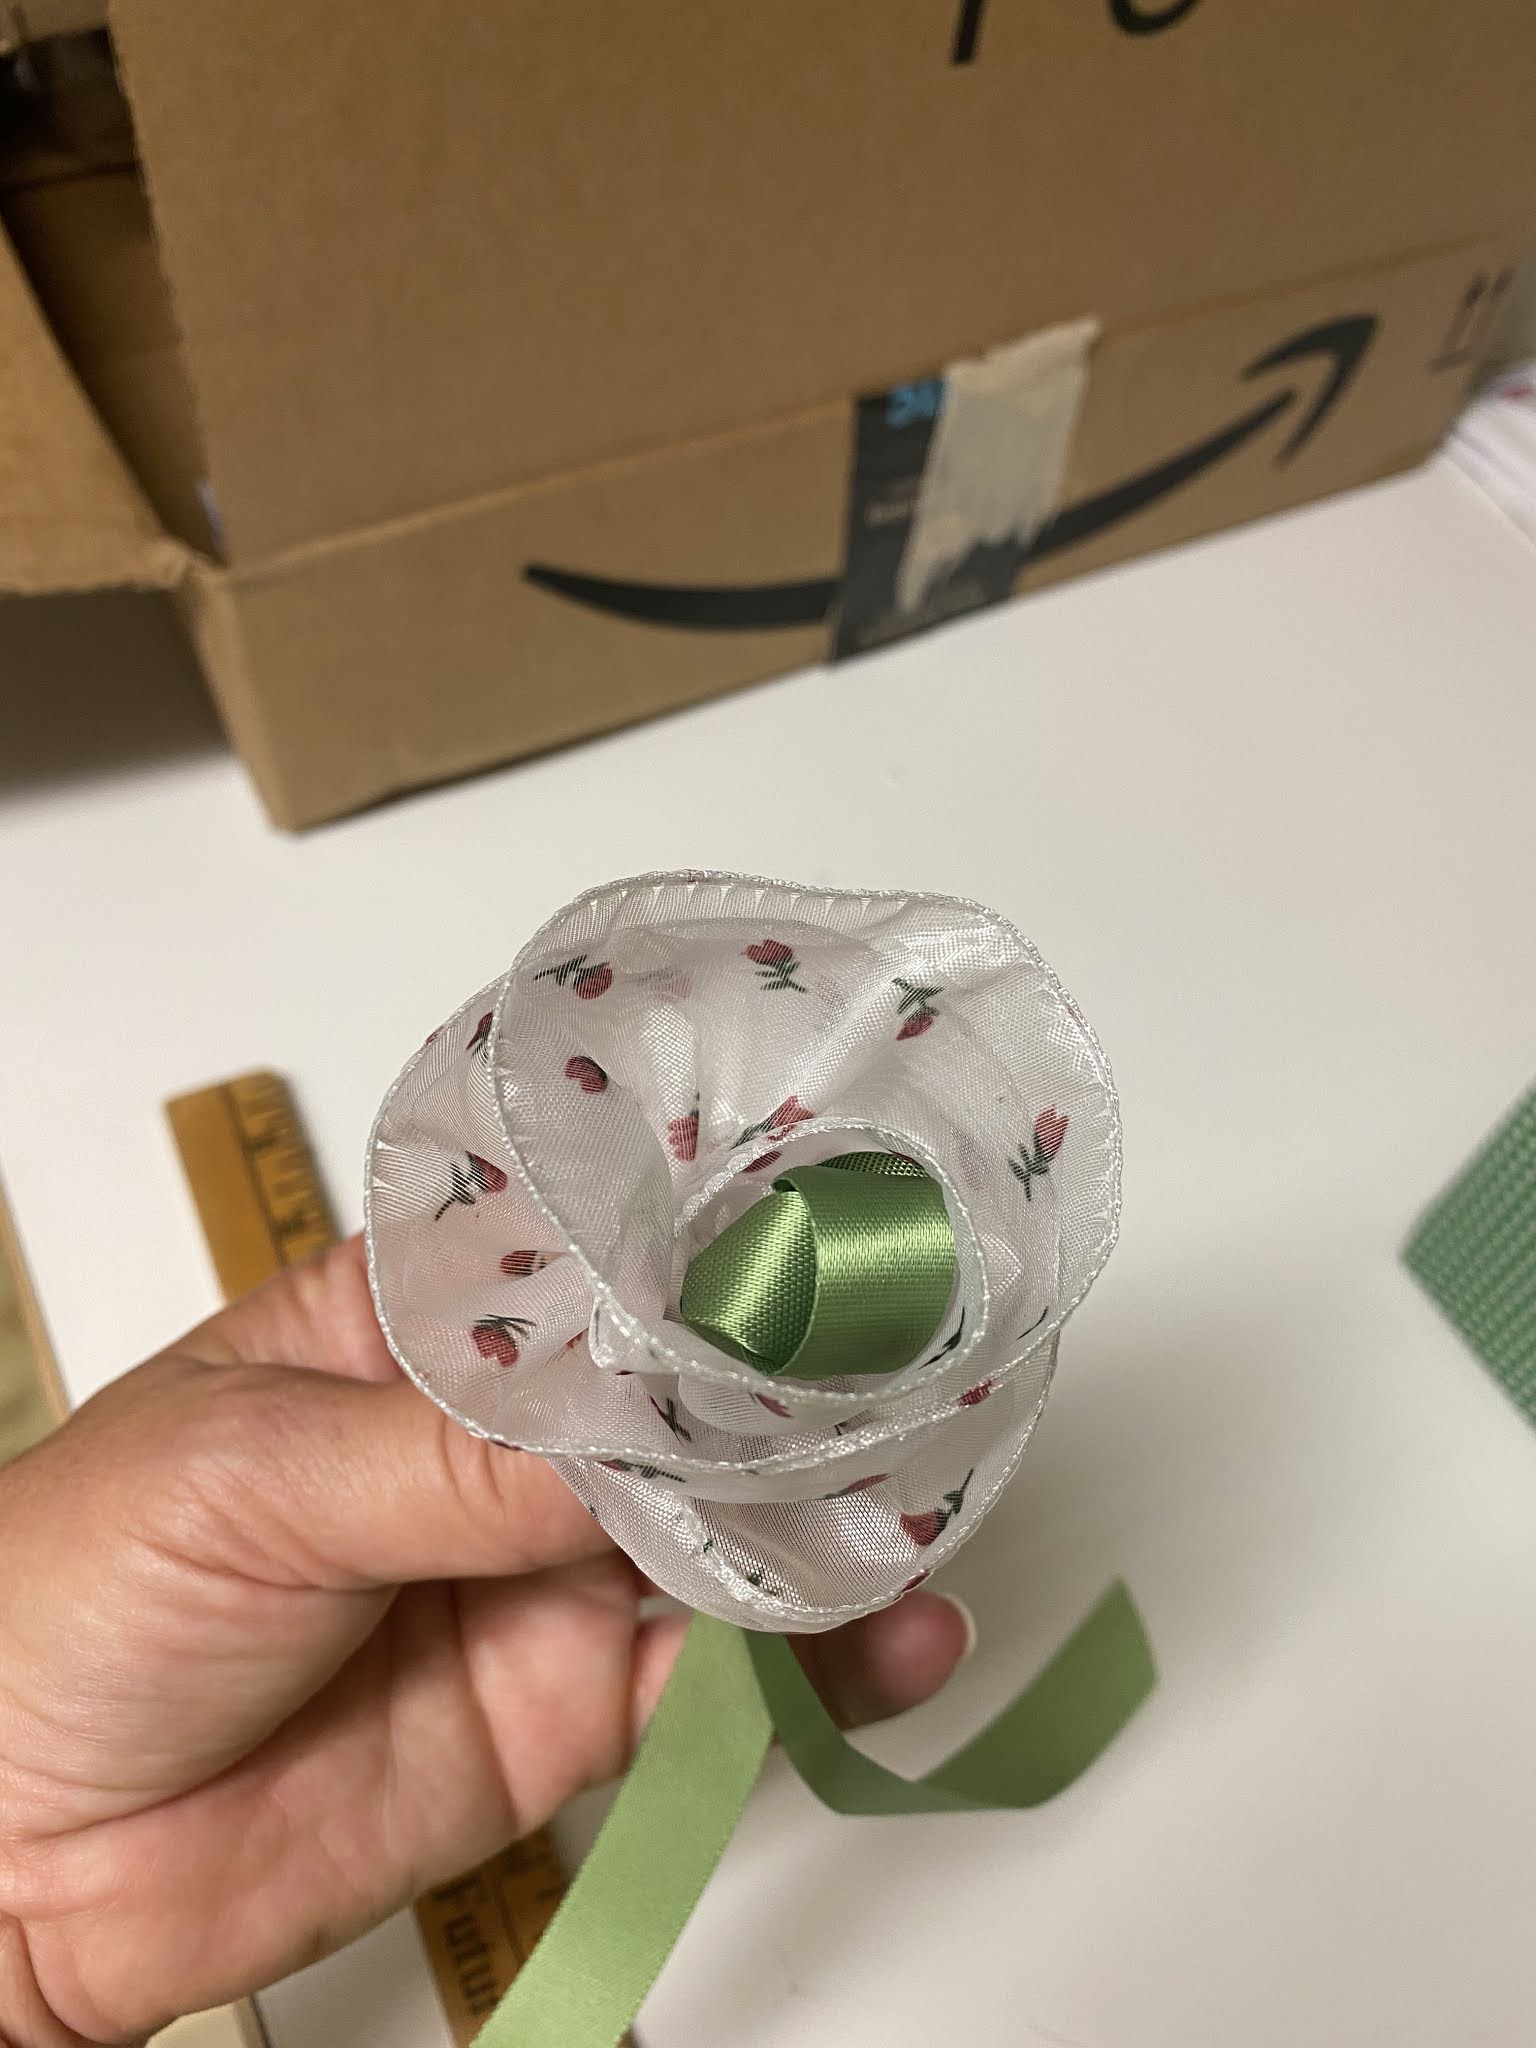
After taking apart and re-assembling the Timberdoodle flower, I made one out of my own ribbon just to prove I could do it without a head start of them already making one - and took even more photos:
I timed myself and it took less than 3 minutes to make! So I made one more to cement the technique in my brain:
I hope this fun technique wasn't a secret since I've just shared it with y'all!! If you're ever in the U.P. I recommend going into the Timberdoodle, so many fun things and then a cute flower to top it off ❤️
4.19.20: 🔥week 16
4.19.19: sports team paddle


No comments:
Post a Comment