Showing posts with label halloween candy. Show all posts

Sunday, October 30, 2016

Mummy Pretzels

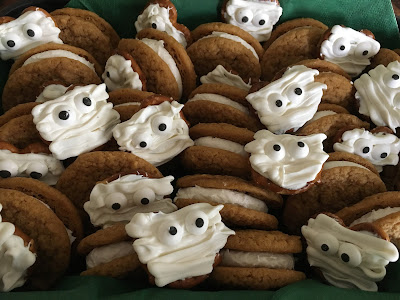
Need a last minute treat to take to work or school (or just cuz they're cute!)? These pretzels twists covered with melted white chocolate to look like mummys are easy, fun, and they'll be devoured in minutes hahah!

mixed in with pumpkin whoopee pies - I'll post
how to make them later - they were also a hit!

Lay out mini pretzel twists on a rimmed baking sheet. Melt one package of white candy melts in a big glass measuring cup in the microwave according to package, put in a ziplock baggie and snip one corner (or use a decorating bag) and fill in the pretzel holes and then smooth some on the top creating a solid surface. I used a small decorating tip that makes a ribbon like design (don't know what number it is) and applied additional white frosting on top of the pretzels in a mummy pattern. You could do the same with a baggie if you cut the hole so it comes out in ribbons - I hope that makes sense. Look at the pictures to see what I mean by ribbon effect, you need to make flat strips on top of the pretzel to get it to look like mummy bandages. Before the chocolate sets add candy eggs - I found these at our grocery store but I've seen them lots of places so they aren't hard to find. Look how cute they turned out and it only took me a few minutes to make a whole plate of them (I had enough eyes for 36). 

supplies: mini pretzel twists, white candy melts, candy eyes,
glass measuring bowl, rimmed baking sheet. 

fill in the holes and then smooth across the top

apply frosting in ribbon zig zag strips like a "mummy"


Monday, October 26, 2015

No Sew Trick or Treat Pillowcase Tote


I saw a few cute ideas for trick or treat bags but couldn't find the one I had pictured in my mind - more like a backpack tote that could be carried easily and the candy will stay inside if there are races between houses - so I figured I'd try to make it up myself.

I started with a pillowcase (classic halloween tote!) and 62" of soft rope/cord that is sort of like clothesline. Cut 2 holes thru both layers 11" down from the top, about 6" apart and thread the rope thru with the middle of the rope centered in the front (I tied a knot in the center to keep it in place). Then cut a small hole in each bottom corner, run the end thru the hole and tie a knot. That just formed the backpack straps.

There will be 2 ropes running thru the center of the bag on the inside, but there is plenty of room to put candy around them into the bag (even if someone is passing out full size candy bars!!). I wore the backpack around the house with 4 pounds of candy in it just to test it out (my husband didn't even ask what I was doing, apparently he isn't fazed anymore by some of my actions!) and it held fine without reinforcing the rope holes or making special knots in the bottom - good news!


I rolled down the top of the pillowcase to just above where the rope is in the front and hot glued it in place all the way around. Then I ruffled 2 pieces of ribbon (folding it back and forth every couple of inches to create the ruffles) and hot glued them on top of the rolled down part to decorate it.


To finish I printed off a bat template from my computer and traced around it with silver fabric paint, then I took a little brush and smudged the paint so it wasn't a hard line. Let it dry for a couple of hours and you're done.