Monday, June 10, 2019

Wine Cork Flower Wreath

I saw this idea online (click here for source) and loved it so much I couldn't wait to make one - and I love how it turned out! I have it hanging on our back door which is inside the garage so it won't be exposed to the elements, not sure how good this would hold up if I hung it on the front door that gets tons of heat and sun.

This is quite easy to make - just hot glue groups of corks together in a flower shape, changing up the flowers by using red and white wine corks - some have red wine for the centers surrounded by white wine "petals", or vise versa, or dark red petals with a pale red center...I just played around with my corks coming up with flower bundles that I liked. To make it a little more interesting I used some shorter corks for some flowers (cutting down if necessary so all 7 in the bundle are the same depth), and some taller ones - did you know that all corks aren't the same size? I just searched for ones that went together as best as I could, then trimmed a few to match.

For this wreath I made 14 flower bundles of 7 per flower (1 in the center surrounded by 6); after choosing all the corks I hot glued them together. 

\
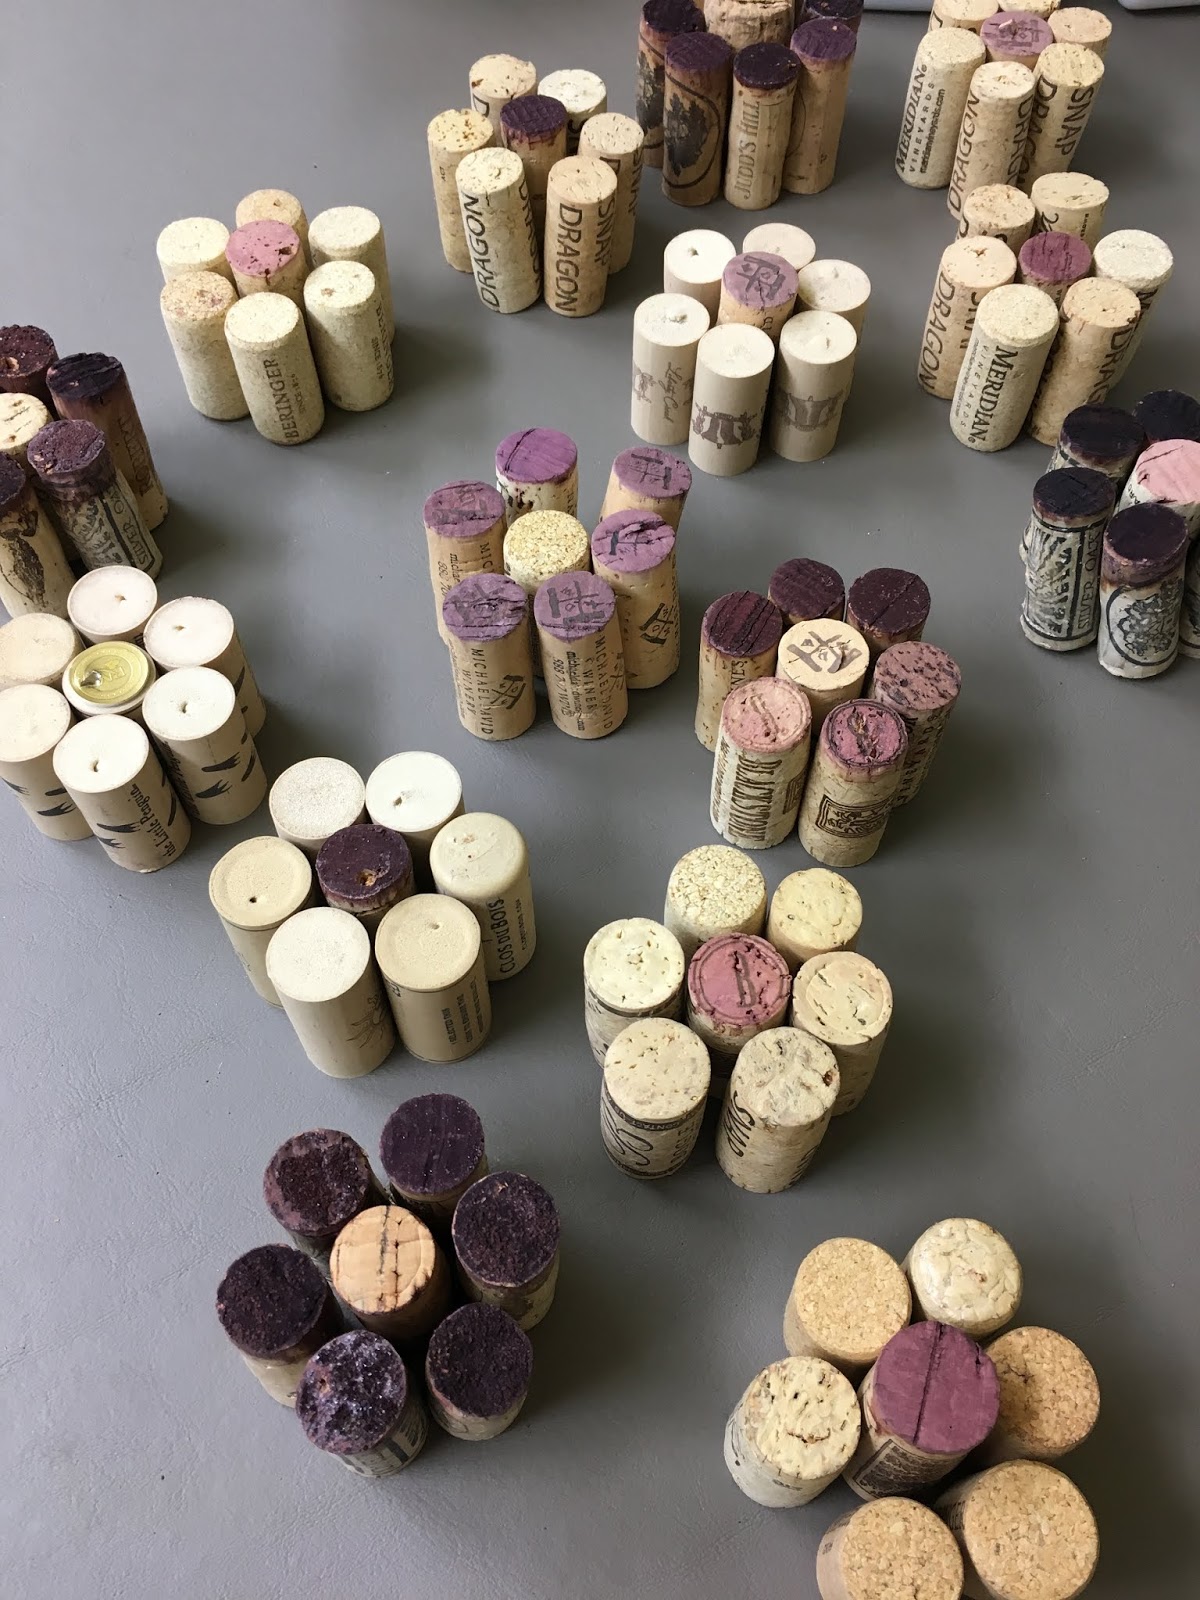


Put all 14 flowers in a circle, fitting them tightly against each other, then glue the flowers together finding the spot between the flowers that touch the most to make it as stable as possible. It'll be wonky until the next step but don't worry, we'll make it way more secure in a sec. To help keep an even circle shape I used a wire wreath as a guide (I didn't glue them to the wire tho - I set the flowers on top of the wire wreath as I glued them to each other, then removed the cork wreath from the wire wreath base). 


At this point the flowers won't hang in a nice circle - to help with that, turn the wreath over and glue popsicle sticks across the corks trying to hide the sticks as much as possible. After you lay down the first row all the way around go back and overlap with a few more sticks to make it even more secure. I tied a piece of twine around one popsicle stick and glued it in place on the back for a hanger.


To finish I added a few leaves and little fake succulents left over from the tiny macrame plant hanger project - decorate however you want! I did have a couple places where I could see the popsicle sticks and a bit of glue here and there so I made sure to cover up as many imperfections as I could with the little plants and leaves. 


 Can you see how some of the flowers are shorter and some taller? It really adds dimension.
Also, one flower bundle on the right side in the middle is a large center cork so I needed 7 corks to make the pedals for that one.


As always, I couldn't decide when to stop adding stuff! If this has too much going on for you just edit yourself better than I did LOL!! 

To make this wreath you'll need:
  • 99 corks, different sizes and colors (98 if you don't make one flower different like mine with the large center cork surrounded by 7 corks on the right side of the wreath)
  • hot glue 
  • popsicle sticks
  • twine for hanging
  • small artificial plants and leaves to decorate, optional


Sunday, June 9, 2019

Around the Campfire 🔥 (week 23)

Dear Campers ~

Here's a quick recap in case you missed anything this week at MMDC.

Posts ~

6.2: 🔥 (week 22)
6.3: wine cork keychain
6.4: tip-sy Tuesday: sorting socks
6.5: skinny chunky monkey cookies
6.6: my sis is hungry: honey chipotle chicken pasta salad
6.7: macrame shell holder
6.8: ice cream sandwich cake

What's cooking ~
  • Al and Cathy made us pasta with creamy vodka sauce (recipe to follow soon), with grilled sausages and roasted veggies
  • steak, saute mushroom medley, caesar salad, potato salad
  • grilled marinated chicken thighs, cauliflower veggie tots, broccoli
  • grilled pork chops, roasted carrots, chopped kale salad
  • grilled chicken breast, cauliflower parmesan (recipe to follow soon), roasted asparagus
my sis sent me this -  totally stealing
the idea for our next party! too funny :)

I'm still dealing with the tendonitis in my hand so not much crafting happening. I managed to plant a couple flowerpots (with a little help from Dave lifting the bigger plants) and started making a wine cork craft that only requires a whole lot of hot gluing so I'm able to do that pretty much one handed - you'll see that project hopefully tomorrow (if I finish it today!). Have a great week - check back to see what happens at camp this upcoming week - I know there'll be another 'My Sis is Hungry' review, an organizing tip that I use all the time, a recipe or two, and whatever else I can mange without much use of one hand hahah!! Bye!

Sincerely ~


Jill
camp counselor and Reese's lover

Saturday, June 8, 2019

Ice Cream Sandwich Cake

I love, love, love Reese's peanut butter cups and oh my gosh I wish I had a reason to make this right now. As in, right this very minute and it's only 9 o'clock in the morning. It looks and sounds amazing and I want it!! Teri made it for her son's birthday and was nice enough (wait, maybe it was actually mean of her because I'm drooling!) to share the recipe and pictures.


Ingredients:

  • 18 vanilla ice cream sandwiches
  • 1 cup peanut butter, melted
  • 1 9.5 oz. package Reese's peanut butter cups (12 total)
  • 6 tablespoons caramel sauce
  • 6 tablespoons hot fudge sauce
  • 2 8 oz containers whipped topping
Directions:
  • Arrange 6 ice cream sandwiches on a serving platter. Drizzle half of the peanut butter over top. Drizzle two tablespoons of the caramel sauce and the hot fudge sauce. Top with a third of the chopped peanut butter cups. 
  • Repeat for the second layer. 
  • Top with the remaining 6 ice cream sandwiches. 
  • Cover the cake with whipped topping. Drizzle the cake with the remaining caramel and hot fudge sauces.
  • Place the cake in the freezer for at least 30 minutes before serving. 

seriously - look how tall this is! 

don't even try to tell me this isn't making you drool too!! 

PS: I also love the geniusness of layering ice cream sandwiches to make an ice cream cake. Brilliant (and yummy). Thanks for sharing this Teri!

Friday, June 7, 2019

Macrame Shell Holder

This project is similar to the tiny macrame plant hangers I posted here, but this time I added some half knots to the top of the hanger to get the cords to spiral and be a little more decorative.

Click the above link to see how to make the basic hanger. You can easily find how to make the square and half knots online, they are simple and this is a quick easy macrame project.

Instead of hanging the tiny terra-cotta pots with succulents I found a pretty shell that fits perfectly and added a live air plant. Then I hung it under my kitchen cabinet using a removable command hook thingy.


Thursday, June 6, 2019

My Sister is Hungry: Honey Chipotle Chicken Pasta Salad

The last couple of reviews my sister has done for the "my sister is hungry" posts have had the recurring theme of "too mild" or "too bland" - so this week I amped it up and made her this Honey- Chipotle Chicken Pasta Salad that is definitely not mild or bland. I'm not a fan of spicy food but there is something about this dish that is the perfect amount of heat - almost addictive. Here's what she has to say about it:


Stopped at my sisters house to pick up my dinner to go.  She was there helping Brooke and her friend cook their Spanish homework. (different story I’m sure my sister will blog). She didn’t “sell” this one well.  Cold pasta.  “like pasta salad” I ask apprehensively?  (thinking in my head, where is the main dish?).  I started by opening it and taking a peek.  Brooke takes a bite, her friend Grace take a bite.  They then each take another bite! They then ask me to leave them a plate of it to snack on!  Well now I’m excited to eat this! 

Even tho skeptical about it being cold, it was still delicious.  DELICIOUS.  It was spicy and flavorful.  It was a nice mix of pasta, chicken, banana peppers and a yummy spicy sauce.  She also gave me a side of the spicy sauce (she apparently knows how much I love sauce) which I then poured over a few bites to try it that way as well.  YUM.  I then thought “well gee if its this good cold, I should try it hot!” I then promptly microwaved some of it.  I could hear my sisters voice telling me just to eat it as she made it and I should have listened to that.  It just wasn’t as good hot.  I don’t know why but didn’t have the same delicious flavor when I heated it.   

My hubs got home late and ready to eat dinner. He was skeptical as well.  “Cold”?  was the first thing he said. HAHAHAHA.. I advised him just to trust me (and Jill) and he did. He loved it as well. His ONLY “complaint” was that it was cold.  He then asked if he should try heating it… so apparently we think the same. I should be embarrassed by that part.

Bottom line is that this one was delicious. Even Cold.  Loved it.  Seems like a great thing to make ahead when pushed for time or take as a dish to pass somewhere- since it doesn’t have to be hot. ðŸ˜Š  
We both give this one a solid 8.  I might actually read the recipe and attempt to make it.

Ingredients:
  • 1 pound ditalini pasta (small little tubes)
  • salt and pepper
  • 2 cups rotisserie chicken (note: I used boiled, shredded chicken breasts)
  • 1 pint cherry tomatoes, halved
  • 1 cup sliced banana peppers, drained
  • 1 avocado, thinly sliced
  • 2 tablespoons chopped chives
For the Vinaigrette:
  • 1/2 cup red wine vinegar (note: I used a little less based on the reviews)
  • 1/4 cup mayonnaise 
  • 2 tablespoons honey
  • 2 tablespoons chipotle peppers in adobo sauce, plus more if needed (note: I used 4 tablespoons)
  • 1 tablespoon Dijon mustard
  • 1 teaspoon dried Italian seasoning
  • 1 clove minced garlic
  • salt and pepper
  • 1/4 cup olive oil

Directions:

To Make the Honey-Chipotle Vinaigrette:
Put the vinegar, mayo, honey, chipotle, mustard, italian seasoning, garlic and some salt and pepper in a blender or food processor. While the machine is running, slowly drizzle in the olive oil until the dressing is combined and emulsified. Adjust the seasoning if necessary, or add more chipotle if you want it more spicy.

Meanwhile, bring a pot of salted water to a boil. Cook the pasta in the boiling water until al dente according to the package instructions. Drain and transfer to a large bowl.

Toss the pasta with the Honey-Chipotle Vinaigrette. Season with salt and pepper. Next, add the chicken, cherry tomatoes and banana peppers. Toss it all and transfer to a pasta bowl for serving. Top with fanned-out avocado slices and garnish with the chives.

found the recipe on foodnetwork.com, click here

Wednesday, June 5, 2019

Skinny Chunky Monkey Cookies

I saw this recipe on FB, don't know who to credit for the original recipe. I had three bananas that were super ripe and I already made (and ate) banana bread last week (click here for that post) and while it is certainly delicious I don't need to make (and eat) more so soon. These are a much healthier option for using up my bananas - they don't have sugar or eggs, and "skinny" is right there in the title so I thought I'd try them...


Mine look nothing like the photo included in the FB post, theirs looks exactly like no-bake cookies and now that I'm thinking about it I'd bet good money that their picture IS of no-bake cookies and not of these "chunky monkeys"! Liars. Mine have a similar look I guess to no-bakes, but do not have it in your head that they are going to taste like them because you'll be in for a letdown! I'm not saying they aren't good, because they are - they just aren't sweet at all, more like chewy granola. Perfect for when I need a little somethin' when avoiding sugar and too many calories, and they are a very easy-quick-simple cookie to make.

I followed the recipe exactly other than after baking they didn't spread at all, so they were little round granola/cookie bites - I flattened them with a spatula so they were more cookie-like.

3 ripe bananas
2 cups oatmeal
1/4 cup peanut butter
1/4 cup cocoa powder
1/3 cup unsweetened applesauce
1 teaspoon vanilla

Preheat oven to 350'. Mash bananas then stir in the rest of the ingredients, let sit for 20 minutes. Drop by teaspoonful onto uncreased cookie sheet. Bake 10 minutes. Makes 30

not a great photo but was trying to show the cookies on the left
baked into balls, cookies on the right are after I flattened them
with a spatula. 


Tuesday, June 4, 2019

Tip-sy Tuesday: Sorting Socks

Here's an idea I'm trying this week - because I hate, hate, hate sorting and matching (and looking for the one rogue missing) socks. Clip a laundry bag to your clothes hamper and put socks that need to be washed into the bag. When you run a load of laundry just add the whole bag of socks to the wash, that way they'll all stay together and there is absolutely no reason for one to go missing...like one always does...Worth a try! 


Monday, June 3, 2019

Wine Cork Keychain with Charms

My niece just bought her first house near a beach, so when I saw this charm that says "life is better barefoot" I knew I had to get it for her and turn it into a cute little something. A cork keychain seems like the perfect thing to keep her house key on - and then I thought how much better it would be if I could find a cork from a bottle of Barefoot wine...you guys know how many corks I have, right? I was sure I'd find a Barefoot one in my stash. I kid you not, I dumped bags of corks out on the floor and for real, I found the one and only Barefoot cork in the last bag. Ugh. As a side note, I organized my hundreds of hoarded corks while putting them away so next time it will be much easier to find what I'm looking for!


It turned out so cute that I made another one for Janis using a couple different charms that reminded me of our Africa trip, and made her keychain using a cork that says "the joy of wine" on it. Love. 


These are easy - find two small washers that fit on the ends of the cork and glue in place (note: hot glue didn't work, I ended up getting the washers to stick using E6000). Attach the charm, tassels, beads, whatever you like to an eye hook and then screw it into the bottom of the cork (thru the hole in the middle of the washer). Attach a keychain to another eye hook and screw it into the top of the cork. 


Sunday, June 2, 2019

Around the Campfire 🔥 (week 22)

Dear Campers ~

Here's a quick recap of the happenings at camp this week in case you missed anything:

Posts ~
5/26: 🔥 (week 21)
5.27: red, white, and blue berry trifle
5.28: Tip-sy Tuesday: jicama
5.29: banana bread
5.30: My Sister is Hungry: Dorito Casserole
5.31: Escabeche
6.1:   Race day photos

What's cooking ~
  • chicken enchilada suizas
  • grilled chicken, cauliflower risotto
  • tuna steaks, steamed rice, creamed spinach
  • pork chops, baked spaghetti squash, roasted broccoli
  • steak with potato, squash and goat cheese gratin (recipe to follow soon)

Miscellaneous things keeping me busy but not worth a whole post ~
  • Doc thinks I have tendonitis in my hand which apparently takes a long time to heal - last week I was hoping it would be better in a few days but nope...soooooo that means I've had lots of free time to read! The Museum of Extraordinary Things by Alice Hoffman (weird); Clan of the Cave Bear by Jean Auel (classic series set in the Ice Age about an orphaned child who is found and raised by a clan of neanderthal people); My Lovely Wife by Samantha Downing (dark, twisted, psycho, creepy book that I couldn't put down!)
  • I did manage to (carefully) arrange all my fiction books alphabetically by author and group our other book together by subject. We don't have tons of books but doing it one-handed took me a long time. 
Hope you had a great week! Got some fun upcoming things next week - check back for a new wine cork craft, a couple recipes, my sis has another review, and who knows what else?! See ya later!

Sincerely ~


Jill
camp counselor and brace-wearing-whiner


Saturday, June 1, 2019

Race Day Photos

My hand still hurts and I haven't been able to make very many crafts one handed lately so I've been spending lots of time cleaning up my computer photos and files. I came across a few pics I took while playing with my camera at the racetrack and thought I'd share them - haven't done any photo posts in a long time - I miss those "Creative Photography" classes we took! I like to find things that are different, and try to see things in interesting ways - for instance sometimes looking at the back of an object instead of straight on, or thru a fence, or cropped up close, or getting an off-beat expression instead of just a posed shot...look at your subjects in multiple ways to come up with some shots that are maybe more interesting, creative, or tell a different story than standard images. Know what I mean?