Thursday, September 10, 2020

Organizing the Black Hole of Doom

This post titled 'organizing the black hole of doom' (AKA the deep chest freezer in the basement) should probably be embarrassing and if I cared that you're going to judge me when you see this first picture then I wouldn't be showing it to you LOL.  


Confession: I don't think I've ever defrosted the deep freezer. And the closest I got to organizing it was throwing meat to the left side and other stuff to the right - and then we have to dig thru the contents to find what we are hoping to find! It's shameful. I know.

So the other day it was like 1,000' outside and super humid and I thought what better time to tackle the freezer. The packed freezer that needs to be unloaded into other coolers to keep cold while I defrosted and came up with an organizing system before it could all be put back in 🤦‍♀️ For the record, next time I will do this when it's cold outside and then I won't have to be in nearly the rush I was! 

I, because I've never done it, googled 'how to defrost a chest freezer' and lo and behold there are quite a few ways and suggestions - once I realized the bottom line is to basically empty the freezer and unplug it I stopped reading how other people do it and just unplugged it already (side note: I've noticed that when I'm starting a project I'll read everything I can about it before starting and then I've wasted so much time instead of just doing it!). There's lots of advice about blowing the ice build up with a hair dryer, or putting a bowl of hot water inside - but 'thanks' to how hot and humid it is outside, this puppy defrosted in no time at all. I did use a flat edge wooden spoon to scrape the hunks off but it was melting so fast I barely had to exert much pressure. 

In case I'm not the only defrosting virgin out there - here's what I did so you don't have to google it:

1. gather coolers and some ice, then take everything out of the freezer and put in said coolers. Tip - feel free to throw things out along the way! I came across some questionable items that may or may not have had dates from 2008...

2. Once empty, unplug. My freezer has a drain plug in the bottom and an opening at the bottom front for the water to drain out - I pulled both plugs and put down a baking sheet and towel under the front opening to catch any melted ice. 

3. Using a flat-edged wooden spoon (do not use any sharp metal objects to scrape, you don't want to damage the inside of the freezer - yeah, guess what we've been using to chip away the build up around the top edge that makes it so you can't close the door tight? A screwdriver. Oops.) scrape away the built up hunks of ice. I put down a plastic bin and scraped the big pieces into it and then took outside to dump on the ground. Once the big pieces were gone from the sides I scooped up what had fallen to the bottom and took that outside too. Then dry the whole thing with towels. True story -  I am short, and the freezer is pretty deep, so when I was drying it the bottom my head and torso were inside the chest and I was balancing on the edge with the top of my hips and my feet were dangling off the ground - I'm so glad no one was around to see that visual! HAH! 

4. The fun part was figuring out how to give the freezer a little structure - it's literally a big deep hole with a step/shelf about halfway up on one side. I should mention that before starting this project I drove around town trying to find some kind of bins or something to put different categories in so I could keep like things with like - for instance, bags of chicken with like bags, all the beef in one container, all the sweets in one, etc. But nothing was right and I was tired of looking so I went home defeated. But then had a idea - I'll just build a little divider for the bottom. I'm not one to make slapped together jerry-rigged cardboard and duct taped projects very often, but in this case no one is going to see this divider other than me and Dave (and you) and it totally doesn't matter what it looks like. So I measured the space, cut one long piece and 2 shorter cross pieces making a 4 square divider and duct taped it together, then put in the freezer. 

5. Before plugging the freezer back in you need to make sure how things are going to fit - in addition to the bottom divider I found some clear plastic containers around the house and figured where they could sit on top of the bottom layer. Don't go to all the work of defrosting and plug it in too early, it'll just frost back up again when you keep opening the door arranging the plastic containers. Go on, ask me how I know?

6. Ok, now you're ready - plug the freezer in and let it cool back down for 20-30 minutes before reloading all the food from the coolers. I put meat in the 4 divided bottom sections (chicken, beef, pork, fish and seafood). One bin sits in the middle on top of the divider and holds side dishes like my fave veggie tots, pierogi, dumplings, etc; other bins hold breakfast sandwiches, mini pizzas (both from Costco so there are a LOT of them hahaha); and baking and candy - they stack on the side shelf. The ice cream and popsicles go in a sliding basket that came with the freezer and sits on the top edge. So now when we open the freezer lid, we just have to lift out the center container and there is access to all of the meat below. 

Is it wrong how happy the organized black hole of doom has made me? I don't dread having to get something out now - and the ice build up is gone so I don't have to chisel it with the screwdriver anymore, YES! Now that I know how easy it is to defrost I will never let it get that bad again :) 

Wednesday, September 9, 2020

Croissant Bread Pudding with Bourbon Butter Sauce

Al and Cathy came for dinner, sort of an early birthday for Dave so I decided to make him some of his favorite things (not mine tho hahahahaha, look how unselfish I am 😂). I made fancy schmancy lamb chops with 2 sauces, orzo with radicchio and pancetta, and this croissant bread pudding for dessert. I'm not a lamb chop fan, a radicchio fan, a croissant fan, or a bread pudding fan - but I must admit this dinner was great. Maybe it's the bourbon sauce talking, but I really like this recipe and would for sure make it again if the occasion arrises.


 I didn't change a thing, even though I was highly doubtful the egg/cream mixture was going to fit in the 13x9 pan and I almost changed to a bigger dish (but it did so don't worry... ), my pictures aren't great because we were eating this outside in the screened porch in very low light! I promise it's pretty and smells great, even toasting the croissants in the beginning step smells heavenly ;)
  • 1 lb. croissants (about 6)
  • 8 large eggs
  • 3 1/2 cups whole milk
  • 1 1/2 cups heavy whipping cream
  • 2 cups sugar
  • 1 t. vanilla
  • 1/2 cup raisins
  • bourbon (to soak the raisins)
  • bourbon butter sauce (recipe below)
  1. Slice the croissants with a sharp serrated knife into 1" cubes. Place the croissant cubes onto a parchment-lined sheet pan and into a 225' oven until dried out, about 30-45 minutes. Cool slightly.
  2. While the croissants are in the oven, soak the raisins in bourbon (enough to cover the raisins).
  3. Whisk the eggs in a large bowl, then whisk in the milk, cream, sugar and vanilla until dissolved. 
  4. Butter or spray a 13x9 baking dish, then place the cubed/dried croissants in the dish. 
  5. Drain the raisins and place in the custard mixture, keeping the bourbon for the sauce. Add the raisins to the custard.
  6. Pour the custard into the croissants, mixing and pushing down with your hands to fully submerge all of the bread. Cover and refrigerate for 2 hours.
  7. Pre-heat oven to 350'. Bake the bread pudding uncovered for about 40-50 minutes until the top is puffed up and golden.
  8. Serve warm with the bourbon butter sauce.


Bourbon Sauce
  • 1/2 cup butter
  • 3/4 cup packed brown sugar
  • 3 T. bourbon (use the bourbon you soak the raisins in)
  • 1/2 cup heavy cream
  • 1/2 t. cinnamon
  1. Combine butter and brown sugar in a heavy bottom sauce pan over medium heat. Stir until melted and smooth.
  2. Add bourbon and cook for 30 seconds before adding the cream and cinnamon. Bring to a simmer and cook for about 5 minutes, stirring frequently.
  3. Keep warm or re-warm before serving.

original source here


Tuesday, September 8, 2020

Tip-sy Tuesday: stovetop toasted garbanzo beans

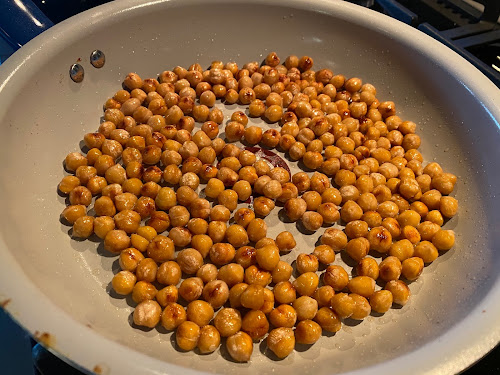
I make roasted garbanzo beans in the oven all the time - just drizzle with olive oil and sprinkle on seasonings and bake until crunchy. We were camping over the weekend and I'm too afraid to figure out how to turn on the RV propane oven but I wanted my crunchy garbanzos - hmmm I had the thought that maybe they'd toast on the stovetop?

Rinse and drain a can of beans, put in a skillet over medium heat and drizzle with a little olive oil. Add seasoning (I like coarse salt, sometimes I change it and add pepper, Italian seasoning, crushed red pepper, up to you - they're all good!) and cook until they are golden brown and crunchy - it took way less time than in the oven so keep your eye on the pan, and shake the pan occasionally. 

They turned out perfect, and I didn't have to turn on scary propane oven!


Monday, September 7, 2020

Face Mask with Filter Pocket

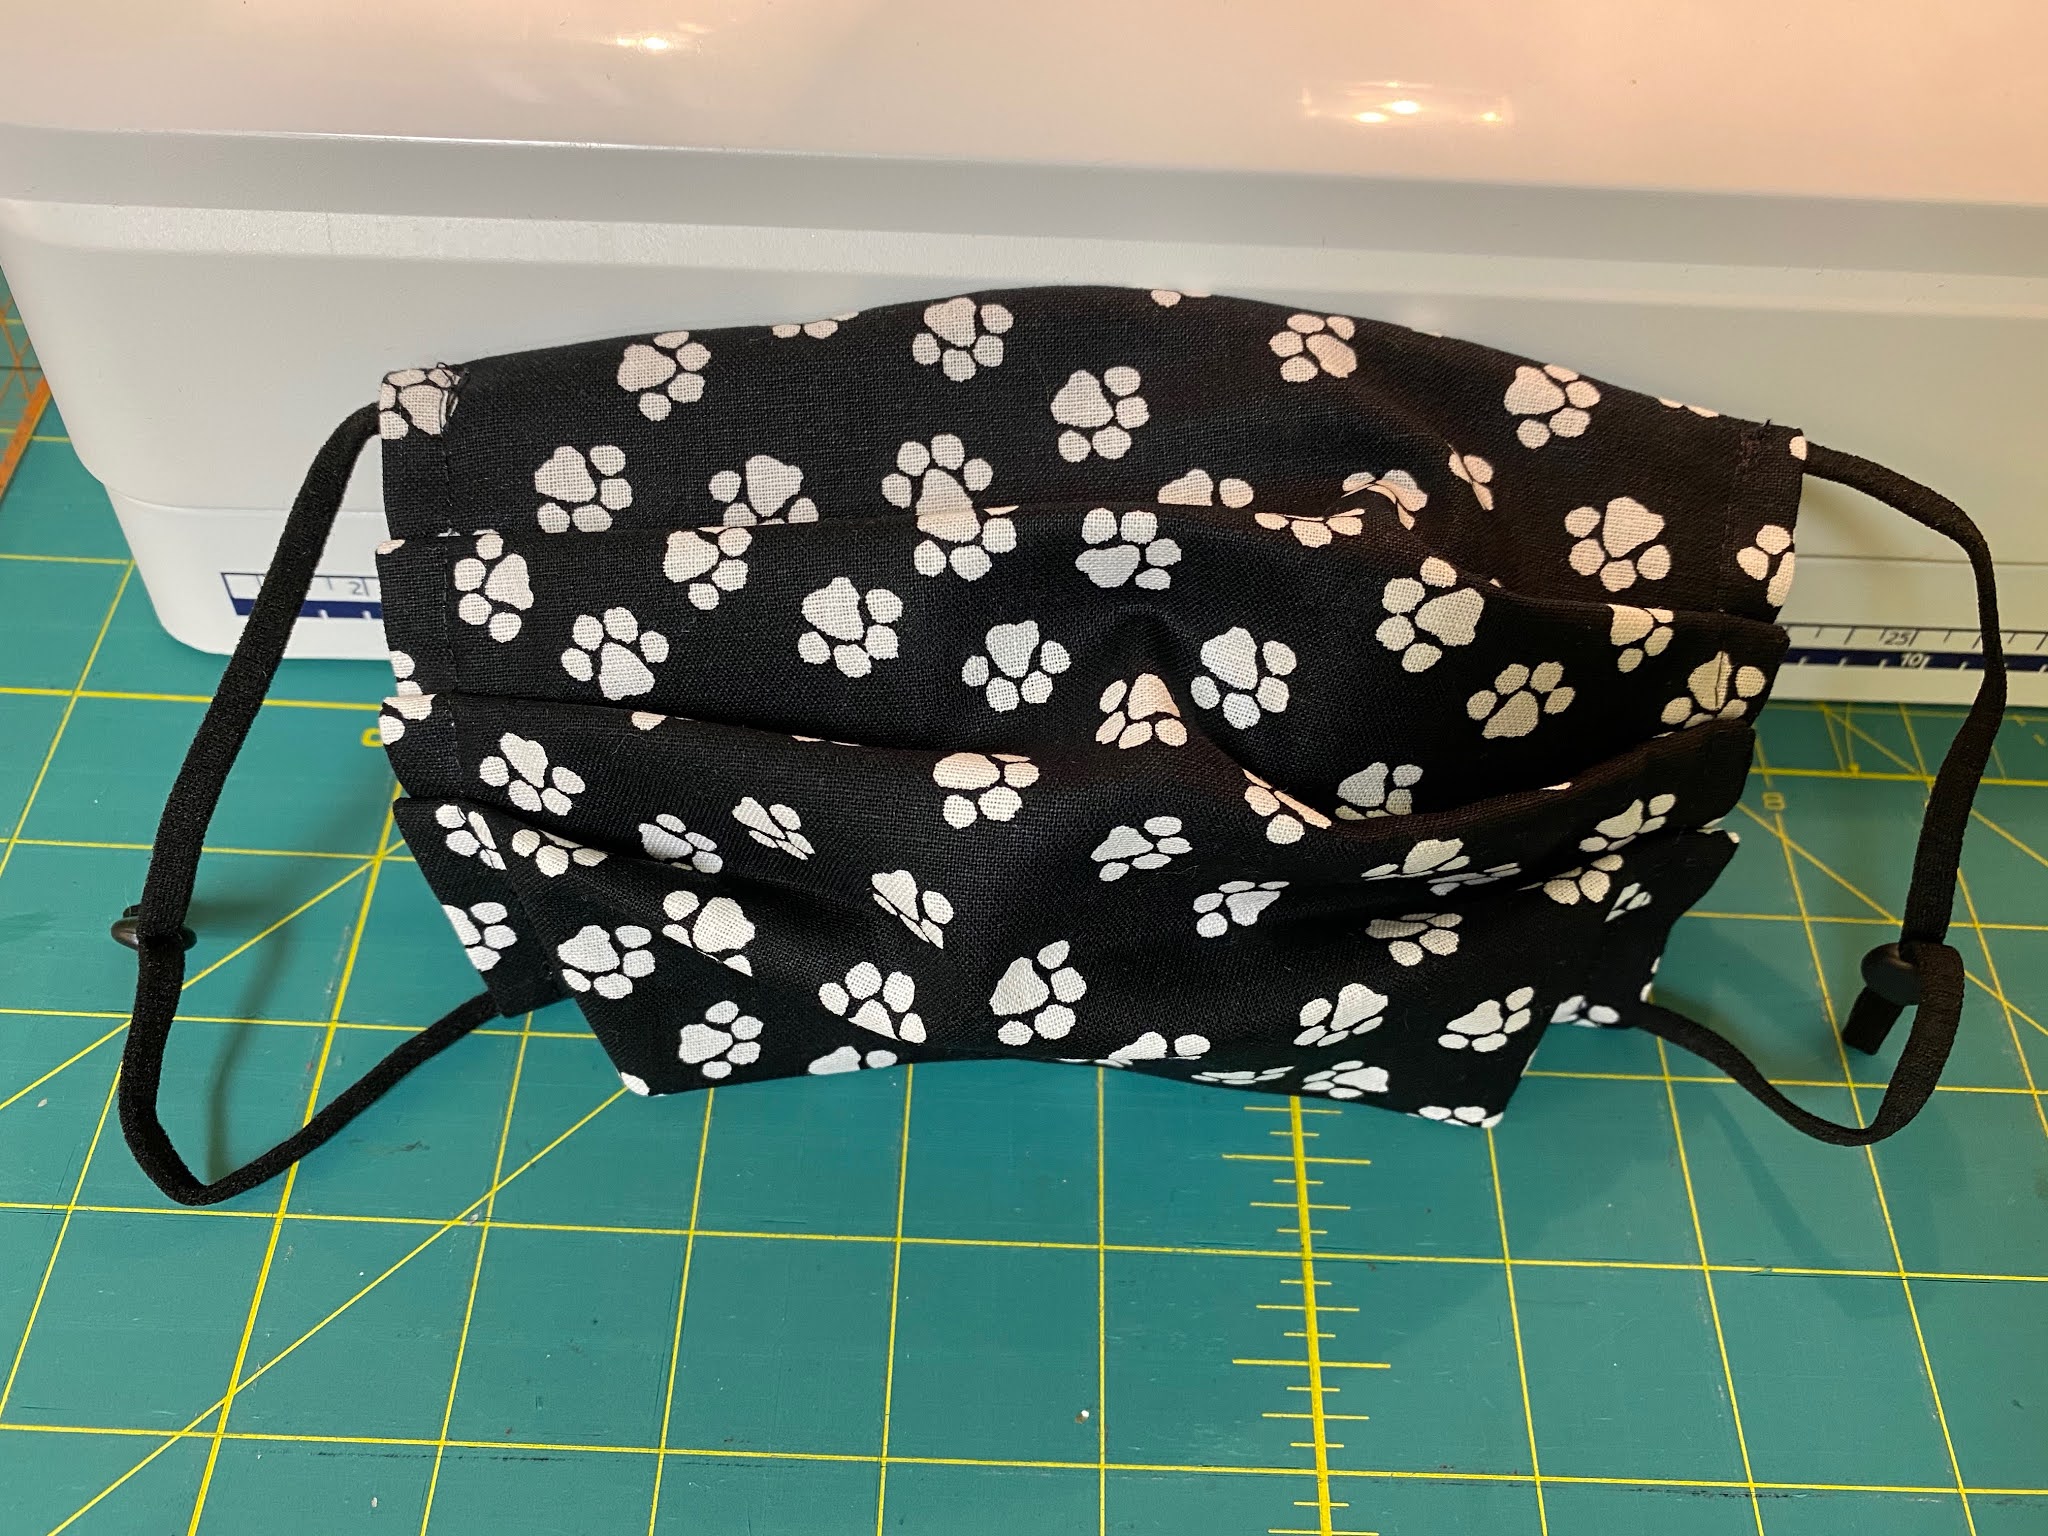
Here's the latest face mask pattern I've been making and I'm really happy with this iteration. There is a small hole on the backside where you can insert a filter if desired; I found adjustable ear loop elastics on Amazon which has taken the guesswork out of how to make them fit different face shape and sizes; and I can whip one out in a fraction of the time it takes to make the masks with fabric binding ties. They end up being a little lighter in weight without the binding, an important thing if you need to wear the mask for any length of time!


I adapted a pattern found at Hobby Lobby, and by adapted I mean I cut a couple corners to save even more time and I think they look, feel, and wear really nice. And I can make one in less than 30 minutes! I took a few pics to show you the steps:

Start with a 15"x8" rectangle of fabric. Fold in half with right sides together and sew 3" towards the middle from the top and bottom, leaving a 2" gap in the center. 


Press the seam open, then put the seam in the center of the rectangle and iron along the top and bottom. Sew a 6" piece of pipe cleaner or other wire across the top using a zigzag stitch. Turn each raw edge back about 1/2" and press in place. 


Gently turn right sides out, push the pipe cleaner up to the top edge and iron again making sure the raw edge sides are still turned under. This next pic shows what the back side looks like with the open space to insert a filter, the sides of the mask are still open at this point. 


Make 3 pleats on each side, pin in place (this is the same as my other masks - put a pin in at 1" from the bottom, then continue up the side pinning at 1", 1/2", 1", 1/2", 1", then fold so the bottom pin meets the next one up, pin in place making one pleat, continue matching the next 2 pins creating 3 total pleats) 


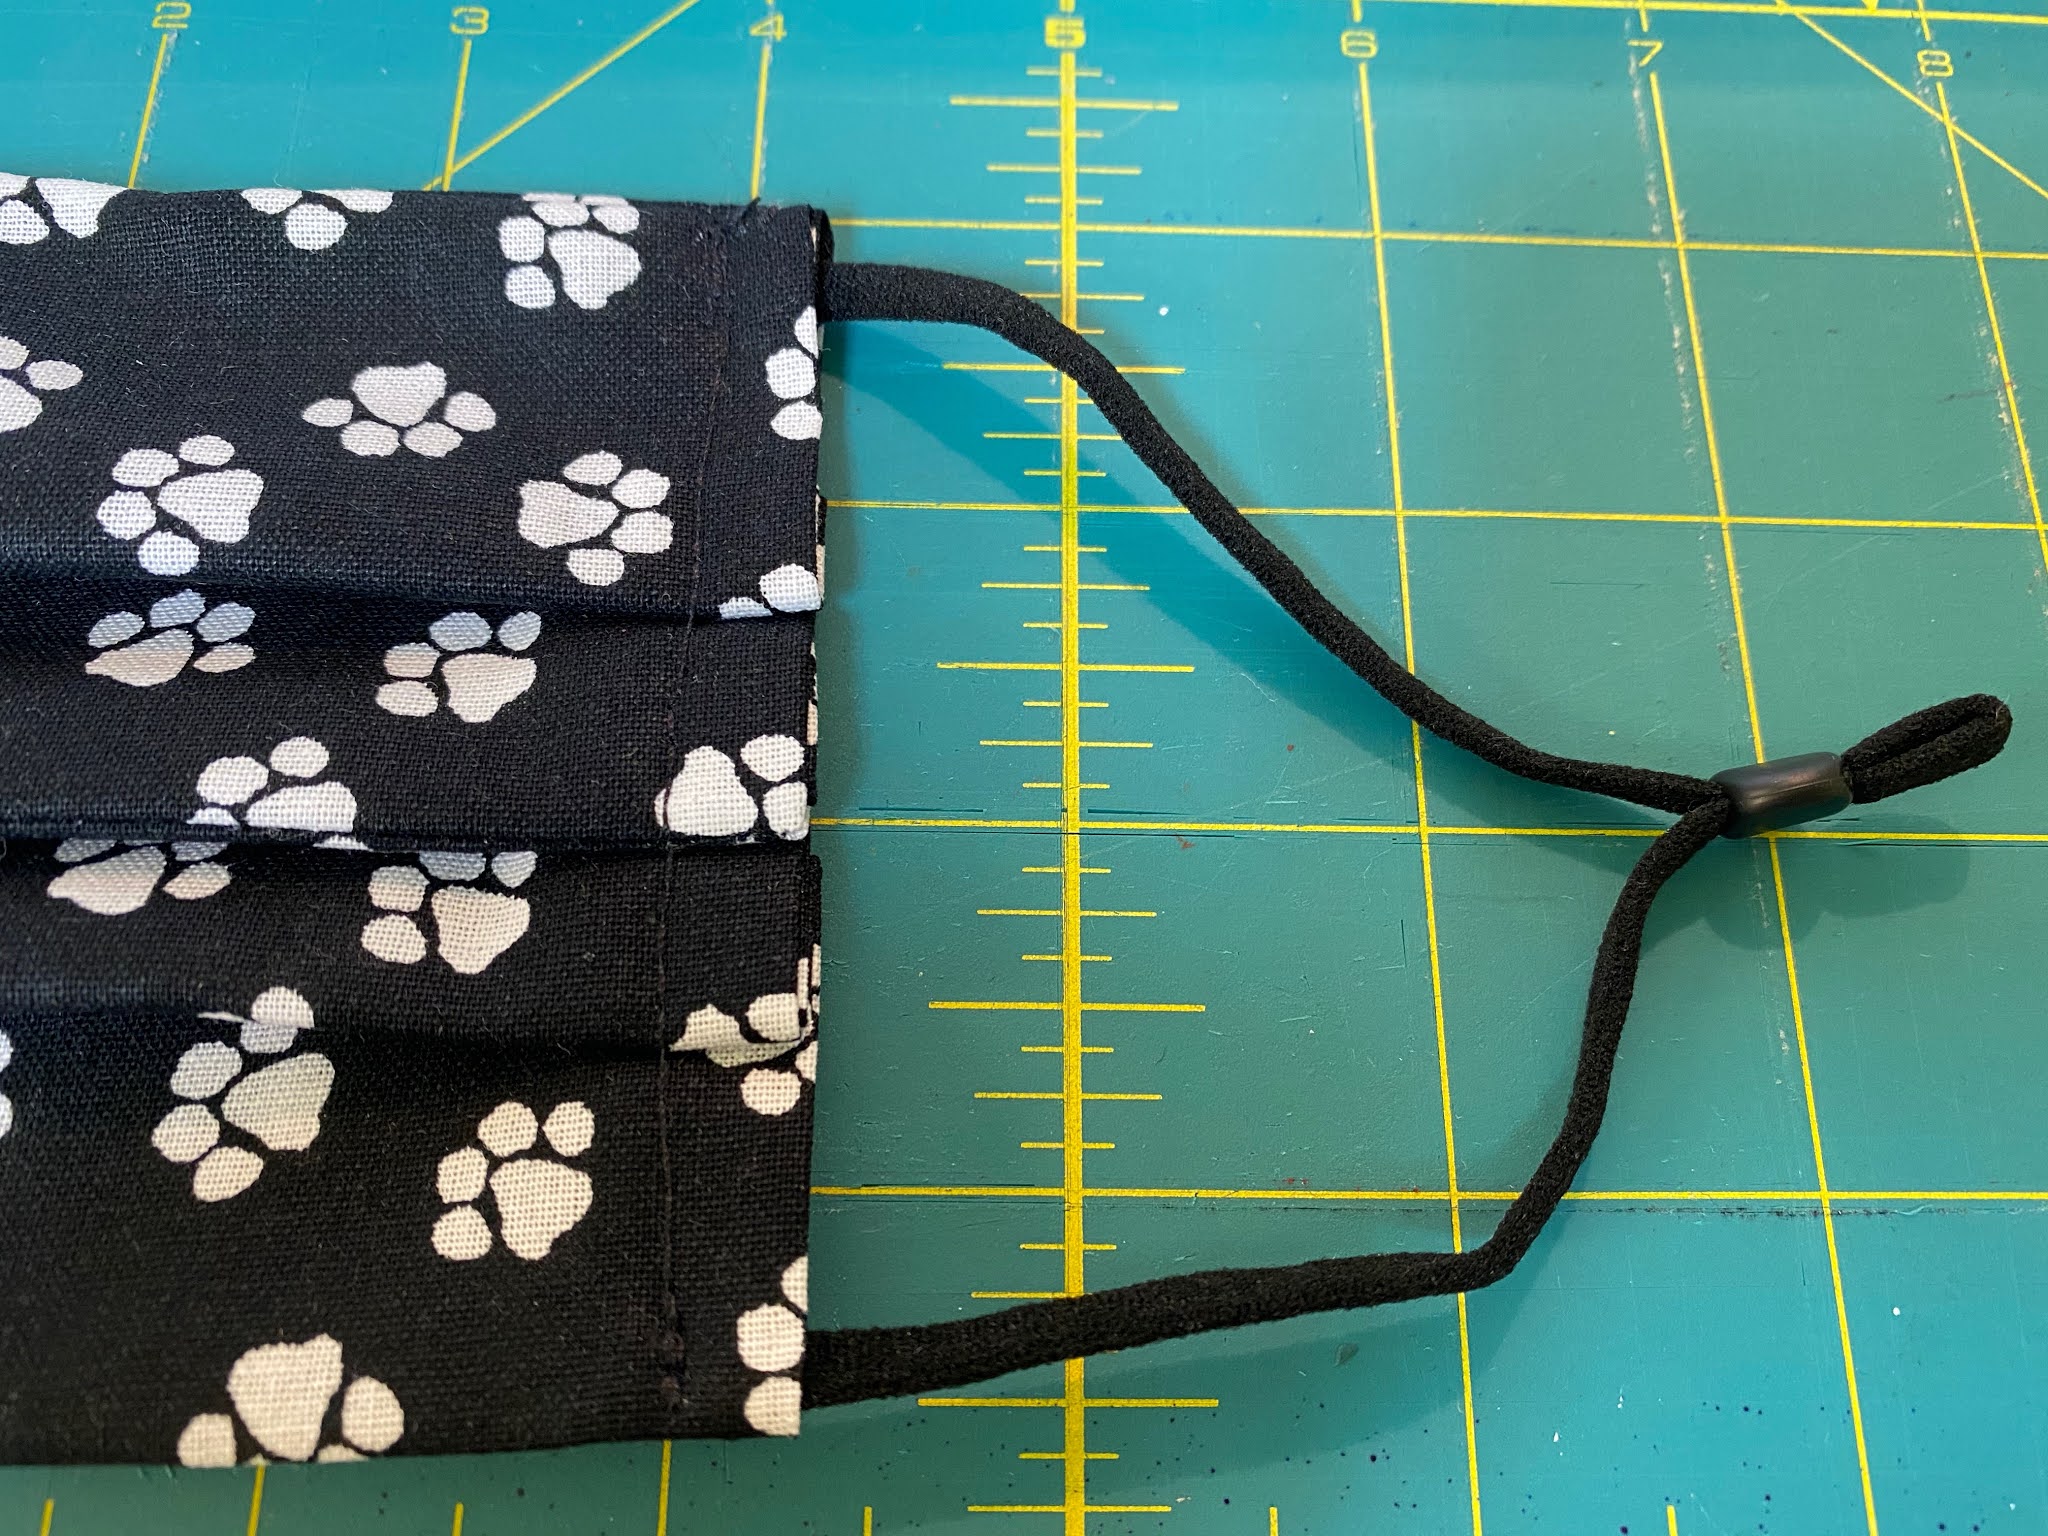
Finally, insert 1/2" of the elastic strap into the top and bottom of the open sides, pin in place. Now just sew down both sides making sure to catch the elastic (I sew a little then reverse to go over the strap a couple times). After you're done sewing give the ear loop a tug to make sure it's in there good. Trim any loose threads and you're done! 


Sunday, September 6, 2020

Around the Campfire 🔥 (week 36)

Dear Campers ~

Here's a quick recap in case you missed anything this week at camp:

Posts ~
8/30: 🔥week 35
8/31: crochet mask band
9/1: tip-sy tuesday: oven hack
9/2: donut and candy topped peanut butter chocolate pie 
9/3: drunken cherry bombs
9/4: Cathy does it again - canvas overhaul
9/5: tomatoes stuffed with cheesy grits

What's Cooking ~
  • grilled chicken breast, leftover lasagna, caesar salad
  • panko crusted baked scallops, couscous, mixed veggies
  • bbq ribs, kale salad
  • pork chops, sauteed zucchini with mushrooms and tomatoes, leftover couscous
  • grilled tuna, greek salad (tomatoes, cukes, feta), pan-fried garbanzo beans
Miscellaneous stuff keeping me busy ~
  • read 'The Hit' by David Baldacci (#2 in Will Robie series), another thriller involving a secret government assassin and his sidekicks. I like the main character so far (I've only read two) but the plot and action is a little farfetched and his style of writing, at least with this series, is getting old. Robie is reminding me of a superhero that gets into sticky situations and miraculously gets out hahahah. Still readable, pretty entertaining, a little long, enjoyable enough of a read to not quit with the remaining books in the series. ⭐️⭐️⭐️1/2
  • also read "First Grave on the Right' by Darynda Jones (#1 in Charley Davidson series) and loved it. It's about a woman who is the grim reaper and a PI - she 'sees dead people' who haven't crossed over yet, helps the police solve their murders (and occasionally relay's messages from the dead). It's funny, creepy but not in a very scary way, and an interesting spin. I'm hooked and can't wait until I can get #2 in 5 weeks from the library! ⭐️⭐️⭐️⭐️1/2
That's it for this week. Hope you had a good one, stop by often to see more fun projects, recipes, whatever else I can think of to make this week at camp!

Sincerely ~


Jill
your camp counselor 

Saturday, September 5, 2020

Stuffed Tomatoes with Grits and Ricotta

Yum. The cheesy grits baked in hollowed out tomatoes is genius and I'm sorry I'm just now trying this recipe! Where have you been all this time cheesy grits? The recipe calls for grits but polenta would be just as good - basically the same thing (ground corn) just ground in different textures (fine vs. coarse), both are delicious and easy to make. And FYI, breakfast leftovers were equally great ;)


1/2 cup grits (or polenta)
1 1/2 cups water
1 teaspoon salt, divided
2 eggs
1 1/3 cups part-skim ricotta cheese
1/3 cup grated parmesan cheese
1/2 cup grated asiago cheese
1 teaspoon garlic powder
1/4 cup chopped Italian parsley
1/4 teaspoon crushed red pepper
8 tomatoes (about 6 ounces each)

1. Combine grits, water, and 1/2 teaspoon salt in a small saucepan. Bring to a boil; reduce heat and simmer, uncovered, stirring occasionally, until grits are tender, about 25 minutes. Let cool 20 minutes.
2. Preheat oven to 350' and coat a rimmed baking sheet with nonstick cooking spray.
3. Beat eggs in a large bowl, then stir in grits, ricotta, parmesan and asiago. Stir in garlic powder, parsley, red pepper, and remaining 1/2 teaspoon salt.
4. Slice tops off tomatoes, hollow out with a spoon, leaving a 1/4" thick outer shell. Divide grits mixture equally among tomatoes (about 1/2 cup each). Arrange on prepared baking sheet.
5. Bake until light golden brown, 30 to 40 minutes. Cool slightly before serving

per tomato: 179 cal, 8.1g fat, 10.9g pro, 17g carb, 2.4g fiber

from allrecipes 6/16


Friday, September 4, 2020

Cathy's Canvas Transformation (aka: making a new painting from an old one)

Cathy did it again - she is a master of changing and remaking objects around her house and this one shocked me. She took a very large, very contemporary canvas and painted right over it! And look how great it turned out - I wish I had the nerve (and skill) to do this. 


It was actually a group effort which I think is even more special - family members took turns painting different areas until they came up with this amazing water scene. I wish I knew how big this canvas is, I'm going to guess 5' tall by 3' wide - she has it hanging in her front entryway and it's huge! Would you have thought to do this? 

Here's what it originally looked like:


During the transformation:


Thursday, September 3, 2020

Drunken Cherry Bombs

Need a fun treat for Labor Day weekend that people will love and be impressed that you made? I made these drunken, dunked, and sprinkled cherries for July 4th (which is why they are red, white, and blue!) but you can just change the sprinkle colors to whatever you want. They were a big hit and not hard to do:

1 (10 oz) jar maraschino cherries with stems attached, drained
1/3 cup Fireball whisky (note you can use regular whisky, doesn't have to be cinnamon Fireball)
1/3 cup cake flavored vodka (or other flavor)
1 cup white chocolate chips, or white chocolate candy wafers
sprinkles, sanding sugar, or other decorations


Put drained cherries back in the jar, add whisky and vodka to cover. (note you might need more or less alcohol, make sure the cherries are covered). Soak for at least an hour (I soaked mine overnight), drain (save the alcohol for another use, like drinking it hahahha) and pat dry with a paper towel.

Pour sprinkles into a shallow dish.

Put chips or wafers in a microwavable safe bowl and melt according to package directions. One at a time dip a cherry about 2/3rds of the way into the melted chocolate, and then set in the sprinkles or sanding sugar to coat about half-way up the cherry.

Place on a baking sheet, plate, or platter lined with a piece of parchment paper, refrigerate until firm and ready to serve.

note: I made some with regular whisky, and also some with all vodka - couldn't really tell them apart! My advice is to just soak them in some alcohol so they become 'drunken' hahaha, whatever you have on hand! Also, I made a handful of non-alcohol bombs for the kids and they turned out great too! I did sanding sugar for those and sprinkles for the soaked ones so we could tell them apart - you can see the 2 different ones in the above photo. Oh, and I had a hard time finding stem on cherries so I did ones with no stems by sticking them on a toothpick to dunk them in the chocolate. Tastes the same, altho the stems on looks prettier.

inspired by the recipe found here

Wednesday, September 2, 2020

Crazy Peanut Butter Chocolate Pie

So guys, I went a little bonkers and out of the box making this crazy donut and candy topped pie! You'll either love it or hate it - too much? Or is it perfect? Here's the backstory ~

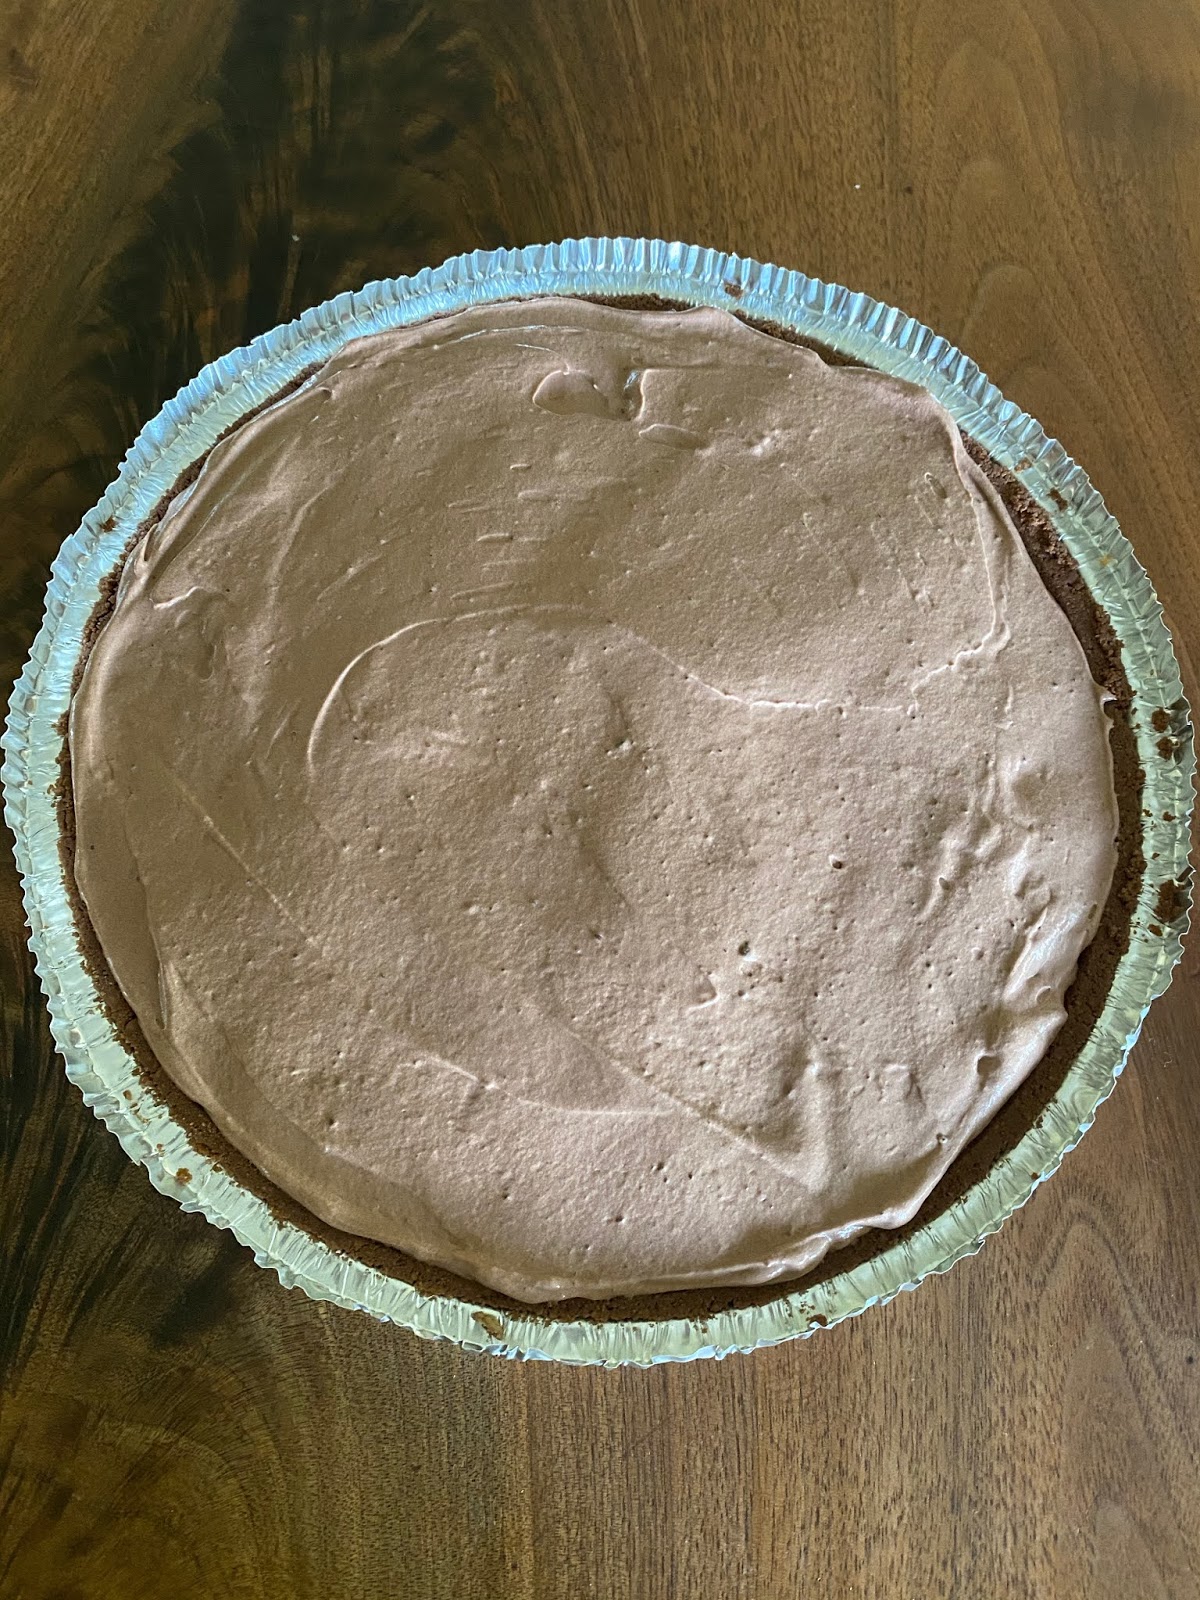
My sis always asks for some kind of peanut butter chocolate thing for her birthday; this year before I started making an easy layered creamy pie for her (there are tons of recipes online, I pretty much followed the one I found here) she made the comment that I didn't have to make anything and she'd be happy with a long john.

Hmmm that got me thinking - what would happen if I gave her both of her dessert desires? I've seen cakes topped with donuts (hello Pinterest), how 'bout a peanut butter chocolate pie topped with a long john? Then this happened:


  • chocolate cookie pie crust (or crush 16 oreos, mix with 2 T. soft butter and press into pie pan)
  • 1 pkg. cream cheese, room temperature
  • 1/2 cup peanut butter
  • 1 1/2 cups confectioners' sugar, divided
  • 16 oz. Cool Whip, thawed, divided
  • 1 cup milk
  • 1 small pkg instant chocolate fudge pudding mix
  • chopped mini peanut butter cups (a big handful)
In a large bowl beat the cream cheese, peanut butter and 1 cup confectioners' sugar with a handheld mixer until smooth. Fold in 1/2 Cool Whip until incorporated. Spoon into the prepared pie crust. Top with chopped mini peanut butter cups.


In another bowl beat together milk, pudding mix, and remaining 1/2 cup confectioners' sugar for 2 minutes, let set for a couple minutes until soft-set. Fold in remaining Cool Whip until incorporated and spread on top of peanut butter cups. Cover and chill for 3 hours. 


So you can be done here and have a delicious peanut butter chocolate dessert and everyone will be thrilled. Orrrrrrr you could go a little crazy and top it with a mixture of Oreo thins cut in half, different sizes of Reese's peanut butter cups (some chopped, some whole), chopped Reese's white peanut butter cups, mini oreos, Hershey's hugs, snowcaps, and white sprinkles! 


I've come this far with the crazy toppings, why stop there - so I added a long john and frosted round donut on top of all that! Be careful what you wish for sister ;)


I also made peanut butter buckeyes - 'cuz you can never
have enough chocolate peanut butter desserts! 


Tuesday, September 1, 2020

Tipsy-Tuesday: Oven Hack

I bake a lot. Like a lot a lot. Saw this little tip at cookinglight.com for getting the oven up to temperature faster and thought I'd try it - it isn't a drastic difference but it definitely heats up the oven a little quicker. So if I can remember to do this maybe I won't be standing around waiting on the oven in the future!

'Turn on the broiler for 3 to 5 minutes before preheating the oven to whatever temperature you need. Shaves minutes off waiting for the oven to heat up'.