Sunday, December 20, 2020

🔥 Around the Campfire (week 51)

 Dear Campers ~

Here's a quick recap of what happened at camp last week:

Posts ~

12/13: 🔥week 50

12/14: plant pot bells by B

12/15: Tip-sy Tuesday: holiday phone case by B

12/16: peanut butter kiss cookies by B

12/17: cork gingerbread man ornament by B

12/18: candy cane bows by B

12/19: candy cane bag closure by B

That's it for this week - I'm actually doing some blog clean up work (it's 6/2021 and I see I forgot to do 3 'around the campfire' recaps at the end of 2020! Just catching things up, apparently time got away from me hahahah ;) 


Saturday, December 19, 2020

Candy Cane Bag Closure by Brooke

Hey guys! Today I made this super cute Christmas bag. It was unfortunately broken and didn’t have any handles and I needed someway for it to stay closed! I cut two holes in the top and stuck a candy cane through it!


Jill here - I love this idea! It's the perfect way to close a wrapping paper bag - I immediately made one to show you how cute it looks (click here to see how to make your own gift bag, seriously it takes me like one minute - easy!).  Good job B! 


Friday, December 18, 2020

Candy Bows by Brooke

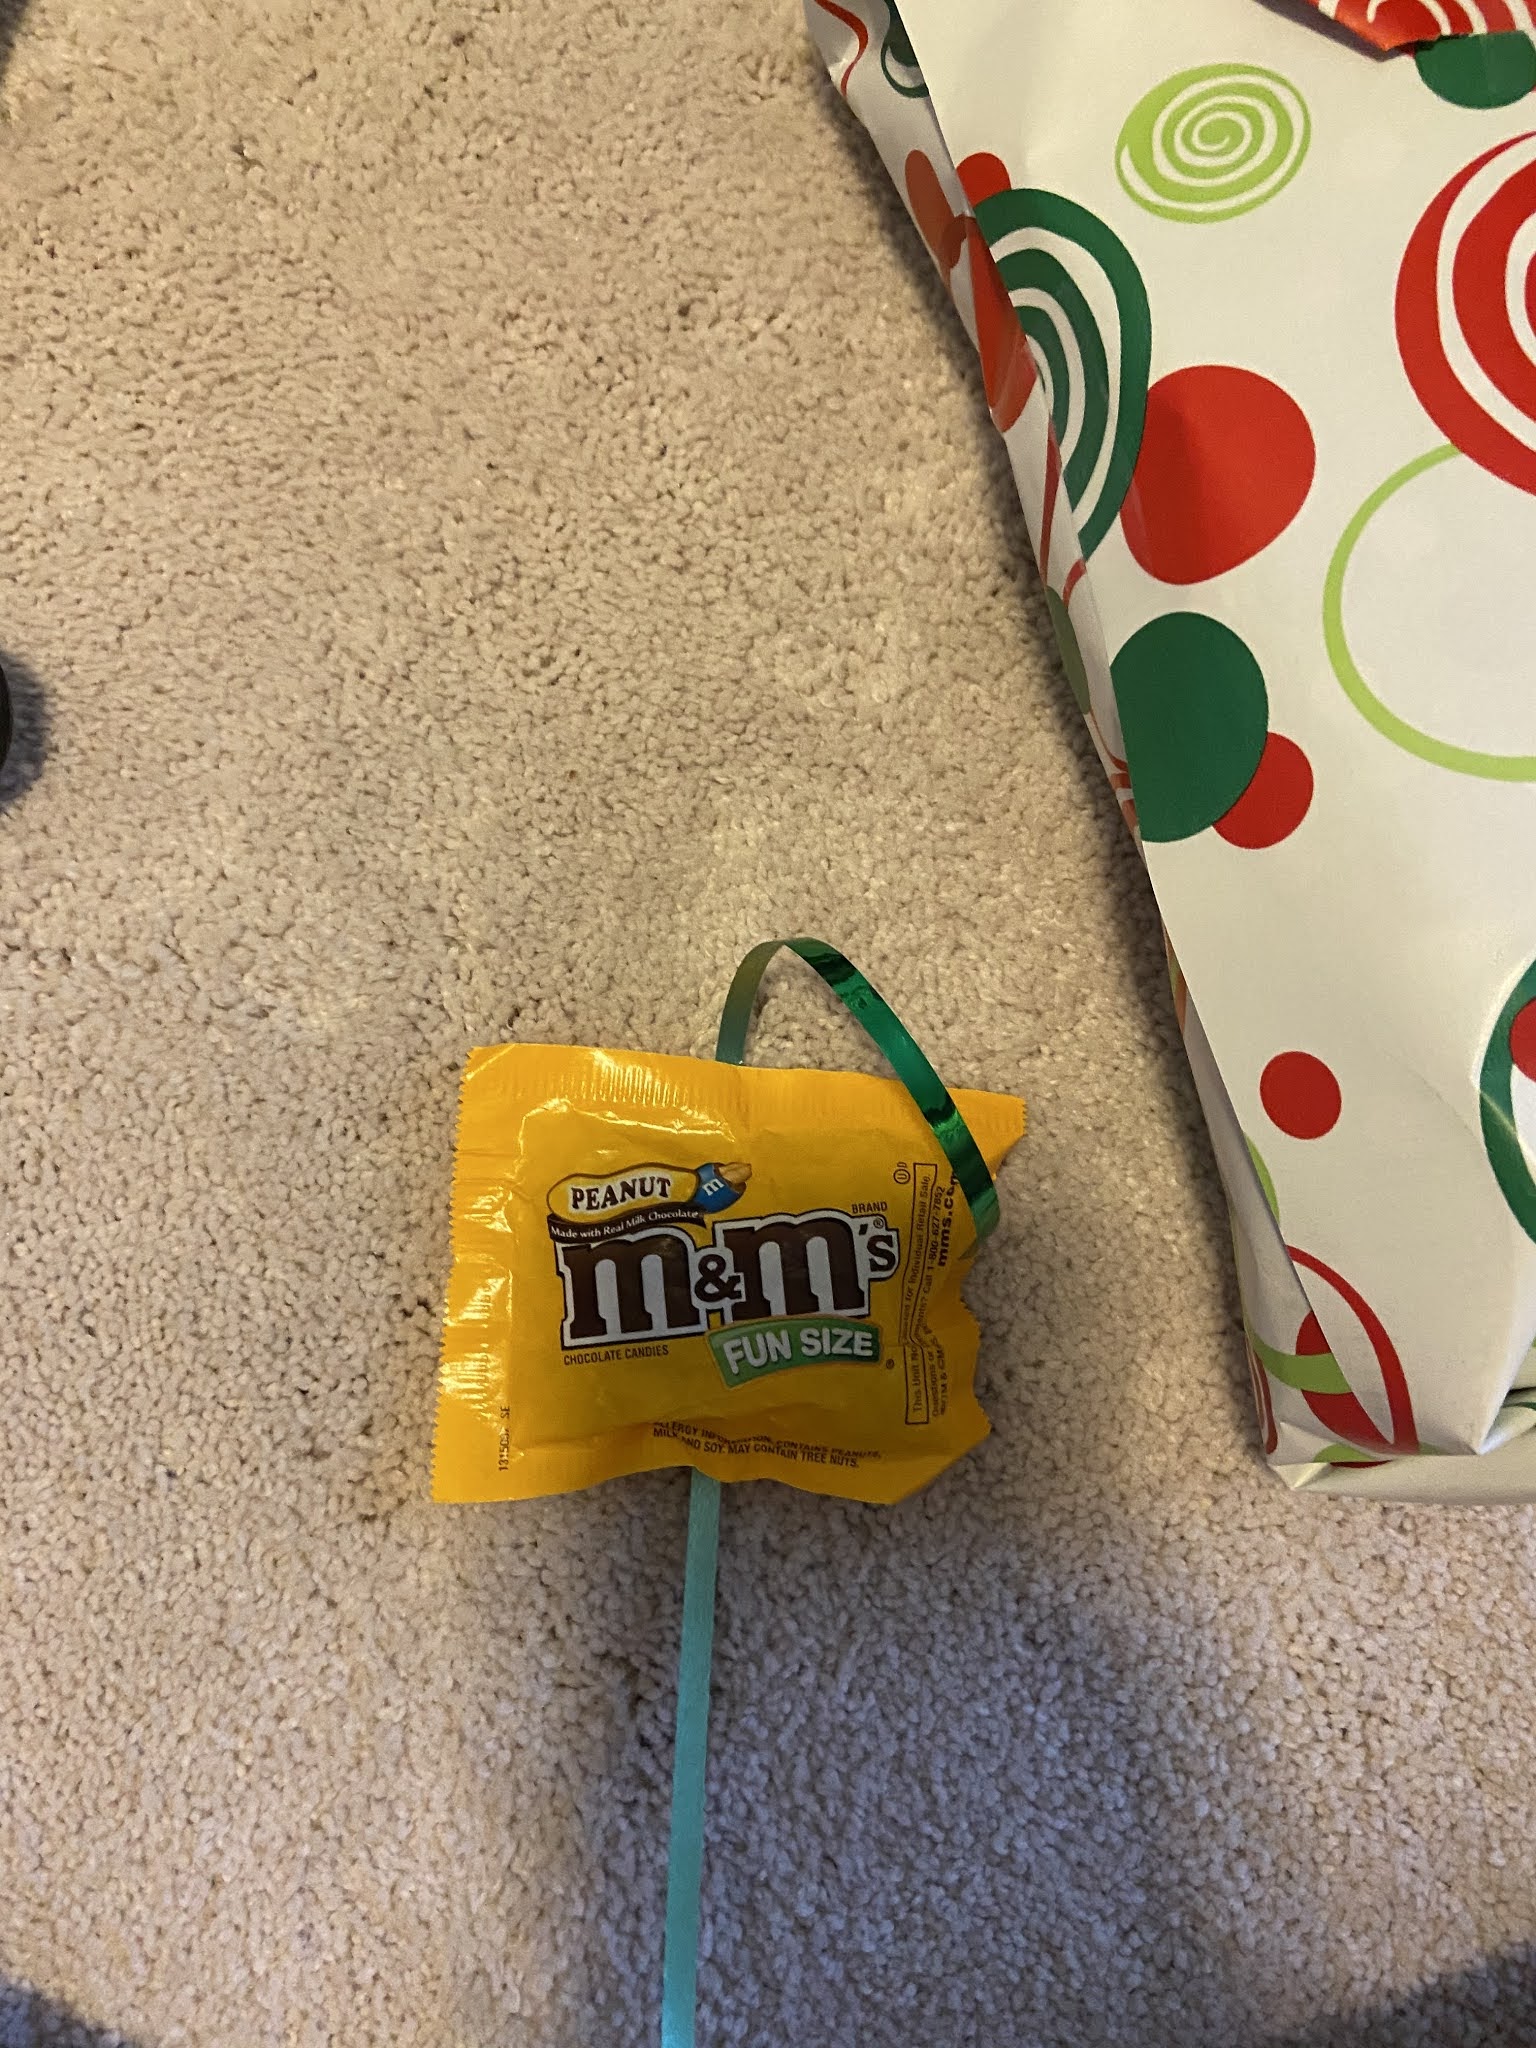
Hey guys! Today I made a super easy bow for Christmas presents! It’s made out of candy bags! This works with big or small candy bags. All I did was tie a ribbon around the middle and tighten it then knot it. Curl the remaining ribbon tails! I taped it to the top of a present but you could wrap ribbon around your gift and attach it that way too. It was so easy and it looks so cute!! 


Thursday, December 17, 2020

Cork Gingerbread Man Ornament by Brooke


Hey guys! I made this super cute gingerbread ornament out of wine corks!! First I glued 5 corks together in the shape of a body! Then I cut a piece off of a cork for the head making it as wide as the other corks! I drew a face on him using paint markers and gave him buttons and a bow tie and little decorations on his arms and legs. Then I glued a piece of ribbon on the back of him and let it dry and now he’s all done and hanging on the tree! I think he is super cute!


Wednesday, December 16, 2020

Peanut Butter Kiss Cookies by Brooke

Hey guys! Today I made peanut butter kiss cookies! They were so delicious! Here’s how I made them. 

The ingredients you need are: 

1 ¾ cups all-purpose flour

1 teaspoon baking soda

½ teaspoon salt

4 ounces (1 stick) butter, at room temperature

½ cup smooth peanut butter (or other creamy nut butter)

½ cup granulated sugar, plus more for rolling

½ cup light brown sugar

1 large egg

1 tablespoon milk, half-and-half, oat milk or nut milk

1 teaspoon vanilla extract

Nonstick spray or vegetable oil for cookie sheet 

Hershey’s kisses 


First mix flour baking soda and salt in a bowl and set it aside. Using an electric mixer mix the butter, peanut butter, sugar, and brown sugar. Add egg, milk and vanilla ; Beat until well blended. Then slowly mix in flour mixture


Next preheat over to 375 degrees. Spray a cookie sheet or lay out parchment paper. Roll dough into 1 inch balls. 


Then after making a ball roll it through sugar and place on cookie sheet. Bake until very light brown and cracked and puffy. 6-8 minutes. 


After done cooking remove sheet from oven and lightly press a candy kiss in the top and let them cool.

Tuesday, December 15, 2020

Tip-sy Tuesday: holiday phone case by Brooke

Hey guys! Today I made this Christmas phone case! I measured my clear phone case on a sheet of wrapping paper, cut it out and stuck it in the back! 


Jill here - isn't this a fun easy thing to get into the spirit? Love it! 

Monday, December 14, 2020

Plant Pot Bells by Brooke

Hey guys! Today I made bells! Well kinda lol. I used little terracotta planting pots and small bells to make my own hanging bell!! I’m using them as ornaments but you can do whatever. The first thing I did was paint my pots. I let the paint dry and then drew on them with paint pens. One with snowflakes and one with Christmas lights. Then I used ribbon and put both ends of it through the hole in the top of the pot. But don’t pull to hard on both ends or you’ll have to do it again! So I put a paint brush in the ribbon loop/hanger so it couldn’t fall through. Then I tied the bell on at about the end of the little pot because I thought it would leave me a long enough string for my bell and it did! After I tied the bell on I cut the excess ribbon and pulled the bell to the bottom of the pot! And there you have it! Super cute bells! 


Sunday, December 13, 2020

🔥Around the Campfire (week 50)

 Dear Campers ~

Guys! It's mid-December already. What the heck. I'm sure you are just sitting at your computer waiting to see what fascinating things I post each day and not slammed with last month Holidays hahahah. But just in case you missed anything at camp last week, here's a recap!

Posts ~

12/6: 🔥week 49

12/7: decoupage glass plates

12/8: tip-sy tuesday: prosciutto 

12/9: scalloped potatoes

12/10: MSIH: scalloped potatoes

12/11: gingerbread cookie hugs

12/12: how to make a multi-looped bow

What's Cooking ~

  • unstuffed chicken cordon bleu, roasted broccoli
  • spiral ham, scalloped potatoes, roasted green beans, southern biscuits
  • marinated pork chops, butternut squash, chopped kale salad
  • crock pot london broil stroganoff, asparagus
  • steak, sautéed mushrooms, caeser salad 
  • grilled chicken, acorn squash
Miscellaneous stuff keeping me busy ~
  • oh it's crunch time for shopping and finishing my homemade gifts! who has time for anything else right now?!!!
  • I did read a couple books but nothing of note and not great so not even going to bother telling you not to read 'And Every Morning the Way Home Gets Longer and Longer' by Fredrik Backman or 'Brighter than the Sun' by Darynda Jones!
That's it for now - my sis and b-i-l are coming over to watch MSU basketball (Go Green!) and I've got beer cheese pub soup in the crockpot for lunch. Gotta go! Have a great week people!

Sincerely ~


Jill
camp counselor

Saturday, December 12, 2020

Make a Multi-Looped Bow

 Last week we made tiny bows using a fork, this time it's how to make a big bow. The nice, full, multi-loop bows that you'd hang on a wreath, the front door, a banister, or a gift. Do you know how to do this already? In that case good for you and never mind the rest of this post hahaha. I knew how to do it in theory but this morning I took one apart to really learn the correct way to put one together. 


This one is made using 2" wired ribbon - it's 3 loops for the bow, 1 small loop for the center, and one long piece for the tail. You'll also need wire (or some other material like yarn, twine, etc.) and a stapler to attach it all together. 


To make a bow about 8" wide and 12" long cut 1 piece 24" long for the tail, 3 pieces approx. 18-20" long, and 1 piece about 5" long for the center. Shape the 5" piece into a circle and staple to hold it. Shape the 3 pieces into loops, overlapping the ends in the middle. If using wired ribbon it will hold it's shape, if not wired then staple the loop closed to hold it. 

Now take one of the loops and fold the middle in half, then fold the sides back on itself - you're sort of pleating the center of the loop. You could also just pinch the middle, you want to get it as flat as possible and then staple to hold. Repeat with the other 2 loops. 


Run a long piece of wire thru the middle of the small center circle. Stack the 3 loops together with the stapled edges touching. Pinch the middle of the long tail and stack that up against the loops. Lay them on top of the center circle, bring the wire over and twist to hold everything in place. Turn over and fluff all the pieces until you have a nice full bow. 


You can adjust the size of the bow by making the loops bigger or smaller, using different widths of ribbon, and add more loops if you want it even fuller. There, now we can all make professional looking bows!

Friday, December 11, 2020

Gingerbread Cookie Hugs...by Brooke

Hey guys! Today at my aunts I made these white chocolate gingerbread cookies! I thought they were so good! Here’s how I made them:


  • 3 cups flour
  • 2 tsp ground ginger
  • 1 tsp ground cinnamon 
  • 1 tsp baking soda 
  • 1/4 tsp ground nutmeg
  • 1/4 tsp salt 
  • 1 1/2 (3/4 cup) sticks butter, softened
  • 3/4 cup packed brown sugar
  • 1/2 cup molasses 
  • 1 egg
  • 1 tsp vanilla extract 
  • 1/4 cup sugar
  • 60 White and milk chocolate swirled Hershey hugs. 


First mix flour, ginger, cinnamon, baking soda, nutmeg and salt in a large bowl. Set aside.


Beat butter and brown sugar in large bowl with electric mixer on medium speed until fluffy. Add molasses, egg, and vanilla; mix well. Gradually beat in flour mixture on low speed until well mixed. Press dough into a thick flat disk. Wrap in plastic wrap. Refrigerate 4 hours or overnight.


Preheat oven to 350°F


Shape dough into 1" balls. Roll in  1/4 cup granulated sugar to coat. Place 2 inches apart on uncreased baking sheets. 


Bake 8-10 minutes or until edges of cookies just begin to brown. 


Right after the cookies get out of the oven push a Hershey’s hug into the middle. Remove to wire racks; cool completely.


Hope you guys enjoyed these cookies as much as I did!


Jill Here - couple funny things while B made these cookies (without my help by the way. I miss her being little and doing things together but man is it nice that she can bake cookies on her own hahah! First she was practically gagging when adding the molasses, said it smelled nasty. And we shouldn't add nutmeg 'cuz it'll wreck the cookies. 'Just follow the directions B'. The dough was very crumbly but held together when she scooped it out, later I read the directions and realized she added the 1/4 cup sugar to the dough instead of putting it in a small dish to roll the cookie dough balls in! But they turned out great anyway. After they were baked and she tried a bite she said 'they're pretty good'. Then after she finished the cookie she amended 'ok, these are great!'. 


This recipe came out of a Meijer | Holiday 2020 flyer I got in the mail