Thursday, January 7, 2021

No-Bake Cookie Bars by Brooke

Brooke brought me a couple of these bars - she made up the recipe herself and quite truthfully I had my doubts but she's right, they are delicious. Not super sweet and we're thinking the melted chocolate is what holds them together, Jen loves them so much she wants to make them herself but is trying to find something a little healthier to bind them (I say go for the chocolate but that's just me hahahah). Good job B! Here's what she did in her own words:


Hey guys! I made no bake cookie bars! They are so good! I used 2 cups of oats and then 1/2 a cup of peanut butter and 2 tablespoons of honey. Then I melted 1 cup of chocolate chips in the microwave and added it to the bowl and mixed it all together. Then I put it in a bread pan and let it sit for an hour or so. Then I cut them up! They were so delicious!


Wednesday, January 6, 2021

Povitica (apple cinnamon rolled bread)

I saw this bread in a catalog around Christmas time - retailing for $35 a loaf! Whaaaat? So that immediately made we want to make this bread and see why in the world you'd pay $35 for a loaf of bread. I'd never heard of it, so naturally I turned to my friend Google and found a bunch of recipes - most have nuts in them which Dave can't have so I chose this apple-cinnamon-no-nut recipe at random. Shoulda paid a little more attention to the recipe, after I started it I realize there are a few errors printed and no pictures of the steps - let's just say pictures of the steps and accurate instructions would have been helpful! So I have no idea if I did this correctly, but in the end it looks right on the inside and it is DELICIOUS! 

It's great. And pretty. It's a lot of steps and doesn't come together quickly and there were lots of dishes and a mess to clean up - but it's delicious and worth it. Now that I have a bit more knowledge I will absolutely make this again and it'll be easier next time. I did take some pics of the steps for you, I'm putting them below the recipe - just remember I might not have done it right hahahah. End result is good tho so that's what matters.

Dave walked into the kitchen when I was cleaning up and goes 'it's a 35 dollar loaf of bread because of how much work and mess it is' LOL. Point. 

I'm linking the source recipe below but will write it for you how I made it (which means I'm writing it and hopefully correcting the errors!). 

One more thing, just FYI - I also googled how to pronounce this rolled Eastern European bread and it's 'po-vee-TEET-sah'

Ingredients for one loaf ~

to activate the yeast:

  • 1/2 teaspoon sugar
  • 3/4 teaspoon all-purpose flour
  • 2 Tablespoons warm water
  • 1 1/2 teaspoons yeast
dough:
  • 1/2 cup milk
  • 3 Tablespoons sugar
  • 3/4 teaspoon salt
  • 1 large egg, beaten
  • 1 Tablespoon unsalted butter, melted
  • 2 cups all-purpose flour, plus more for the dough if needed and for flouring the surface
filling:
  • 2-3 small apples, peeled, cored, and roughly chopped
  • 1/2 cup brown sugar
  • 1/4 cup honey
  • 1/4 cup unsalted butter
  • 2 Tablespoons flour
  • 2 Tablespoons cinnamon
  • 1/2 teaspoon nutmet
  • 1/2 teaspoon allspice
topping:
  • egg white
  • melted butter
Directions ~

to activate the yeast:
  1. In a small bowl, stir sugar, flour, and the yeast into warm water and cover with plastic wrap.
  2. Allow to stand for 5 minutes (it should look foamy if it's active)
to make the dough:
  1. In a medium saucepan, heat the milk to just below boiling (about 180'), stirring constantly. Hot enough to scald you but not boiling. Allow the milk to cool slightly until it is about 110'. (my note: I microwaved the milk in a glass measuring cup for 1 minute which put me right at 180' - lucky guess).
  2. In a large bowl mix the scalded milk, sugar, and the salt until combined. 
  3. Add the beaten egg, yeast mixture, melted butter, and 1/2 cup of flour.
  4. Blend thoroughly; slowly add remaining flour mixing well until the dough starts to come away from the side of the bowl. 
  5. Turn dough out onto a floured surface and knead, gradually adding more flour a little at a time until the dough is smooth and does not stick. (my note: I used my kitchen aid standing mixer with the bread hook instead of kneading by hand)
  6. Place dough in a lightly oiled bowl; cover loosely with a clean towel and let rise in a warm place and hour and a half to 2 hours, until doubled in size. Click here to see yesterday's tip about using the oven while the dough is proofing (rising). 
meanwhile, make the filling:
  1. In a small saucepan, combine chopped apples, brown sugar, butter, honey, and flour.
  2. Heat to boiling and cook for about 3 minutes, stirring constantly. Reduce heat to medium-low and cook for 10 minutes. 
  3. Remove from heat, stir in spices. Allow to stand at room temperature until slightly cooled.
  4. Transfer to a food processor or blender and puree until smooth. Set aside until ready to use. 
to roll and assemble the dough:
  1. Spread a clean sheet or cloth over your counter (my note: I didn't do this and rolled it out onto my large cutting board and then my counter). Sprinkle with a little flour to keep the dough from sticking. 
  2. Place the dough on the sheet and roll the dough out with a rolling pin as thin and uniform as possible, you can use your hands to help stretch the dough if that's easier. Pick up and shift the dough often to keep it from sticking to the surface. Use additional flour if necessary. You want the dough to be almost see-thru thin. Tip: if the dough springs back and is difficult to roll, cover and let it rest for about 15 minutes - this will make it easier to work with.
  3. Spoon apple cinnamon filling onto the rolled out dough, spread evenly over dough until covered. 
  4. Lift the edge of the cloth and gently roll the dough like a jelly roll from both long sides toward the middle. (my notes: roll it as tight as you can without squishing out the filling. I followed these directions to roll in from both sides but next time I will just roll it up from one long side like a traditional jelly roll).
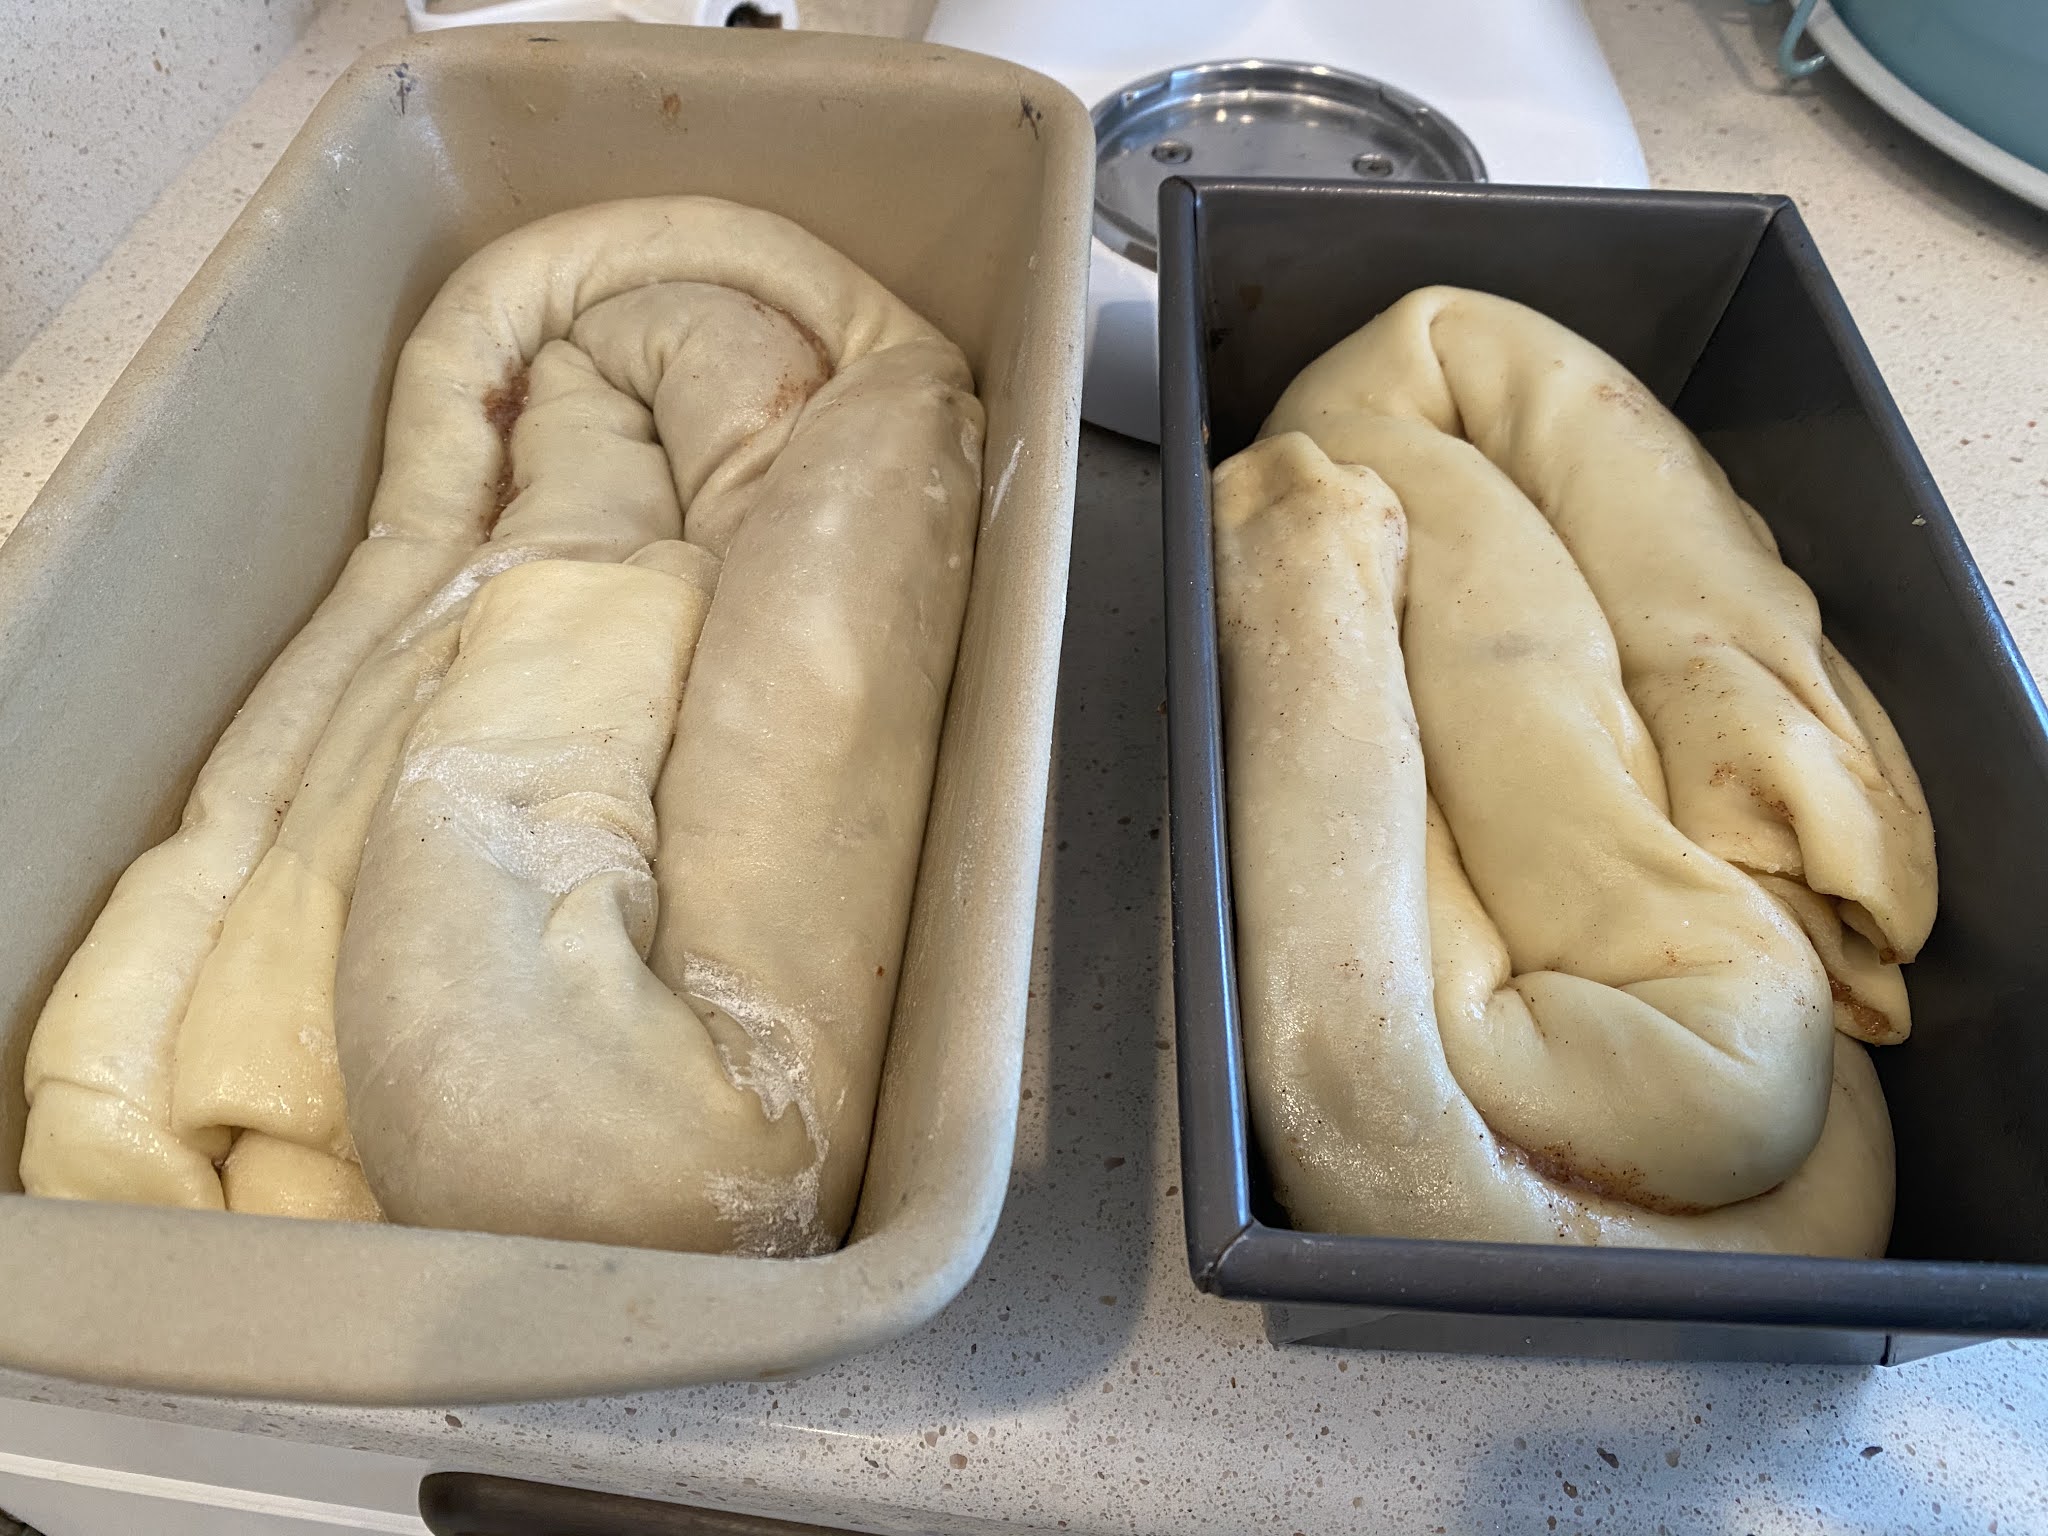
  5. Once the dough is rolled up like a long rope, gently lift it up and place it into a greased loaf pan. Fit the dough into the pan by shaping it into a 'U' or 'S' shape, coiling the dough around itself.
  6. Brush the top the loaf with egg white.
  7. Cover pan lightly with a clean cloth and allow it to rest for about an hour.
  8. Preheat the oven to 350'. 
  9. Remove cloth from dough and place into the preheated oven and bake for approximately 15 minutes. Turn down the oven temp to 300' and bake for an additional 45 -50 minutes, until done. Check the bread to make sure it isn't getting too brown, loosely cover with a sheet of aluminum foil if it is. 
  10. Cool on a wire rack for 20-30 minutes. (my note: I left it in the pan for a few minutes and then decided to turn it out onto the wire rack so I could make sure the bread was done - after checking it I put it back in the pan to continue to cool. 

combine ingredients to activate the yeast

after about 5 minutes it'll be foamy, add to dough ingredients

let dough rise until doubled

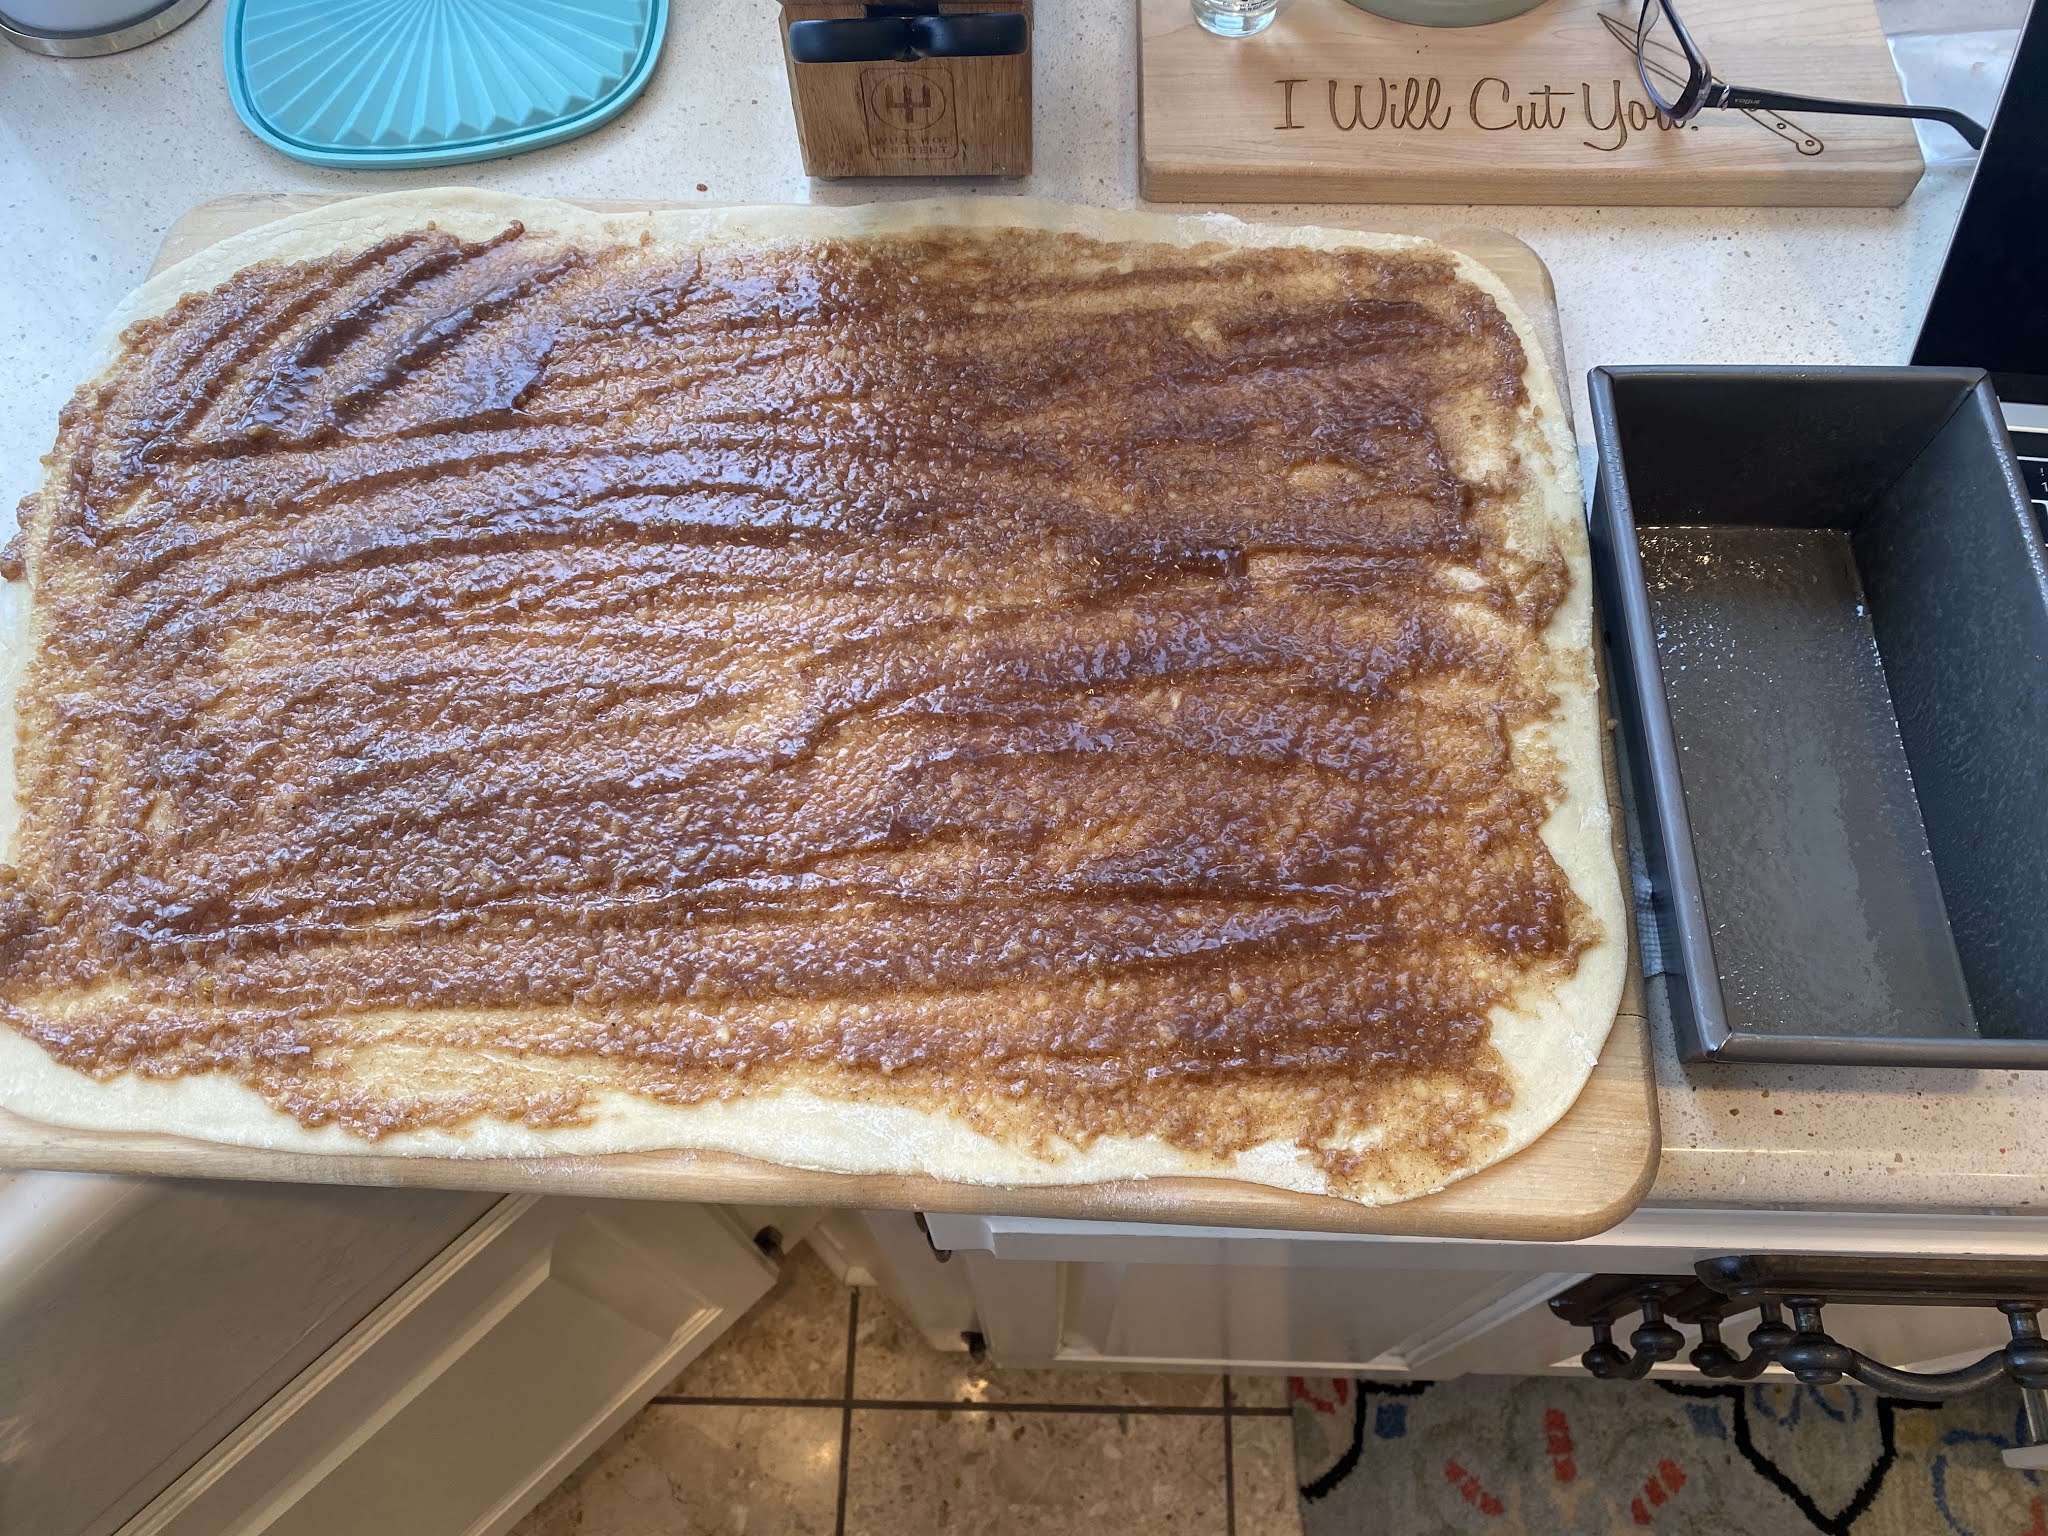
roll out as thin as possible - one loaf I rolled on my cutting board (above) that is 18"x21",
the second loaf I rolled out on the counter to about 21"x24". The thinner you can roll it
the more layers you'll have. 

make the filling

let it cool a bit and then process until smooth

I thought it was going to be too runny but as it cools it thickens up


this is the one I rolled out even thinner 21"x24"

and this is the smaller one - smaller means less swirls on the inside of the loaf

following the instructions, I rolled from both ends. 

not gonna lie - this looks like intestines to me hahahha...

but much prettier once baked!

this is the smaller one with less swirly layers...

...and this one has more layers


 click here for source


Tuesday, January 5, 2021

Tip-sy Tuesday: proofing dough

Have you discovered the love of baking bread thru all these stay-at-home-trying-to-entertain-yourself days (weeks, months...)? Maybe not? Not yet, anyway? I grew up making bread (side story - I won a 4H ribbon for my cinnamon rolls when I was like 10, had to have a neighbor kid stir the flour in for me because I wasn't strong enough to do it by hand!) and there's something to be said for how satisfying it is to spend the day making it and seeing/smelling the results. Anyway - on with today's bread making tip!

After you make the dough it needs to rise for a couple hours or so until it doubles in size, and you need to put it somewhere warm for that to happen. Not too warm, not too cold...yesterday when I made a weird but delicious bread (I'll post it tomorrow) I tried a new technique and it worked so thought I'd share. My mom gave me this idea but I couldn't remember exactly what she said, so I did the next best thing and googled it ;)

I know, I know, I bet you groaned. But it made me laugh!

Once the dough is ready to rise, turn your oven on the lowest temp it'll go - mine is 175' at the lowest. Let the oven heat until it reaches 110' and then turn it off. You're aiming for an oven of approx 75' to 85' - letting the oven heat a little higher than that assures the temp will be warm enough after you open the oven door and place the dough inside (you'll have the dough in an oiled bowl with a clean cloth covering it). 

An alternate method for using the oven to proof your dough is to put a glass pan in the bottom of the cold oven and add 3 cups or so of hot water. Place the dough on a rack above it and the steam from the hot water will warm the oven - I haven't tried that method but don't know why it wouldn't work, I just didn't want to deal with another dish to take care of! 

Now having said all that, if you live somewhere warm or you have your temperature cranked to at least 75' you can just leave it on the counter away from drafts and it should be fine. But in snowy Michigan it's 30' outside and I like to keep the house on the chillier side (everyone who comes over complains or makes note of how cold it is - put a sweater on people!) so I needed to find a warmer spot for the dough to hang out! 

PS: Dave's mom used to tell stories about how she'd make a couple loafs of bread and when the kids got home from school they'd devour it all - so she stopped making it hahahahah!! 

Monday, January 4, 2021

Marinated Pork Steak in a Cast Iron Skillet by Jen

Jen told me about a dish she made using pork steak. I thought to myself 'what the heck is pork steak?' and asked her to blog it for us. 2 take-aways from this - 1) pork steak is a thing and 2) my sis can apparently cook better than she likes to say and I'm pretty sure it's just so I'll make food for her. Here's what she did in her words:


Recipe from the Sister. Yep the sister. 

I bought 2 cheap Pork steaks. And when I say cheap I mean cheap. $3.45 for 2.  And no it wasn’t expired.

I googled a lot of recipes and couldn’t find one I liked or had all the ingredients for so I merged 2 together to come up the following.

I have to say it was delicious.  My onion was way too big but didn’t want to store the other half so just cooked it all.

The pork held its flavor even the next day and was still pretty darn good if I say so myself.


2 Pork Steaks

1 large onion

One lager style beer

Salt and pepper to taste. 


First I marinated the pork in beer and chopped onion for 2 hours.  I heard I could marinate up to 6 hours (no longer or gets mushy) but I didn’t test that out.  2 hours was plenty.

I then put the pork in the cast iron skillet and salt and peppered.  I then browned the pork 5 minutes, turned and browned the other side 5 more.

Removed the pork from the pan and set aside. Put the Beer and onion marinade in the skillet and brought to a boil.  Lowered the heat to medium and cooked 5 minutes more until the onions started to soften. I then returned the pork to the skillet and  cooked the entire mixture covered on medium heat for 12-15 minutes (until cooked through).


Yum.


Sunday, January 3, 2021

Black-Eyed Pea Jambalaya (rerun)

I originally posted this 1/3/16 and looking at the recipe again makes me want to go right out and get the ingredients for dinner tonight - except it's cold and slushy and I don't want to go out hahahaha. Next time I'm at the grocery store tho...

Did you know that eating black-eyed peas on New Years Day is thought to bring you good luck and prosperity? I'm not entirely sure why that is - but I'm all for bringing good luck and if eating them helps than why not haha! I searched for black eyed pea recipes and settled on making Emeril Lagasse's black-eyed pea jambalaya - it isn't like any jambalaya I've ever had before but that doesn't matter, it is delicious and easy to make.


I made a couple changes - I couldn't find tasso sausage so I used portuguese sausage instead.  I also couldn't find chorizo that was already cooked so bought fresh and cooked it first, it was a little greasy so I took some paper towels and blotted some of the grease out of the pan before adding the other sausages. I was afraid it would be too spicy for me but it just gave it a little bite, not at all too much. I added some cubed ham for texture since the chorizo was ground up instead of in chunks, didn't really need it though. Also to speed things up I'd use canned black-eyed peas if I didn't want to soak dried beans overnight, just reduce the cooking time so they don't turn to mush.

I'm posting this a couple days after New Years so not sure if you will still get the benefits of good luck and prosperity ;) but fortunately this is just a yummy recipe that you should make just cuz it's good! Click here for the recipe. 1/2020 update - I clicked on that link and it no longer takes me to it on the Food Network - hmmm that's weird. I found it on emerils.com and also pasted it here so we will have it for the future!

Black Eyed Pea Jambalaya

  • Prep Time: 20 minutes, plus overnight to soak the peas
  • Total Time: 1 1/2 hours
  • Yield: 10 to 12 servings

Ingredients

  • 2 tablespoons olive oil
  • 4 ounces tasso sausage, diced into small pieces
  • 1/2 pound chorizo sausage, sliced in half lengthwise and cut into1/4-inch pieces
  • 1/2 pound smoked sausage, sliced in half lengthwise and cut into 1/4-inch pieces
  • 2 cups chopped yellow onions (1 large onion)
  • 1 red or green bell pepper, chopped
  • 1 teaspoon salt
  • 1/2 teaspoon cayenne
  • 1/2 teaspoon black pepper
  • 2 tablespoons minced garlic
  • 4 bay leaves
  • 5 sprigs fresh thyme
  • 8 cups chicken stock
  • 1 pound black-eyed peas, soaked overnight
  • 2 cups long grain rice 
  • 1/2 pound medium shrimp, peeled, deveined and chopped
  • Essence to season
  • 1/2 cup chopped green onions
  • 2 tablespoons chopped flatleaf parsley

Directions

  • In a large pot over medium heat, add the olive oil. When the oil is hot, add the tasso, chorizo and sausage, and render for 5 minutes. Stir in the onions, bell pepper, salt, cayenne, black pepper, garlic, bay leaves, and thyme. Saute for 5 minutes, or until the onions are wilted. Stir in the chicken stock and the peas. Bring the liquid up to a brisk simmer, reduce heat to medium-low and cook partially covered just until the peas are nearly tender, 20 to 30 minutes. Stir in the rice, bring the liquid to an intense boil, stir, cover, and cook for 10 minutes. Uncover the pot, stir the rice and peas again to evenly distribute the rice, then cover the pot and reduce the heat to low. Cook, undisturbed, until the rice has absorbed the liquid, about 10 minutes longer. Remove from the heat.
    Sprinkle the shrimp with Essence to season. Using a large fork, gently fluff the rice and toss the shrimp, green onions, and parsley into the rice. Return the cover and allow to steam (undisturbed), for an additional 10 to 15 minutes before serving. Serve warm.


🔥Around the Campfire (week 1)

 Dear Campers ~

Here's a quick recap of what happened at camp last week in case you missed anything:

Posts ~

12/27: 🔥week 52

12/27: Christmas break

12/28: stuffed pizza crust

12/29: recycled holiday card projects

12/30: Borchers breakfast pie

12/31: New Years Eve

1/1: Happy New Year!

1/2: hot buttered rum

That's it for this week - I'm actually doing some blog clean up work (it's 6/2021 and I see I forgot to do 3 'around the campfire' recaps at the end of 2020! Just catching things up, apparently time got away from me hahahah ;) 


Saturday, January 2, 2021

Hot Buttered Rum (rerun)

This is from 1/2/16 - Sarge and I just came in from shoveling snow, it's beautiful and cold and this drink came to mind so I thought I'd repost it. Perfect for cold snowy winter days (or nights hahah, it might be a little early in the day for rum drinks. I say 'might be' but am not really 100% behind that right now!). I see my note to put in less water, fast forward 4 years and my new note is to add more rum! LOL! 

I've been seeing this drink and wondering (a) what is it (b) is there actually butter in it and (c) why would you put butter in a drink? So I decided to try it - there are lots of recipes and different ways to make this, I found a simple recipe here to experiment with.

You make a "batter" of butter, brown sugar, and spices, add that to a mug and top with a shot of rum (or whiskey) then fill up with hot water. Stir until it dissolves.

It's good but you don't really taste butter haha so I was disappointed. It's a good drink for a cold night tho that is easy to put together and is something different. Next time I will put less water in, I think it'll taste better (and maybe the butter flavor comes out more) less watered down.

Friday, January 1, 2021

Happy New Year! (rerun)

What a difference between this New Years day and 1/1/2018 when we got up super early to take pictures of the Rose Parade floats! Since today looks way different and I'm sitting inside playing on my computer (once again, thanks Covid!) I thought I'd share the Rose parade pictures again - much more interesting than pictures of me doing nothing hahaha.

HAPPY NEW YEAR!!! I'm posting a little later today because we got up at the butt-crack of dawn this morning to go to the Rose Parade and I wanted to be able to share a few pictures of our adventure with you. We went with a group from Paul's Photo on a "photo walk" which was the perfect way to see the floats... we got there 2 hours before the parade started and were able to be up close to the floats, bands, horses, and other marchers while they were staging - an amazing way to take pictures and talk to people. Once the parade started we got out of there (did you know there's like 800,000 people there? I did not!), but since we were able to walk thru the entire length of floats and marchers beforehand we didn't miss a thing! Best way to see the parade for sure. I don't take photos like all these professional guys, but I still think I got some good ones - what a fun day!


people sleep right on the curb to get a good spot!
 

these "angels" are from the SoCal Mini Horse Sanctuary...

I'm super allergic to horses but I want to wear this costume and walk the parade!


I love that the Budweiser float has a dalmatian running around on the top! 


look how different the parrot looks - I took this one when
 it was still dark out, the one above is in the daylight

lesson - always check your background... this looks like we have birds sprouting from our heads!