Sunday, March 20, 2016

Boneless Coq Au Vin

Made this for Sunday Supper and everyone (except Patty, she doesn't like chicken thighs - but I couldn't even tell it was dark meat!) loved it. This is a winner recipe - I don't think I've ever made a dish using all thigh meat, I would normally just make it with white meat but FOR ONCE I decided to make a recipe exactly as instructed. No changes. And it's really really good! Maybe I should follow the instructions more often...hmmm.

We had it with mashed potatoes, crusty bread,  and Patty brought a lettuce salad with dried blueberries and cherries, avocado, blue cheese and a slightly sweet vinaigrette that was excellent. Janis made her famous bread pudding for dessert - we were stuffed and super happy :).

browning the chicken thighs
served in shallow bowls with mashed potatoes


 click here for the recipe.

Saturday, March 19, 2016

Gimlet

This is an easy recipe for an oldie but goodie cocktail - a gimlet. These are traditionally made with gin but I like them using vodka instead, I'm not a big gin fan.

All you do is put some ice in a shaker, add 2 ounces vodka and 2 tablespoons Rose's lime juice. Shake, strain, pour into glass. Garnish with a lime wedge if you have one on hand :). Tart and a tiny bit sweet - so good!

Friday, March 18, 2016

Kids Craft: Duct Tape Pencil Holder

Yay, Brooke is back this week with a cute easy project that just about anyone can do - watch her make a pencil holder using a ziplock baggie and some duct tape (also watch her funny facial expressions when she is trying to hole punch thru the layers of tape, makes me laugh).


Supplies needed:
duct tape - she uses two different colors, you can make it using however many you want!
small ziplock baggie
scissors
hole punch

She tapes rows of duct tape over top of the baggie, then hole punches the side to be able to carry in a binder. I love when she doesn't go get her binder to measure where to put the holes and just wings it. Funny girl :)

Thursday, March 17, 2016

Photo Class: Landscapes

This week in photo class the topic was "landscapes" which I mistakenly thought meant taking pictures of hills and trees - nope, it was more about paying attention to the landscape or environment you move through (both internal and external) and looking for themes that come up, repeated shapes or objects, things that remind you of your past, how light shifts, etc. As usual we were to create 20 photographs getting at different ideas we noticed, and were given a few categories to fill such as one image depicting or representing "home", one image referring to our past, and one image that is visually abstract.  There was also an alternate assignment given if we'd rather - to create a series of photos that went together (like a car collection, water towers, industrial buildings, etc.) instead of filling in the random categories.

(simple lines and form)


We studied the work of 9 photographers who are known for their specific series, ranging from cultural iconography (old signs, retro buildings) to abstract or all blurry, simple lines and colors, and abandoned places (buildings or objects). I decided to combine the assignments and took photos that inspired me from each of the 9 photographers work - so they didn't all go together other than that they represented all of the artists we studied. 

(abstract/meditation)

What was really fun about that was I got to take pictures of many different styles and objects - which I normally wouldn't do. We just shoot what we are interested in, right? So even though I'm not big on blurry impressions it was interesting to figure out how to make a cool blurry photo, and I've never thought about taking pictures of industrial buildings but I did and it turned out great. 

(power plant)

Because I was searching for different things than I would normally take photos of I ended up walking down many back alleys, the back side of buildings, out of the way places where I wouldn't normally go - Sarge loved it! He got to receive and leave "messages" in all kinds of fun new places.

(cultural iconography)


(abandoned places)

So this week maybe challenge yourself to move through your environment with intention. Pay attention to interesting things around you that you might not have noticed before - buildings, cool doors and stairways, things that remind you of your past...and explore the back sides of stores or buildings just to see some different things - it was a fun week!  


creativephotoacadamy.com for info on classes at Pauls Photo, Torrance, CA


Wednesday, March 16, 2016

St Patrick's Day Coloring Page

Just a quick little thing you can do for St. Patty's Day, fun for yourself or kids! I love to color (and have been buying adult coloring books for years - way before it's become popular again haha!) and when I saw this coloring page here I thought it'd be fun to color myself a pretty picture :). Download it, color it in with your preferred coloring medium (I like fine tipped markers or colored pencils depending on the picture), and relax for a few minutes! Or do what Brooke and I do and have a contest over who can color the best picture and get someone in the house to judge...everything is a competition around here. HA!

Tuesday, March 15, 2016

Irish Creme Delights

I made these cookies to take to photo class tonight - since it's getting close to St. Patrick's Day I've been in the holiday spirit so decided to try these Irish creme delights (click here for source). 


They turned out good, basically a frosted snickerdoodle - and I do love snickerdoodles. The only real difference is adding either coffee liqueur or instant espresso coffee to the dough, and using coffee liqueur in the buttercream frosting - you could leave that out that and just replace it with additional half and half. I would sprinkle with cinnamon if you do that just to give the frosting a little more flavor.

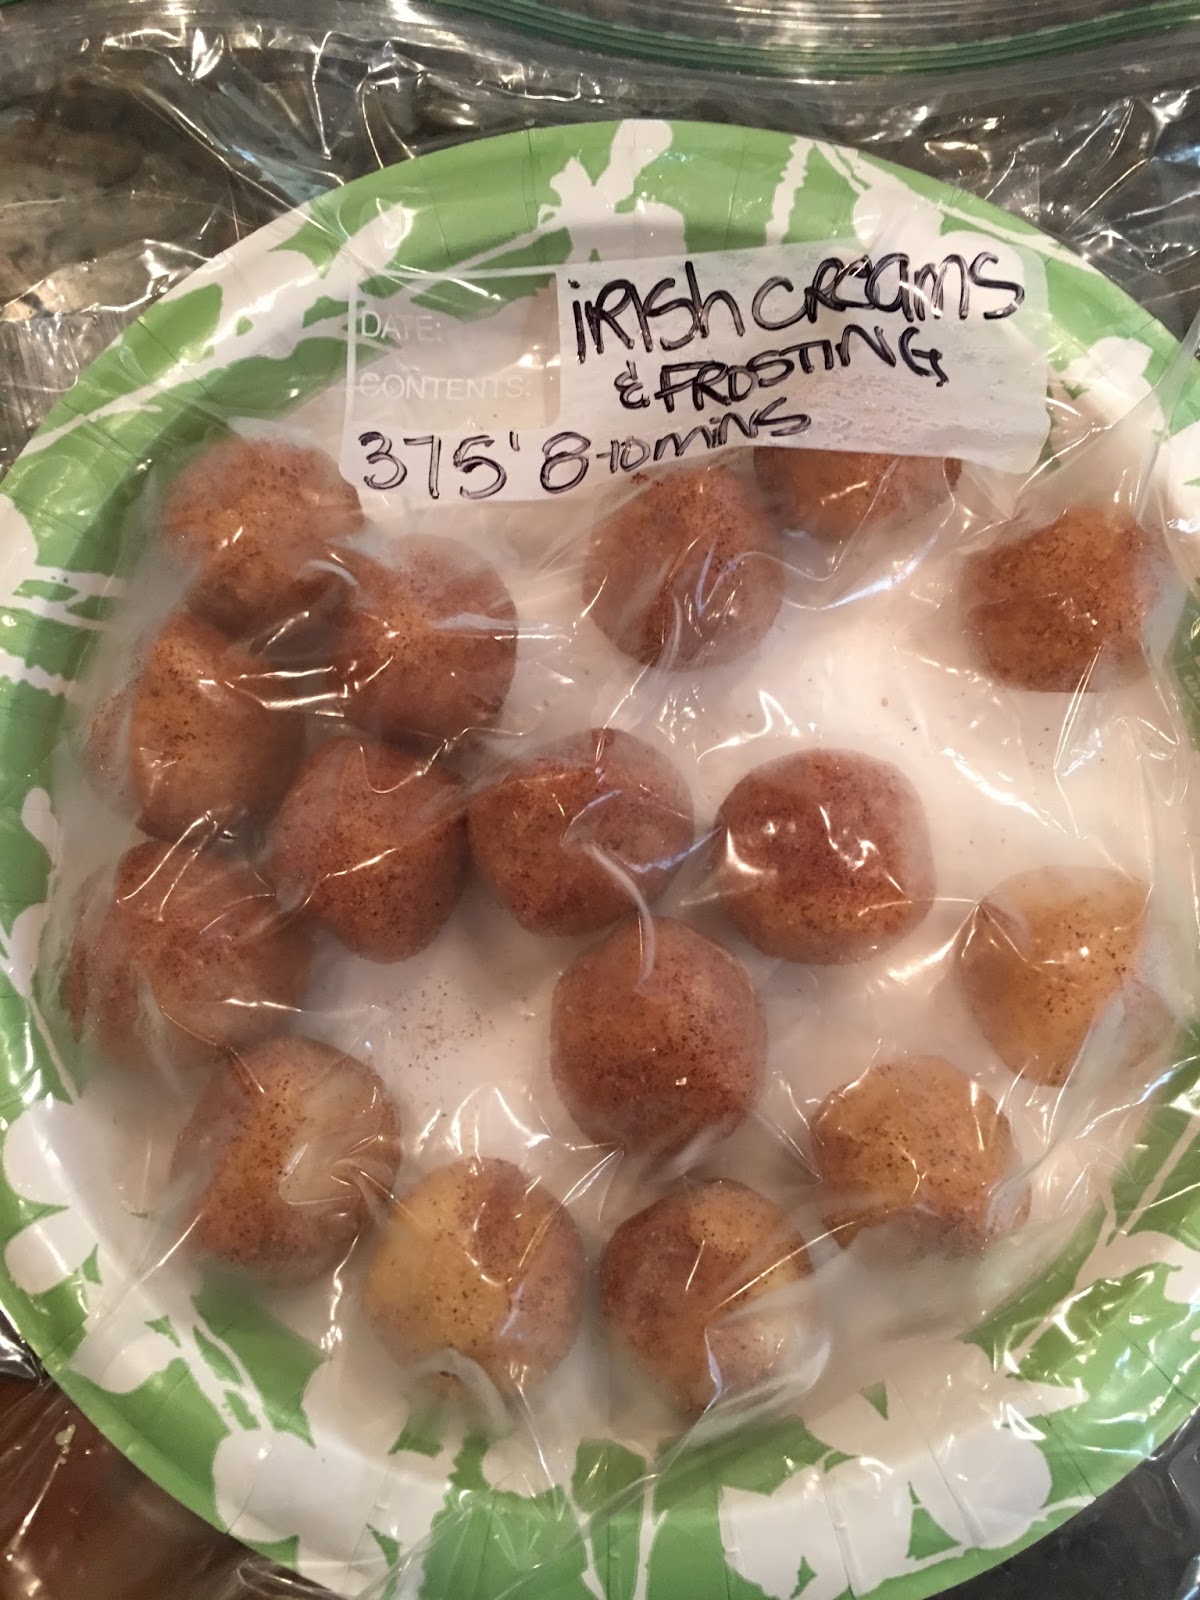
The recipe says it makes 48 1" dough balls, I used my small cookie scoop and got 40. I only baked 24 of them for tonight and froze the remaining unbaked dough (in balls rolled in cinnamon and sugar)  along with the extra frosting - I put the frosting in a small zip lock bag and put in it a gallon size bag along with the dough balls.

  • 1/4 cup butter, softened
  • 1/4 cup shortening
  • 1 cup sugar
  • 1 T. coffee liqueur or 1 t. instant espresso powder
  • 1/4 t. baking soda
  • 1/4 t. cream of tartar
  • 1/4 t. salt
  • 1 egg, lightly beaten
  • 1 t. vanilla
  • 1 3/4 cups flour
  • 1/4 cup sugar
  • 2 t. ground cinnamon
  • 1 recipe Irish Creme frosting
  • ground cinnamon (optional)


  • 2. In a small bowl, combine the 1/4 cup sugar and the 2 teaspoons cinnamon. Shape dough into 1-inch balls. Roll balls in cinnamon-sugar to coat. Place balls 2 inches apart on an ungreased cookie sheet. 
3. bake in preheated over for 8 to 10 minutes until edges are lightly browned. Cool on wire racks. 

4. Spread Irish Creme Frosting over cookies. If desired, sprinkle with additional cinnamon.

    Irish Creme Frosting
    • 3 T. softened butter
    • 1 T. coffee liqueur
    • 3 C. powdered sugar
    • 1 - 3 T. half-and-half
    • In a medium bowl, combine softened butter and coffee liqueur. Beat with an electric mixer on medium to high speed until combined. Gradually beat in powdered sugar. Beat in enough half-and-half or whipping cream (1 to 3 tablespoons) to make a frosting of spreading consistency.

    roll the balls in cinnamon and sugar before baking

    these also taste good unfrosted!

    I froze the unbaked dough for later, under the plate in the gallon
     size bag is a small flattened ziplock bag with the leftover frosting.
    I wrote the baking instructions on the bag so I don't have to look
    up the recipe when I want to bake these later.  


    Monday, March 14, 2016

    Ribbon Bracelet

    There are some beautiful ribbons out there that catch my eye and I want to buy, but there's only so many ribbons a person needs...then I started buying just a small amount of the ones that I love and would be pretty to wear and now I make bracelets out of them. My favorites to wear are from ribbons that are soft to touch and very detailed, like this flowered one:


    I wanted to make a St. Patrick's Day ribbon bracelet but didn't find any ribbon that was perfect - but I do like this green/black/white striped ribbon enough and they are pretty easy to make so even though it isn't my favorite ribbon ever I still made it and really like how it turned out. Now I'll have something green to wear on St. Patty's Day!


    materials needed:

    • 8" ribbon
    • 20 seed beads
    • 1 small button for closure
    • stretchy cord
    • needle and thread

    cut a length of stretchy cord to make the closure loop, I cut a piece probably 10" long. thread it onto a needle, tie a knot in one end of the stretchy cord and pull it thru from the backside of the ribbon.


    turn the ribbon over and add 20 seed beads to the cord, the needle probably won't go thru the tiny hole in the beads but the stretchy cord is stiff enough that you can just thread them right onto the end of the cord.


    thread the cord back onto the needle and poke it back thru the front side of the ribbon right next to where the cord came up to start. this creates a bead loop for the closure.


    this is what the back of it will look like after you make the bead loop and tie it off close to the ribbon.


    fold the end of the ribbon over twice making sure the loop is at the edge of ribbon. sew the hem in place.


    measure how long you want the bracelet to be for your wrist, add about an inch so you can fold the other end of ribbon over twice and sew it in place. sew on the button on the right side.

    here's the front of the finished bracelet...


    ...and the back...


    ...and how it looks on!


    Sunday, March 13, 2016

    Crock Pot Corned Beef

    I love corned beef and cabbage and have been making this crock pot version for years, easy and always delicious. I used to put potatoes and carrots in the crock pot with the corned beef but last year I did some in the crock pot and some in the oven, and everyone preferred the oven roasted ones over the crock pot. So this year for our St. Patty's Day party I will roast them all instead (toss with olive oil and coarse salt and put in a 400' oven until they are done). I'll still add some carrots to the crock pot though in case that helps flavor the meat.  I really really love the cabbage part of this meal so I always buy and cook too much to fit in the crock pot - I steam it by itself on the stovetop.  Here is the original recipe:


    CROCK POT CORNED BEEF

    4 lb. corned beef with seasoning
    1 cup water
    1 cup guinness (enough liquid to fill 1/2 way up or so)
    2 bay leaves
    1 t. extra cloves

    cook on low x10 hours.

    add carrots last 4-5 hours
    add cabbage last 3 hours (if you're adding to the crock pot)

    I don't have pictures of this but it just looks like a traditional corned beef and cabbage St. Patrick's Day meal :). 


    Saturday, March 12, 2016

    Shamrock Shake

    I haven't had a Mc'Ds shamrock shake in years, but since it's almost St. Patrick's Day and I've been doing drinks on Saturdays lately (Saturday Sips? What shall we call it haha?), I decided to try to make one today...

    There are tons of copycat recipes out there - I went with a simple version: For one serving  put 1/2 cup vanilla ice cream, 1/2 cup milk, one drop of mint extract (seriously just one drop - trust me), and a splash of green food coloring in the blender and blend until smooth. Top with whipped cream and a maraschino cherry - pretty and yummy. To be perfectly honest I had to make this twice to make it edible - the first one I just added a few drops of mint and it was, to quote my niece at about 4 years old, "di-gusting".
    Put just one drop in and taste - so much better!

    Friday, March 11, 2016

    Shamrock Garland


    Brooke must have been busy this week, I didn't get any of her awesome kid craft videos to share with you today...so instead I've decided to channel her and come up with my own craft that I think she'll approve of - naturally by asking myself "what would Brooke do?" I had to use the hot glue gun! And yep I burned my thumb - she seems to be better at being careful than I am!

    I had a left over package of foam shamrocks from making the wreath the other day (see here for that project) and some twine, and of course the hot glue and thought a quick garland to hang from a door would be cute.


    That is literally all I did, glued shamrocks back to back (making sure the stems matched up) every few inches on a long piece of twine. Stuck up one of those little Command removable hook things to the top of the door and looped the top of the garland string around it.