Showing posts with label recipes. Show all posts

Saturday, April 10, 2021

Crock Pot Country Ribs

This is just about the easiest recipe ever - and it's delicious. What's not to love about that hahaha?!


Put a package of boneless, pork country ribs in a large crockpot (I spray the crockpot with no-stick cooking spray first). Add 1 large can of cream of mushroom soup and 1 or 2 cans of mushrooms, including the juice. Cover and cook on LOW for 8-9 hours. If you don't want as much sauce just use a small can of soup, but I like to have extra to put over noodles or mashed potatoes as sort of a gravy. Yum. 


Note: country ribs aren't actually ribs, not sure why they're called that! Maybe because of the way they're cut? I've only ever made them in the crockpot - they are very moist, meaty, and flavorful. 


Wednesday, April 15, 2020

Tuna Salad Stuffed Avocados

Got the idea for tuna stuffed avocados from allrecipes.com, but their recipe for tuna salad included green onions, bell pepper, garlic and balsamic vinegar which is not how we like our tuna salad...so I adapted the idea to suit us. Make your favorite tuna salad and fill avocado halves with it, put on a bed of lettuce and have a delish and pretty lunch.


I have been making tuna salad this way since I met Dave, it's how his mom made it and it's great:
Mix together one can drained tuna fish, chopped celery, sliced green olives with pimentos, and enough mayo to stick it together. Season with salt and pepper. I know - olives? Trust me, it's delish.


Now in the interest of full disclosure and keepin' it real - the above filled avocado looks pretty and all that, but really - that is not enough tuna to fill me up at lunch! This is how my plate looked after I took the 'pretty' picture (the half avocado is under that mound of tuna salad)!!


4.15.19: eggshell candles
4.15.18: LeDonna's Broccoli Cottage bake

Saturday, December 14, 2019

Caprese Chicken

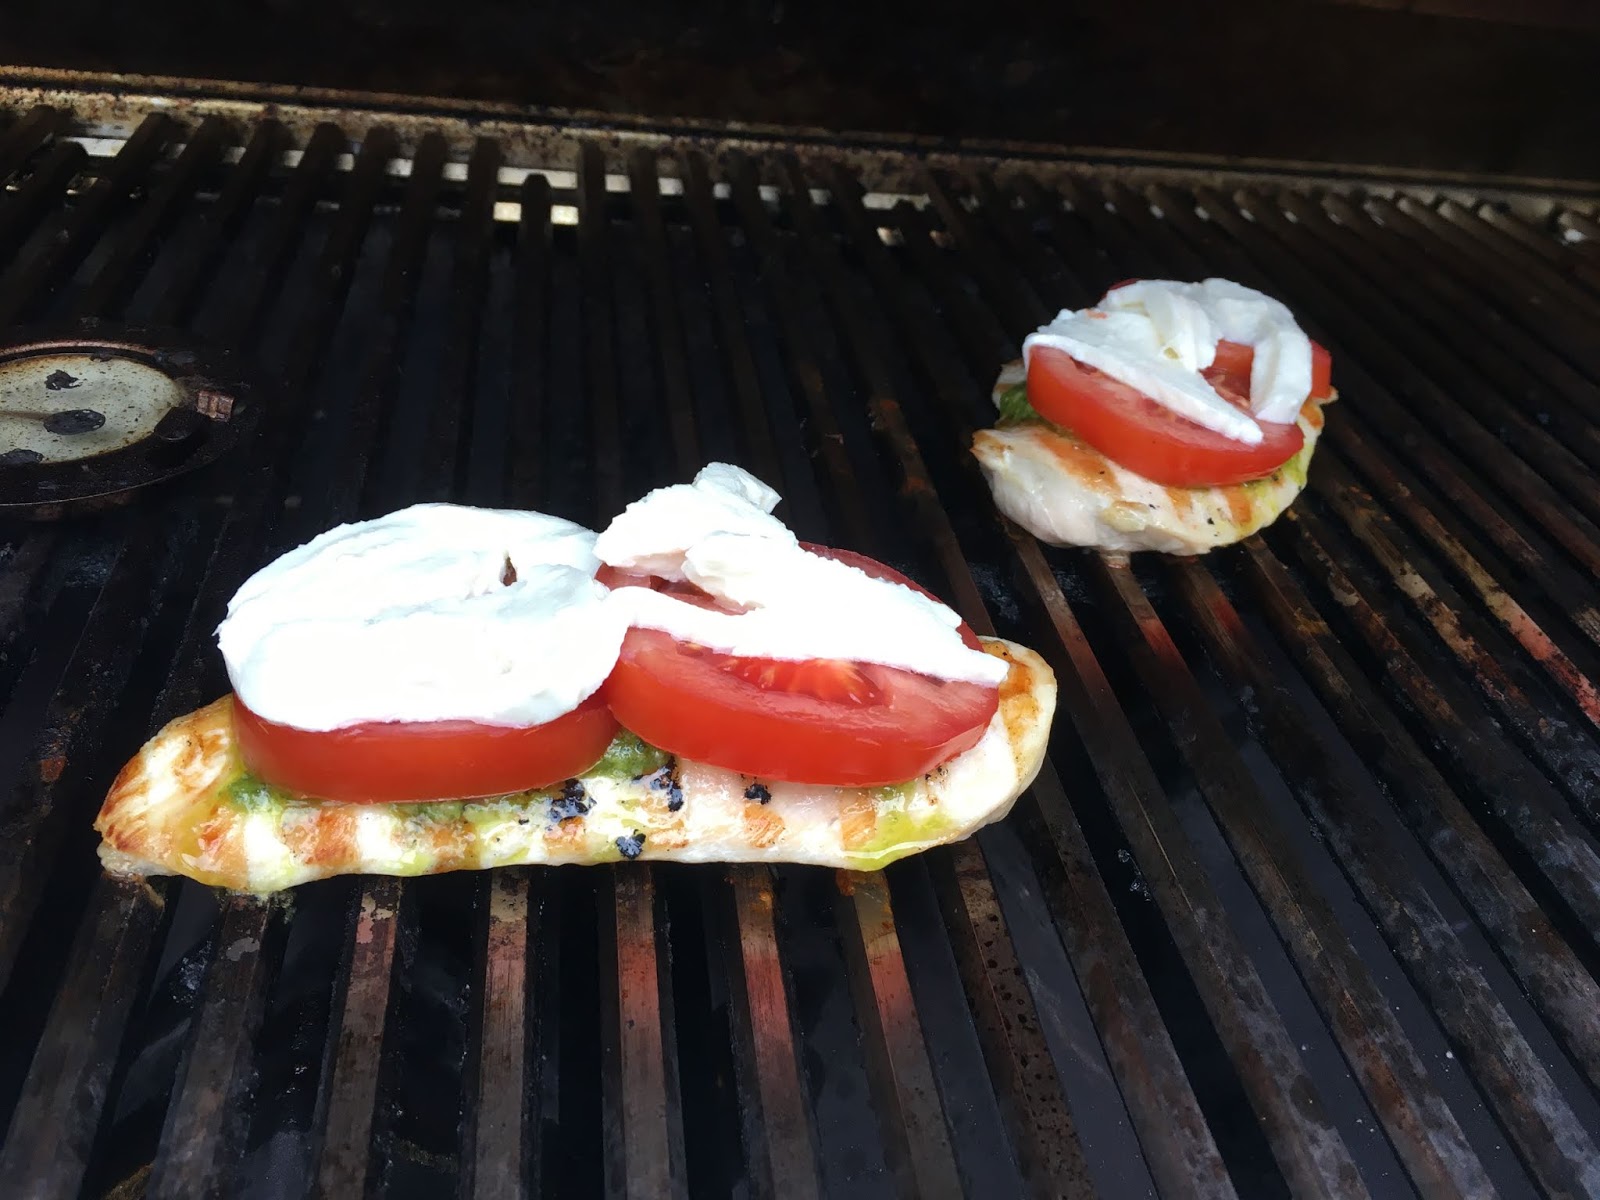
I didn't follow a recipe for this Caprese Chicken, just winged it (well technically this is chicken breast not wings - but I don't think "breasted it" makes any sense bahaha) and it turned out SO good! Dave grilled boneless chicken breast then I put the cooked chicken on a sheet pan, topped each piece with pesto sauce, sliced tomatoes, and slices of mozzarella cheese, pop under the broiler until the cheese is melted. Mmmmmmm....


My plan was to put all the toppings on while the chicken was still on the hot grill but D didn't want the cheesy mess all over his grill so I moved it to the oven.

I just noticed this is red, green and white - Christmas colors!


12.14.18: Christmas pinecone wreath


12.14.17: bacon jam
12.14.16: Georgian cheese bread
12.14.15: Christmas bell door hanger


Thursday, May 2, 2019

Provencal Vegetable Bake

Originally posted 11/8/15:


Layers of sliced summer squash, potatoes and tomatoes over a bed of white beans, topped with crumbled cheese - I found this recipe in an old Family Circle (click for recipe) magazine and it's really good. I do it a little differently from the original recipe omitting the called for eggplant (I don't love eggplant) and onion (my husband doesn't like onion) and I don't think it's missing either of those ingredients - it's very flavorful and pretty! It also calls for herbes de provence which is a mixture of dried herbs that you can make yourself or buy in the spice section at the grocery store (I bought it in a jar and had no problem finding it), if you don't have it or want to buy it I think this would taste just fine without it - add salt and pepper to taste and maybe a sprinkling of any kinds of herbs you happen to have - thyme, rosemary, etc. I served it on the side with grilled chicken - it would taste good with lots of different meats and could also be served alone since it has the beans for a protein. Usually I slice all of these by hand but I'm still learning how to use all the attachments on my food processor so decided to play with the slicing disk and it worked great - saved some time and made everything more uniform for sure. It works just fine slicing by hand tho, don't let that stop you from making this! It's a good one - enjoy!
the magazine shows these arranged in overlapping layers, I stand
 them up alternating veggies and like how it looks...

Ingredients


2 medium sweet onions
3 tablespoons olive oil
3/4 teaspoon salt
2 cloves garlic, chopped
15 ounce cannellini beans, drained and rinsed
2 1/2 teaspoons herbes de Provence
1/4 teaspoon pepper
1 large eggplant (about 1 pound), ends trimmed, halved lengthwise
3 large summer squash (combination of zucchini and yellow squash), ends trimmed
1/2 pound russet potatoes
3 plum tomatoes
4 ounces goat cheese

Directions

  1. 1. Heat oven to 400 degrees . Peel and halve onions; cut into 1/4-inch-thick slices. Heat 1 tablespoon of the oil in a large saute pan over medium heat. Add onions and 1/4 teaspoon of the salt. Cook 8 to 10 minutes or until softened. Add garlic and cook 1 minute. Stir in beans, 1/2 teaspoon of the herbes de Provence and 1/8 teaspoon of the pepper. Pour mixture into bottom of a 9 x 13 oven-safe casserole.
  2. 2. Meanwhile, cut eggplant, squash, potatoes and tomatoes into 1/4-inch thick slices. (To speed things up, use a food processor fitted with a slicing blade or a mandoline.) Toss vegetables with remaining 2 tablespoons olive oil, 1/2 teaspoon salt, 2 teaspoons herbes de Provence and 1/8 teaspoon pepper. Arrange vegetables on top of onion-bean mixture in 1 layer; pack tightly.
  3. 3. Cover dish with aluminum foil and bake at 400 degrees for 45 minutes. Remove foil and crumble goat cheese on top. Bake 15 more minutes. Cool slightly and slice into 4 servings.
Nutrition Information for Provencal Summer Vegetable Bake
Servings Per Recipe: 4
Per Serving: 12 g fiber, 701 mg sodium, 6 g sat. fat, 13 mg chol., 15 g pro., 378 kcal cal., 17 g Fat, total, 45 g carb.

Saturday, April 13, 2019

Herb-Crusted Lamb with Roast Potatoes

Let me start by saying I'm not a big lamb lover. Wait, I love lambs - but you know what I mean...the flavor isn't my favorite. Having said that, this lamb roast is delicious and I've never had anyone not like it. Easter is coming up quickly and if you haven't decided on the menu yet consider making this easy, flavorful traditional springtime roast  - you won't be disappointed!

(I feel like ham is our traditional dish at Easter, but Dave loves lamb and says his mom always made it for Easter and he feels that it's the most traditional - what do you think?)


The original recipe came from The New Basics Cookbook, over the years I've changed it a bit. I'm going to give you the original recipe and tell you what I do differently in notes after the recipe.

Ingredients:

  • 1 leg of lamb (7 to 8 pounds)
  • 2 large cloves garlic, sliced
  • 5 tablespoons olive oil, divided (that means you don't add it all at once)
  • 2 tablespoons plus 2 teaspoons dried thyme leaves
  • 2 tablespoons dried rosemary leaves
  • 2 tablespoons plus 1 teaspoon coarsely ground black pepper
  • 2 teaspoons ground coriander
  • 30 small red new potatoes, quartered
  • 2 tablespoons chopped fresh rosemary leaves
  • 1 teaspoon coarse salt
  • rosemary sprigs for garnish, optional
Directions:
  1. Preheat oven to 425'.
  2. Cut slits all over the lamb with the tip of a sharp knife, and insert the garlic slivers in the slits.
  3. Brush the lamb all over with 2 tablespoons of the olive oil.
  4. Combine the 2 T. thyme, dried rosemary, 2 T. pepper, and coriander in a small bowl and mix well. Pat the herb mixture all over the lamb to form a crust. Place the lamb in a shallow roasting pan.
  5. Place the potatoes in a large mixing bowl. Add the remaining 3 T. olive oil, fresh rosemary, the remaining 2 teaspoons thyme and 1 teaspoon pepper, and the coarse salt. Toss to mix well, and arrange around the lamb in the pan.
  6. Place the pan on the center rack in the oven, and roast for 45 minutes. Then reduce the heat to 375', stir the potatoes slightly so they don't stick to the pan, cook an additional 30 minutes.
  7. Remove the pan from the oven, and insert an instant-read meat thermometer in the thickest part of the meat. It should read 120' minimum for rare, let the lamb rest loosely covered for 15 minutes before carving. (The meat will continue to cook a bit more while resting, the temp will rise to 135' to 140'). Place the roast on a serving platter, surrounded with the potatoes. Garnish with fresh rosemary sprigs.
makes 8 servings

My Notes: 
  • I get a boneless or semi-boneless leg of lamb. They are usually between 4 and 5 pounds. You might need to adjust the cooking time depending how you want it done - for rare lamb allow 12 minutes per pound, for well-done lamb allow 18 minutes per pound. I still follow the time table in the recipe above, but if it's too rare after 30 minutes I pop it back in the oven until it reaches the temp I want. Rare seems to be the "usual" preferred temp. but others like it more on the medium-well done side (me included) but the longer you roast it the greater the chance of it getting tough. It's usually just right after the 30 minutes and 15 resting, rarer in the center and more well done on the ends. 
  • I don't put garlic in slits on the lamb. 
  • In the herb mix I add garlic powder, and dried oregano.
  • Put the lamb in the pan with the fat side down. The potatoes cook in the fat and they are SO good, don't cook them separately. 
  • I often use baby red potatoes, leave whole or cut in half if they are on the bigger side. This last time I made 3 pounds for 8 people and there wasn't a single potato left over. I'll make more next time!  

Saturday, April 6, 2019

Vodka Bolognese Pasta

Yes, vodka is in the title. But don't let that scare you off this recipe - you don't have to use vodka if you don't drink or the thought of adding vodka to a dish you want to serve the kids just seems wrong; if you prefer to not cook with alcohol just replace it with chicken or beef broth (although it simmers for so long all the alcohol is cooked out so no one is getting drunk eating this delish pasta sauce, it's even ok for kids to eat it!).

I adapted this recipe from the original found here.

Ingredients:
  • 2 T. olive oil
  • 2 shallots or 1 small onion, chopped
  • 3 carrots, chopped
  • 2 celery stalks, chopped
  • 1 pound lean ground beef
  • 3/4 pound ground Italian sausage (mild or spicy)
  • salt and pepper
  • 1 can (28 oz.) chopped tomatoes
  • 1/4 cup tomato paste
  • 2 teaspoons dried oregano
  • 2 teaspoons dried basil
  • 2 sprigs fresh thyme (leaves only, remove from stem)
  • 2 bay leaves 
  • 1 cup whole milk
  • 3/4 cup vodka
  • 1 parmesan rind, plus grated parmesan for serving
  • 1 pound pasta, cooked according to the package. I used tagliatelle noodles.
Directions:

Heat the olive oil in a large Dutch oven or soup pot over medium heat. Add the shallot, carrots, and celery, season with salt and pepper. Cook 5 minutes until the onion is translucent and starting to brown. Add the beef and sausage, brown all over, breaking up the meat as you go so there's no big clumps, about 10 minutes.
Add the tomatoes, tomato paste, spices, milk, vodka, and the parmesan rind. Season with salt and pepper. Stir to combine; cover and cook over medium-low heat for 2 to 3 hours, stirring occasionally. 
Let the sauce cool, then spoon off any grease that is sitting on the top - NOTE: I had quite a bit of grease from the sausage, next time I will drain it off after browning the meat before moving on to adding the tomatoes, etc. Using a spoon I scooped up the obvious pools of grease. You can now refrigerate the sauce and then reheat it about 1/2 hour before serving time, or if you are eating it right away just put it back on the stove top and reheat the sauce.

Remove the parmesan rind. If the sauce is soupy, cook an extra 20-30 minutes uncovered.


To serve, divide the pasta among bowls or plates and ladle the bolognese over top. Serve with additional parmesan cheese. 

Saturday, March 30, 2019

Brown Rice Mushroom Risotto

I love risotto. Like love love it. If you don't like rice don't automatically think you won't like risotto because after wine, stock, butter, and cheese have slowly been stirred in it becomes something so not like plain old rice. It's thick, creamy, so flavorful, and the options for add-ins are endless. Having said that tho - if you've never made risotto I'm going to warn you that it isn't usually quick and hands-free...traditionally you stand at the stove and stir in about 1/4 cup of stock until it's incorporated, then another 1/4 cup of stock until it's incorporated, then repeat a whole bunch of times until a few cups of stock (or broth) have been absorbed. It's quite the labor of love and I don't have the time or patience to make it often. Until I saw this recipe for "easy" brown rice risotto; after reading the directions I thought if this works then we can have risotto waaaaay more often - and since it's made with brown rice it's a bit healthier which doesn't hurt!

You can find the original recipe here, I changed it just a bit and am giving you how I did it:

Ingredients:

  • 3 T. olive oil, divided (that means you don't use it all at once)
  • 1 small yellow onion, chopped
  • 1 teaspoon garlic, minced 
  • 4 cups chicken stock or broth, divided
  • 1 cup water
  • 1 1/2 cups brown arborio or short-grain brown rice (note: don't use long grain)
  • 16 oz. sliced Cremini (baby portobello) mushrooms
  • 1 cup grated parmesan cheese
  • 1/2 cup white wine
  • 3 T. unsalted butter, cut in small cubes
  • coarse salt
  • coarse ground black pepper
Directions:
  1. Preheat oven to 375' with a rack in the middle of the oven.
  2. Heat 1 T. olive oil in a medium Dutch oven over medium heat, add onions, garlic, and a pinch of salt. Cook, stirring occasionally, until the onions are translucent and browned.
  3. Add 3 cups chicken stock or broth and 1 cup water, cover and bring to a boil over medium-high heat. Remove from heat and stir in the rice. Cover the pot and bake until rice is tender and cooked through, about 65-70 minutes. Don't worry if it looks dry when you take the lid off, once you add the other ingredients it'll all work out. 
  4. Meanwhile, while the rice is baking, prepare the mushrooms. Warm 2 T. olive oil in a large skillet, add the clean sliced mushrooms to the pot with a dash of salt. Cook, stirring occasionally, until the mushrooms are darker in color and have soaked up most of their own juices, about 13 minutes. Add the frozen peas and let the veggies hang out until the rice is done.
  5. Once the rice is tender, remove the pot from the oven. Pour in the remaining cup of broth, the parmesan, wine, butter, salt and pepper to taste. Stir vigorously for 2 to 3 minutes, until the rice is thick and creamy. Stir in the mushroom and pea mixture, and any remaining juices. Season to taste with salt and pepper. If the mushrooms and peas have cooled off before you add them to the rice, pop the pot back onto the stove top and heat over medium until everything is hot again. 
  6. Divide into portions, add additional parmesan if desired. 
after 65 minutes the rice is cooked and removed from the oven, the
mushrooms and peas are cooked and standing by...
add the butter, remaining broth, parmesan, wine, salt and pepper...
add the veggies and stir to combine.


This would be a great meatless Monday meal if you use vegetable broth or water instead of chicken!


Happy moment ~ the few minutes you're awake before the 5 year old wakes up :)


Friday, March 15, 2019

Stuffed Zucchini

LeDonna sent me a picture of the stuffed zucchini she made for dinner, I immediately made it for us because it sounded so good and her pic was so pretty. I've stuffed zucchini before but haven't seen the technique used here of chopping up the insides of the zucchini and using it in the stuffing - seeds and all! Delicious.


3 medium zucchini (about 1 1/2 pounds)
1 medium onion, chopped (about 1/2 cup)
1/4 cup butter
1 small green pepper, chopped (about 1/2 cup)
1 jar (2 ounces) diced pimiento, drained
1 cup herb-seasoned stuffing mix
1/2 cup shredded mozzarella cheese

Heat 2 inches salted water (1/2 teaspoon salt to 1 cup water) to boiling. Add zucchini. Cover and heat to boiling. Cook just until tender, 8 to 10 minutes; drain. Cool slightly; cut each zucchini lengthwise into halves. Spoon out pulp; chop coarsely. Place zucchini, cut sides up, in uncreased 11 x 7 x 1.5"  baking pan. Alternatively, you can microwave the zucchini instead of boiling it - put in microwavable dish, cover tightly, microwave 5 minutes. Turn zucchini, re-cover, microwave an additional 2-4 minutes. 

we aren't fans of green peppers, so I substituted
chopped celery to give it some crunch. 

Cook and stir onion in butter in 10" skillet until tender. Stir in chopped pulp, green pepper, pimiento, and stuffing mix. Divide stuffing mixture amount zucchini halves. Sprinkle each with about 1 tablespoon cheese. Cook uncovered in 350' oven until hot and cheese is melted, 25 to 30 minutes. 


LeDonna sent me the recipe from this un-named cookbook,
I don't know who to credit for the original recipe. 

Her photo before adding the cheese. She sliced the zucchini in manageable
pieces before baking it because she was using one of those really big ones instead
of the 3 medium sized the recipe calls for. 


Happy moment ~ saw our neighbor's turtles sitting on their rocks, Leo had his hand on Leona like he was giving her a boost (or telling her to get her big butt out of the way!) 

Wednesday, March 6, 2019

Stuffed Poblano Peppers...by Jen

Hi! Time for another post from the non-cooking non-crafty sister! So I LOVE stuffed peppers. So unhealthy but so delicious. I don’t like the green pepper kind of course that can be disguised as remotely healthy if you try. I’m talking about jalapeño peppers stuffed with cream cheese and fried. A few years ago I started making them at home without the frying. Still unhealthy but still delicious. So today it hit me I should try a little harder. My new favorite thing is cauliflower “rice”. I’ve been making burrito bowls with it so got to thinking I wonder if I could make a version similar to stuffed green peppers with the cauliflower rice? Maybe with poblano peppers instead of green peppers so would still be slightly hot? So today I gave it a shot. 


I sliced a poblano in half and filled with a veggie mixture. I did still use cream cheese to hold it together but switched to fat free. This was delicious. 

I didn’t find it quite flavorful enough so added hot sauce on top after cooking. Next time I’ll add something to the mixture. I’m thinking red pepper flakes or garlic? Or maybe a taco seasoning packet. In the meantime here is what I used: 

3 large Poblano peppers
1 block fat free cream cheese
1/3 cup mozzarella cheese
1 cup cauliflower rice
1 cup mushrooms
1/2 cup spinach
1/2 cup Pico
1/3 cup fat free sour cream

Mix it all together, fill peppers and bake on a cookie sheet 30 minutes at 350 or until peppers are soft. 

Wednesday, February 13, 2019

Asian Style Meatballs with Sweet Chili Sauce

I had all that leftover ground meat in the freezer from making the "Christmas Pasta" dish that was soooooo good (click here for that post), I thought I'd use it up making meatloaf but then this recipe popped up in my feed and it sounded so good that I made it that night for dinner. We loved this dish! The meatballs were easy to make, flavorful and moist; and the sauce is sweet and a little spicy - but in an addictive sort of way. My only changes are I omitted the green onions, and substituted ground ginger for fresh.


Served with sticky rice and creamed spinach this was an excellent meal - there were enough leftovers to have again the next day and was still just as delicious (and yes, I had them for breakfast!)


 MEATBALLS:
  •  2 pounds ground meat (beef, pork, turkey or a combo) 
  •  1 cup panko or regular bread crumbs 
  •  1/4 cup chopped fresh cilantro 
  •  2 green onions, white and green parts finely chopped 
  •  2 large eggs 
  •  2 tablespoons soy sauce (I use low-sodium) 
  •  1 tablespoon finely minced ginger (or ginger paste) 
  •  3 cloves garlic, finely minced or 1/2 teaspoon garlic powder 
  •  1 teaspoon dried basil 
  •  Zest from 1 lime (about a teaspoon) 
  •  Pinch of crushed red pepper, more or less to taste (optional) 

SAUCE: 

  •  1/3 cup soy sauce 
  •  1/3 cup sweet chili sauce  
  •  1/4 cup fresh lime juice (from 2-3 limes) 
  •  2 tablespoons brown sugar 
  1. Preheat the oven to 425 degrees F. Line a large, rimmed baking sheet with aluminum foil and lightly spray with cooking spray.
  2. In a large bowl, add the ground meat. Add all the other meatball ingredients and mix until well-combined. Roll 2-3 tablespoons of the mixture into meatballs and place 1/2-inch apart or so on the prepared baking sheet.
  3. Bake for 20-25 minutes until cooked through (an instant-read thermometer should read 165 degrees F in the middle of a meatball).
  4. While the meatballs cook, whisk together all the sauce ingredients in a microwave-safe bowl or small saucepan and heat until simmering.
  5. Using tongs or a spatula, remove the meatballs from the baking sheet onto a plate or tray. Drizzle the cooked meatballs with the warm sauce and garnish with additional green onions and toasted sesame seeds, if desired. Serve the meatballs on their own or over brown rice, white rice, quinoa, etc.


Click here for original source


Happy moment - watching our new goldfish speeding around his freshly cleaned fishbowl

Saturday, January 12, 2019

Sour Cream Chicken Enchiladas

I've posted my chicken enchiladas before (click here) which we love, but as I'm reading Joanna Gaines' new cookbook (thanks mom!) I see she has a similar version that sounds good so thought I'd give it a try. To be honest I can't give a good critique because I didn't follow her recipe exactly - it's so annoying when people review a recipe and then note all the changes they made to it! If you didn't make the recipe exactly you have no business giving it a poor rating hahaha!


Anyway - I combined some of her recipe with my standard recipe and came up with good dish that is waaaaay saucier than my usual one...I like extra saucy so I really liked this version, Dave doesn't like saucy so he prefers the way I've always made them. So your choice - make my delicious go-to enchilada recipe, or try this sauced up version!


I'm not going to give you her original recipe since I didn't make it exactly (she added more verde sauce and diced green chiles, uses 10 larger flour tortillas, and bakes in a 13x9 dish). This is very similar to my standard recipe with the addition of soup to the sour cream. One thing I will do from now on no matter if it's this hybrid recipe or my regular one, is to mix the sour cream and the verde sauce together before pouring overtop - way easier to spread that way (my recipe calls for pouring the verde sauce over and then spreading the sour cream over the sauce).

Ingredients:
  • 16 oz. jar mild green verde sauce
  • 10.5 oz. can condensed cream of chicken soup (I used Campbells Healthy Request)
  • 8 oz. sour cream (I used light) 
  • 3-4 cups shredded rotisserie chicken
  • 8 oz. shredded mozzarella
  • 4 oz. or so shredded colby jack (it's what I had - use whatever you want!)
  • 9 corn tortillas
  • fresh chopped cilantro
shredded lettuce, chopped tomatoes, chopped avocado for salad on the side if you want, or put toppings in small bowls and let everyone garnish as they wish. 

Directions:

Preheat oven 350'. Spray an 11x7 baking dish with non-stick spray. 

Mix together the verde sauce, soup, and sour cream. Spread 1/2 cup in the baking dish.

Lay out the tortillas on a clean workspace, top with a sprinkle of shredded colby/jack or whatever cheese you want, some of the shredded chicken, and a bit of fresh cilantro. Tightly roll up the tortilla and place it seam side down in the baking dish. Continue rolling the tortillas and adding to the baking dish in a tight single layer.

Pour the remaining sauce over the filled tortillas. Bake for 20 minutes. Sprinkle the 8 oz. mozzarella on top, bake until the cheese is melted about 15 minutes.


Serve with side salad or bowls of garnishes. This made 3 big servings (3 tortillas each) or 4 smaller portions.

1.12.18: sweet dill pickles (the best!)
1.12.17: little ideas for things to purge
1.12.16: closet storage


Happy Moment ~ getting an out-of-the blue text from your niece saying she misses you


Wednesday, January 9, 2019

Tuna Noodle Casserole

I know, I know - tuna casserole is super common and normal and probably everyone's mom made this growing up (we ate it a lot!) and chances are you already know how to make it, but I made it for dinner and got a "that was the best tuna noodle casserole ever" from Dave so I thought I'd share how I did it. He isn't a casserole fan, but it was cold and rainy and neither of us wanted to go to the grocery store and I had the ingredients on hand...so casserole it was.


I did a couple different things this time, versus the regular ol' way I would normally do it - and I will make it this way from now on! Cuz "best ever" demands the changes haha! One, I added a panko crumb mixed with melted butter topping on about 15 minutes before we were eating; two, I only had one can of cream of mushroom soup and it seemed dry so I made a little cream sauce from scratch to add moisture; and three, I sautéed some fresh mushrooms in a little butter and added them to the casserole.


Ingredients:
  • 1/2 box cellentani pasta (or whatever shape you want, it was good with curly noodles), boiled according to package directions - I had about 4 big cups of pasta once cooked
  • 1 can cream of mushroom soup
  • 1/2 can milk
  • 1 cup frozen peas (I add these to the hot pasta and water a couple minutes before draining the pasta)
  • 1/2 cup shredded cheese (I don't actually measure, just a couple handfulls)
  • 1 can tuna, drained and flaked
  • 1/2 cup fresh mushroom slices
  • 1 Tablespoon butter

  • 1 Tablespoon butter
  • 1 Tablespoon flour
  • 1/4 cup milk or cream, additional water as needed for consistency
  • 1/4 cup shredded cheese

  • 1 cup coarse panko crumbs
  • 1-2 tablespoons melted butter
  • 1/4 cup parmesan
Directions:
  1. Saute the mushrooms in a little butter until browned.
  2. In a small saucepan, melt 1 T. butter and stir in 1 T. flour until it's all incorporated. Keep stirring the flour for a minute or two to get rid of some of the flour taste. Slowly whisk in the milk or cream, stirring continuously until it thickens. If it's too thick add a little water to get it to the right consistency. Add 1/4 cup shredded cheese until melted. Season with salt and pepper. 
  3. Stir together cooked pasta, soup, milk, peas, mushrooms, 1/2 cup cheese, tuna, and the extra cream sauce, pour into casserole dish. 
  4. Bake at 350' for at least 30 minutes until heated thru. Note: I like to make this earlier in the day and put it in the fridge to set up and meld the flavors before baking it. If you do that and the casserole is cold, it needs longer to bake - I did 45 minutes. 
  5. About 15 minutes before you are ready to eat the casserole, stir together the panko crumbs, parmesan, and enough melted butter to coat the crumb mixture, and sprinkle it overtop of the casserole. Turn up the oven temp. to 400' for about 15 minutes. 

Saturday, January 5, 2019

Unstuffed Chicken Cordon Bleu

Made this unstuffed chicken cordon bleu for Sunday supper and it was a huge hit. I'm never stuffing it again, why go thru that extra work when you can just layer the ham and cheese on top of thinly pounded chicken breasts - so much easier, looks great, tastes fantastic. You are definitely going to want to try this for yourself - I made a couple little changes but even if you follow her recipe exactly it'll be great and you'll look like a rock star when people gobble this up!

We had a couple pieces left over and it made for a delish lunch the next day...actually it made for delish breakfast for me, lunch for others haha.


 INGREDIENTS:

  •  2 tablespoons olive oil 
  •  1 1/2 pounds broccoli, cut into spears/thin wedges (see pictures in the post for a visual) 
  •  Salt and pepper 
  •  4-5 boneless, skinless chicken breasts (1 1/2 to 2 pounds), pounded to 1/4-inch thick or cut in half to form two thinner cutlets (see note) 
  •  2 tablespoons Dijon mustard 
  •  4 to 8 slices deli ham (exact amount depends on brand/size of slices) 
  •  1 cup (4 ounces) shredded Gruyere or Swiss cheese 
  •  15 Ritz crackers, coarsely crushed (about 3/4 cup) 

  • DIRECTIONS:
  1. Preheat the oven to 450 degrees. Make sure an oven rack is in the lower-middle position. Brush a large, rimmed baking sheet (about 11X18-inches) with 1 tablespoon of the oil.
  2. Toss the broccoli with the remaining tablespoon of oil, 1/4 teaspoon salt (I use coarse, kosher salt), and a pinch of black pepper.
  3. Pat the chicken dry with paper towels and season lightly on both sides with salt and pepper. Place the chicken breasts side-by-side on one side of the prepared baking sheet (to help them fit, you can alternate thicker end to thinner end as you lay them down). Placing them close together (without overlapping) will help the cheese stay put as they bake.
  4. Spread the mustard lightly over the top of each chicken piece. Top with 1 to 2 slices ham to cover and then add 1/4 cup or so of the shredded cheese evenly across the top.
  5. Sprinkle the cracker crumbs evenly over the cheese, and press lightly so the crumbs aren't loose.
  6. Arrange the broccoli in a single layer on the opposite side of the baking sheet.
  7. Bake for 20 minutes until the chicken registers 160 degrees F on an instant-read thermometer and the broccoli is roasted and tender. The exact time will depend on the thickness of the chicken. If the chicken still needs more time but the broccoli looks like it is finished, scoop the broccoli off the sheet pan onto a plate and lightly tent with foil while the chicken finishes cooking.
  8. I recommend removing the chicken as soon as the sheet pan comes out of the oven so it doesn't sit in the liquid that will naturally pool on the bottom of the sheet pan.

My changes: I did green beans instead of broccoli, and roasted them on their own baking sheet - I made too much chicken for it all to be on the same pan. Used thinly sliced swiss cheese instead of shredded; and substituted coarse panko crumbs mixed with melted butter for the Ritz crackers. Oh man this is good ;)


The recipe came from Mel's Kitchen Cafe, click here for the original post.