Wednesday, May 24, 2017

2 Days In Amsterdam

Spring in Amsterdam - without even realizing it we happened to book a trip in time to see the tulips! Amazing, and an unexpected treat. It was a quick stop so tried to see as much as possible in a short amount of time - the first day we hired a local tour guide to give us a walking tour of the town. 


A couple things stood out: 1) the city was surprisingly dirty, trash everywhere and that really surprised us. Maybe there's a garbage strike or something? I wonder if that's how it always is? and 2) the architecture is so interesting and unusual - they have buildings that are actually crooked because of the foundations being so old and rotting away (they are built on wooden poles because the soil is so wet). Fortunately most of the houses are touching the house next door so they are sort of holding each other up - but some of them are so so crooked it looks like they should fall over! I wonder how they feel on the inside - if you drop something in one room does it roll to the other side of the house? I'm tippy on a good day so this could mean big trouble for me if I lived there...

The guide did a quick walk thru of the "red light district" - I didn't know what to expect (should have read up on it I guess). There are literally scantily clad women (all ages and sizes!) standing behind full length windows with a red light over each one trying to entice men (and women too I imagine) in. When they get a customer they close a curtain over their window indicating they are "busy". Wow. Just wow. And sad. And super awkward, I didn't know where to look! We ended the day with a canal cruise for a different view of the city which was a pretty cool way to see everything.

there are 7 bridges in a row that you can see thru looking
down this canal

pretty much every street looks the same with canals, boats, bikes, row houses...

Can you see how the house on the left is crooked? And the city's
 narrowest house is the little dark red one in the middle!

wait, I want the best croissant...
the front door of the house that Anne Frank and her family hid in
and where she wrote her diary -
now that I've seen where she lived I really want to re-read her story. 


dinner our first night was one of our favorites the entire trip -
if you get a chance go to the Restaurant Haesje Claes for
traditional Dutch food...especially the pea soup, Stampot (mashed potatoes
mixed with other veggies) and Beef Stew. Yum!


For our second day we hired a driver/guide to take us outside of the city - we went to Kukenof gardens to see the amazing flowers, stopped at a little village to photograph some windmills (don't you think of Dutch windmills along with tulips? apparently most of the windmills are gone now and they just keep a few for "the tourists". I was a little bummed to hear that!) and eat lunch,  and a visit to a touristy shop to see how cheese (my new favorite is a Gouda called "Old Friend") and wooden shoes are made...it was a little cheesy (no pun intended haha) but informative and we sampled lots of different locally made cheese - I didn't try the "hemp cheese" tho! 

my pictures of the gardens really don't do the flowers justice - they were magnificent!


lunch was "Mustard soup" - SO good!!! I have to learn how to make this!  seemed
to be a regular cream soup with the addition of mustard seeds, I will experiment and let you know...


I enjoyed seeing Amsterdam and am happy we had a couple days here, not my all-time favorite city but the food was great, people are nice, and it felt safe...After 2 busy full days we flew to Edinburgh, Scotland - more on that later!

Tuesday, May 23, 2017

Suitcase Divider

Before I tell you about our latest trip I have to show you what I just made, I'm super excited about this actually because the idea just came to me when I was posting about my packing list yesterday and I was thinking about how helpful a suitcase divider would have been. I googled and can't find anything like what I pictured so I just made it up myself - woohoo, Shark Tank here I come!


 Ok, ok, maybe you aren't finding this as exciting as am I...but I love the idea and it's going to be so helpful on my next trip. I took hollow core cardboard from some leftover packing material that hasn't made it into the recycle bin yet (D had to buy another tabletop grill, don't even get me started about that), measured and cut it to fit in my suitcase (one long piece the width of the suitcase and one shorter piece to divide one half vertically), then because plain old cardboard is boring I hot glued some old fabric around it so it's purdy. Before I take this idea to Shark Tank I will come up with a better way to cover the cardboard cuz I burned the shizzle out of my fingers stretching the fabric around the cardboard! Sigh. Wedged the inserts into the suitcase and now I have 3 separate spaces for organizing my travels - I'm imagining the bottom space will hold my shoes, one top part will have my clothes and maybe one of the packed cubes; the other part will hold toiletries, underthings, and accessories. I'm feeling like going on another trip just to test out my new invention!


As I mentioned, my bag got slapped with a "heavy" label so it was important to not make the divider out of anything that will add weight! This hollow core cardboard worked perfect, but I think regular cardboard will also work. I also chose the lightest fabric I had on hand, initially I was going to use felt but went with this super light cotton that doesn't match very well instead - I am my grandmother's granddaughter after all so just used what I had in the closet for instant craft gratification, when I sell this idea I'll make it out of fabric that matches the inside of the suitcase better ;).

Monday, May 22, 2017

Travel Packing List - Amsterdam, Scotland, and Ireland in Spring

Ok, I've talked before about packing light and really really thought I was doing good this time around...and yet I still took too much! Ugh. When will I learn...? We were very lucky with the weather this trip - I thought we would have lots of rain and it'd be chilly so everything I packed was thin and lightweight to be able to layer as needed, but it only rained a couple times! It was still nice to have the multiple light layering pieces so I did good there, but I just took more than I needed. Nothing like getting up to the baggage drop counter and having them put a "heavy" tag on your bag (I was a little offended on behalf of my bag, that's kind of a rude label if you ask me LOL!). In my defense I didn't have to use the extender zipper to fit it all tho, so there's that.


We were gone 16 days - I googled, researched, and studied other people's suggested packing lists for the areas we were going and they basically all said the same things...layers layers layers and lots of black/gray/white. I pretty much followed suit and took the following (I don't have the fancy app that lets you take organized nice clean pictures of everything you are packing like everyone on Pinterest does, so just use your imagination - "gray long sleeved t-shirt" is not hard to figure out without a photo). I kept the pieces basic so I could wear them multiple ways:

2 jeans (dark-wash straight leg, light-wash skinny)
1 black stretchy jeggings (a cross between black jeans and leggings - they look like jeans though)
1 black leggings
3 button up long sleeved tops (white, jean, black)
2 long sleeved t-shirts (gray, black/white stripe)
2 lightweight hoodies (cream, gray)
2 short sleeved shirts (cream, black)
red pullover light sweater with hood
black pullover light sweater
gray pullover light sweater
black cardigan
multi colored (brown/blue/cream/gray) cardigan
flowy dressy tank
short sleeve black button up dress with a little collar and tie belt
2 thin down vests (silver, cream)
2 scarves (both matched everything)
tall brown boots
black ankle high combat boots
brown/black ballet shoes
hiking tennis shoes
a couple tight tanks for layering
pajamas
swimsuit and coverup shorts
hip length black jacket
long black light rain coat/shell with a hood
knit hat, lightweight gloves

That equals 4 bottoms, 12 outer shirts (not counting short sleeve and tanks that I never wore alone), 1 dress, 1 flowy dressy tank in case we went somewhere "nice". All of the places we went are super casual, or if they were a little nicer no one cared what we wore so we still wore casual clothes. I wore the dress one time under the black pullover top with tights and tall boots - totally didn't need to take it. I wore the dark straight jeans with ballet flats one time, didn't need either of those pieces either. Only wore the multi-colored cardigan once, didn't need it. Did not wear the flowy tank or the short sleeve black t-shirt. The tall brown boots were an extra that I debated packing but I wore them all the time and am so glad I decided to bring. A couple of the hotels had pools but there was never time to swim so didn't need the swimsuit.  I didn't pack anything that was bulky or heavier-weight and didn't need them so that's good. Now that I've been I would pack a little differently if I ever go back to these places around this time of year:

dark wash skinny jeans
black stretchy jeans
black leggings
2 button up long sleeve tops (either white, jean, or black - didn't need all 3)
1 or 2 long sleeved t-shirts in neutral color (I never wore this without a shirt overtop, it's just for layering)
2 lightweight pullovers
1 long cardigan
2 lightweight hoodie/shirts (I wore these a lot!)
2 thin vests (1 down and 1 fleece)
1 lightweight fleece either pullover or zip up
scarves and jewelry to jazz up the neutrals
1 coat that has a hood and is water repellant that can be worn with everything. I took 2 different ones and layered them but one light- to mid-weight would have done it.
tall boots, ankle boots, hiking shoes
2 tight layering tanks
pajamas
knit hat

I could probably pare down even farther, and this amount of clothes will probably still earn me a "heavy" bag tag but there would be less to deal with which would be nice and this amount of clothing would still give me lots of mix and match options - and something I should have remembered is that you are pretty much wearing a jacket or vest over every outfit every day so what you have on underneath is really not seen all that much!

Some packing tips and ideas:
-I rolled all of my shirts and laid them in a single layer in the top part of my suitcase that has a zip around cover in the lid - when I unzipped it the shirts were all in order and functioned almost like a drawer. I could see everything and didn't have to move any shirts to get to another one. That worked great.


-I used 3 cube things to keep my bag in order: 1 big one for tanks, swimsuit, pajamas, etc. 1 medium one for under things and socks. 1 smaller one for hair accessories and jewelry.

-Put a shower cap over the soles of the shoes you are packing so they aren't touching your clothes, and for my boots I put them in a large plastic bag (or a plastic grocery bag). Pack a couple extra plastic grocery bags in case your clothes or shoes get wet from the rain and you need to put them back in your suitcase before drying out.


-If you are traveling someplace that is normally rainy, spray your boots, purse, backpack, etc. with water repellant spray before you go. I did this to my shoes and boots and never had wet feet.

-Bring along a piece of bubble wrap in case you buy anything fragile (I brought home 2 coffee cups and wrapped them up in the bubble wrap and placed between the down vests).

-Print out your name and contact info on a piece of paper and include it in your suitcase in case the outer tag gets ripped off.

Here are some photos so you get an idea of what we wore:

skinny jeans, tall boots, black cardigan, blue button up shirt with tank under, scarf. 

I'm wearing a tank, jean shirt, lightweight hoodie, thin down vest
with my skinny jeans and tall leather boots...too many layers, we were
all peeling off clothes in the warm sunshine!

yep, our guide Scott wore a kilt every day - even when it was cold!

skinny jeans, hiking/tennis shoes, black pullover with long sleeve t-shirt under,  down vest

it was cold and rained pretty hard the day we went to the Cliffs of Moher -
definitely a layering day. I have on my knit hat, and put my jacket under
the hooded rainshell, and wore my waterproof hiking/tennis shoes.
Stayed warm and dry!

If there are any guys reading this post, here is Dave's packing list:

3 jeans (black, gray, blue)
1 chico/khaki dressier pants
2 plaid flannel shirts
2 plaid cotton button up shirts
2 lightweight turtlenecks (tan, black)
1 lightweight pullover (gray)
1 short sleeve polo (black)
Nike lightweight lounge/workout pants and pullover (black)
1 swim shorts
2 short sleeve t-shirts (gray)
1 mid-weight hip length jacket with hood (gray)
2 pairs shoes (hiking/tennis shoes and loafers)

He didn't wear the chinos, black jeans, swim shorts, or the polo shirt. The Nike pants and pullover he wore on travel days. He says he didn't need anything other than what he brought, wouldn't change his packing list other than not needing that many bottoms.

I'm going to do a few travel blog posts for the next couple days if you're interested - stay tuned!


Sunday, May 21, 2017

Donut Hole Cake Pops

These turned out so good they deserve a second look - super cute easy dessert for Memorial Day or Fourth of July for sure, but if you just change out the sprinkles they'll be perfect for any time! Check out the colander as a holder idea, I forgot how well that worked. Mmmmmm donuts.

From last June:


Saw this idea here and love it! I haven't tried to make cake pops - I know I know, I'm very behind in the cake pop game...doesn't it seem like they are everywhere? Well I saw this shortcut of dipping donut holes in candy coating with red white and blue sprinkles and said to myself "now there's a genius idea" and wanted to make them. 

Side note: This is a very dangerous thing for me because I have a hard rule that I can only eat donuts on my birthday. I established this rule for myself years ago when I was working in an office and I swear every day someone would bring in donuts and I'd eat one. Every day! So making this rule is the only way I don't go crazy and eat donuts to my hearts content -  I've stuck to this rule for years only breaking it if I'm with someone on their birthday and their treat is donuts. That would be just rude of me to say no ;)

The hardest thing about making these was trying to find plain donut holes! I gave up and bought the ones rolled in powdered sugar and it worked just fine, might make them a little bit sweeter but it's already a donut rolled in candy coating so what's a little more sugar?

As sometimes happens, I didn't read thru the entire directions before starting and this is what happened:


So I read how I was supposed to do it and then - surprise - they worked perfectly and were quite easy to do. The key is to dip the stick in a little melted candy coating and poke it into a donut hole and put them in the freezer for 30 minutes. After that they dipped very easily, didn't break apart or fall off the stick into the coating so I had to fish it out and then have Dave eat the broken ones so I wouldn't...


I couldn't find anything to stand the pops in while they were drying (hmmm, I'm wondering if I missed that part in the directions?) so I fashioned my own stand using the holes in my colander, worked like a charm.


Directions are simple (especially if you actually read thru them before starting!):

  1. In a small microwave-safe dish heat 1 ounce of the candy coating, about 1/4 cup, on medium for 60 seconds until melted and smooth, stirring once. Dip one end of each lollipop stick into melted candy coating and poke sticks into doughnut holes. This helps the doughnut holes to stay on the sticks. Freeze for 30 minutes. 
  2. Place remaining candy coating in a small saucepan. Heat over medium-low heat until melted and smooth, stirring frequently. Dip doughnut holes, one at a time, into melted candy coating. Allow excess to drip off; sprinkle with assorted sprinkles. Let coating set before serving. Store in covered container.

My sister is going to a party and needs a dish to pass so I'm sending these with her.
She's gonna have to come up with her own way to stand them up or display them tho...


Saturday, May 20, 2017

Mini Pies

I love to make these mini pies, and everyone loves to eat them. What is it about something in miniature that makes it so appealing? Maybe that it seems like you aren't eating so much if you have 5 little bites instead of one full piece? Whatever - trust me that these are super easy and delish - and they look like you spent a lot of time making them (when you didn't!)....it's a win-win dessert! For Memorial Day how about making blueberry and cherry for a "red, white, and blue" themed dessert? You can also make pudding/cream mini pies by baking the shells empty and then filling with whatever flavor you like - chocolate cream, coconut cream, banana cream are all favorites around here.

This is from last June:

My niece asked me to make her favorite mini pies for graduation last week, she wanted to share them with her co-workers/students on her last day of school. I made 48 total and that wasn't nearly enough, she said they were gone in like an hour and a half! Oops, I didn't plan that very good - but she said they were delicious and everyone loved them - yay.


This is a very easy shortcut way to make cute little mini pies using refrigerated pie crust and canned pie filling.


Roll out the crust so it's a little thinner than you would use for a full pie, then cut circles using a 2.25" round cookie cutter - I've also used a small juice glass before and that works just fine. Gently press the dough into mini muffin tins that have been lightly sprayed with non stick spray. Using my small cookie dough scoop I fill the cups about 3/4th full, too full and they'll bubble over (which makes a mess in the oven, trust me). Bake at 400' for approx 12 minutes until the edges of the crust are browned. Cool for a few minutes in the pan and then carefully remove to a cooling rack (I use a small knife to help lift them out).


I made blueberry using canned pie filling, after they were cool I drizzled them with powdered sugar mixed with a little milk (put in a small baggie, snip a bit off the tip and drizzle away).


She also requested apple and of course I forgot to buy apple pie filling...so I was all set to drive to the store for some when it occurred to me that I have apples and should just whip up my own apple filling. I peeled and diced 2 apples, put in a saucepan with a little bit of flour (like a tablespoon), 2 tablespoons of sugar, a dash of cinnamon and a small amount of water. Cook for 5 minutes or so at medium heat until the apples have cooked a bit but aren't mushy. To finish the apple pies I made a crumb topping  from 1/4 cup flour, 2 tablespoons of sugar, a dash of cinnamon, and 4 tablespoons butter - using a fork I cut the ingredients together until it formed coarse crumbs - and then sprinkled on top.


Dave gave the blueberry pies a 10+ and the apple a 9.5...apparently canned pie filling tasted better than my made up apple pie filling. Oh well. Paige said she loved them both so that's good :)

Here is how her station turned out - she was happy with everything :)


Friday, May 19, 2017

Mason Jar Flag

Re-reading this post made me cringe, good grief I complained a lot and made this sound super hard didn't I? I'm curious if anyone wanted to make these after reading my story hahaha! I'm posting this again for a couple reasons - 1) Memorial Day is coming fast and this is a perfect craft for that (or any patriotic holiday, or just cuz you like flags!), 2) even though I whined about it these are really cute and totally worth making again, and 3) my sister loves these and I've seen her use them a bunch of times! So please ignore how difficult I made them sound and give them a try!

This post is from last June:

Ever have a crafting day where nothing goes right? Well I certainly do and this project falls under that category... good grief I struggled. I'd seen this mason jar project numerous places and thought it was cute - and then my sister mentioned she had seen it and was hoping I would make them for her. Sure thing sissy, I'm always happy to have a purpose for crafting haha.

It started out fine, if you count going down to the basement to get 3 pint jars from storage and knocking over an entire shelf of plastic containers fine. And that was just the beginning. I couldn't find navy paint at 2 different craft stores so figured I'd just make my own by adding black to some brighter blue. That actually worked, but still - why can't I just buy navy paint? So 2 jars get painted white and one navy; there was something wrong with my white craft paint and it ended up going on uneven and gooey. I tried to speed up the drying process by hitting it with the hair dryer but it just looked bad - fortunately I used regular old acrylic craft paint so it was easy to wash off the jars and start again with fresh white paint and the second time I painted them went better. I ended up painting all 3 jars with a second coat. After thoroughly dry I taped off the areas where I wanted to paint the red stripes using washi tape as recommended - I read that blue painters tape would pull the paint off the jar. Guess what, washi tape pulls the paint off too...ugh. 

glue foam stars to a wine cork to
make the stamp
I used a tip I saw online to make the star stamp and hot glued a couple foam stars to the end of a wine cork, yes - that worked! Great idea I will def use again. Then dip the stamp in white paint and stamp over the navy, except the jar is round so I had to press the edges of the star onto the jar - you won't get nice crisp star edges doing that but I decided the rustic handmade look is what I was going for and not try to make them so perfect. One site I found with directions said when they were completely decorated and dry she lightly sanded them in places to make them look distressed, I know why she did that - cuz they don't look so good and you want to rough them up a bit to help with the illusion that you meant for them to look beat up!

After sanding I sprayed them with clear shiny sealer so they will hopefully last forever and I don't have to remake them for her! I'm not saying this isn't a cute or worthwhile project - once completed I actually really like them, but let's just say that after having everything go wrong I'm not going to be making another set!


I couldn't get the tape to stick tightly around the curved edge of the top of ball jar, so I used a rubber band as a guide

this is what the jar looked like after removing the washi tape...a little messy! I touched up the area where the red went into the white and where it peeled the paint off with a small brush.

once dry I took them outside and sprayed with a clear sealer


after I lightly sanded them to give them a "distressed" look. Actually I was distressed more than the jars!!

Thursday, May 18, 2017

Switching Duvet Covers

Remember this one from last May? Anyone try it, and if so do you do it this way now? It's such a handy tip I want to share it again:

Putting a duvet or comforter into the cover is SUCH a pain! I dread trying to stuff it in there neatly without working up a sweat - not fun. I've heard about this little trick before and have even tried to figure it out with no luck...until now. I was determined to do it, googled a few different sites and watched a couple videos - and almost gave up again but I stuck with it and IT WORKS! I can't believe it, this is so much easier than my old way of fighting the duvet and cover. I'm not going to try to explain it, I took a couple pictures but since my duvet and cover are the same color the pics aren't very helpful. Watch this video, and stick with it - once you got it you'll never go back. A couple hints: Lay the cover (inside out) down on the bed with the closed end towards you, then lay the duvet on top. I have little ties on the inside of the cover to help keep the duvet in place, if yours doesn't have them I pin them with strong safety pins. After rolling the two up together turn the roll around so the open end of the cover is facing you. When you reach into the cover it says to grab the ends of the roll and pull thru, that is where it got a little tricky for me - I wasn't sure which part of the end to pull. You grab the entire end, the whole roll and pull it thru. Once you start unrolling you'll just keep adjusting the edges to keep the whole thing rolling out. It's amazing, and quick - try it!

roll up towards the open end of the cover 

unrolling the "burrito"

Click here for the link to the video - if it doesn't work for some reason just google "duvet cover trick" and click on the lifehacker.com site. They explained and showed this trick really well I think.

Wednesday, May 17, 2017

DIY: Pallet Garden

Almost time to start my garden and I can't wait to plant my herb pallet garden. This post is from 5/16:

My niece saw this idea on Pinterest last year and got both of us a small pallet so we could each make one. I love this idea - it's pretty simple to do and works great for planting small things like herbs or flowers. It was a success and I just replanted it for this season - it's propped outside of our kitchen so it's handy to grab herbs when I need them.


I figured out where I wanted to put the planting areas on the pallet, one side has 4 boards across but the other has 3; I decided to plant in the top and bottom and leave the center open, with the 3 boards being the front so I can access the planting spaces.

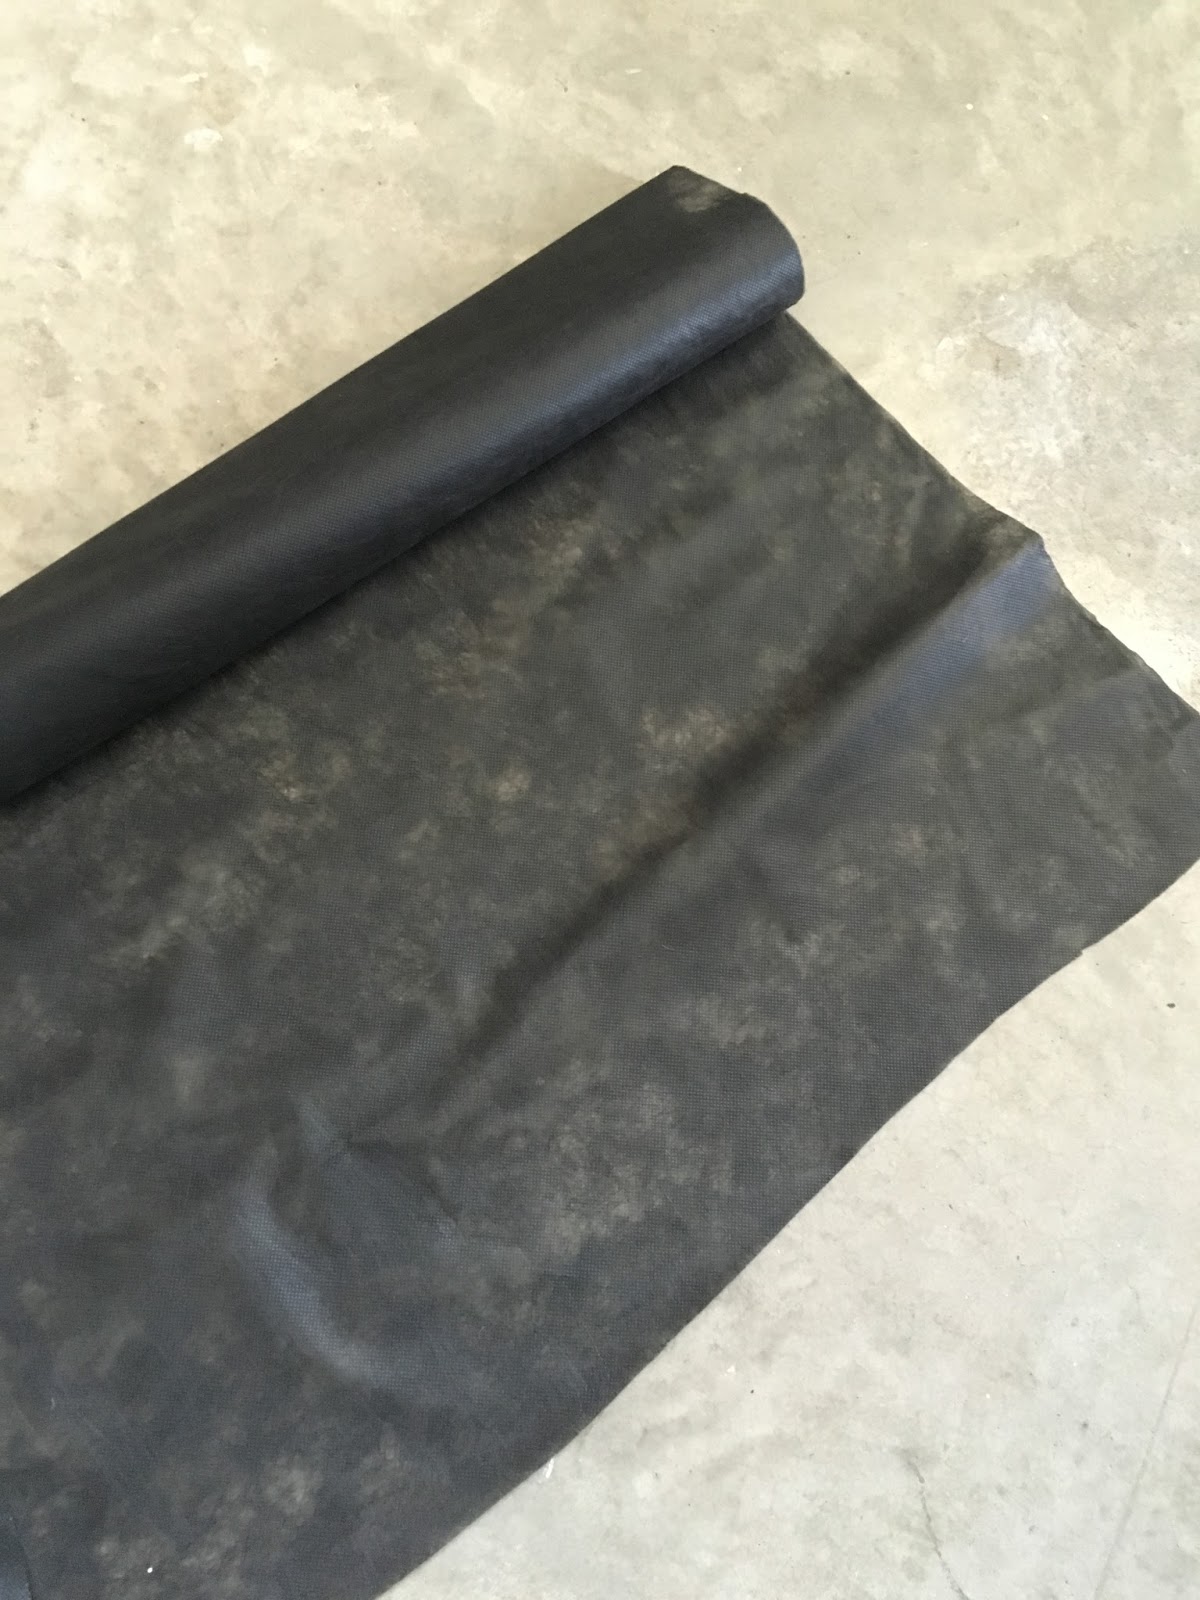
landscape fabric

The pallet is open in the middle between the front and back boards with a board running down the center, so to make a box for planting and to keep the dirt in the box I cut a double sized piece of landscape fabric, folded it over so it's double thick, and used my staple gun to attach it to the bottom side of the top boards (I made two different "boxes" on the top on either side of the middle board) to create a planting box. Repeat for the bottom two boxes. I now have 4 small spaces to plant in. I put the staples close together so the fabric wouldn't sag and holds the dirt. There is probably a "better" way to create the planting box, maybe nail pieces of wood between the pallet boards for the box base, but I was winging it and saw this fabric in the garage and thought I'd give it a try. It works!

underside of the top planting space


looking into the top planting box

Then just plant with whatever you want and whatever fits - I bought a couple plants (basil, lemon thyme, pineapple sage ) and also planted some seeds (parsley, arugula, cilantro). Last year I planted some marigolds in one box but this time I'm trying arugula and cilantro instead. My little pallet garden is so cute!