Saturday, October 10, 2015

Halloween Layered Candle

I made this layered candle using colored granulated wax (purple, orange, black, white - good halloween colors obviously) - it's a simple project that is good to do with kids. It can be a little messy but I've found these things help combat that:

  • lay down newspaper
  • I like to work on top of old cookie sheets - helps catch wax that doesn't make it into the container
  • transfer the granulated wax (it almost has the consistency of sticky sand) into plastic containers - I use old cool whip containers
  • use a different plastic spoon or scoop for each color so you aren't transferring colors into each other
Find a clear glass container that you can burn wax in, I usually use mason jars (any size, even little small ones work). Stick a wick to the inside bottom of jar, making sure it's at least as tall as the container you are using, in these photos I have wound the wick around a skewer to help keep it straight up the middle of the jar.  Then layer in the different colors making whatever pattern you like - it's a lot like making sand art, did you do that as a kid? You can tilt the jar so the wax stays on one side then tip the other way for another color, or just do straight layers, or take a long skewer and run down the sides when you're done for a v shaped pattern...whatever you want. Trim the wick to just a little above the wax before burning. Oh, and don't tip the candle over - the wax stays loose until you start to burn it. Yeah, I learned that lesson the hard way...;)


Friday, October 9, 2015

Soap with Spiders

My niece and I made spider soap yesterday (she won't let me make soap with pieces of barbies in it anymore...fun sucker...but floating spiders are ok). We LOVE to make soap and it's an excellent way to spend lots of time together with fairly easy clean up (it's soap - easy clean up hahaha...anyway...). I buy blocks of soap from the craft store and melt it in the microwave according to directions; add scent, colors, and any items you want to float in the soap; then pour into molds. (note: I've been in charge of the microwaving and until recently the pouring into molds but I have her stir in the scent and colors - she's getting old enough now though that she can pour, I just have a bowl of ice water handy in case she gets any hot soap on her fingers!) We put them in the freezer to speed up the hardening process, especially if you are making layers of different colors. Pop them out of molds when done and put them next to a sink where you'll get the most shock value :)
this is two layers of clear soap, the bottom is colored
orange and the top we left clear

we made this just using clear glycerin soap

Thursday, October 8, 2015

Creepy and Cute Pumpkin

(Ok, maybe not very creepy but since I like fun halloween and not scary halloween this is about as creepy as it gets!)

For this pumpkin make a hole in the bottom and scoop out all of the seeds from there. Using a marker, draw out  2" circle for the eyes with a 3/4" circle in the center, then carve the outer part of eye leaving enough flesh to hold the inner circles in but thin enough you will be able to see thru them when it is lit. I just keep scraping with a small knife until the outer eye is smooth and thin. Next cut  a 5" x 2" rectangle in the pumpkin for the mouth. I found some small soft twigs in the yard and broke them into same sized pieces, made small holes above and below the mouth and inserted the twigs in bending them to curve into the holes. For the ears cut pieces out of the sides, carve them a little bit to look like ears and then insert them back into the same hole they came from (use a small skewer or toothpick to help hold them in place if they won't stay there). Insert a candle and check out how cool this looks glowing in the dark!

Wednesday, October 7, 2015

BOO painted mug

Super easy quick (love those words!) project that anyone can do...


I found a plain white coffee mug (this one is from Walmart) and put stickers on it spelling "boo"; then made little dots all around the stickers with paint markers (I've read you can use sharpies but I've only done it with these paint markers - they are easy to use and come in lots of colors), I started with black and then added silver and orange on top radiating out from the words so it's thicker in the center of the design and then fades out. Then carefully remove the stickers - I used a pin to lift up an edge and then peeled them off. Up to this point you can wash off the design if you goofed or just changed your mind - if you like your finished project and want to "set" your design so it won't wash off, put the painted mug in a low oven (I did 300') for 30 minutes, turn oven off and let the mug cool down in the oven before taking it out.

You can obviously change your words and colors to whatever you want, or paint on other things (vase, bowl, plate, etc.). Have fun!


Tuesday, October 6, 2015

Spooky Terrarium

look how cute this spooky terrarium is!
 love it :)
  • Put some sheet moss in the bottom of a clear lidded jar.
  • Cut out the shape of a creepy house (I used black foam board, you just need to make it out of something that will stand up on its own) and draw lines on it with a paint marker (they said white but I used silver).
  • Make a ghost from a tissue tied around a small round thing with clear line or cord, suspend from the lid. They called for a small styrofoam ball but that was too big and black cut out shapes for eyes - I used a small ball of play dough and made the eyes with a black sharpie. 
  • Add a piece of fencing, a stick for a dead tree, and some reindeer moss for additional texture.
I had a hard time getting a good picture of it, trust me it's super cute! I saw this idea on HGTV, check there for other photos and detailed instructions if you need them. 


Monday, October 5, 2015

Squash Ghosts

I love when a project ends up being super easy and cute! Sometimes when I attempt what seems to be an easy project it ends up harder than I think haha, but this one is a winner. You could do with any kind of gourd or squash you want that has a good ghostly shape...I used butternut squash (making sure they are flat enough on the bottom to stand up). Paint them with 2 coats of white acrylic craft paint (I used a 1" foam brush); when dry paint on eyes and mouths (just free hand it, it looks good not perfectly symmetrical I think!) with black acrylic craft paint using a small rounded brush. Done. 


Sunday, October 4, 2015

Pumpkin Bisque

I have a recipe for butternut squash bisque that I love -  it's from the LA Times and I've made it bunches of times -  I was planning to make it this weekend since it's starting to feel like Fall and this is the perfect Fall soup...however, before I could make the soup I decided to use the squash for a different project (see tomorrow for Squash Ghosts LOL!). 

I have a craving for the soup now and just adapted the recipe to what I have on hand - canned pumpkin. It turned out SO good, the house smells amazing...


The recipe calls for leeks - these are often very dirty on the inside and can be difficult to clean. My method is to cut off and discard the root end and green top (where it goes from very light green to darker), make a cut lengthwise down the leek but don't cut all the way thru. Then run it under water spreading the layers apart and washing thoroughly.


After cooking the leeks and garlic I added the pumpkin, chicken broth, nutmeg, cumin, s&p. Cook for 20 minutes then puree the solids (I used my immersion blender which I'm not even sure why I own, I never use the thing. Today I got it out though...a food processor or blender is what I would normally use - be careful obviously to not let the hot soup splash out when pureeing!).


Once it's pureed smooth, add corn and a little bit of cream. Stir well. Add more broth or seasoning if you want.

If using butternut squash the nutritional info is 230 calories, 7g fat. Didn't take the time to figure out if pumpkin changes those numbers. 


This is adapted from a recipe published in the LA Times years ago for Butternut Bisque - if you want to make it the original way just substitute chopped butternut squash for the pumpkin. 

1 T. oil
1 medium leek, white part only, sliced
1 clove minced garlic
1 can 100% pumpkin (not pumpkin pie filling)
3 cups chicken broth
1/2 t. nutmeg
1/4 t. cumin
salt and pepper to taste
1 cup corn kernels
3 T. whipping cream

Heat oil over medium-high heat. Add leeks and garlic, cook 4 minutes until tender. Add pumpkin, broth, nutmeg, cumin, s&p, simmer about 20 minutes. Puree solids in a processor until smooth, adding more liquid if necessary. Return all to pot, stir in corn and cream. Adjust seasonings as needed.


I used frozen corn on the cob for this recipe - after I cut off
most of the kernels Sarge finished up for me.
He's eating it right off the cob - and not biting my fingers! 

Saturday, October 3, 2015

Halloween or Fall Front Porch Decor

It was a sunny afternoon so I decided to decorate the front porch overhang - I don't always hang up Halloween stuff this early but might as well do it while it's nice out!


I used 6 small fake pumpkins, 7 rubber hanging bats, a big metal star, and 2 strands of garland leaves.

Put some thin wire (I have a roll of a lightweight gauge silver wire that I use for tons of things - get it at the craft store or maybe check the hardware store if you're there) thru the pumpkin stems, leaving ends long enough to hang them - I did different lengths to stagger them. The bats came with an elastic cord attached to hang them, I added some heavy string to a couple of them so they aren't all at the same level.


I nailed in a few small nails to the backside of the overhang (um, maybe don't tell my husband that part - he hasn't asked how I got these decorations to stay up and I'm not volunteering the info...) then I hung the star first in the center, then spaced out the pumpkins, then the bats, and then hung the garland over all of the nails. It's windy today and I was worried they might fly off the nails so I took some little twist ties from our trash bags and wound them around the ends of the nails to keep things in place. I hung one of the bats from the bottom of the side light and he looks cool spinning around down there.

Sarge and those ears...he looks like a bat!
Fits right in with the decorations. 

I thought about hanging some orange mini lights up there too but there isn't very much room left on the small nails - plus I didn't feel like dealing with the extension cord! That would look good though...

 Find some Halloween things you like that can stand up to being outside and give this a try - If you don't have an overhang maybe adapt this idea to decorate around the door or columns next to your door?

Friday, October 2, 2015

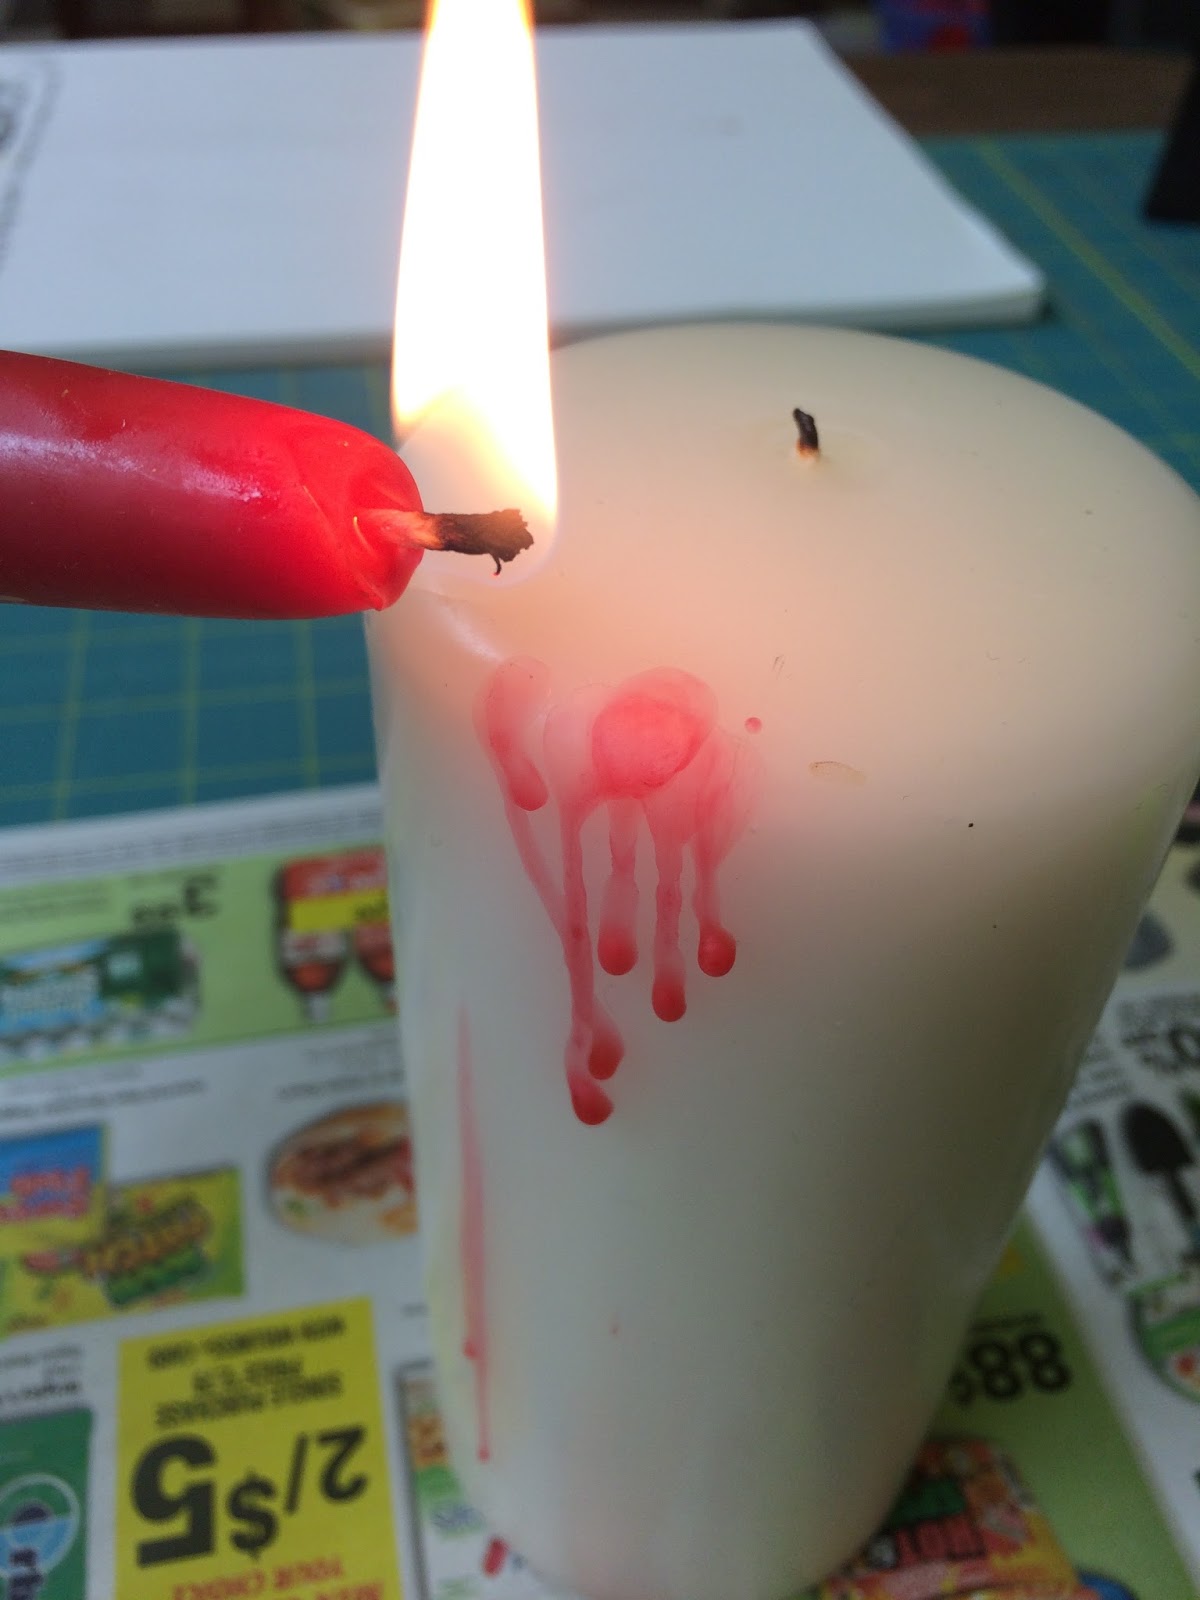
"Bloody" Candles

I am not into scary gross Halloween decorations - I opt for the cute most of the time - but when I saw this candle idea I really wanted to try it (and it isn't that scary haha).  I had the supplies on hand so that made it even better, I love when I can just make something without going to the store first!

All you need is a white pillar candle (this one is probably 2" x 6" but any size will work), a red taper/candlestick, and either a match or lighter.


Light the red candle, as it melts let it drip down the sides of the white candle. Keep going around building up the drippy red wax.


That's it. This photo doesn't really do it justice, it's even cooler in real life. And I gotta say - it was quite fun to drip wax all over. Try it!

Thursday, October 1, 2015

Mossy Halloween Wreath


I made 2 of these wreaths a while ago - even though it isn't a new project for me to show you I still think they are cute and worth sharing. They have held up really well, I occasionally have to hot glue a spider or bat back on but overall they are doing great.

I started with straw wreaths and wrapped a chenille stem around to hang them from (you could tie a long ribbon around the finished wreath instead if you want to see the hanger), then hot glued preserved reindeer moss (I found it at Hobby Lobby) all over completely covering the straw on the front and sides (any part that won't be hidden against the door). I got some rubber and plastic spiders, scorpions, and bats at the craft and/or dollar store, put some glitter glue on them so they are sparkly ;) and hot glued them randomly on top of the moss. I put a large straight pin thru the heavier pieces (large tarantula and bat) to help anchor them into the wreath. That's it! Definitely one of the easiest wreaths I've made.


 You could easily change this up and add whatever Halloween items you would like - check out the different small things at the craft store like pumpkin picks, feathers, witch hat and brooms, etc. I can also see this at Christmas with ornaments, pine cones, snowflakes, etc. instead of the bugs!