Saturday, May 20, 2017

Mini Pies

I love to make these mini pies, and everyone loves to eat them. What is it about something in miniature that makes it so appealing? Maybe that it seems like you aren't eating so much if you have 5 little bites instead of one full piece? Whatever - trust me that these are super easy and delish - and they look like you spent a lot of time making them (when you didn't!)....it's a win-win dessert! For Memorial Day how about making blueberry and cherry for a "red, white, and blue" themed dessert? You can also make pudding/cream mini pies by baking the shells empty and then filling with whatever flavor you like - chocolate cream, coconut cream, banana cream are all favorites around here.

This is from last June:

My niece asked me to make her favorite mini pies for graduation last week, she wanted to share them with her co-workers/students on her last day of school. I made 48 total and that wasn't nearly enough, she said they were gone in like an hour and a half! Oops, I didn't plan that very good - but she said they were delicious and everyone loved them - yay.


This is a very easy shortcut way to make cute little mini pies using refrigerated pie crust and canned pie filling.


Roll out the crust so it's a little thinner than you would use for a full pie, then cut circles using a 2.25" round cookie cutter - I've also used a small juice glass before and that works just fine. Gently press the dough into mini muffin tins that have been lightly sprayed with non stick spray. Using my small cookie dough scoop I fill the cups about 3/4th full, too full and they'll bubble over (which makes a mess in the oven, trust me). Bake at 400' for approx 12 minutes until the edges of the crust are browned. Cool for a few minutes in the pan and then carefully remove to a cooling rack (I use a small knife to help lift them out).


I made blueberry using canned pie filling, after they were cool I drizzled them with powdered sugar mixed with a little milk (put in a small baggie, snip a bit off the tip and drizzle away).


She also requested apple and of course I forgot to buy apple pie filling...so I was all set to drive to the store for some when it occurred to me that I have apples and should just whip up my own apple filling. I peeled and diced 2 apples, put in a saucepan with a little bit of flour (like a tablespoon), 2 tablespoons of sugar, a dash of cinnamon and a small amount of water. Cook for 5 minutes or so at medium heat until the apples have cooked a bit but aren't mushy. To finish the apple pies I made a crumb topping  from 1/4 cup flour, 2 tablespoons of sugar, a dash of cinnamon, and 4 tablespoons butter - using a fork I cut the ingredients together until it formed coarse crumbs - and then sprinkled on top.


Dave gave the blueberry pies a 10+ and the apple a 9.5...apparently canned pie filling tasted better than my made up apple pie filling. Oh well. Paige said she loved them both so that's good :)

Here is how her station turned out - she was happy with everything :)


Friday, May 19, 2017

Mason Jar Flag

Re-reading this post made me cringe, good grief I complained a lot and made this sound super hard didn't I? I'm curious if anyone wanted to make these after reading my story hahaha! I'm posting this again for a couple reasons - 1) Memorial Day is coming fast and this is a perfect craft for that (or any patriotic holiday, or just cuz you like flags!), 2) even though I whined about it these are really cute and totally worth making again, and 3) my sister loves these and I've seen her use them a bunch of times! So please ignore how difficult I made them sound and give them a try!

This post is from last June:

Ever have a crafting day where nothing goes right? Well I certainly do and this project falls under that category... good grief I struggled. I'd seen this mason jar project numerous places and thought it was cute - and then my sister mentioned she had seen it and was hoping I would make them for her. Sure thing sissy, I'm always happy to have a purpose for crafting haha.

It started out fine, if you count going down to the basement to get 3 pint jars from storage and knocking over an entire shelf of plastic containers fine. And that was just the beginning. I couldn't find navy paint at 2 different craft stores so figured I'd just make my own by adding black to some brighter blue. That actually worked, but still - why can't I just buy navy paint? So 2 jars get painted white and one navy; there was something wrong with my white craft paint and it ended up going on uneven and gooey. I tried to speed up the drying process by hitting it with the hair dryer but it just looked bad - fortunately I used regular old acrylic craft paint so it was easy to wash off the jars and start again with fresh white paint and the second time I painted them went better. I ended up painting all 3 jars with a second coat. After thoroughly dry I taped off the areas where I wanted to paint the red stripes using washi tape as recommended - I read that blue painters tape would pull the paint off the jar. Guess what, washi tape pulls the paint off too...ugh. 

glue foam stars to a wine cork to
make the stamp
I used a tip I saw online to make the star stamp and hot glued a couple foam stars to the end of a wine cork, yes - that worked! Great idea I will def use again. Then dip the stamp in white paint and stamp over the navy, except the jar is round so I had to press the edges of the star onto the jar - you won't get nice crisp star edges doing that but I decided the rustic handmade look is what I was going for and not try to make them so perfect. One site I found with directions said when they were completely decorated and dry she lightly sanded them in places to make them look distressed, I know why she did that - cuz they don't look so good and you want to rough them up a bit to help with the illusion that you meant for them to look beat up!

After sanding I sprayed them with clear shiny sealer so they will hopefully last forever and I don't have to remake them for her! I'm not saying this isn't a cute or worthwhile project - once completed I actually really like them, but let's just say that after having everything go wrong I'm not going to be making another set!


I couldn't get the tape to stick tightly around the curved edge of the top of ball jar, so I used a rubber band as a guide

this is what the jar looked like after removing the washi tape...a little messy! I touched up the area where the red went into the white and where it peeled the paint off with a small brush.

once dry I took them outside and sprayed with a clear sealer


after I lightly sanded them to give them a "distressed" look. Actually I was distressed more than the jars!!

Thursday, May 18, 2017

Switching Duvet Covers

Remember this one from last May? Anyone try it, and if so do you do it this way now? It's such a handy tip I want to share it again:

Putting a duvet or comforter into the cover is SUCH a pain! I dread trying to stuff it in there neatly without working up a sweat - not fun. I've heard about this little trick before and have even tried to figure it out with no luck...until now. I was determined to do it, googled a few different sites and watched a couple videos - and almost gave up again but I stuck with it and IT WORKS! I can't believe it, this is so much easier than my old way of fighting the duvet and cover. I'm not going to try to explain it, I took a couple pictures but since my duvet and cover are the same color the pics aren't very helpful. Watch this video, and stick with it - once you got it you'll never go back. A couple hints: Lay the cover (inside out) down on the bed with the closed end towards you, then lay the duvet on top. I have little ties on the inside of the cover to help keep the duvet in place, if yours doesn't have them I pin them with strong safety pins. After rolling the two up together turn the roll around so the open end of the cover is facing you. When you reach into the cover it says to grab the ends of the roll and pull thru, that is where it got a little tricky for me - I wasn't sure which part of the end to pull. You grab the entire end, the whole roll and pull it thru. Once you start unrolling you'll just keep adjusting the edges to keep the whole thing rolling out. It's amazing, and quick - try it!

roll up towards the open end of the cover 

unrolling the "burrito"

Click here for the link to the video - if it doesn't work for some reason just google "duvet cover trick" and click on the lifehacker.com site. They explained and showed this trick really well I think.

Wednesday, May 17, 2017

DIY: Pallet Garden

Almost time to start my garden and I can't wait to plant my herb pallet garden. This post is from 5/16:

My niece saw this idea on Pinterest last year and got both of us a small pallet so we could each make one. I love this idea - it's pretty simple to do and works great for planting small things like herbs or flowers. It was a success and I just replanted it for this season - it's propped outside of our kitchen so it's handy to grab herbs when I need them.


I figured out where I wanted to put the planting areas on the pallet, one side has 4 boards across but the other has 3; I decided to plant in the top and bottom and leave the center open, with the 3 boards being the front so I can access the planting spaces.

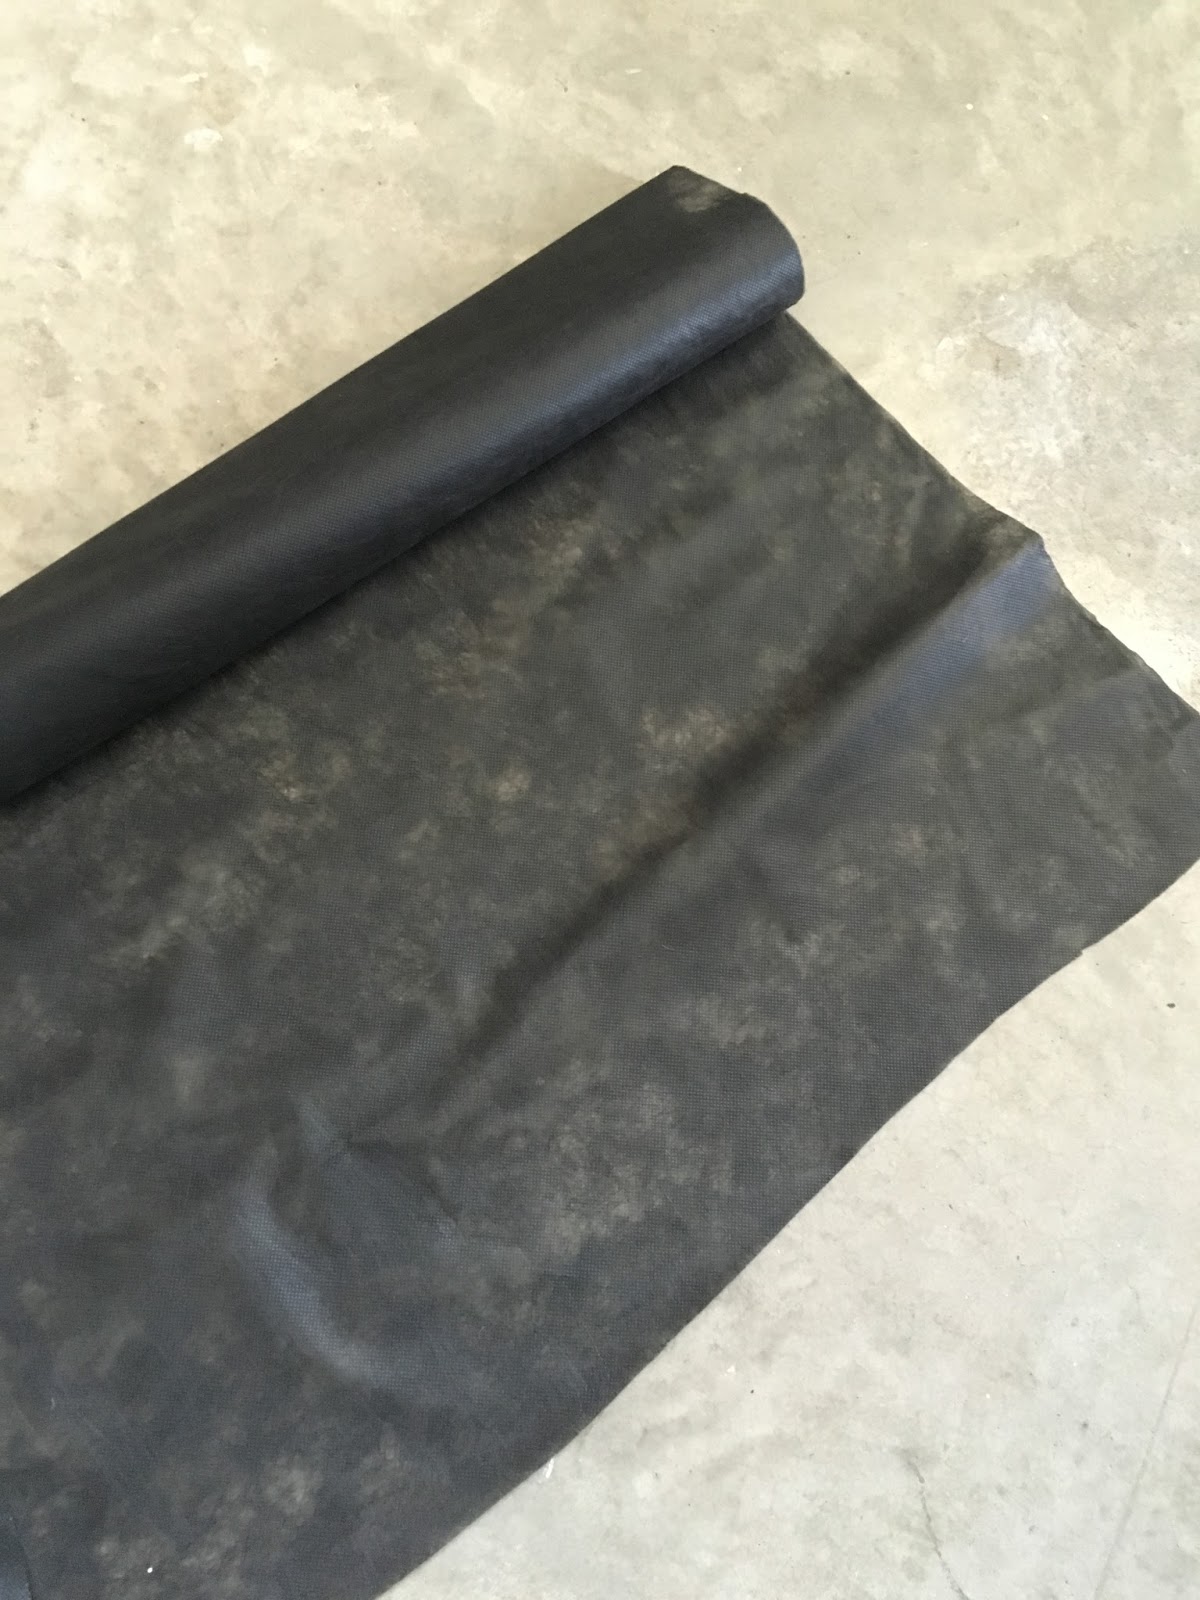
landscape fabric

The pallet is open in the middle between the front and back boards with a board running down the center, so to make a box for planting and to keep the dirt in the box I cut a double sized piece of landscape fabric, folded it over so it's double thick, and used my staple gun to attach it to the bottom side of the top boards (I made two different "boxes" on the top on either side of the middle board) to create a planting box. Repeat for the bottom two boxes. I now have 4 small spaces to plant in. I put the staples close together so the fabric wouldn't sag and holds the dirt. There is probably a "better" way to create the planting box, maybe nail pieces of wood between the pallet boards for the box base, but I was winging it and saw this fabric in the garage and thought I'd give it a try. It works!

underside of the top planting space


looking into the top planting box

Then just plant with whatever you want and whatever fits - I bought a couple plants (basil, lemon thyme, pineapple sage ) and also planted some seeds (parsley, arugula, cilantro). Last year I planted some marigolds in one box but this time I'm trying arugula and cilantro instead. My little pallet garden is so cute!

Tuesday, May 16, 2017

Homemade Citrus Pesto

From August '16 - one of my favorite recipes, especially when I have lots of basil growing in the herb pallet garden!

I'm not a fan of making videos of myself but am going to try to do them more often to make it easier to show you some of our projects - watch this one to see how to make a pesto that we love.


Citrus Pesto:

1 bunch basil leaves (about 3 cups)
1/2 cup toasted pine nuts
1 garlic clove
grated zest and juice of 1 lemon, and 1 orange
1/2 teaspoon each salt and pepper
1/2 cup olive oil (or to taste)
1 cup grated parmesan

Blend the 1st 7 ingredients in a food processor. Stream in oil until creamy. Stir in parmesan.

Lots of uses for pesto - one of our favorites is to combine it with 1 lb of cooked pasta and 1/2 cup of the water you cooked the pasta in.


This recipe came from "Everyday Pasta" by Giada DeLaurentis

2020 update: I make this all the time and we love it. I have no idea why this post mentions a video of me making pesto - there's no video here? Hmmmm....whatever, just follow the recipe - you don't need a video, it's super easy. And I promise this is delish!


Monday, May 15, 2017

Container Gardening


Another re-run from 5/16:

It's sunny and warm! Time to plant my little garden - hopefully I'm not doing it too early but I can't wait any longer, it's very nice out today and I'm itching to get going :). A couple years ago I discovered square foot gardening in large containers on my deck and have had great success - the idea is to plant in one foot squares instead of in rows, eliminating a lot of wasted space between rows and being able to cram a lot of things in a very small space. Oh, and it certainly makes weeding and picking easier!


 I made grids out of 3' bamboo garden stakes held together with twist ties, you can make it out of whatever you want or don't use a grid at all - I like how organized and orderly it looks with the grid. After preparing the soil (weed and rake smooth) lay one grid in each of your containers - change how many squares you have depending on how big your area is, I have 9 (1' each) squares in each of mine (so I guess they are roughly 3' square containers). That gives me a total of 18 squares to plant in.

both containers ready to be planted with the grids in place

 I made a list of what I wanted to grow and then made a plan of how I wanted to lay them out. I drew it out on paper first before buying plants and seeds to see how much I needed to get - instead of showing you my hand drawn chart though I went online and found a free square foot garden planner so you would see a much prettier garden design - it was fun using the interactive designer playing around with what plants to put where. Click here for the site I used. Anyway...after knowing where I was putting everything I planted it today and it's already so cute!


I bought some fresh seed packets but also used a couple left over from last year - you are supposed to test the old seeds first by seeing if they will germinate before planting in the garden but it takes a few days to do and I have no time or patience for that...I stuck them in the ground and it is what it is, they'll come up or they won't.

I like to make my own trellising for beans and peas using whatever materials I have, it changes every year - this time I used tall tomato cages and ran sticks thru them (attach the sticks to the cage with twist ties) to give the plants climbing support. Sometimes I make teepees out of 3 tall stakes tied together at the top, or put a bunch of sticks in a row and wind twine between them for support...or just buy some trellis's and save yourself the trouble :).

can you see how I did the trellis? It's the 2 red
tall tomato cages in the back with sticks
running between them.


I also LOVE silly garden crap - gnomes, scarecrows, signs, wind chimes, whatever. This is an easy place to put all that tchotchke stuff, no one really sees the garden and it makes me happy.


If you don't have the space, time, or the inclination to put in a big ol' garden maybe give square foot container gardening a try - I love it and in a very small space I am growing a lot! I have beans, peas, carrots, beets, 6 tomato plants, cukes, summer squash, sweet peppers, lettuces, and some marigolds. Will keep you posted on how it all goes thru the summer - can't wait for harvest time!

PS: farmer Jill says don't forget to water after planting :)


Sunday, May 14, 2017

Still My Best Cake!

This is from 5/16 and still the best cake I think I've ever made. Raspberry and whipped cream filled white cake. YUM.

That's a long title I know, I don't know how better to describe it though - oh, and there's raspberry buttercream frosting! OMG this is one of the best cakes I've made in a long time. It's wicked good - fluffy and melt in your mouth delicious.


I doctored a boxed white cake mix: replace the oil with melted butter, add an extra egg, and a dash of vanilla. I just read about a different technique I've never heard before, which is to lightly sprinkle sugar on top of the batter before you put it in the oven, they say it helps the cakes to not dome up too much - ok, I'll try it. Bake according to directions, I tend to pull them out a couple minutes before the suggested time. Run a knife around the edges, flip the cakes onto a cooling rack but leave the pans over top of them until they are totally cool. I feel like this helps keep them moist. Yep, the sugar on top of batter worked - cakes are pretty flat so I won't have to trim them down, yay! I poorly divided up the batter and got one cake bigger than the other (usually I measure better) so I cut the bigger one in half - it's now a 3 layer cake. If you get even layers it'd be fine to just do 2 layers - although more layers means more filling...just sayin'...

I tried a new thing - lightly sprinkle sugar on top of the
batter before baking to help keep them from doming too much. 

run a knife around the edges, flip over onto cooling
 rack - leave the pans on top of cakes until completely cool.

oops, didn't measure batter very good, got uneven
layers so I cut the taller one in half - this is now a 3 layer cake.


Now the really delicious part - filling and frosting!

-Filling is seedless raspberry jam and very lightly sweetened fresh whipped cream. I added a little scoop of the buttercream to the whipped cream but that made it break down a little, next time I will just do stiffly whipped cream.

-Raspberry Buttercream Frosting: Beat in a mixer 1cup unsalted butter (2 sticks), approx. 5 cups powdered sugar, 1 Tablespoon vanilla, 5 Tablespoons heavy cream for a few minutes until light and fluffy. Beat in a couple tablespoons of the seedless raspberry jam, then add more cream or powdered sugar to make it the right spreading consistency.

To assemble:
Put down one layer on a cake plate or whatever you are serving it on, brush with 2 Tablespoons seedless raspberry jam. To help keep the whipped cream from squishing out I piped a circle of buttercream around the top edge of the layer (over the jam) and filled with whipped cream. Top with another cake layer; repeat brushing jam, making a frosting dam, and filling with whipped cream. Put the last layer on top, cut side down. Frost the entire cake with a thin crumb coat (essentially frost the whole cake with thinned down buttercream to make the cake have a smooth base and cover up loose crumbs), put in freezer for a few minutes to set up. To finish, I frosted the sides pretty smooth (I didn't do it super perfect) and made large swirly flowers with a large 1M frosting tip. It's a very easy thing to do - just hold the tip 90' (straight down) to the top of the cake and starting in the center of each flower squeeze out frosting while directing the tip in a spiral. It sort of looks like a wedding cake more than a birthday cake haha, but it's spring and for a womans birthday so I think it's fine. You can frost this using whatever technique you want, just smooth it on or swirl it with a spoon - it tastes so good it doesn't really matter if there are swirly flowers on top!

brush bottom 2 layers with jam, pipe an edge of buttercream  on the top edge to help keep the whipped cream from squishing out. Don't overfill with the whipped cream. 

frost entire cake with a crumb coat, chill for a few minutes to set  up. 

using a 1M tip swirl spirals of frosting on top to look like flowers. 

I tied balloons onto skewers to stick in the top of the birthday cake for decoration (and to help it look
less like a wedding cake!). I made this for a friend who is having a dinner party so didn't want to stick the balloons in yet.  

I made a baby tester cake from the batter before baking - spoon out a little bit into a greased ramekin and bake along side the 9" cake layers. That way I could taste what this cake will be like!


Saturday, May 13, 2017

Parachute Cord Dog Collar

Here's a re-run of a post from January '16. Sarge still wears this collar all the time :)


I made Sarge a new "necklace" out of two colors of parachute cord and added a length of chain to it to jazz it up. I'm calling it a necklace instead of a collar because I don't trust the plastic clasp on this to hold him with the way he pulls on the leash so hard, I use a thick slip-over-his-neck collar when we walk - so this is just for decoration :) If I had a nice gentle dog that doesn't pull like a madman then I would be ok with using it as his collar. You can attach a D-ring if you want to have someplace to clip the leash to.


Search online for the instructions for how to make these, parachute cord projects are everywhere - you can make bracelets, etc. too with the same directions. I had the soccer girls make keychains using this technique (click here to see that post), it isn't hard but I'm not going to try to explain making the knots when other people have already figured out how to teach it haha! One useful tip I have is to clip the top of the piece to cardboard or something, and then clip the middle two strands that are stationary (you make the knots over the two middle strands using the two outer strands) at the bottom of the cardboard - it helps to not have them moving all over when you are knotting.

-Measure your dogs neck, or the length you want a bracelet or whatever to be.
-The directions I was following online said to cut the cords one foot for every inch you will be knotting but that wasn't correct for me. I made Sarge a 14.5" collar so cut 16' of cord and had a ton left over. I used approximately 9 feet of cord (each color).
-Put both of the cords thru one end of the clasp, pull them thru the length you want your project to be plus a couple of inches. In my case I pulled about 18 inches thru. The short cords are the 2 middle strands and clip them to the bottom of a piece of cardboard. The long strands are what you will knot over the short strands.


-Make knots until you get a couple inches from where you want to end, thread the other end of the clasp on (make sure the clasp is facing the same way as the other end, they bow slightly) and fold the short ends back on themselves. Continue making knots over the short ends to weave them in.
-Get as close to the clasp as you can, then tie off. Clip the short ends off that are now sticking out of the collar.


-Trim off the excess long strands, I left long tails on Sarge's cuz I think it's cute to have them hanging down. Using a lighter or match, carefully melt the end tips of the cord (wherever you decide to cut them off. If you don't want tails, clip the cords close to the collar and melt them there) so the cord doesn't fray.


I decided he needed to be a little fancy and attached a chain to both clips so it sits next to the collar.


Friday, May 12, 2017

Summer Vegetable Bake

This one is from November '15 - hopefully you've tried it by now but if you haven't check it out, it's so good and pretty too!


Layers of sliced summer squash, potatoes and tomatoes over a bed of white beans, topped with crumbled cheese - I found this recipe in an old Family Circle (click for recipe) magazine and it's really good. I do it a little differently from the original recipe omitting the called for eggplant (I don't love eggplant) and onion (my husband doesn't like onion) and I don't think it's missing either of those ingredients - it's very flavorful and pretty! It also calls for herbes de provence which is a mixture of dried herbs that you can make yourself or buy in the spice section at the grocery store (I bought it in a jar and had no problem finding it), if you don't have it or want to buy it I think this would taste just fine without it - add salt and pepper to taste and maybe a sprinkling of any kinds of herbs you happen to have - thyme, rosemary, etc. I served it on the side with grilled chicken - it would taste good with lots of different meats and could also be served alone since it has the beans for a protein. Usually I slice all of these by hand but I'm still learning how to use all the attachments on my food processor so decided to play with the slicing disk and it worked great - saved some time and made everything more uniform for sure. It works just fine slicing by hand tho, don't let that stop you from making this! It's a good one - enjoy!

Thursday, May 11, 2017

Travel Folder

When we are going on big trips I make a travel folder to take with me - this system works really well for me to stay organized. Yes a lot of the info I include could just be on my phone but I like hard copies of all this stuff! There are reservation numbers, travel arrangements, out of country phone numbers, itineraries, maps, and details - so much info I need (and want) to have on hand. I like to use a plastic bendable folder with a 3 ring binder thing inside - keeps it light and flexible in my bag; I make tabs for each stop, city, or sometimes country that we will be going to just using colored pieces of thicker paper (like index cards) stapled onto the edge of paper (see the picture - I'm just being frugal, you can totally just buy these already made haha) and then I put all info pertaining that place behind each tab. I also like to include a page protector/pocket with each section and then I keep small "souvenirs" like ticket stubs, info from attractions you've gone to, city maps, etc. or receipts in them - way neater than throwing all that un-contained mess in my suitcase. 


Travel tip: when you come back into the states you have to fill out a customs form and they want to know how much you've spent on merchandise you are bringing back with you - I keep the receipts in one of the page protector envelope things so you can easily figure out the total. When we are back home I sort out papers I don't need to keep and then the folder becomes a scrapbook of sorts that I put on a shelf to reference and show people later.

this is a little homemade but it works - I make my own dividers
by stapling tabs to pieces of paper and then put in a 3 hole binder

We are off on another trip that I am SO excited about - a couple days in Amsterdam, then we fly to Scotland for a few days, and end with 6 days in Ireland. I imagine I won't be able to blog while we are gone and no one stepped up with guest blog ideas haha, so instead of going dark (I've only missed one day since starting this blog and that was because we were traveling and I couldn't get service!) I'm going to give you a few "re-runs" of my favorite posts - hopefully you'll enjoy them again the second time around! I'll tell you all about the trip, packing lists and all that when we get back. Bye!


this folder had a place to make your own cover so I quickly
 found an online template and printed this off.