Showing posts with label gift wrapping. Show all posts

Tuesday, August 14, 2018

Tissue Paper Flower Gift Topper

I haven't made tissue flowers in a long time (click here for another post) - I didn't have a good bow or ribbon for the big box I wrapped my sissy's gift in yesterday so I quickly made 3 small flowers to tie on top.


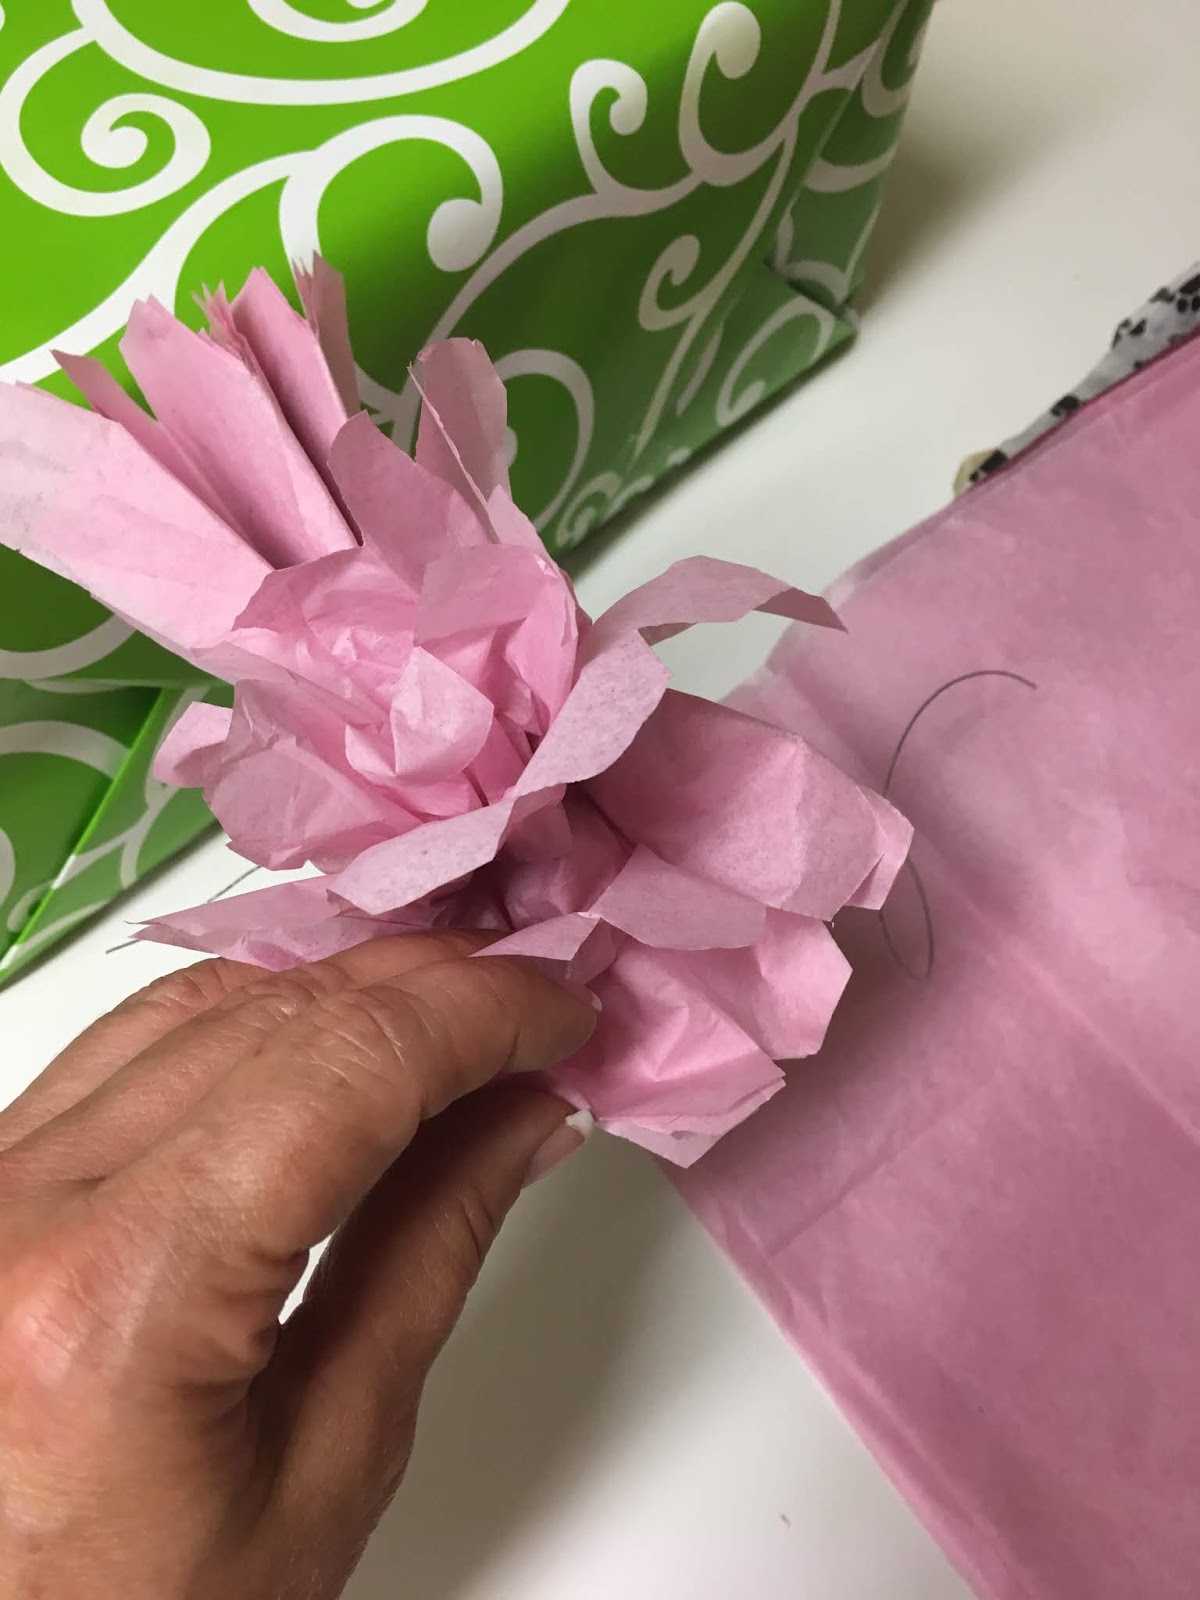
Cut a few squares of tissue paper, for these small flowers I cut them approximately 5" square and used 9 squares. Stack on top of each other, accordion fold them, twist a short piece of thin wire around the center, trim the edges either round or pointed, then carefully separate the layers and shape like a flower. I made 3 of them, twisted them together so they looked like a bouquet, and attached to a ribbon that I wrapped around the box. Look how pretty it looks! Very inexpensive, easy, and quick to do - and it's different than a regular ol' bow.

rounding the edges...

...or cutting them into a point gives the flowers a different look.

gently pull up the layers to separate

here I've separated the layers on the left side of the wire, continue with the right side and shape.

twist the flowers together into a bouquet


one year ago: make a personalized shopping bag
two years ago: quebec chicken

Thursday, December 8, 2016

Origami Gift Card Holder

I love anything gift wrapping related, and love to get new ideas (remember the one about making gift bags out of wrapping paper? click here for a refresher - I make these all the time now)  so when I saw this on a Stampin' Up site I had to try it - it's very easy to do, just a few basic folds, and after watching the video you should have no problem at all making them. And other than if you want to make a belly band to slip around it there is no adhesive needed - even better.


This idea comes from Sandi Dailey, she gave picture instructions but I like to watch and follow along so I hope this visual helps you! Sandi and the Stampin' Up ladies decorated these much more elaborate and fancy then I did - if you're up to it go ahead and get creative with the finish decorations! I kept it simple...it's (usually) how I roll (unless I'm in a glitter and glue mood and then watch out LOL!).

2021 update: I have no idea where the video went, hopefully you can watch the instructions on youtube!

Friday, December 18, 2015

Gift Bag from Wrapping Paper

Have you ever made a gift bag from wrapping paper? I recently learned and love this -  no more having a gift that won't fit a store bought bag (and no more having to run to the store for a bag - just make your own!). It's a little hard to take pictures while folding the paper haha - I need a third hand sometimes. I took a bunch trying to capture what it is I'm doing exactly...


This is an especially good idea if you need a wider bottom bag or are wrapping something that has an odd shape, you can make the bag whatever size you need.


1. Start with a length of wrapping paper that will fit your item. Lay the paper on a flat surface wrong side up.


2. Fold the sides in, overlapping slightly, and tape.


3. Fold up the bottom as wide as you want the base of your bag to be (mine is approx 4").


4. This next part is hard for me to describe, but it isn't hard to do - open up the bottom part you just folded up and fold the sides that have the crease in them towards the center of the bag creating a diamond shape.


5.Then fold the top and bottom points in towards the center of the diamond, overlapping about 1/2" and tape.

6. cut off the top of the bag to however tall you want it to be


7. open up the bag and shape until the bottom is flat


8. put your gift inside and roll down the top to close. 

There - no more buying bags or putting your presents in garbage bags cuz they won't fit in your store bought bag! I guess I should point out that you can only make a bag as large as your wrapping paper - I'm not sure I could make one as big as a garbage bag haha...hmmm, maybe I'll go try. See ya!


Monday, November 9, 2015

Magazine Page Bows


Discovered a new favorite thing to do for decorating a present - making bows out of magazine pages...love!  Once I got the hang of it they are super easy and quick to make.


I know this idea has been around a long time, but it's new to me... my mom always wrapped our presents in newspaper and comics, I'm wondering why she never made these bows - it would have been perfect (and inexpensive!) and she could have got us to make them for her haha. I'm bummed to find out I was deprived of this awesome project as a child :)


Start by cutting a magazine page into 3/4" strips, you'll need 9 total. Leave 3 of them the full size (mine are 10 1/2" long), cut 3 of them to 9 1/2" long, 2 of them 8 1/2" long, and one 3 1/2" long.
 You should have:
3 - 10 1/2" x 3/4"
3 -   9 1/2" x 3/4"
2 -   8 1/2" x 3/4"
1 -   3 1/2" x 3/4"

Twist each strip (except the shortest one) so it has a loop on each end. This step is what took me a minute to figure out - it's almost like making a figure 8. Play with it looking at my picture and you'll get the hang of it. Staple it in the center. Shape the shortest strip into a circle and hold with a glue dot or double sided tape.
 This is what you'll have when they are all formed into the loops and circle.
Space the largest 3 on top of each other evenly like flower petals and staple to hold. Repeat with the next 3, and the remaining 2. This gives you 3 bundles. I used glue dots to then stick the 3 layers together but you could also staple or use double sided tape. Add the circle to the center of the "petals". There you go - magazine bow!


Wednesday, October 28, 2015

Tissue Paper Flowers

I love to make tissue paper flowers to put on top of gifts instead of bows - since it's October and almost Halloween I used black, orange and black/white patterned tissue papers to decorate the top of my niece Macey's birthday present. I wrapped her present in zebra so it's a little hard to see where the bottom of the flower starts tho!


For this one I cut tissue paper into 10"x20" sheets (2 patterned, 4 black, 4 orange) and stacked them. In this picture the flower that is done was stacked 4 black on the bottom, then 2 patterned, and 4 orange on top. For the flower that is on the present above I did 2 patterned, then alternated 2 black, 2 orange, 2 black, 2 orange. Fold the stack in about 1" pleats  back and forth like making a fan, tie something tight around the middle, and either round the edges or cut them into points.


Then carefully separate the layers (do one side at a time) and gently pull them up to shape into a "flower".  In this picture I've separated one side but the other is still in the fan stage.


You can make them any size you want (up to the size of your sheet of tissue paper of course). These are also nice if you are mailing a gift, the tissue paper still looks good if it gets a little crumpled.