Showing posts with label marshmallows. Show all posts

Wednesday, August 2, 2017

Chocolate Marshmallow Cookies

My friend Teri went on a road trip with her husband and boys, and just before they left I decided to make a treat for them to take...but just like with my sister's road trip granola bites I thought about this at the last minute and only had like an hour to make a treat before she was leaving. So once again I didn't have time to go to the store and had to make something using what I have on hand...I'm down to cocoa powder and an a half-empty bag of marshmallows (it's time to grocery stock and get my supplies back up!) so googled ideas for something using those two ingredients and came up with this (click here for source) - and they turned out pretty good! They are a little gooey and messy but the flavor is really good so it's worth needing a wet wipe after eating them hahaha. Teri said her boys loved them :)

Ingredients:

  • 3 cups flour
  • 34 large marshmallows (or if you cut each one in half you'll need 17. see below)
  • 2/3 cup cocoa
  • 1 t. baking soda
  • 1 t. salt
  • 1 cup (2 sticks) un-salted butter, softened
  • 1 cup sugar, plus additional for the outside of the cookies
  • 1/2 cup brown sugar
  • 2 eggs
  • 1 t. vanilla
Directions:
Cream butter and sugars. Add eggs and vanilla and mix well.

In another bowl, mix flour and other dry ingredients.

Add dry ingredients to the creamed butter mixture. The dough should be thick enough that you can shape it into flattened disks. 


To assemble: make balls of dough using a 2 T. cookie scoop, then flatten into a disk big enough to cover a marshmallow (or half a marshmallow if you prefer). 
wrap the dough around the marshmallow

Put a marshmallow in the center and close the dough up around the marshmallow making sure you completely cover it, you shouldn't be able to see any white at this point. Roll each ball in granulated sugar, place on parchment lined baking sheet and bake at 400' for 8-10 minutes.


completely cover the marshmallow


They are done when the cookies start to crack open and you can see melted marshmallow. Remove from oven and cool, leave on the baking sheet for a couple minutes before transferring them to a cooling rack - letting them set up a bit makes it easier to remove the baking sheet. 

Makes about 33 big cookies.

the difference between a whole marshmallow (on the left) and half (on the right)
Note: when I did a whole marshmallow they worked good but lots of marshmallow runs out and it gets quite messy. So I switched to half a marshmallow and not so much ran out but also there wasn't as much marshmallow "filling" that way - I'd recommend making a couple each way before doing the whole batch so you can see which you prefer. The ones with more marshmallow probably taste better 'cuz they are gooier but they are also quite delicate because they crack so much, not as "pretty". The half marshmallow still tastes good and holds it shape better, but not as "marshmallowy"...so depends on what you're going for!


one year ago today: fix those uncomfortable (but cute) shoes

Monday, December 26, 2016

Melting Snowman Cookies


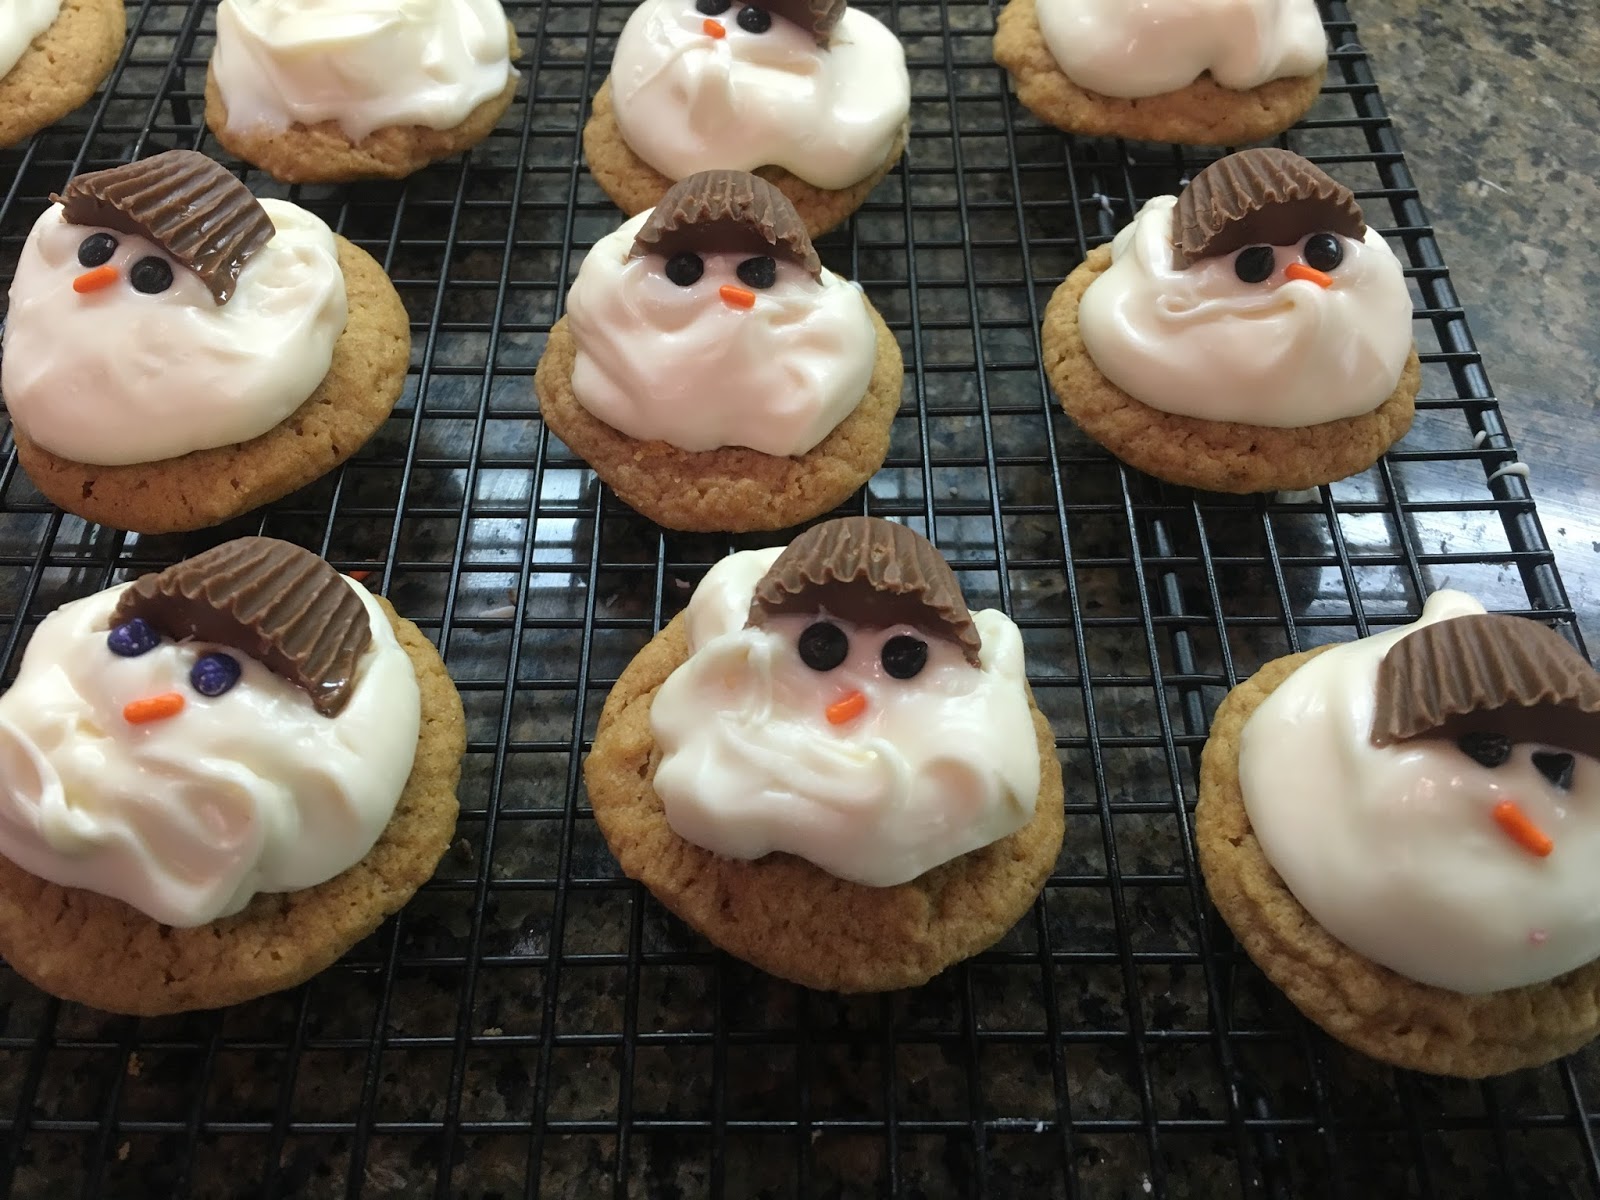
For the base I baked a batch of pumpkin spice cookie mix (the same kind I made the whoopie pies out of that are SO good, click here for that post) using a small one tablespoon cookie scoop. Cut regular sized marshmallows into thirds, lay one piece on top of a small cookie, spoon melted white chocolate over top and let it run over the marshmallow to cover. Then decorate with half a mini reeses peanut butter cup, an orange sprinkle, and 2 dark round sprinkles for the eyes. Easy!


Couple notes: had a hard time cutting the reeses without them crumbling, found if I left the paper on and cut thru it they held their shape better (obviously remove the paper after cutting haha). I used tweezers to put the sprinkles on, it was easier to place them that way on the melted chocolate. 


Wednesday, September 23, 2015

Candy Coated Marshmallows

I saw this in a craft store ad and thought it'd be fun to try (and eat)...it was actually a little harder, messier, and not as pretty as the ad though - that drives me crazy!

The good: a bag of candy melts goes a long way - I made 32 using 4 colors of candy melts (caramel apple, light cocoa, candy corn, orange) and easily have half of each bag leftover, it was a fairly quick project, there are lots of different colored melts to customize to your party or theme colors, and they should taste good (fluffy sugar with sugar coating and sugar sprinkles - what's not to taste good?).
first layer

The bad: it was messy, and hard to get the second layer of candy to look good - even sprinkles didn't help much. I tried applying the second layer by dipping them in the melted candy (which is what they said to do),  using an offset spatula, and finally with a decorating bag and #104 tip...nothing worked to make them look like the picture.
adding second layer and sprinkles

The ugly: I am taking these to my niece and her soccer team tonight at practice - I hope that even though they don't look as nice as I would have liked they still taste good and the girls like them!