Welcome to day camp - it's either a place for you to get inspired and want to make stuff, or a place where I can show off the cute things I've made since my family is tired of my texting them pictures every day! Just like camp I do all kinds of fun projects - crafts, DIY, bake, cook, garden and more - and can't wait to share them with anyone looking for ideas.
Have you tried balsamic reduction? I'm addicted and put it on everything - it's great drizzled over salads, vegetables, around grilled halibut stacks; another one of my favorite things is to slice an avocado in half and fill the cavity with halved cherry tomatoes, then fill up the hole with balsamic reduction - yum!
You can purchase balsamic already reduced into a thick tangy syrupy glaze but it's simple to make at home: put some balsamic vinegar in a small saucepan, bring to a boil over medium-high heat, reduce to a simmer and let it cook down until it's reduced by at least half. That's it!
Just thinking about this is making my mouth water - really, ya' gotta try it!
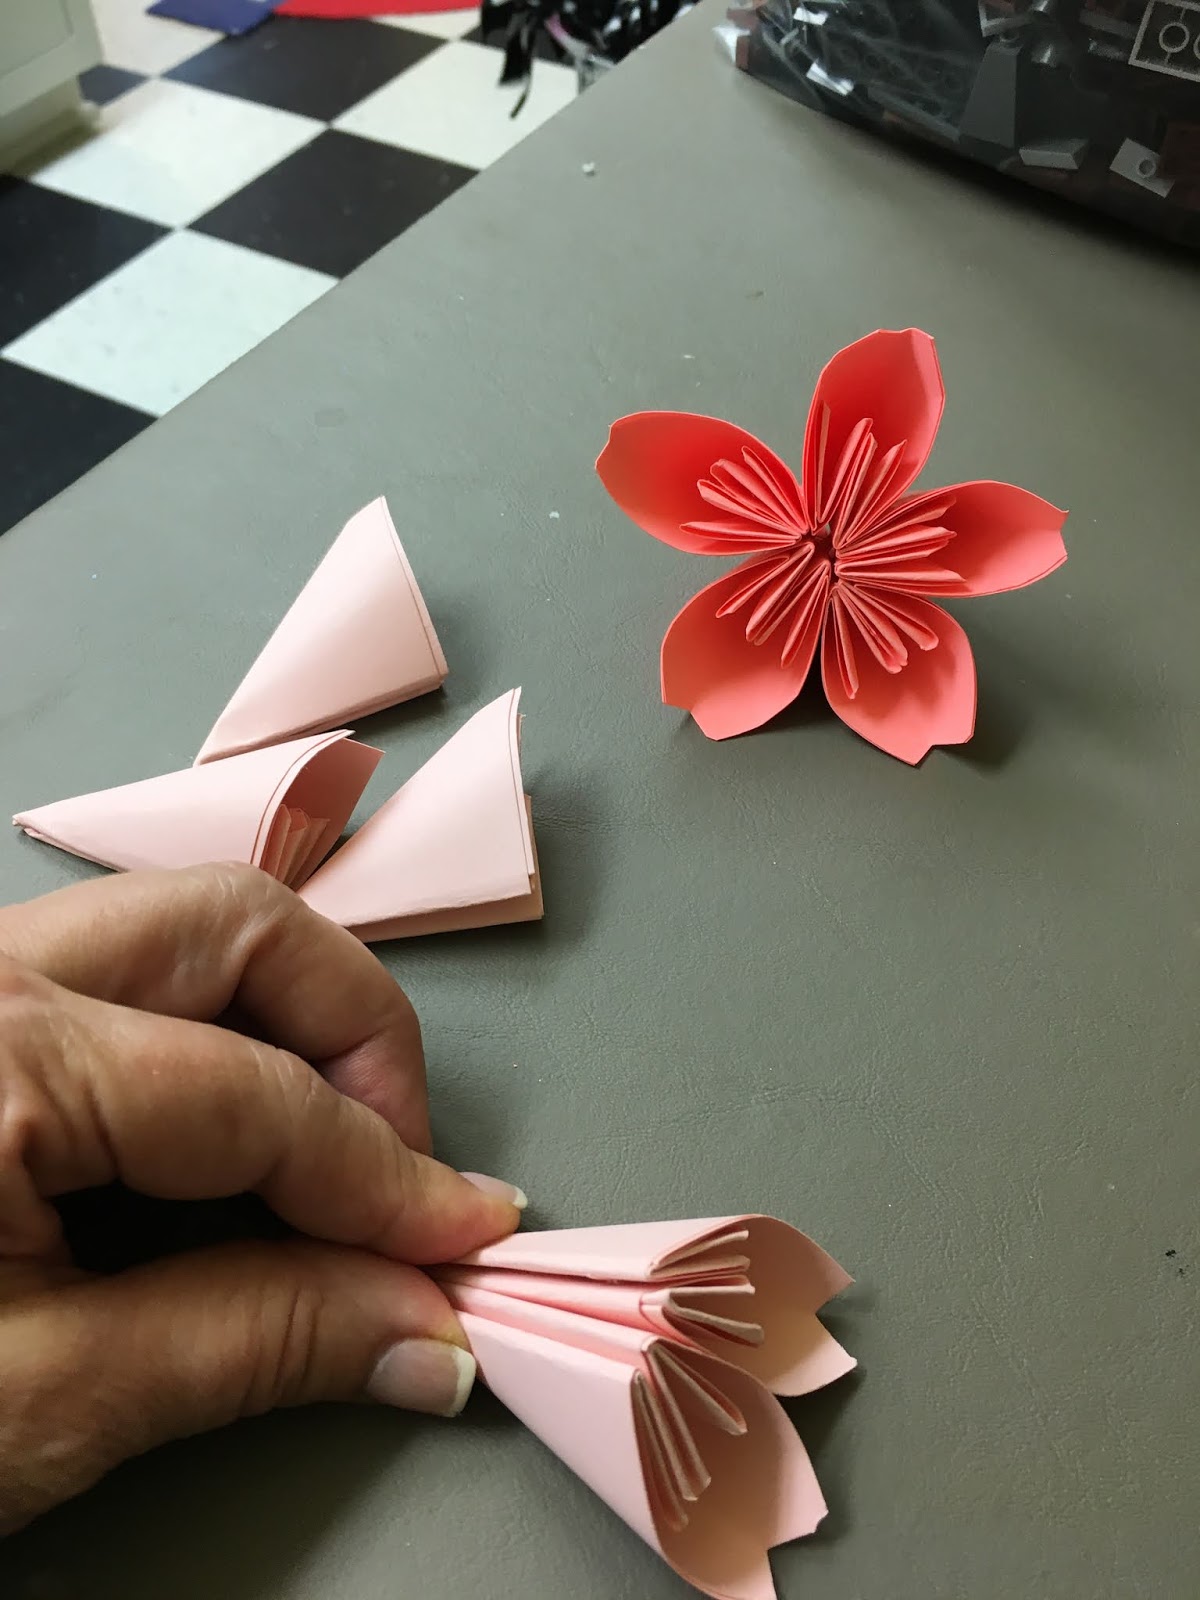
While looking for Lego crafts I came across a video - it had nothing to do with Legos but popped up and caught my eye - on how to make a paper flower ball. I've made a few paper flowers (as you might recall, click here and here for a couple of them) but never any like this, so after practicing with a piece of white paper to make sure it was going to work and not waste my cardstock I moved on from looking at Lego crafts to making tropical flowers. The original idea made a round flower ball which takes 12 flowers, but I'm still dealing with tendonitis in my hand from moving furniture like a month ago, so I quit after making 4 flowers - I think they're very pretty even if I didn't make a ball!
Here's how:
Cut 4" paper squares, 5 per flower.
1. fold a square into a triangle
2. fold the sides in to meet in the middle, creating a square shape
3. unfold the side triangles you just made
4. insert a finger into the side triangles and flatten them like in this next photo
5. fold the side tips down
6. fold the side triangles in half
7. fold but don't crease the two edges to meet each other
8. snip off the top tip
9. glue the edges together to form the petal - I used glue dots
10. after making 5 petals, glue them all together to make a flower - note the glue dots didn't hold all the petals together so I switched to hot glue. Add something to the very center, I wanted to use sticky back Stampin' Up gem embellishments but couldn't get them to hold so switched to a mini pompom. The original inspiration video used pearls.
11. glue however many flowers you want together in a bundle. I made a couple leaves following the above directions but didn't snip the tips off - seems more "leaf-like" to me - and glued them to the flowers before gluing the flowers into a bundle.
I made a short video on how to fold the petals in case my description above doesn't make sense!
one year ago: coincidentally it's a different paper flower.
two years ago: for real, it's another paper flower! I honestly had no idea and did not do this on purpose!
three years ago: rock photo stand. whew, 3 years of paper flowers woulda been super weird timing.
Miscellaneous things keeping me busy but not blog-worthy ~
read 'Clock Dance' by Anne Tyler - easy, light, pretty entertaining. I'd say ⭐️⭐️⭐️⭐️ out of 5
Cathy gave me a big box of legos her grandkids don't play with anymore, I don't have kids or grandkids to play with but I'm not passing up a box of Legos LOL! I love Legos... I got a little carried away sorting them (once I started I couldn't stop!) and after I get done making a few things I'm passing them on to Mickey for her school office.
Hope you have a great week, check back often to see lots more projects, recipes, and whatever else I can think of to make!
This isn’t actually a blog post so my sister probably wont give me credit, but every once in a while I feel I should try a little harder to be more like my Sissy. I stumbled across my new mantra:
I'm working on being more organized.
Not like "alphabetize the pantry" organized,
just like "stop buying the gift on the way to
the party and wrapping it in the car" organized.
Yes. My sister has her pantry alphabetized.. and labeled. Aye yi yi..
Jill here: I do not have my pantry alphabetized ~ although it is labeled for sure. I do have my spice drawer alphabetized, but doesn't everyone?
Check out this super easy, super fast, super cute, and most importantly - super practical idea: Wrap duct tape around a snack baggie; wet a sponge and freeze it; insert the frozen sponge into the baggie. DIY Ice pack! Keep lunches cold, use as a compress, whatever. Wrapping in duct tape helps insulate the baggie, plus it's cute ;) Took me longer to write this than it did to make it!
Jill here - I didn't follow a recipe for these little calzones and am pleasantly surprised they turned out so good. Dave was really bummed that I gave them away, I didn't think he'd want them for dinner so I gave them to my sis for this week's My Sister is Hungry review - oops, guess I should have asked! They're so easy and quick to make, I'll make him another batch and he'll get over it haha. Here's what she has to say:
So its looking to be a very busy week. So that said, instead of dinner this week we got a “snack”. “Little mini calzones”. This sounds great to me. I love snacks. So in my mind I am envisioning something roughly the size of a large pizza roll. When I get these first of all they are not a large pizza roll. These are meal sized. Like the size of an oddly shaped “uncrustable”. (ever had those? lazy people’s peanut butter and jelly?- a story for a different time). Anyway - they were big enough for a meal. Not sure what kind of “snacking” people do at her house but these were a meal. Add in a salad and I’d be done. BOOM. Hey... I just have a great idea for dinner tonight..
So these looked fantastic first of all. Really pretty. They had a beautiful crust. Dusted with something yummy, almost cheesy looking. I don’t know if she made it from scratch but it was great. Tasted exactly like I’m describing. Little pockets of pizza goodness. Inside it was cheesy and delicious. Not sure what was in it besides cheese and mushrooms. Husband thought ham- I don’t love ham so I didn’t peel it apart to see what was inside. Just decided to eat it and enjoy. He thought it was so good could have been served in a restaurant.
One thought I had was I should have reheated in the oven instead of the microwave. Microwaving didn’t leave it a crisp. Another thought is she asked if I had pizza sauce to dip into but really didn’t need it. It had great flavor without it. I also tried dipping in ranch - again not needed.
Bottom line is these were fantastic. Hubby loved them - he gives it a solid 8 ½ and says this was his favorite meal she made so far…yes for us it was a meal - not a snack. 😊 So good we will have it for dinner again tonight!
Ingredients:
1 tube pizza dough
canadian bacon, chopped
canned mushrooms, chopped
shredded cheese, I used Italian4-cheese blend
dried Italian seasoning
pizza sauce
egg, beaten
grated parmesan cheese
Directions:
Unroll the pizza dough and roll out to about 1/4" thickness. Using a 4 1/2" bowl as a guide, cut out circles of dough; reroll the scraps of dough and continue cutting out circles until you use all the dough - I got 8 pretty ones and 1 scraggly one from the end of the scraps.
Spoon about a tablespoon of pizza sauce onto each circle, spread around but leave a little space along the edge free of sauce. Sprinkle a little Italian seasoning over the sauce, then top with canadian bacon, mushrooms, and cheese.
Fold the circle in half, brush the edges with the beaten egg, then seal using the tip of a fork pressed into the edges.
Brush the tops with beaten egg, sprinkle with grated parmesan and coarse pepper. Bake at 400' for about 12 minutes until golden brown. Serve with additional pizza sauce (or ranch) if desired.
I made this easy gratin recipe as a simple side dish for grilled steak (along with roasted asparagus); just takes a couple minutes to throw together and doesn't have all the fat and calories I usually associate with a gratin, which is a big plus. Fresh, pretty, rustic, simple, fairly healthy...what's better than that?
2 medium yellow summer squash (about 8 ounces total)
4 small to medium red potatoes (about 1 pound total)
3 tablespoons olive oil, plus more for the baking dish
4 ounces fresh goat cheese, divided
salt and pepper
1/4 cup whole milk
1/3 cup grated parmesan
1 tablespoon thinly sliced basil or thyme leaves, optional
Heat the oven to 400'. Lightly grease a 1 1/2- to 2-quart baking dish with a drizzle of olive oil.
Use a mandolin or chef's knife to slice the squash and potatoes into very thin slices, 1/8" thick or less. Place sliced vegetables and olive oil in a large bowl and toss to combine.
Place 1/3 of the squash and potato slices in an even layer in the bottom of the baking dish, season with salt and pepper. Sprinkle with 1/2 of the goat cheese in large chunks. Repeat with another 1/3 of the vegetables, seasoning again with salt and pepper, top with the remaining goat cheese. Finish by layering on the remaining vegetables and seasoning with salt and pepper.
Pour the milk evenly over the entire dish. Sprinkle with the parmesan. Cover tightly with aluminum foil. Bake for 30 minutes. Uncover and bake until the top browns, about 15 minutes more. Sprinkle with the fresh basil or thyme, if using.
6 servings. per serving: calories 252, fat 13g, carbs 25.9g, protein 9.6g
Store leftovers in an airtight container in the refrigerator for up to 5 days.
I keep a small photo album in my closet, the kind with clear slip in/open end pockets, to help organize all the extra buttons and threads that would normally either get tossed in a drawer, thrown out, or misplaced. This has been my system for years and I'm telling ya - it totally works and only requires minimal effort to keep up. After removing the tags, buttons and thread/yarn from a new piece of clothing, I jot down on an index card what item the button, etc. goes with (or if the tag says what the clothing piece is I'll just use that) and slip it along with the buttons, etc. into an album pocket. That way when I lose a button or need to make a small repair I easily flip thru the album looking for the correct pieces.
I saw this idea online (click here for source) and loved it so much I couldn't wait to make one - and I love how it turned out! I have it hanging on our back door which is inside the garage so it won't be exposed to the elements, not sure how good this would hold up if I hung it on the front door that gets tons of heat and sun.
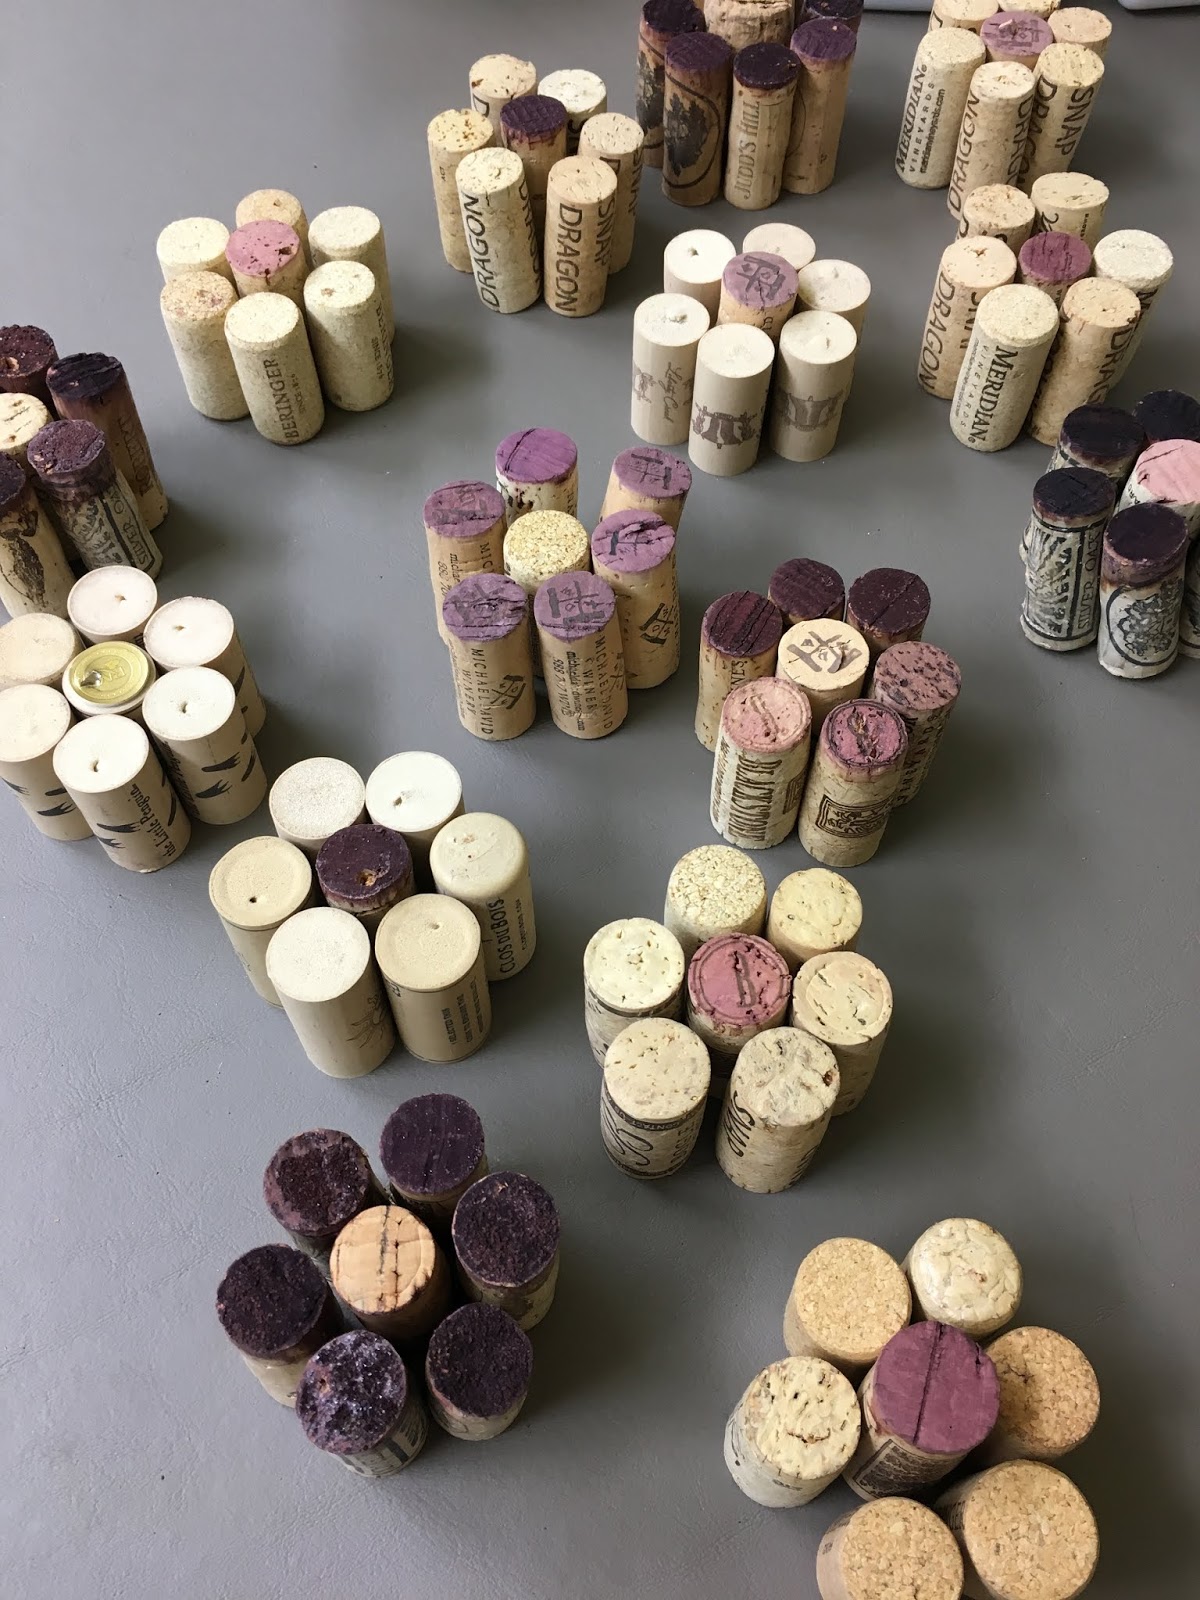
This is quite easy to make - just hot glue groups of corks together in a flower shape, changing up the flowers by using red and white wine corks - some have red wine for the centers surrounded by white wine "petals", or vise versa, or dark red petals with a pale red center...I just played around with my corks coming up with flower bundles that I liked. To make it a little more interesting I used some shorter corks for some flowers (cutting down if necessary so all 7 in the bundle are the same depth), and some taller ones - did you know that all corks aren't the same size? I just searched for ones that went together as best as I could, then trimmed a few to match.
For this wreath I made 14 flower bundles of 7 per flower (1 in the center surrounded by 6); after choosing all the corks I hot glued them together.
\
Put all 14 flowers in a circle, fitting them tightly against each other, then glue the flowers together finding the spot between the flowers that touch the most to make it as stable as possible. It'll be wonky until the next step but don't worry, we'll make it way more secure in a sec. To help keep an even circle shape I used a wire wreath as a guide (I didn't glue them to the wire tho - I set the flowers on top of the wire wreath as I glued them to each other, then removed the cork wreath from the wire wreath base).
At this point the flowers won't hang in a nice circle - to help with that, turn the wreath over and glue popsicle sticks across the corks trying to hide the sticks as much as possible. After you lay down the first row all the way around go back and overlap with a few more sticks to make it even more secure. I tied a piece of twine around one popsicle stick and glued it in place on the back for a hanger.
To finish I added a few leaves and little fake succulents left over from the tiny macrame plant hanger project - decorate however you want! I did have a couple places where I could see the popsicle sticks and a bit of glue here and there so I made sure to cover up as many imperfections as I could with the little plants and leaves.
Can you see how some of the flowers are shorter and some taller? It really adds dimension.
Also, one flower bundle on the right side in the middle is a large center cork so I needed 7 corks to make the pedals for that one.
As always, I couldn't decide when to stop adding stuff! If this has too much going on for you just edit yourself better than I did LOL!!
To make this wreath you'll need:
99 corks, different sizes and colors (98 if you don't make one flower different like mine with the large center cork surrounded by 7 corks on the right side of the wreath)
hot glue
popsicle sticks
twine for hanging
small artificial plants and leaves to decorate, optional
my sis sent me this - totally stealing
the idea for our next party! too funny :)
I'm still dealing with the tendonitis in my hand so not much crafting happening. I managed to plant a couple flowerpots (with a little help from Dave lifting the bigger plants) and started making a wine cork craft that only requires a whole lot of hot gluing so I'm able to do that pretty much one handed - you'll see that project hopefully tomorrow (if I finish it today!). Have a great week - check back to see what happens at camp this upcoming week - I know there'll be another 'My Sis is Hungry' review, an organizing tip that I use all the time, a recipe or two, and whatever else I can mange without much use of one hand hahah!! Bye!