Showing posts with label tips. Show all posts

Tuesday, February 18, 2020

Tip-sy Tuesday: How To Change a Sewing Machine Needle

Oops, I tried to sew thru something thick and my needle wasn't up to the task and broke off in the machine. If this happens to you, don't fret - it's a very easy fix (well it's easy if you have the extra needles that probably came with your machine - if not, you'll need to get yourself some new needles before continuing!). It's also helpful to know (and a reminder to myself) that they make assorted sized needles for different tasks - follow the instructions below to change to the appropriate needle that works for the material you are sewing on...or don't, and risk breaking one like me! 
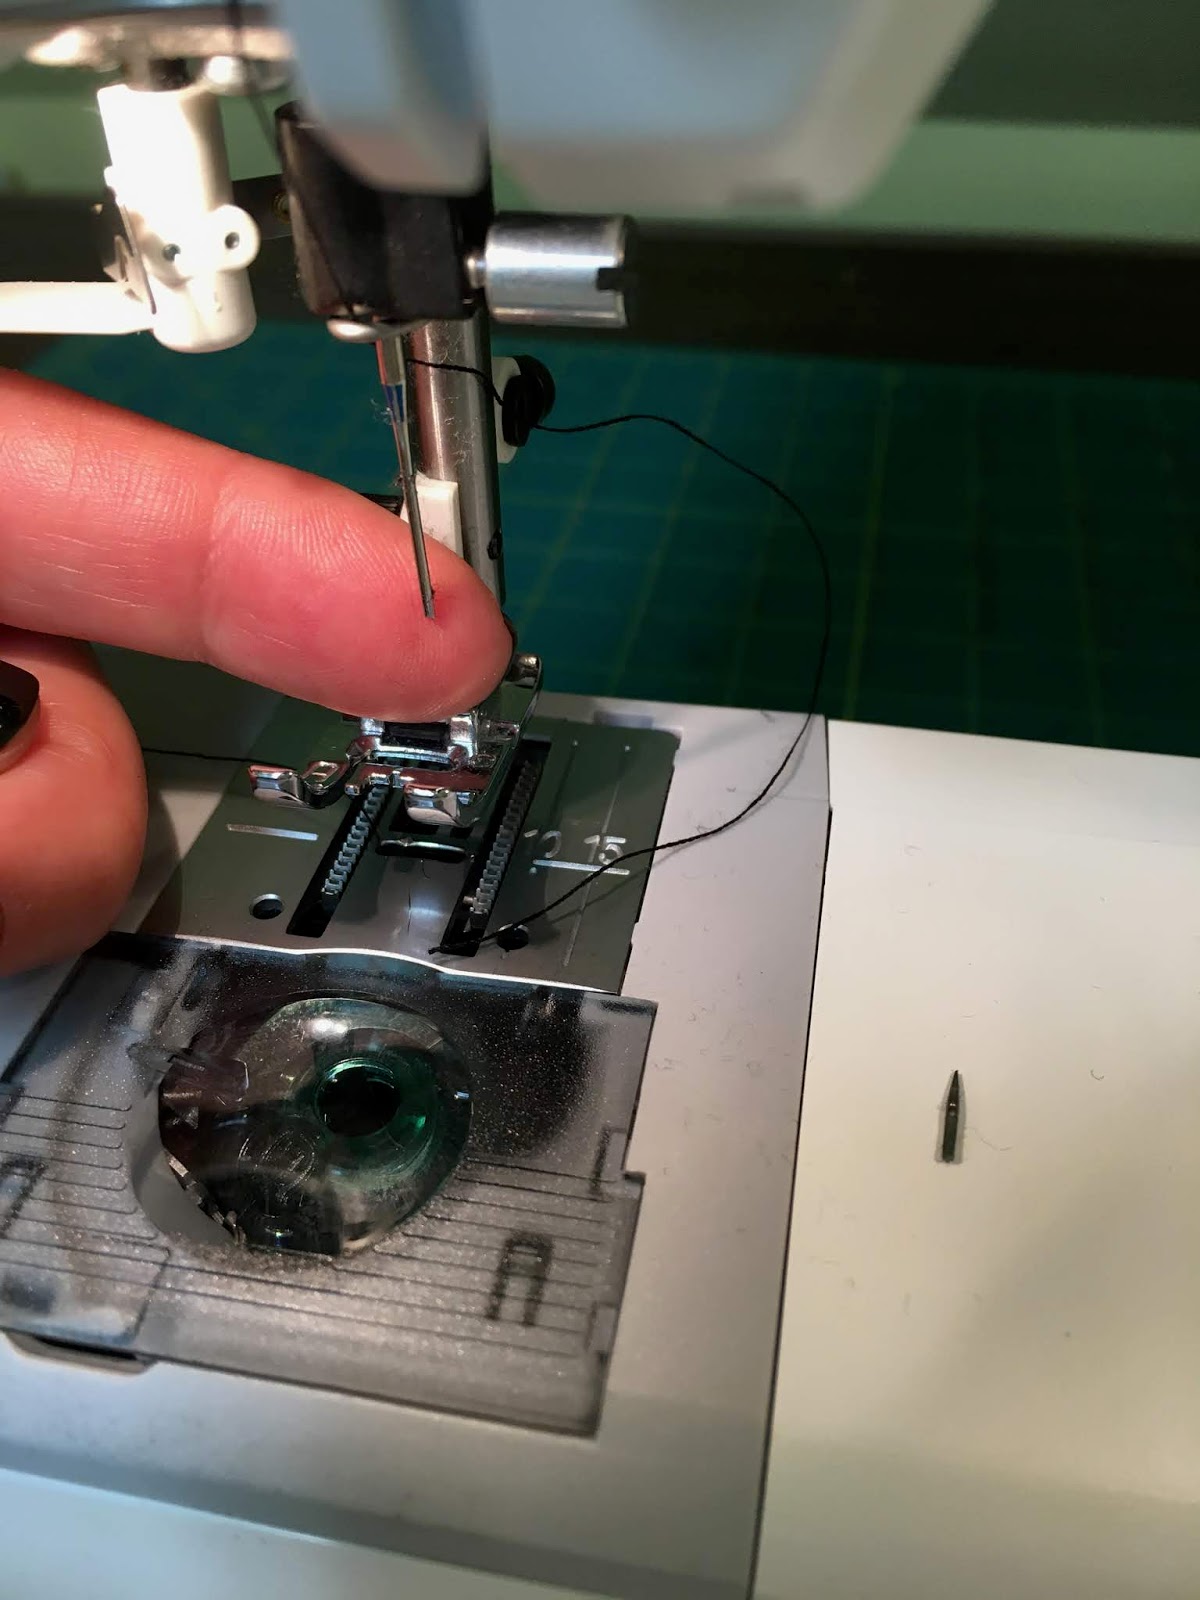
                                        

First you need to remove the broken needle: loosen the screw that's right above the needle, either with a small screwdriver if there's a slot or turn it by hand - I have two machines and one turns with a screwdriver and the other by hand - until the needle is loose enough to pull out; then slide the new needle up into place - most likely the head of the needle is flat on the backside and curved on the front, make sure you put it in so it fits correctly in the space (curved side facing you and the eye of the needle in front), then tighten the screw back up. Done. 


Note on needles: my case indicates which needle is used based on the weight and texture of the fabric - this case includes needles for thick jeans, stretchy material, a wing needle used for hemstitching, and universal 'all-purpose' needles used for most fabrics. 


All the sewing machines I've ever had work like this, sorry if yours is different and this is no help to you at all!


Tuesday, June 18, 2019

Tip-sy Tuesday: how to make Balsamic Reduction

Have you tried balsamic reduction? I'm addicted and put it on everything - it's great drizzled over salads, vegetables, around grilled halibut stacks; another one of my favorite things is to slice an avocado in half and fill the cavity with halved cherry tomatoes, then fill up the hole with balsamic reduction - yum!


You can purchase balsamic already reduced into a thick tangy syrupy glaze but it's simple to make at home: put some balsamic vinegar in a small saucepan, bring to a boil over medium-high heat, reduce to a simmer and let it cook down until it's reduced by at least half. That's it!

Just thinking about this is making my mouth water - really, ya' gotta try it!


one year ago: halibut stacked with potatoes and spinach
two years ago: meatloaf


Friday, January 11, 2019

How to Clean your Yeti (or other stainless steel mugs)

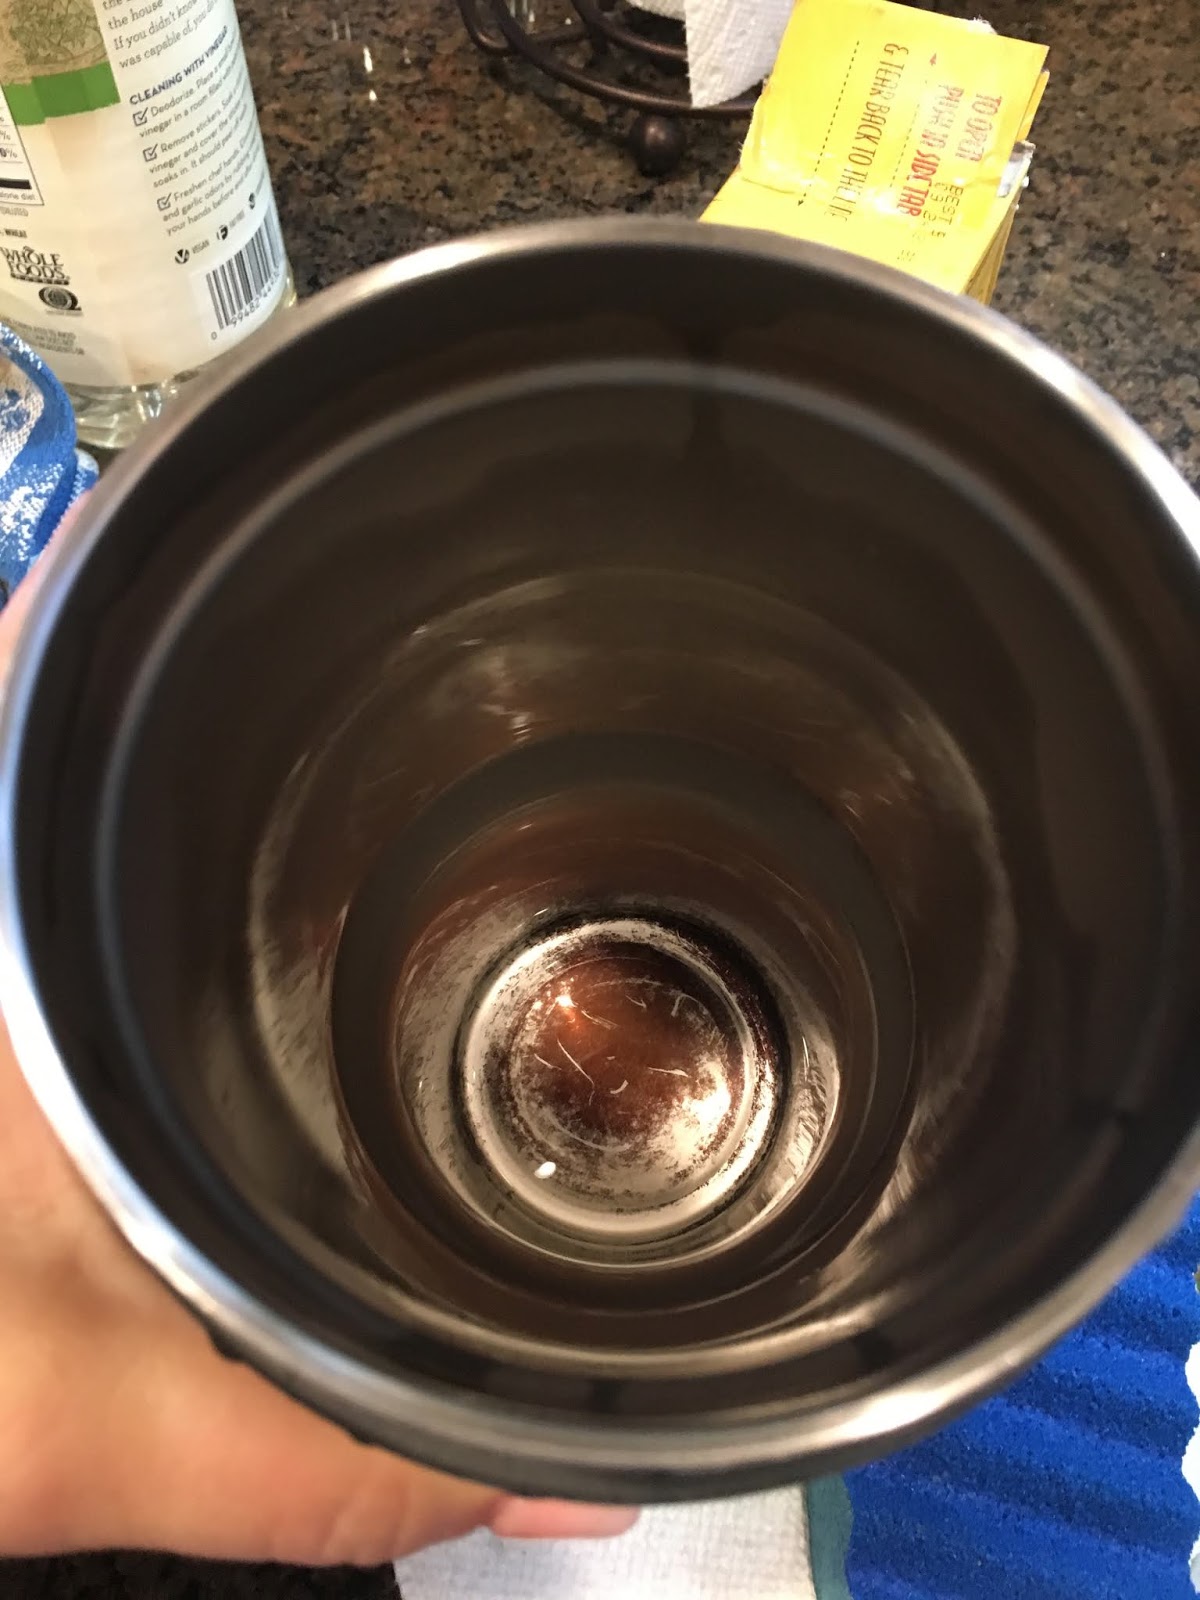
So Dave's Yeti that he uses daily as a coffee mug was super stained and I didn't know it - he thought putting it in the dishwasher would clean it but when I took it out of the washer the other day I noticed how bad it was! The entire thing was coffee-stained and looked gross. So I decided to see if I could remove the stains...and I did...and it was simple.

Put some white vinegar in the bottom of the mug; I used a blue sponge that has a scrubber side, put baking soda pretty heavily on the wet sponge so it makes a paste then dip in vinegar and start scrubbing. You need a little elbow grease but it didn't take long for the staining to come off. It's like a science experiment, the baking soda hitting the vinegar foams and bubbles which is pretty cool on it's own - but then I poured the vinegar out and rinsed and it was almost perfectly spotless! Just the very bottom still had a little stain, so I repeated the vinegar/baking soda/scrubbing and it all came out. Looks brand new!

Of course I didn't have high hopes for the vinegar/baking soda to work so didn't take a picture of the cup totally stained - I did take one of the remaining stain on the bottom tho so you have an idea of what the entire inside surface looked like.
Yuck, right?

Side note - I read that you are supposed to remove the black rubber ring from the top to clean it, didn't know that! Now his mug and top are just about as clean and sparkly as can be ;)


Happy Moment (see yesterday for an explanation) ~

the first sip of coffee in the morning. ahhhhhh.


Thursday, February 23, 2017

Frozen Cooked Chicken

I just saw this idea and can't believe I haven't been doing it all along - cook boneless chicken breasts, chop up and freeze, then have cooked chicken available whenever you want it for salads or whatever. Simple and a really good idea.

I just boiled the chicken in a little water, poultry seasoning, pepper, and a handful of herbs (chives and thyme that I had in the fridge and needed to be used up) until the chicken was cooked thru. Let it cool, cut up into bite sized pieces, and freeze. I put the pieces on a paper plate in a single layer and put in the freezer for a few minutes until just frozen and then transferred to small baggies in case the chicken pieces stick together. Freezing them individually first should help to avoid them clumping together after frozen. When you are ready to use it just take out the amount you want and let it thaw for a bit and it's ready to go.

Tuesday, January 10, 2017

Kitchen Tip...date your Spices

When I open a new spice or seasoning jar I leave the little paper/cardboard seal attached on one edge and write the date the jar was opened on the paper with a sharpie. That way I know how long it's been open and if it's time to replace it with a fresh one.

I posted 3/1/16 how I arrange my spices - um, alphabetically of course haha - click here if you're interested.

Tuesday, May 3, 2016

Houseguest Treat Bucket

Janis gave me another great idea (she's been busy and is sharing lots of good ideas with me!) -  we had houseguests last week and she told me that when she has people staying over she puts together a big basket of goodies so everyone can help themselves if they want snacks and munchies without having to ask. Love this idea! Never fear midnight snackers, now you can sneak down and grab food without rummaging around in the pantry haha!

I don't have a basket the right size, so I used this plastic bucket and it was fine. Use whatever you have on hand, people care more about what's inside! I made a little card to set over the edge of the bucket that says "help yourself" so no one had to wonder why I had snacks in a bucket on the counter. I filled it with individual snack bags of chips, pretzels, and popcorn; granola bars; small bags of almonds; and miniature candy bars.

Thanks Janis - keep the ideas coming please :)

Tuesday, April 26, 2016

Canister Vacuum Wand Guard

Quick tip for today - this is my friend Janis's great idea to help protect her walls and furniture from the dreaded vacuum banging into them. She covered the wand with old socks to provide some cushion where they might cause damage. If you have a canister vacuum with a wand this is a simple quick solution, and a good use for old socks - thanks for sharing Janis!


Tuesday, April 12, 2016

Tidying Up

I can actually see all my scarves now!
Well thanks to a book I just read on decluttering and organizing (written by a Japanese woman who is very popular right now and making the rounds) I am now inspired to surround myself with things I love and that "spark joy" in me. Sounds like a daunting task, right? But how great would it be to just have things that make you happy and you love? Of course I have to be a little practical - if I get rid of all the clothes that aren't joy inspiring I'm gonna need to do a whole lot of shopping cuz I'll have nothing to wear! Dave is really not going to like this hahaha. Anyway, I'm sharing this with you because rather than crafting something all I've been doing is tidying up my stuff :)

I was going to give you a sort of breakdown on how she recommends going about this whole decluttering and organizing thing, but that would be rewriting her book and take too long haha - if this kind of thing interests you maybe pick up the book for yourself (I'm a regular at the library) or borrow from a friend (thanks Sheryl for loaning me your copy!). I've talked to lots of people that just couldn't get into the idea, or don't care about doing it - I love this stuff though so I enjoyed reading it. I'm not going to do everything she says (for instance, when you discard an item you should thank it for it's service, for a job well done, or in the case of getting rid of something that's unflattering on you then thank it for teaching you what doesn't look good on you - uh yeah, if I start talking to my stuff D is seriously going to question my sanity! HA!) but the basic idea of only owning what makes you happy is appealing to me.

So far I've purged a bunch of vases and candles, scarves and t-shirts  - I'm enjoying having more space in those cupboards and drawers now and am looking forward to freeing up even more when I have time, after I've crafted some more of course!


Tuesday, February 23, 2016

How to Separate an Egg

I overheard a conversation (what's the difference between overhearing and eavesdropping? I don't know - whichever it was lets just go with 'I overheard'...) between a couple behind me at the grocery store, and the guy said what a good cook his mom is - "she even knows how to separate an egg and stuff". At first I thought to myself "well separating an egg doesn't mean she's a good cook" but that wasn't very nice, I don't know his mother at all and she might be an amazing cook. Then I tried to remember who taught me how to separate an egg, I feel like I've always known but not sure how - did I see it on tv? Did I teach myself? Were there numerous attempts and lots of broken eggs on my part figuring it out? That memory is gone... So my little tip for today is how to separate an egg if you don't already know!

I didn't talk on this video, I think it's pretty obvious what I'm doing without explanation. You'll need 2 bowls, one for the egg white and one for the yolk. Crack the egg open over one bowl, as it cracks in half let the white run out into the bowl but tip your hands so the yolk stays in the shell. Then transfer the yolk back and forth between the 2 shell halves until all the egg white separates from the yolk and is in the bowl. Then put the yolk into the second bowl. Repeat as necessary for your recipe.

Now your kids can tell people what a good cook you are :).

2022 update: I have no idea why my videos keep disappearing! you can look for this on my youtube channel  https://youtu.be/VRg6WA1LWfo