Showing posts with label organizing. Show all posts

Tuesday, October 20, 2020

Tipsy-Tuesday: organizing fabric

So, let's be clear here. I am usually organized and neat, I like things to have a home so I know exactly where they go, and I don't like clutter. But...when I'm working on a project things tend to spread out and get out of hand and the next thing I know my house is a disaster. And then I get a wee bit cranky because I am usually organized and neat, I like things to have a home, and I don't like clutter. It's a problem.


Today's tip is how to organize fabric because I literally had a pile of fabric on the floor in the middle of my craft room from making masks - I'm not talking about a neatly folded pile of fabrics, nay, I'm talking a mountain of wadded up fabric that was so big I couldn't even step over it - and I knew I had to reign it in somehow. Which naturally led me to googling solutions instead of just folding the fabric, because it was much easier to play on the computer then get up and actually get shizzle done. My favorite idea is wrapping the fabric around comic boards and standing them up on a shelf - organized, I can easily see what I have, and it looks beautiful. 


And then my project was delayed a couple more days because I had to order comic boards from Amazon, and then a couple more days because I couldn't figure out how to fold the fabric around the boards which led to more googling of solutions. In case you're still reading and you want to know, fold the fabric in half with the selvage edges together, then fold in half again. That should give you a rectangle about 10" tall. Put a comic board (btw, I had to research what a comic board is - thin paper boards that are meant to support collectable comic books that are then placed in protective bags) on top and wrap the fabric neatly around. Some people use plastic clips to keep the fabric from unwrapping, don't use pins or metal clips because in time they might rust and ruin the fabric; I didn't clip them and so far just being wedged together is keeping the fabric in place. 


Finally I got the technique down, wrapped all the fabric, and found a basket big enough to file them in. Ahhhhhhh, I can't even tell you how happy this makes me - I keep going into the craft room just so I can look at them. And it'll be so easy now for people to pick their mask pattern, love that too!


Thursday, August 2, 2018

Birthday Calendar

I'm still stuck in the good ol' paper days when it comes to grocery lists, to-do lists, and this birthday calendar that I've relied on for years now. Yes I know all of this can be done on my phone but my brain doesn't work so good that way - I need to either have the paper in hand or the birthday calendar on my desk.


It's not hard to make - I typed out each month and some lines underneath, 6 months per page, each month is sized 2.25 x 3.25 and fits in this little standing clear acrylic frame...so it's small and takes up minimal space on my desk, but since it's in my face every day I don't usually miss a birthday (unless I don't change to the next month fast enough, if a birthday is the 1st couple days of the month sometimes I don't see it in time!).


I made a little holder for the months that aren't in the frame (I keep 6 months at a time in the frame), very not fancy and now that I've been helping Ronda and learned a bunch of ways to make paper/gift holders I think I'll make a patterned paper one soon! In the meantime this is what I've used forever and it just goes in my desk drawer until I need them.


one year ago: chocolate marshmallow cookies

Saturday, February 10, 2018

Organizing...Food Containers

I'll tell you what drives me crazy....see if you have an issue with this too...you want to clean up after dinner and put the leftovers away, so you open the drawer and pull out the appropriate container and CANNOT find a lid that fits. Why does that happen? It's like 1 missing sock in the laundry - where do they go?????

To save a little sanity I went thru all of the containers and matched them up with a lid. If I had a container or a lid that didn't match up then out it went. This way I'm positive that every container in the drawer has a matching lid. Then I put the shapes together (bowls with bowls, etc.) and stacked them, odd sizes go in the back, and all of the lids (except the big ones that don't fit, they stay with their containers in the back) go in a large container. I've been doing it this way for a while now and I gotta say - the system works and saves tons of time (and frustration)!

Do you guys have a way to keep this area organized that you want to share?


Tuesday, January 23, 2018

Organizing...Your Life!

I read an article about organizing different areas to help your house run more efficiently and got all excited about one specific idea using a small notebook. The woman writes down everything in this little book that she carries everywhere with her - goals, to-do lists, menu plans, weekly schedules, etc all go in the book. She still uses her digital calendar and master schedule, but likes writing it all down and having it with her...not gonna lie, I started searching for the perfect small notebook a little obsessively with big plans to do this system myself. Then I paused...and realized that even though I love making lists and being organized I would be creating more work for myself having to keep the notebook up-to-date (I usually leave my purse in the car, and I know I'm not going back out to the car to get the notebook! And then I'd have to remember to put it back in my purse..nope, not gonna happen), in addition to my digital calendar and big planner that sits in the kitchen and I love (my sister buys me one every year - it functions as both calendar and diary). I did incorporate a couple of the ideas from the small notebook system though and it's working so well for me I thought I'd share.


I'm still using my big planner as it's intended (scheduling/calendar) but have added a couple things - the book is big enough for me to draw a line down the center of each facing page and use one half for menu planning (a side note: I'm very bad about meal planning, we just run to the store most days and get what we want for dinner. Once in a while I go get big groceries, usually when Dave complains that we are out of everything! I'm hoping that by actually making a plan I'll be able to buy enough once a week that we don't need to run to the store constantly!) and the other half for a weekly to-do list. I've only been doing this for 3 weeks but it's already making a difference - seeing it all written down in the planner that I look at every day makes me get the to-do list done, and I only made one extra trip to the store last week. Ahhh.


I also started recording work-outs and chores that I need to do to help keep those things on track. I'm really liking this new system - let's see if I keep it up!

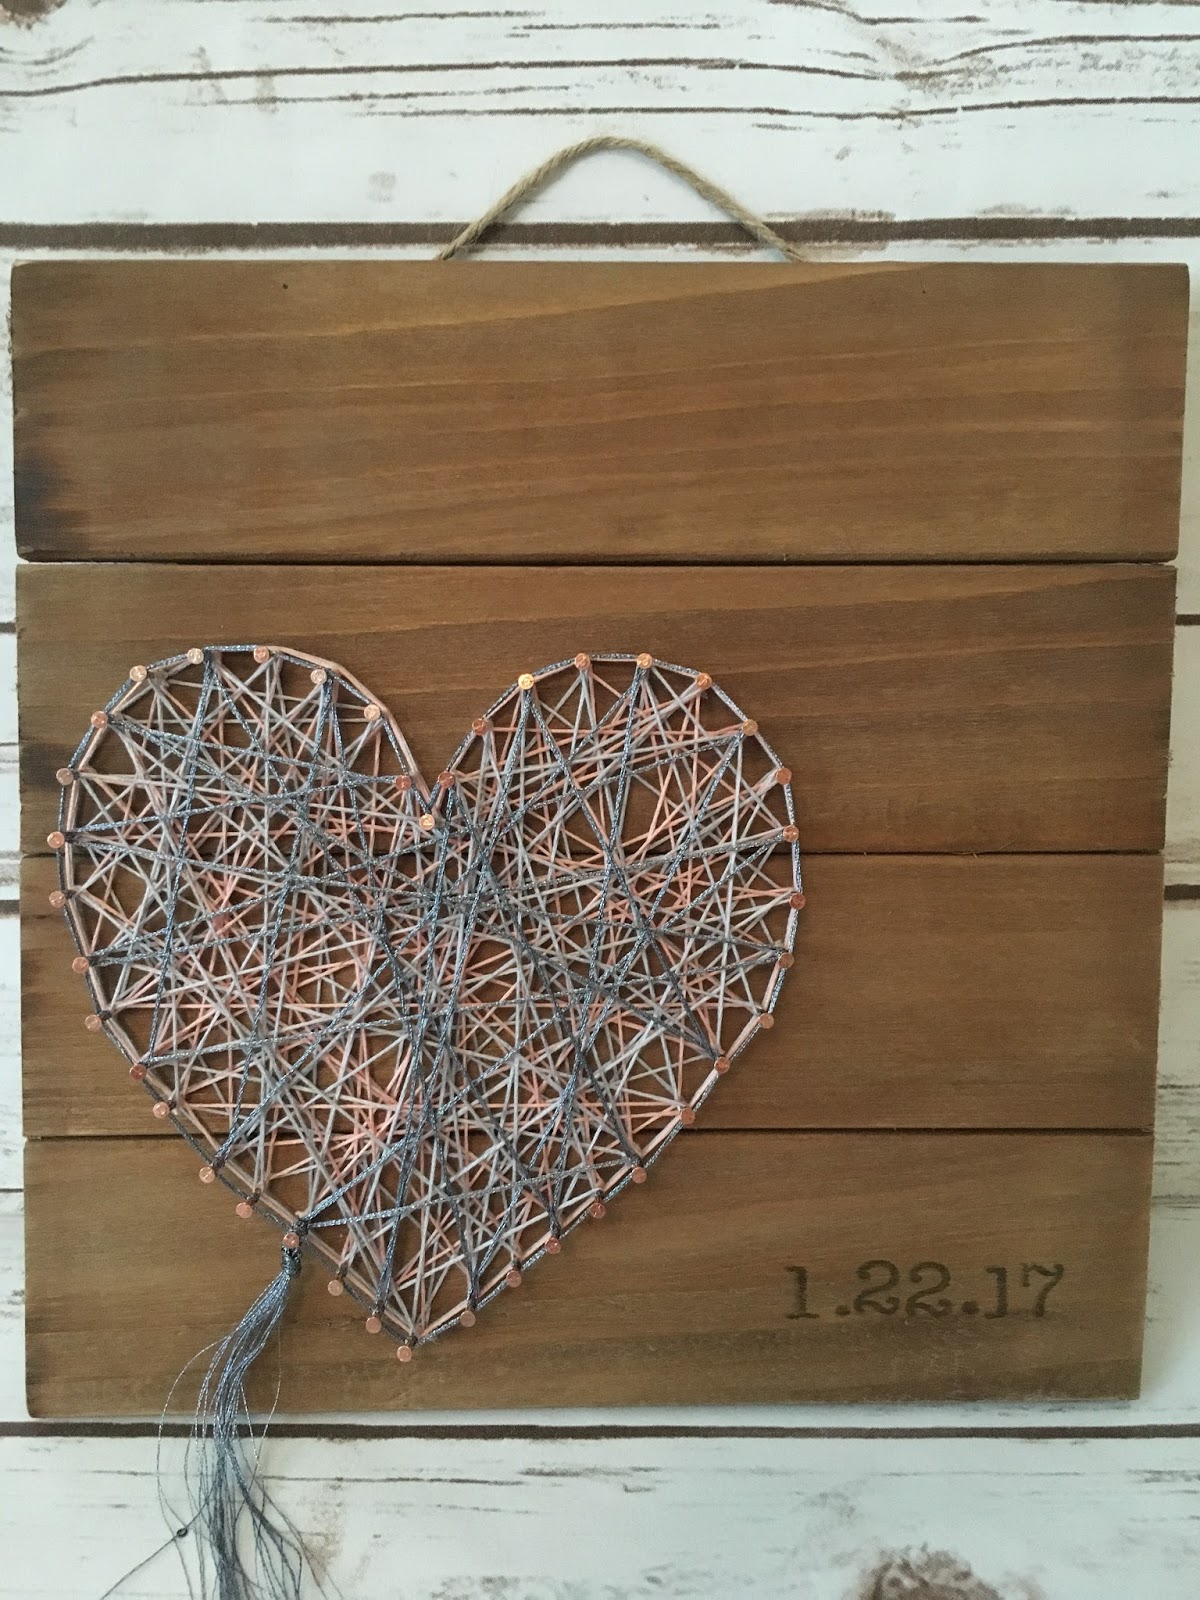
one year ago: string art


two years ago: Dave's Cosmopolitans 

Monday, January 9, 2017

Housework...organizing my garage craft room

Haven't been able to craft much lately because my little space in the garage has been a disaster since before Christmas! Hard to be inspired and creative when I can't even get to my supplies :(. So I spent all afternoon pulling everything out, cleaning, re-organizing, re-arranging, and just generally getting the space back together so it functions better for me.  I've taken over the area in the garage where there is a work bench, peg board for my tools, and garage cabinets to store most of my stuff - it's smaller than my big ole' Michigan craft room (click here for that post) but it works, and it works even better when I keep it clean and organized - I'm excited to get back to making stuff!

Our garage isn't wide but it's pretty deep so I'm able to work in my
craft area without moving a car. This area is also my exercise room -
under the gray mat (it's a bunch of rubber puzzle piece type squares that lock
together and form this big moveable mat) I laid linoleum squares so I can
practice tap dancing (to the delight of the neighbors I'm sure), when not tapping
the gray mat cushions the floor better for working out, lifting hand weights,
doing exercise dvds, whatever I get up the energy to do...


I bought some plastic food containers at the grocery store
to hold all the miscellaneous craft room bits - inexpensive
and works great. I went to town relabeling everything :)

Sarge loves to come to the craft room, I have no idea why since
he just falls asleep every time!


Tuesday, January 3, 2017

Monthly Bill Log

January...time to make a fresh start, get organized, start some resolutions, take on challenges and all that. I'm almost done putting away the Christmas decorations and lights - click here to see how I organize Christmas lights - so the house is in decent shape for the time being. Sitting at my desk though is another story - I have things piled up so high it's giving me anxiety! So it's time to get this part of my life together and since it's the first of the month it's time to start a fresh monthly bill log and I thought I'd share what I do to keep track. I pretty much pay bills online now, I have most of them set up to email me a reminder when they're due but it's hard for me to remember what's been paid and what's coming up, and also keep confirmation numbers - so I made up this simple chart to help me keep track of what's been done and what still needs to be paid. I just did this in Word, super simple to make a table and fill in the basic information - I print the form off for every month and hand write in the details as things come up, you could also keep this on your computer and fill in that way but I'm old school paper and pen. I keep them in a folder (along with another form that holds account numbers, passwords, email addresses, etc.) and at the end of the year staple them all together and file away - that way I can easily look back and see what I spent. I've been doing this system for a couple years now and it really works for me - I try to sit down every Monday morning and see what's due or coming up so I can stay on top of the checkbook - having a set time to pay bills works for me, other wise I'd procrastinate and end up with late fees which I hate! Now I'm off to whittle down some of the towering piles next to me...

Here's what my form looks like to give you an idea how to create your own - it doesn't need to be fancy, I just want to record basic information to help me keep track (note at the top of the form I have a space for the month and year, and the bottom has a total line for the month - they got cut off in this example):


Tuesday, September 27, 2016

Organizing 101... Socks

This is Cathy's idea and I just started doing it cuz it's an easy thing to do and helps to be more organized - who doesn't like that? Pretty smart actually...she saves the paper liners that come in her no -show socks (in my case I'd thrown them all out so made up a simple template and cut more out of coated cardboard or heavy cardstock) and keeps her socks on them lined up in her drawer. No more searching for the match!

before....
...and after! I just realize I'm missing
my "friday" socks...Brooke?

make a template...

cut out however many you need and insert
into your pair or no-show socks.

Tuesday, April 19, 2016

Trash Cup

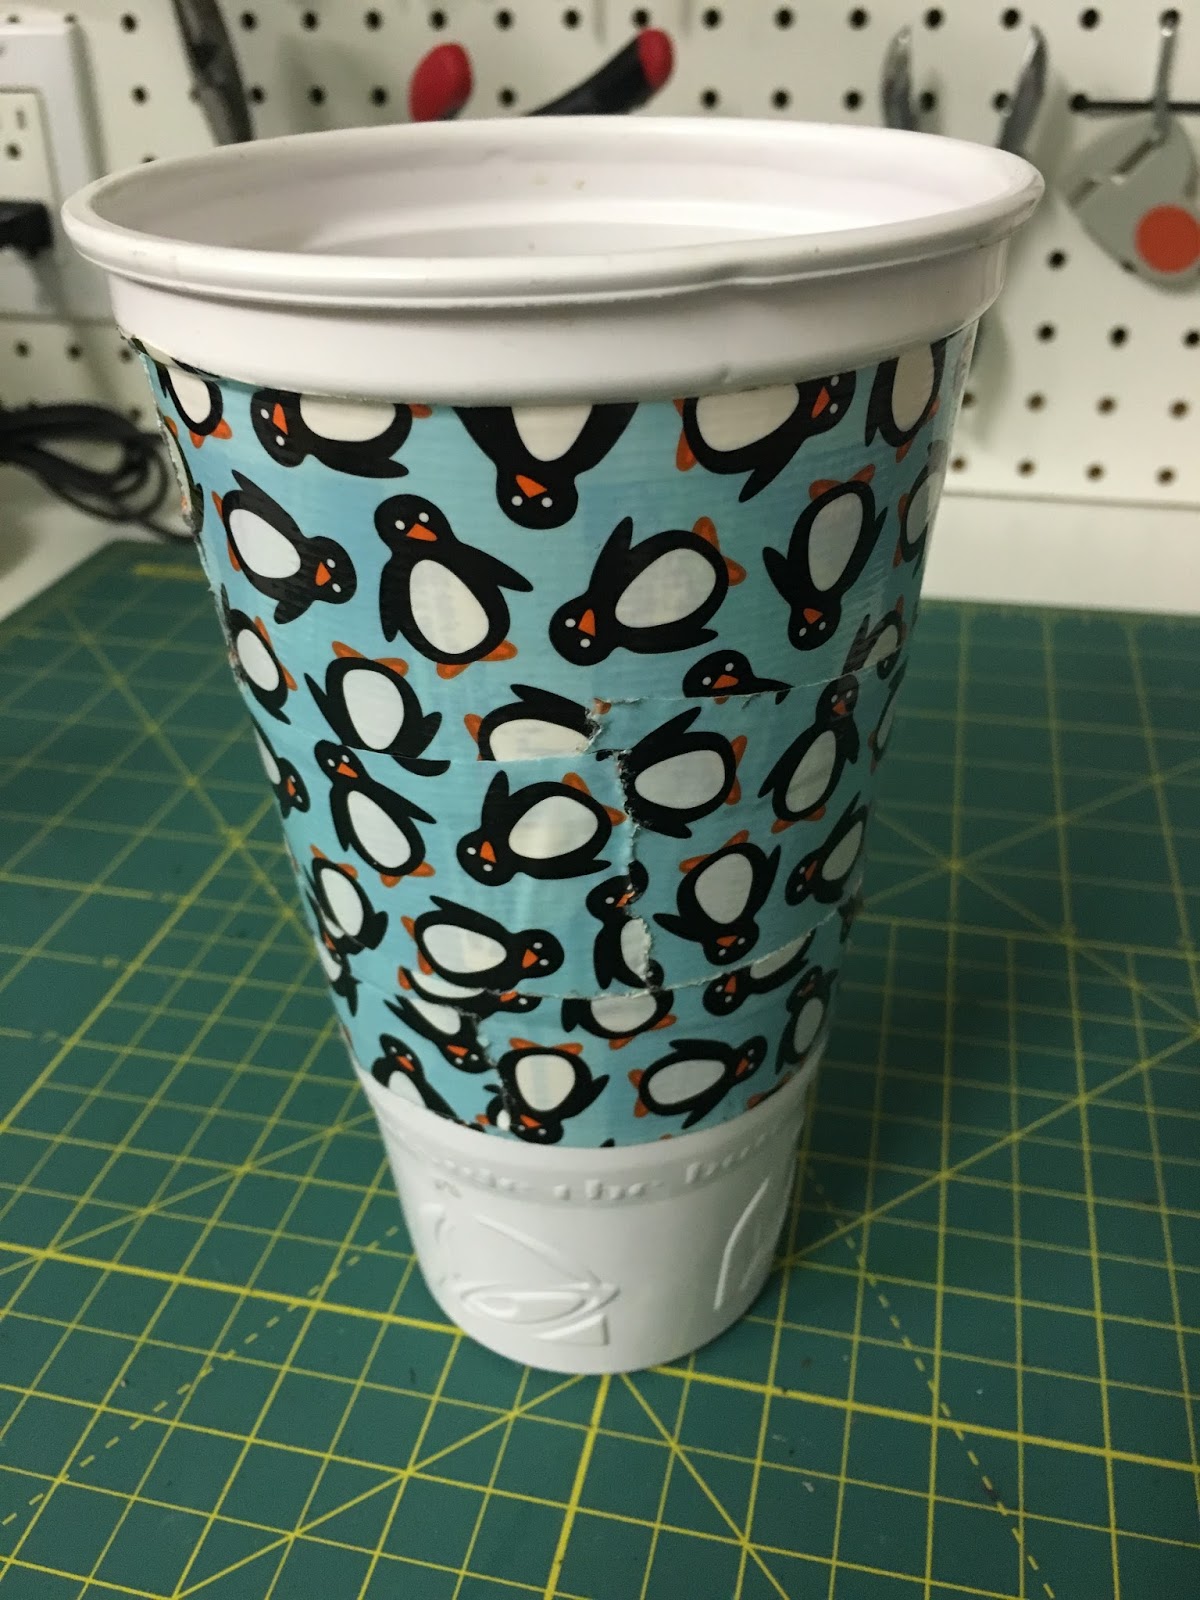
Here's a quick 5-minute 'craft' that anyone can do and everyone can use! I have been making these for years (and all my family members have received them as "presents" haha) - it's a decorated disposable drink cup that fits in your car drink holder for all the little bits of trash you accumulate in the car (gum wrappers, used gum, ticket stubs, etc.). Love this easy idea :)

use with or without a liner. I prefer a liner
 so gum doesn't get stuck to the cup!

Start with a clean plastic fast food drink cup, you could use styrofoam I guess but the flimsy paper cups aren't going to work as good or last very long. Whatever size you want that will fit in your cup holder.  Either cover the words that are on it with colored or patterned duct tape, or wrap scrapbooking paper around it and hold in place with double sided tape. I line it with a (clean, haha) doggie poop pickup bag (we have tons of them with Sarge around, you don't have to line yours but it'll last longer if you do) and hold it in place with a rubber band.

I covered the words on a Taco Bell cup with cute penguin duct tape...

another option is to cover it with patterned paper. trace the shape of the cup onto the back side of a piece of paper (hold a pencil where you want the paper to cover and roll the cup on the paper to get the correct line and arch). cut out and doublestick tape it in place. 


Tuesday, April 12, 2016

Tidying Up

I can actually see all my scarves now!
Well thanks to a book I just read on decluttering and organizing (written by a Japanese woman who is very popular right now and making the rounds) I am now inspired to surround myself with things I love and that "spark joy" in me. Sounds like a daunting task, right? But how great would it be to just have things that make you happy and you love? Of course I have to be a little practical - if I get rid of all the clothes that aren't joy inspiring I'm gonna need to do a whole lot of shopping cuz I'll have nothing to wear! Dave is really not going to like this hahaha. Anyway, I'm sharing this with you because rather than crafting something all I've been doing is tidying up my stuff :)

I was going to give you a sort of breakdown on how she recommends going about this whole decluttering and organizing thing, but that would be rewriting her book and take too long haha - if this kind of thing interests you maybe pick up the book for yourself (I'm a regular at the library) or borrow from a friend (thanks Sheryl for loaning me your copy!). I've talked to lots of people that just couldn't get into the idea, or don't care about doing it - I love this stuff though so I enjoyed reading it. I'm not going to do everything she says (for instance, when you discard an item you should thank it for it's service, for a job well done, or in the case of getting rid of something that's unflattering on you then thank it for teaching you what doesn't look good on you - uh yeah, if I start talking to my stuff D is seriously going to question my sanity! HA!) but the basic idea of only owning what makes you happy is appealing to me.

So far I've purged a bunch of vases and candles, scarves and t-shirts  - I'm enjoying having more space in those cupboards and drawers now and am looking forward to freeing up even more when I have time, after I've crafted some more of course!


Tuesday, March 29, 2016

Kitchen File

This system of organizing all the manuals and instructions for household things works great for us - each category gets it's own folder and they are all hanging in a free standing file box that I keep in a kitchen cabinet so they are always handy. We pull these out all the time and it's nice to have them so conveniently located and in one place.


I have the folders broken down something like this:
-oven/stove
-fridge/freezer/ice maker
-washer/dryer
-outdoors (grill, furniture, etc.)
-small appliances (blender, food processor, etc.)
-tv/direct tv

I also keep take-out menus, pet instructions, trash/recycling info, etc. in hanging folders in another standing file box. Works great for corralling all the little miscellaneous info we need to keep and would otherwise just get piled up or shoved in a drawer!


Tuesday, March 1, 2016

Organizing a Spice Drawer

Super easy organizing tip - I have a big shallow drawer in the kitchen that I have all of my spices in, they are pretty much in alphabetical order so I can quickly find what I'm looking for. Some random seldom used spices are in the way back; truthfully they aren't even seldom used, they are never used and I've just decided I need to go clean them out of there! Later.


I have the spices laying down with labels up so I can easily see them. the ones
standing in the bowl are Dave's go to spice blends for grilling so I put them where
he can grab them and also put them away easily...he'd be in trouble if he didn't
 put them back in the correct alphabetical order haha!! no I do not have OCD or anything...;)


Monday, November 23, 2015

Cookie Cutter Organizing


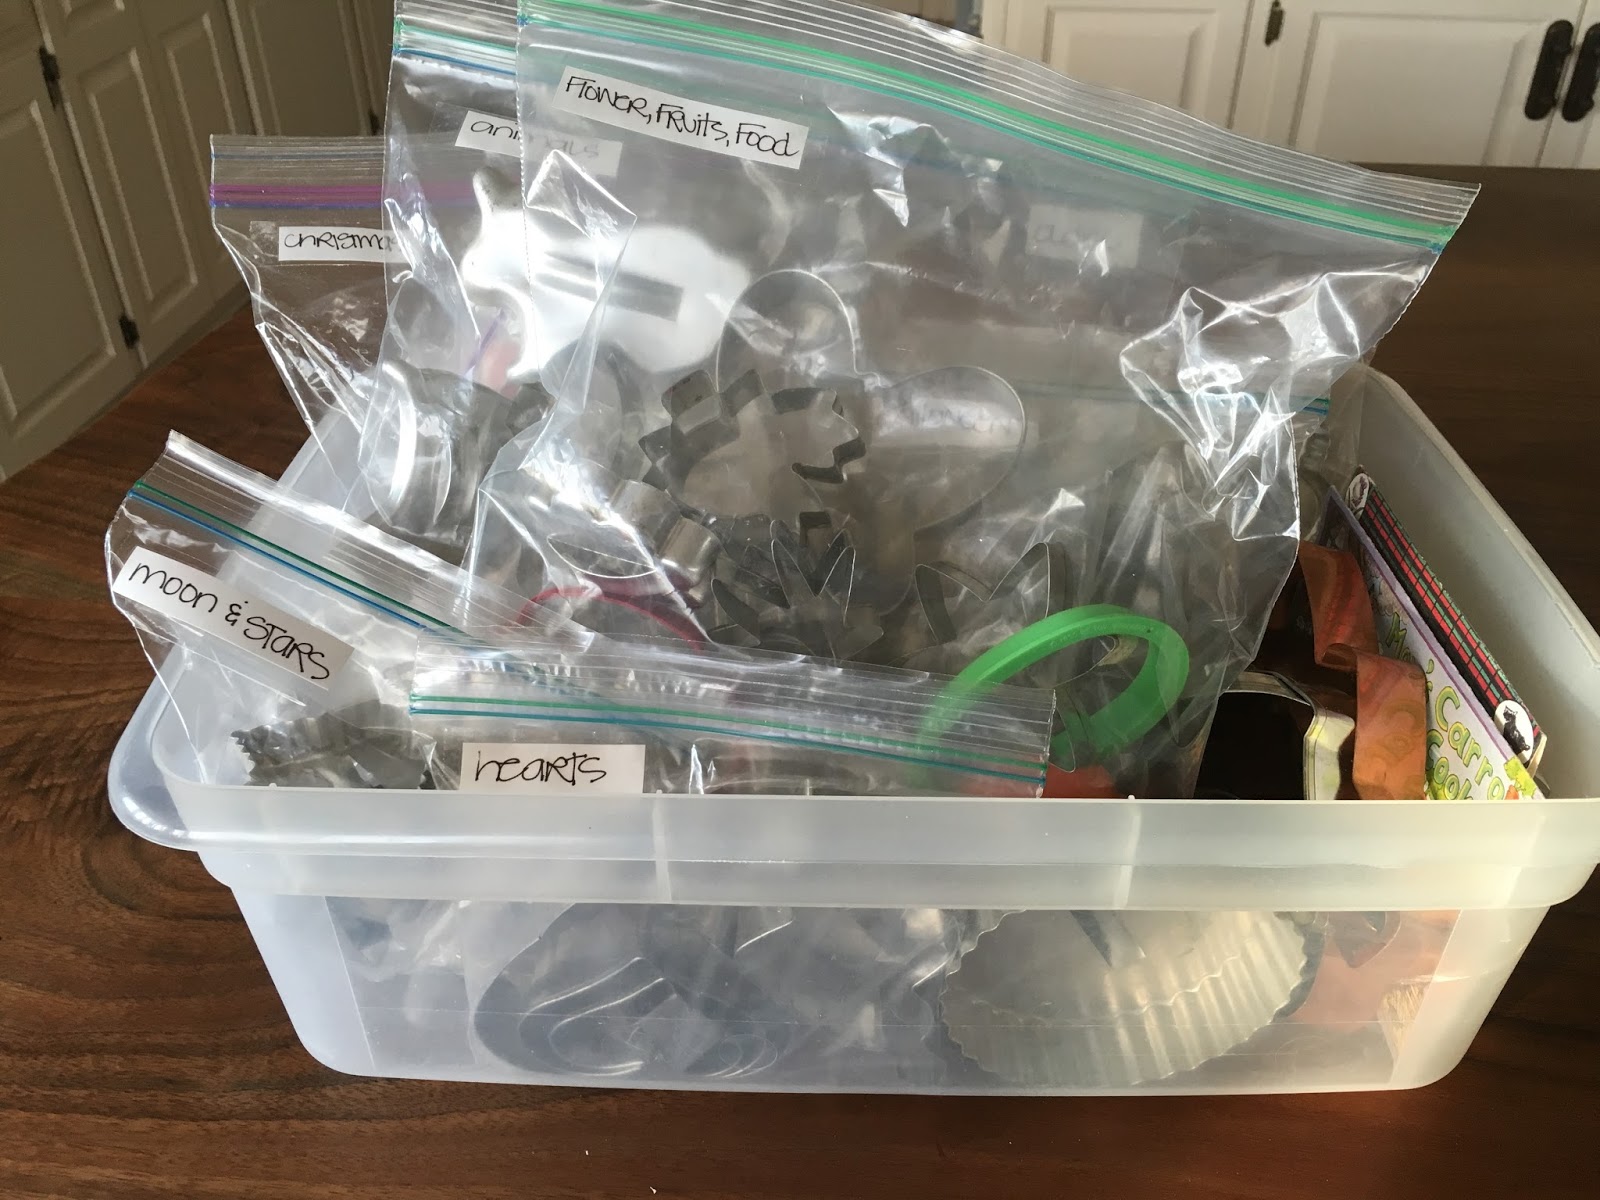
I have a lot of cookie cutters - and trying to find the one I'm looking for is always a pain. So I decided to organize them a little bit...took me long enough to finally do this! 


I sorted out different categories (Christmas, animals, flowers, etc.) and put them in labeled gallon size zip lock bags and put in a rubbermaid tub. The cutters that are oversized I just put loose in the bottom of the tub. So much easier to find what I'm looking for!


One other quick tip - when I'm rolling out a small batch of sugar cookies I use my big wood cutting board (I actually use the back side, the front side has a groove around the edge to catch juices from when we slice meat), lightly flour and roll out smaller balls of dough to keep on the board. This makes cleaning up the mess so much easier - when I flour the counter it ends up everywhere :).

Monday, November 2, 2015

Costume Organizing/Storing

This is my system for maintaining some control of our costume and accessories chaos and I thought I'd share in case you are looking for some ideas...this works really well for me.


I like to keep all of the parts of a costume together (with directions and pictures if I remember); if they fit I put them in a gallon size ziplock bag, clip them onto skirt hangers and hang in the basement - you could put them in a closet if you have extra space available but I don't...so we hung a rod up in the basement.

If they won't fit in a ziplock (like bird/angel wings, tutus, etc) I cover them with a grocery bag, cellophane or the packaging they came in and hang them on the rod. For the rest of the costumes or accessories I have them all in a large labeled box under the hanging costumes so they are all together.

The costumes stay organized and together this way -makes it so much easier to find all the little pieces of a costume that could be jumbled together if I put them loose in a box.