Showing posts with label paper crafting. Show all posts

Monday, June 17, 2019

Paper Tropical Flowers


While looking for Lego crafts I came across a video - it had nothing to do with Legos but popped up and caught my eye - on how to make a paper flower ball. I've made a few paper flowers (as you might recall, click here and here for a couple of them) but never any like this, so after practicing with a piece of white paper to make sure it was going to work and not waste my cardstock I moved on from looking at Lego crafts to making tropical flowers. The original idea made a round flower ball which takes 12 flowers, but I'm still dealing with tendonitis in my hand from moving furniture like a month ago, so I quit after making 4 flowers - I think they're very pretty even if I didn't make a ball!

Here's how:

Cut 4" paper squares, 5 per flower.

1. fold a square into a triangle


 2. fold the sides in to meet in the middle, creating a square shape


 3. unfold the side triangles you just made


 4. insert a finger into the side triangles and flatten them like in this next photo


5. fold the side tips down


6. fold the side triangles in half


 7. fold but don't crease the two edges to meet each other


 8. snip off the top tip


 9. glue the edges together to form the petal - I used glue dots


10. after making 5 petals, glue them all together to make a flower - note the glue dots didn't hold all the petals together so I switched to hot glue. Add something to the very center, I wanted to use sticky back Stampin' Up gem embellishments but couldn't get them to hold so switched to a mini pompom. The original inspiration video used pearls. 
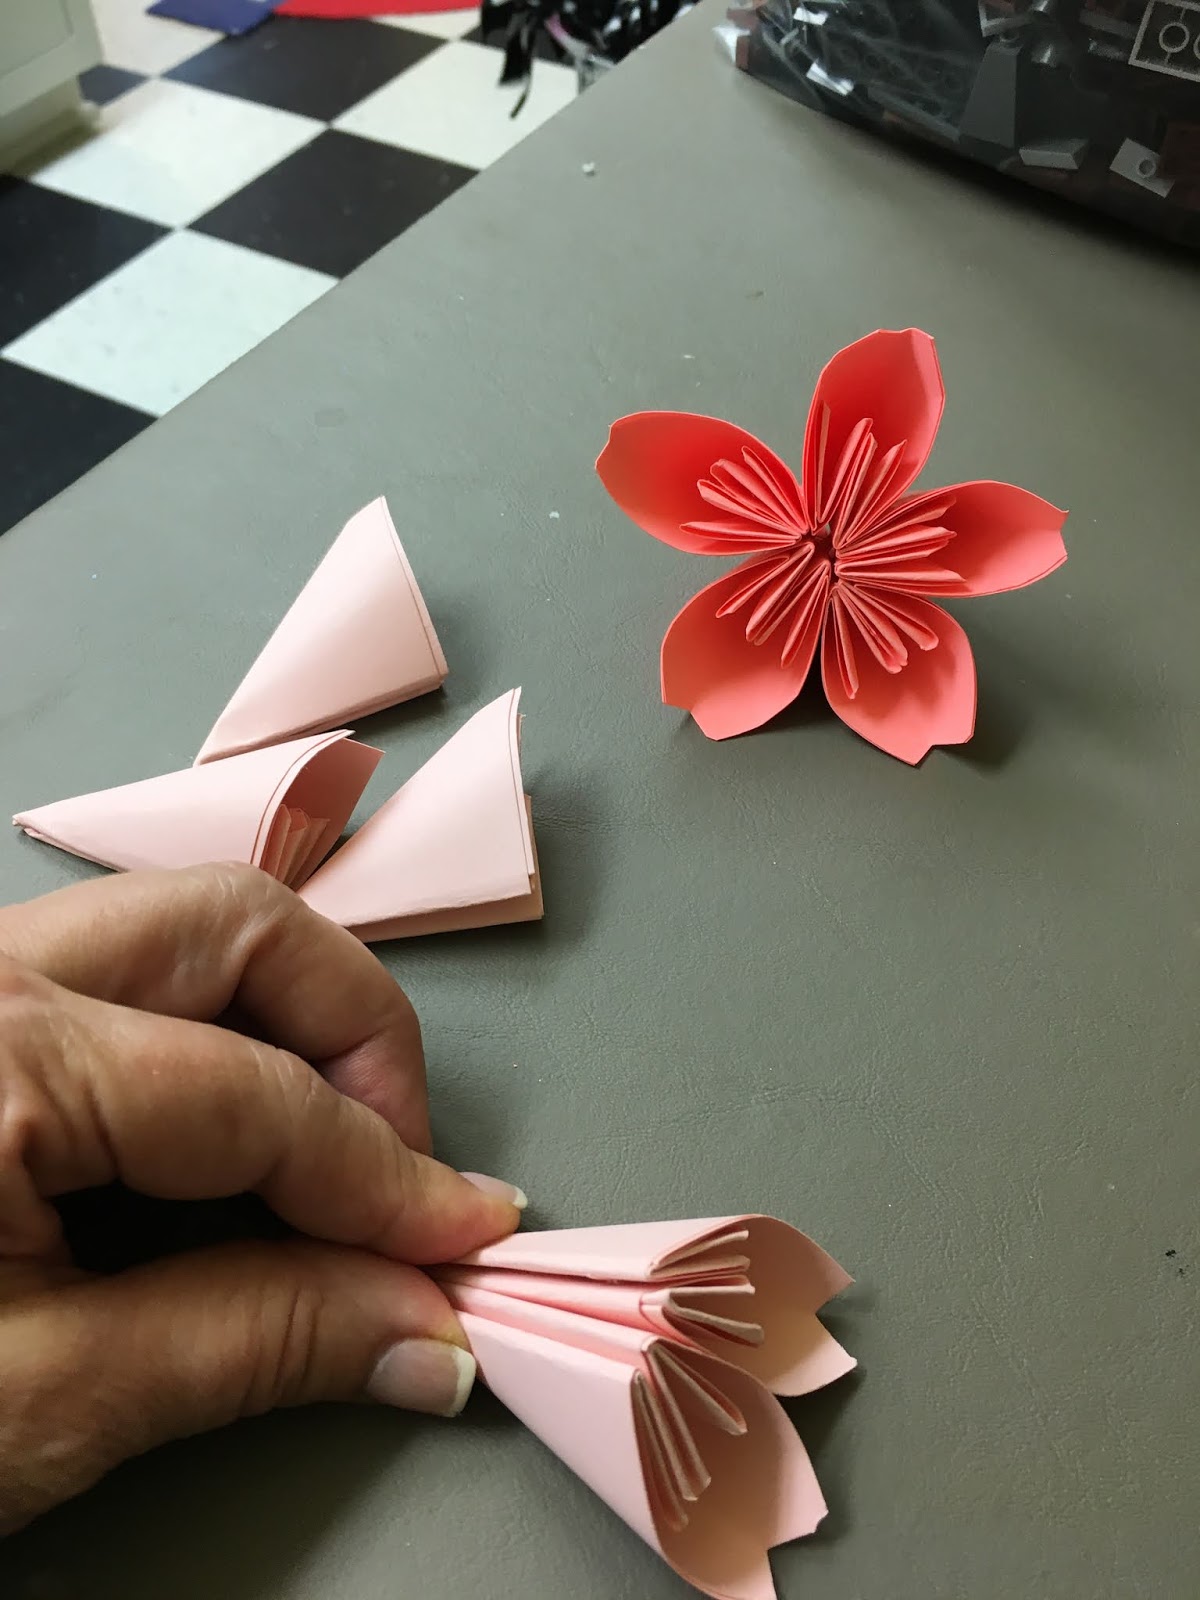


11. glue however many flowers you want together in a bundle. I made a couple leaves following the above directions but didn't snip the tips off - seems more "leaf-like" to me - and glued them to the flowers before gluing the flowers into a bundle. 


I made a short video on how to fold the petals in case my description above doesn't make sense!


original source found here


one year ago: coincidentally it's a different paper flower.
two years ago: for real, it's another paper flower! I honestly had no idea and did not do this on purpose!
three years ago: rock photo stand. whew, 3 years of paper flowers woulda been super weird timing.


Friday, September 14, 2018

How To Use a Big Shot Die-Cutting Machine

Hey - do you guys know how to use a Big Shot die cutting machine? There are other names for these things, the one I have from Stampin' Up is called "Big Shot" - it's a simple tool but makes paper crafting so, so, so much easier and neater than hand cutting! You can buy tons of different templates, everything from tags and labels to words, shapes, ovals, sqaures...the list is endless. 


Anyway, after posting yesterday about making the card with a gift holder inside I was remembering that the first time I went to a card-making class at Ronda's I had zero idea how to use this thing and the other crafters were just whipping around me cutting things out without even a second thought and after watching for a bit I got the gist. Now that I've been helping Ronda at her Stampin' Up studio and cranking pieces out for her for the past couple years I can now run this beast in my sleep (in fact I'm pretty sure I've had dreams about die cutting LOL)!

So, in case you have no idea what I'm talking about, here's a simple tutorial that will give you the basic technique and you'll have an idea of what to do if you're in a situation like I was feeling like such a novice and newbie at paper crafting!

You sandwich a piece of paper (cardstock, decorative paper, foil, etc.) and the cutting template you've chosen (in these pictures I'm just cutting out a white circle) between need two clear cutting pads. Lay the "sandwich" on a base pad on either side of the Big Shot, lining it up on the tray so it'll fit cleanly thru the slot. Crank the handle and the sandwich will advance and the roller presses down on the cutting pads/paper/template stack making a sharp crisp cut out, then it comes out on the other side of the Big Shot. Make sense? Look at the pics, that'll help.

The picture above shows the Big Shot with the base plate in place on the right side of the machine,
two clear cutting pads (which have been well used and are all marked up, it's normal),
and 2 circle metal die cut templates laying on turquoise and white cardstock 

I've sandwiched a piece of white cardstock with the die cut circle on top between 2 clear cutting pads.
Lay the stack on top of the base plate so it'll go thru the channel in the machine under the handle.

crank the handle and the tray moves thru the machine

keep cranking the handle until the sandwiched template has cleared the handle,
then remove from between the cutting pads.


A couple more tips:

  • Occasionally the paper and template might be too thick so the "sandwich" won't fit thru the machine, in that case you'll need a thinner base plate (that doesn't come with the starter Big Shot but can be purchased) or it might be too thin if you're using a skinnier template so the roller isn't able to press down hard enough on your cutting pad stack - if that happens you can make a "shim" of sorts by adding a second piece of paper to the stack (that helps to make the sandwich stack thicker and the roller can then do it's job). There are different base plates and adapters you can interchange to get the right thickness needed for the machine to do it's cutting - for the most part just the basic plates that come with the machine do the job. 
  • The die cut thing has a cutting ridge on one side of it and is smooth on the other - lay the ridged cutting side so it's against the paper otherwise it won't make the cut. 


  • The clear cutting pads get really beat up and warp - turn them over and rotate them to even out the wear and tear. You will eventually have to replace them and there's nothing you can do to prevent it!
  • They sell a magnetic base board that helps to hold the metal templates in place which is super helpful if you have little things to cut out - they tend to shift around between the clear plates so having the magnet board makes that part easier. I don't have one, it's on my list :)
  • Click here, here, and here for examples of things you can make using the die cut machine. 

Monday, July 24, 2017

Paper Gift Pouches

I'll start by saying I love these paper pouches Ronda designed - just to get that out of the way.

She is working on a big order and needed 120 of these pouches made - to make one you need to score, cut, fold, tape, and decorate - naturally I opened my big mouth and volunteered to do them at home thinking I'd be able to whip them out in no time sitting in my craft room listening to music with no distractions. How bad could it be? Did I mention 120 of them? Yeah.....

So a couple days and like 11 hours later I finish. And I kid you not while packing them and all the supplies up to take back to her I see a stack of mini glue dots on the corner of my table and think to myself "what the? what are those for?" Oh sh...ugar, I missed a step. I'm not gonna lie that I debated ignoring the fact that I did them wrong and hope she wouldn't notice but that goes against my perfectionism and knew that I had to make it right. I didn't tell her that part and she doesn't need to know haha - they're done and look great and overall I love this project. And even though you might think I'll never want to make another one, I will. This is too great and useful to not make more of - you can scale them up or down to fit whatever you want (I actually made a small one to hold a gift card right after I finished number 120 of Ronda's!) and as long as you aren't making so many they really don't take very long at all!

To make a 4x6" like these you'll need:

  • one 6" piece of double sided cardstock (note all of these supplies are from Stampin' Up, I love love love this wood patterned paper, it comes in a bunch of different grains)
  • one 4x6" piece of the same paper
  • scissors, something to score with, adhesive (I used tear off tape and snail glue, glue stick would probably work)
  • 1 1/2 inch circle punch
Score the 6" piece of paper 1 inch in on the sides and 3/4" up on the bottom. Using the punch remove a half circle from the top middle edge that hasn't been scored. Purely for decoration and not necessary if you just leave it straight. Cut a square out of the 2 bottom edges where the folds come together, that's extra paper you don't need and makes the edges bulkier. Fold the 3 scored edges in.

Turn the scored paper over so the flaps are turned underneath, add adhesive to the bottom edge of the bigger piece and stick to the bottom edge of the 4x6" piece paying attention to which way you want the wood to show - Ronda did the same pattern on the front and back of the pouch with the contrasting pattern on the inside. Then glue down the 2 sides forming the pouch. 

after scoring, cut out the little square made at each bottom corner where the score lines intersect (see next picture) fold the edges in along the score lines, then turn the paper over
make a half circle notch on the top edge if you want. the white lines are where you'll be taping to the smaller paper


 tape the bottom edge of the larger folded card to the bottom edge of the smaller card as shown.

glue the 2 sides of the larger folded paper (laying down on the table in this picture) to the smaller piece of paper

back of the pouch
front of pouch


You could stop there but if you want to decorate like the ones shown here you'll need:
Look - this is my favorite one! Know why?
Yep, it's #120 ;)
  • sticky foam dimensionals
  • mini glue dots
  • paper lace doily
  • bakers twine
  • 1 1/2" white paper circle stamped with message or design of your choice. Ronda filled her pouches with packages of twine and stamped "we are cut out to be friends" on the paper circle. 
  • it's hard to see in these pics but behind the white paper circle is a little bit bigger circle punched with a starburst punch out of silver glitter paper. 
-Glue a paper doily to the front using snail glue or glue stick.
-Wrap twine twice around the pouch and tie in a little bow.
-Attach the glitter circle using 2 or 3 foam dimensionals (they give the design more of a 3D look and makes attaching over the twine easier).
-Using mini glue dots (here's what I missed) glue the paper circle to the glitter circle. The glitter paper is hard to stick to, the mini glue dots are stronger than snail glue or glue stick!


Thursday, July 13, 2017

Beachy Scene in a Wood Box (popsicle stick adirondack chair, paper umbrella, paper hat, fish marbles)

Look how cute this little scene turned out - I made a popsicle stick adirondack chair, paper umbrella, paper hat, and a fishy background (note I used Stampin' Up paper for all the paper projects); filled the chalkboard box I made a while ago (click here for that post) with sand and some fake long grass, and set up the cute scene...


I looked online for how to make a popsicle adirondack chair - found a few things to give me an idea but ended up just winging it. I think you can see from the pictures how I did it  - I cut the sticks to length with my craft wire cutters (they get used for everything - not just wire cutting!) and used Elmer's glue to stick it all together. It isn't perfect but come on, it's a popsicle stick chair and doesn't really need to be ;).


Here's how I made everything except the paper umbrella, come back tomorrow and I'll show you that!


-Cut 5 popsicle sticks to different lengths to make the back, glue to a small stick across the back to hold together.
-Cut 2 sticks in half to make the seat, then glue to the chair back.
-Cut 2 sticks to make the back leg supports, I used 2 little scrap pieces for the front legs and the pieces on the top of the seat. Glue all together.


The hat was very simple but adds a little beachy touch I think is cute - cut out 2 circles from card stock, a 2" for the brim and a 1" for the top. Then cut a strip from the same paper about 1/2" by about 4" or however long you need to go around the 1" circle to make the side of the hat. Curl the strip up to form a 1" circle and glue (I used a gluestick) to hold it's shape, then glue to the 1" circle that is the top  of the hat. Then glue that to the 2" circle to make the hat. I tied a piece of ribbon around it to make it even cuter.

my glue stick is an inch around so I used
that as a guide. see the strip around the top
of the glue stick, that's the side of the hat. 

I glued the strip around the glue stick and
then glued the top on and tied with ribbon
before removing it from the glue stick and
attaching to the 2" bottom circle. Just helped
hold everything in place doing it this way. 


For the background I cut out fish shapes from patterned Stampin' Up paper and mod podged large flat glass stones on top then glued them to a background paper cut to fit inside the box. I also cut some random flowy shapes to look like seaweed and put them along the bottom of the background.

Monday, June 26, 2017

Paper "Fireworks"


I'm working on making things for Ronda's seasonal display table (click here  for Halloween and here for Fall), we're doing a "beachy" summer theme and I'll show you all the fun things I've been making for her in the next few posts. While making some pretty paper flowers I thought how much they looked like fireworks if I used red, white, and blue paper - they'll be perfect for Fourth of July decorations.


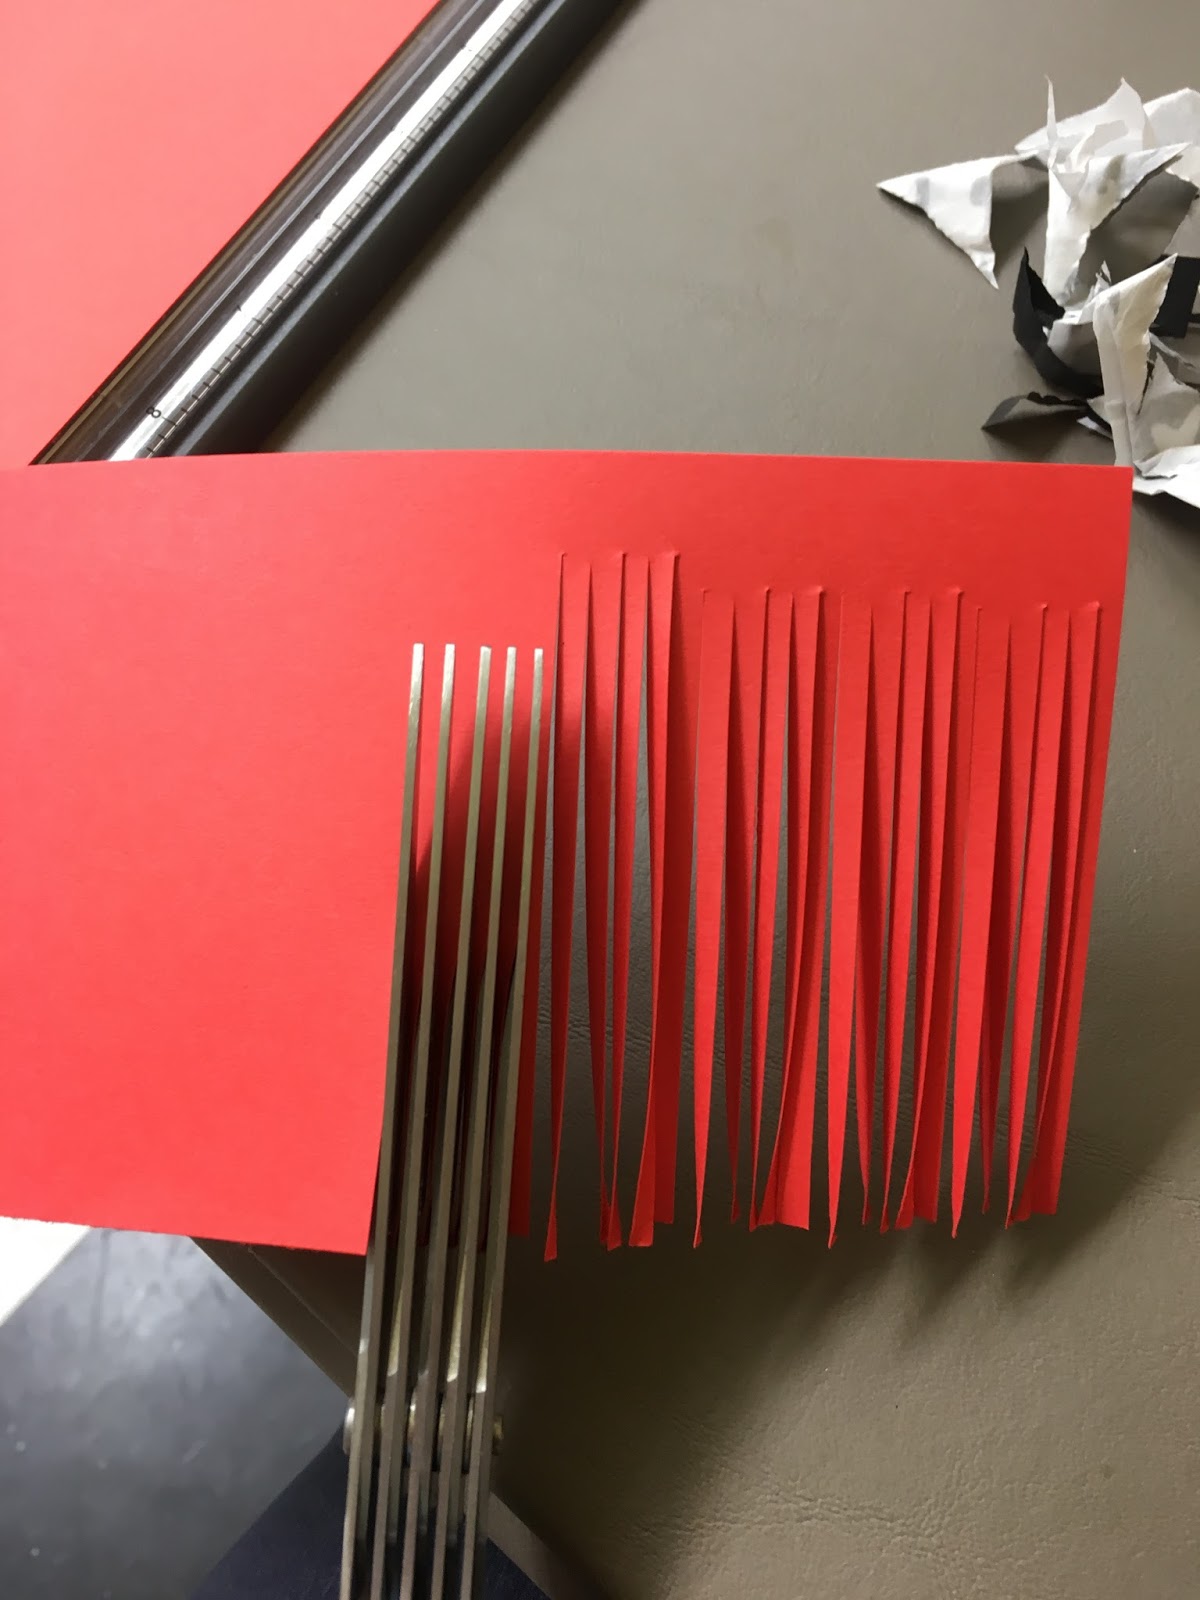
Starting with a 3.5"x8.5" strip of cardstock, fringe one long edge with fringing scissors (or just make thin cuts the entire length with sharp scissors). Tightly roll up the strip, run some glue (I used a glue stick) along the last one inch of end so it'll stay coiled up. Pull the fringe down, slightly curving it with your fingers as you go so it pulls apart and looks like a paper pompom. Add a drop of glue to the underside of the coil then insert a wooden skewer. Done. I did the flowers a little differently and will share that later (click here to see the spider mum post). 


Monday, March 6, 2017

St. Patrick's Day Paper Shamrock Wreath

Super easy quick craft for St. Patrick's Day - you could pin this up somewhere, make into a card and send to someone, use as decoration for a party, prop in the windowsill, make a few of them and put at everyone's place setting for your corned beef dinner...really it's just a little thing that can be used numerous ways. Have fun!

I punched out little hearts from white, darker green, and silver glitter paper (all from Stampin' Up but use whatever you have!). Lightly trace a circle on lighter green paper, lay out the hearts in patterns that look like overlapping shamrocks and glue down on the circle so it looks like a wreath. Mine ended up being 4 leaf clovers more than shamrocks cuz I messed up on the placement and it was lopsided! Whatever, it's still cute ;) Embellish if you want with sequins, I added a little ribbon because it was just laying lonely on my craft desk and caught my eye. Sometimes it's hard to say "enough is enough" and I just keep adding things!

Sending this to Ronda for her seasonal display table, we'll see how she uses it!

Monday, November 14, 2016

Curvy Keepsake Box Turkey

Last week I made a little scarecrow out of a Stampin' Ups curvy keepsake box die cut thing, now I made a super cute (well, I think it's super cute anyway!) turkey. These boxes are only a couple-three inches big so I made it much bigger by adding a tail using scraps of Ronda's fall themed papers and some corn husks. His little face is just a piece of orange cardstock beak with a scrap of red felt underneath, and 2 googly eyes glued on top of 2 light brown circles. Put a piece of burlap ribbon thru the handle and he's done. You could make this without the box if you want, he could be more one-dimensional by making the body from a flat piece of brown cardstock and either hang him up or lay him on your table - one on each place setting would be adorable for Thanksgiving.