Showing posts with label paper pouch. Show all posts

Wednesday, January 2, 2019

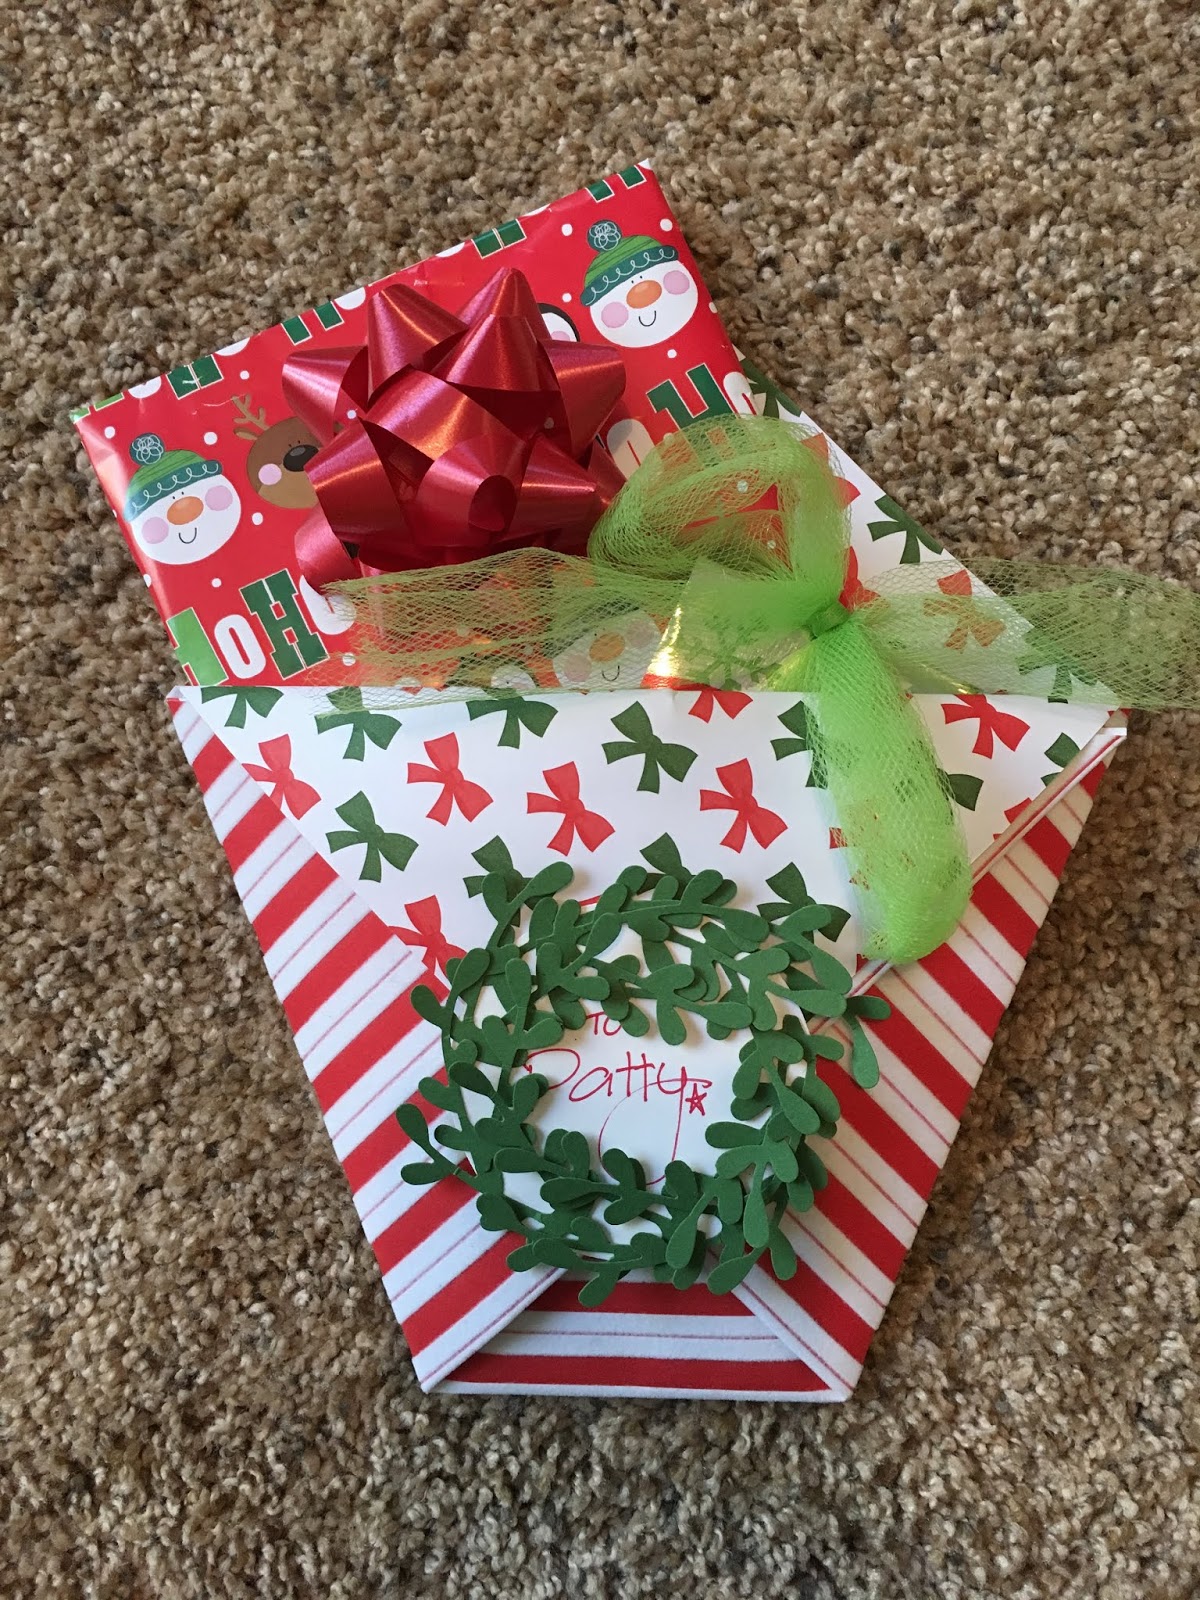
Diaper Fold Gift Holder

I watched a video that Ronda posted showing how to make this diaper fold gift holder; after all the times I've helped her at her Stampin' Up studio - and trust me, I've made a lot of paper gift holders for her - I've never seen this one! Super easy and it turned out soooooo cute I have to share with you. You're gonna want to do this for sure - it's now part of my commonly used techniques (along with wrapping paper gift bags, I use that ALL the time).

We just had our last holiday gift exchange so I made this holder with Christmas paper and decorations, obviously you can use this year round by using different papers, etc...You can also vary the sizes - this one I started with a 12" square piece of double sided decorative paper (this is Stampin' Up Christmas paper that is fuzzy on one side, how fun); if you don't use double sided paper then the inside of your holder and the flap that folds down in the front will be white - not bad, but I like the different patterns showing together. Do what ya' want! Change the size of the holder by changing the size of the square you start with - Ronda did as small as 6" square, up to a 12" one. The 12" is too big for a lone gift card, but if you have other things to put in the pouch, like I did, then big is ok.


1. fold the paper in half forming a triangle. Creasing the fold with a bone-folder will give you a nice crisp edge - if you don't have one I'd run something smooth and hard over the folds, like maybe a ruler or credit card.


2. with the point of the triangle that is open at the top and the folded edge at the bottom, fold in one side of the triangle straight across reaching the other side (see picture below), then fold in the other side. Add a glue dot or a little adhesive under the top flap to keep it down.


3. now that it's folded it sort of looks star-shaped to me - at the top is two open points, fold down the top one over the folds you created in step 2 leaving the bottom one still up. In the picture below, the bow print is what is on the back side of the striped paper, you see it once you fold the front point down. This opens the holder into a pouch where you place your small gift or gift cards.


To finish I cut out a 2.5" circle and a bunch of green sprig punches (using both a Stampin' Up circle and sprig punch). Glued the sprigs around the edge of the circle using a glue stick, creating a wreath. Attach to the front with adhesive.


Cute right? And simple! I love cute and simple ;)


1.2.2016: hot buttered rum. yum. 


Monday, January 29, 2018

Folded Paper Pouch

I forgot about making these cool folded paper pouches at Ronda's a while ago, sorting thru photos today I came across them and thought I'd share - looking thru my photos I realize I am quite behind blogging a bunch of things! Apparently I make more than I have days to share hahah!!

I still love the other open top pouch I made for Ronda (all 120 of them - click here for that post) and continue to make them; the last time was at Christmas when I made one with a cover which I figured out how to do all by myself (!) to hold a few gift cards. See it at the bottom of this post (I forgot how cute it turned out!).

For this folded pouch you'll need a piece of cardstock 4 1/2" x 12".

Score both of the long sides 3/4" in, then turn the paper and score across the narrow side at 2 1/2" and 8". Starting at the top where the 2 1/2" score line is, remove 8" of the long sides as shown (leaving 3/4" x 4" piece that forms tabs at the bottom edge where the other score line is - see picture).

Fold the two side tabs in, apply adhesive to the back sides of the tabs (the white strips in the below picture shows where I applied double stick tape), then fold at the bottom score line so the tabs stick and create the opening. You can notch the top corners if you want a little more detail. Once again, look at the picture to try to figure out what I'm saying - it's not hard I just have issues describing what I'm doing!
To finish, put whatever goodie you want into the pouch (Ronda's held Stampin' Up gem embellishments which fit perfectly) and fold the top part down at the remaining score line (the one that you made at 2 1/2"). It will overlap the pouch opening a little bit.
She had me make these cute tags to stick on the front overtop of some twine I wrapped and tied to hold the flap down.


A few days later I made the same pouch to hold a gift card using double-sided patterned paper, I like the contrasting pattern on the inside. You can see I didn't notch the corners, tied pretty ribbon around to keep the flap closed and attached a card to finish it.


Here is the other paper pouch that I learned to make from Ronda, I added a cover over the open end to sort of turn a gift card holder into more of a present. Cute, right?

Monday, July 24, 2017

Paper Gift Pouches

I'll start by saying I love these paper pouches Ronda designed - just to get that out of the way.

She is working on a big order and needed 120 of these pouches made - to make one you need to score, cut, fold, tape, and decorate - naturally I opened my big mouth and volunteered to do them at home thinking I'd be able to whip them out in no time sitting in my craft room listening to music with no distractions. How bad could it be? Did I mention 120 of them? Yeah.....

So a couple days and like 11 hours later I finish. And I kid you not while packing them and all the supplies up to take back to her I see a stack of mini glue dots on the corner of my table and think to myself "what the? what are those for?" Oh sh...ugar, I missed a step. I'm not gonna lie that I debated ignoring the fact that I did them wrong and hope she wouldn't notice but that goes against my perfectionism and knew that I had to make it right. I didn't tell her that part and she doesn't need to know haha - they're done and look great and overall I love this project. And even though you might think I'll never want to make another one, I will. This is too great and useful to not make more of - you can scale them up or down to fit whatever you want (I actually made a small one to hold a gift card right after I finished number 120 of Ronda's!) and as long as you aren't making so many they really don't take very long at all!

To make a 4x6" like these you'll need:

  • one 6" piece of double sided cardstock (note all of these supplies are from Stampin' Up, I love love love this wood patterned paper, it comes in a bunch of different grains)
  • one 4x6" piece of the same paper
  • scissors, something to score with, adhesive (I used tear off tape and snail glue, glue stick would probably work)
  • 1 1/2 inch circle punch
Score the 6" piece of paper 1 inch in on the sides and 3/4" up on the bottom. Using the punch remove a half circle from the top middle edge that hasn't been scored. Purely for decoration and not necessary if you just leave it straight. Cut a square out of the 2 bottom edges where the folds come together, that's extra paper you don't need and makes the edges bulkier. Fold the 3 scored edges in.

Turn the scored paper over so the flaps are turned underneath, add adhesive to the bottom edge of the bigger piece and stick to the bottom edge of the 4x6" piece paying attention to which way you want the wood to show - Ronda did the same pattern on the front and back of the pouch with the contrasting pattern on the inside. Then glue down the 2 sides forming the pouch. 

after scoring, cut out the little square made at each bottom corner where the score lines intersect (see next picture) fold the edges in along the score lines, then turn the paper over
make a half circle notch on the top edge if you want. the white lines are where you'll be taping to the smaller paper


 tape the bottom edge of the larger folded card to the bottom edge of the smaller card as shown.

glue the 2 sides of the larger folded paper (laying down on the table in this picture) to the smaller piece of paper

back of the pouch
front of pouch


You could stop there but if you want to decorate like the ones shown here you'll need:
Look - this is my favorite one! Know why?
Yep, it's #120 ;)
  • sticky foam dimensionals
  • mini glue dots
  • paper lace doily
  • bakers twine
  • 1 1/2" white paper circle stamped with message or design of your choice. Ronda filled her pouches with packages of twine and stamped "we are cut out to be friends" on the paper circle. 
  • it's hard to see in these pics but behind the white paper circle is a little bit bigger circle punched with a starburst punch out of silver glitter paper. 
-Glue a paper doily to the front using snail glue or glue stick.
-Wrap twine twice around the pouch and tie in a little bow.
-Attach the glitter circle using 2 or 3 foam dimensionals (they give the design more of a 3D look and makes attaching over the twine easier).
-Using mini glue dots (here's what I missed) glue the paper circle to the glitter circle. The glitter paper is hard to stick to, the mini glue dots are stronger than snail glue or glue stick!