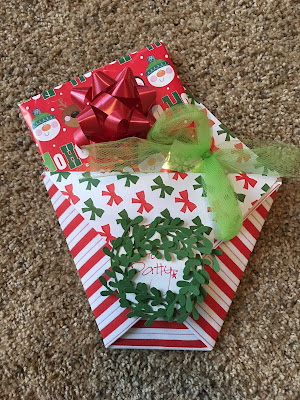
I watched a video that Ronda posted showing how to make this diaper fold gift holder; after all the times I've helped her at her Stampin' Up studio - and trust me, I've made a lot of paper gift holders for her - I've never seen this one! Super easy and it turned out soooooo cute I have to share with you. You're gonna want to do this for sure - it's now part of my commonly used techniques (along with wrapping paper gift bags, I use that ALL the time).
We just had our last holiday gift exchange so I made this holder with Christmas paper and decorations, obviously you can use this year round by using different papers, etc...You can also vary the sizes - this one I started with a 12" square piece of double sided decorative paper (this is Stampin' Up Christmas paper that is fuzzy on one side, how fun); if you don't use double sided paper then the inside of your holder and the flap that folds down in the front will be white - not bad, but I like the different patterns showing together. Do what ya' want! Change the size of the holder by changing the size of the square you start with - Ronda did as small as 6" square, up to a 12" one. The 12" is too big for a lone gift card, but if you have other things to put in the pouch, like I did, then big is ok.
1. fold the paper in half forming a triangle. Creasing the fold with a bone-folder will give you a nice crisp edge - if you don't have one I'd run something smooth and hard over the folds, like maybe a ruler or credit card.
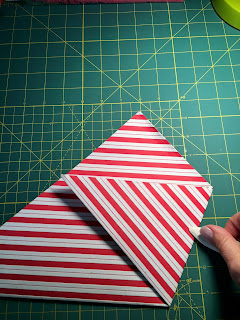
2. with the point of the triangle that is open at the top and the folded edge at the bottom, fold in one side of the triangle straight across reaching the other side (see picture below), then fold in the other side. Add a glue dot or a little adhesive under the top flap to keep it down.
3. now that it's folded it sort of looks star-shaped to me - at the top is two open points, fold down the top one over the folds you created in step 2 leaving the bottom one still up. In the picture below, the bow print is what is on the back side of the striped paper, you see it once you fold the front point down. This opens the holder into a pouch where you place your small gift or gift cards.
Cute right? And simple! I love cute and simple ;)


No comments:
Post a Comment