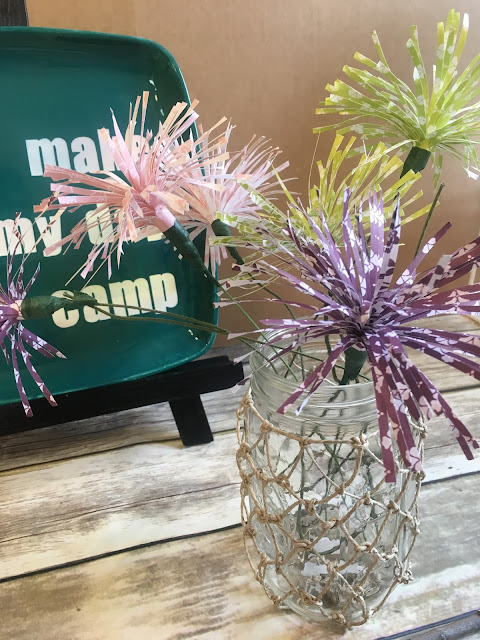
Remember the paper fireworks I posted before the Fourth? Well here's what I was making when I decided they would be good fireworks - spider mums. I wanted a simple airy flowery filler for Ronda's display table, saw these here and really liked them - and since I'm using Ronda's Stampin' Up double sided papers I thought they'd be perfect.
So you make the flower part just like the fireworks, only I cut the paper into 3" x 12" strips so they are a little thicker than the fireworks. I copied the directions I posted before, click here to see the instruction pictures and that post...
for the fireworks: 3.5"x8.5" strip of cardstock, fringe one long edge with fringing scissors (or just make thin cuts the entire length with sharp scissors). Tightly roll up the strip, run some glue (I used a glue stick) along the last one inch of end so it'll stay coiled up. Pull the fringe down, slightly curving it with your fingers as you go so it pulls apart and looks like a paper pompom. Add a drop of glue to the underside of the coil then insert a wooden skewer.
To make them into flowers is a tiny bit trickier. You need to wrap the bottom of the flower onto a piece of floral wire using floral tape, but the bottom of the flower is way bigger than the wire so there needs to be something between the flower and the wire so it tapers down more like a real flower would. I was unable to just tape the flower to the wire. The instructions I followed said she uses pieces of tissue paper wadded up to fill in the gap, that worked pretty good - I thought maybe cotton balls would work but the tissue paper is better. I struggled getting the flower, filler, and wire to stay together while I was wrapping with the floral tape so played around with better ways to go about doing that - I found that if you wrap regular clear tape around first it's so much easier to then wrap the floral tape around the bottom of the flower, around the filler, and then down the wire a few inches
To shape them, run your finger and thumb down each strand and bend slightly.


Super cute, easy and adorable.
ReplyDelete