Showing posts with label seasonal decoration. Show all posts

Tuesday, July 11, 2017

Spider Mum Paper Flowers


Remember the paper fireworks I posted before the Fourth? Well here's what I was making when I decided they would be good fireworks - spider mums. I wanted a simple airy flowery filler for Ronda's display table, saw these here and really liked them - and since I'm using Ronda's Stampin' Up  double sided papers I thought they'd be perfect.


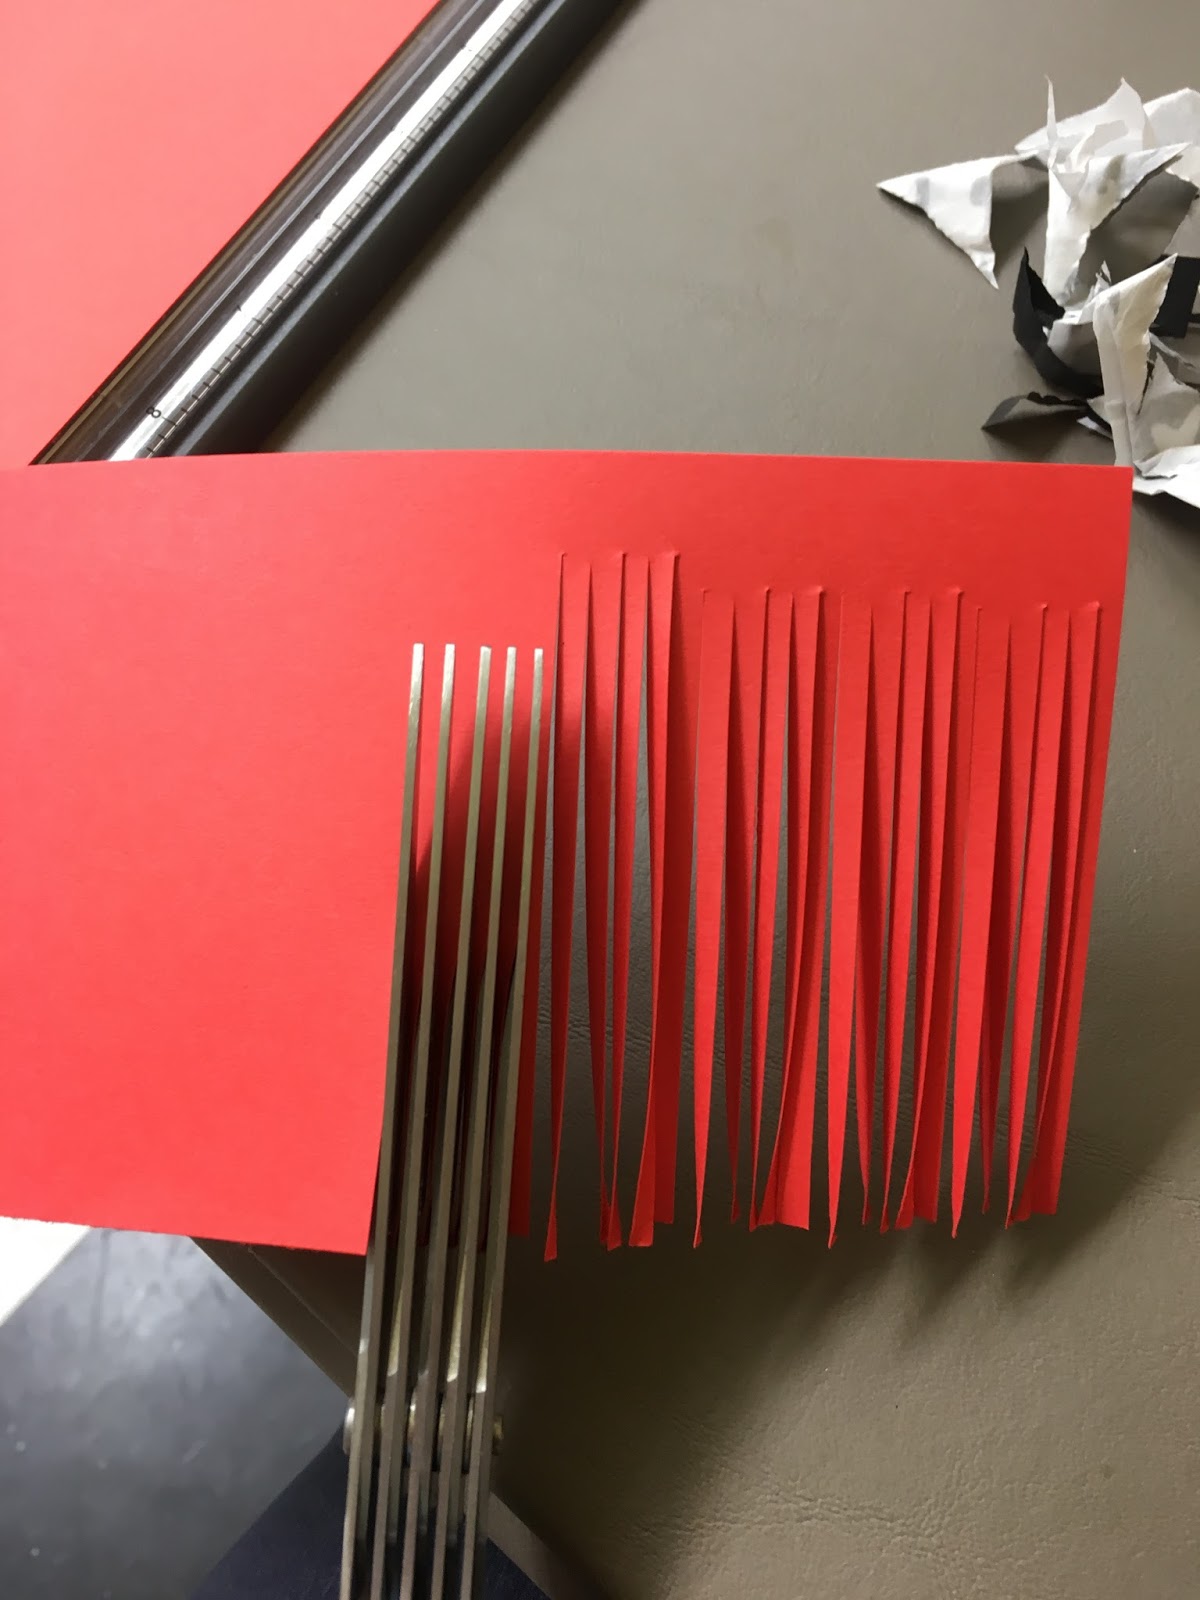
So you make the flower part just like the fireworks, only I cut the paper into 3" x 12" strips so they are a little thicker than the fireworks. I copied the directions I posted before, click here to see the instruction pictures and that post...

for the fireworks: 3.5"x8.5" strip of cardstock, fringe one long edge with fringing scissors (or just make thin cuts the entire length with sharp scissors). Tightly roll up the strip, run some glue (I used a glue stick) along the last one inch of end so it'll stay coiled up. Pull the fringe down, slightly curving it with your fingers as you go so it pulls apart and looks like a paper pompom. Add a drop of glue to the underside of the coil then insert a wooden skewer.

To make them into flowers is a tiny bit trickier. You need to wrap the bottom of the flower onto a piece of floral wire using floral tape, but the bottom of the flower is way bigger than the wire so there needs to be something between the flower and the wire so it tapers down more like a real flower would. I was unable to just tape the flower to the wire. The instructions I followed said she uses pieces of tissue paper wadded up to fill in the gap, that worked pretty good - I thought maybe cotton balls would work but the tissue paper is better. I struggled getting the flower, filler, and wire to stay together while I was wrapping with the floral tape so played around with better ways to go about doing that - I found that if you wrap regular clear tape around first it's so much easier to then wrap the floral tape around the bottom of the flower, around the filler, and then down the wire a few inches


To shape them, run your finger and thumb down each strand and bend slightly.


Monday, July 10, 2017

Fishnet Wrapped Mason Jar

When we decided on a beach theme for Ronda's seasonal display table I immediately thought about those cute net wrapped mason jars I see everywhere - in fact when I showed my sister the one I ended up making and told her she needed one she replied "yep, I own that. except I bought it". Well where's the fun in that haha? So I wanted to make one - did a little internet searching and ended up sort of following the directions I found here. Wasn't hard at all, you only need twine and a jar (and scissors) - I took lots of pictures to show you the process, if you need more directions click on the above link and see if her instructions help.


Directions:

1. Wrap a piece of twine around the top of the jar with a little extra to tie off. Lay it out on the table.


2. Cut 10 lengths of twine that are 32" each. Fold in half, put the loop under the short piece of twine that will go around the top of the jar, then feed the two ends thru the loop and pull tight. Repeat with all ten long pieces, space them out on the short piece, then tie the short piece around the top of the jar.


fold 32" piece in half and put under the short piece

bring the two ends up over the short piece and thru the loop, pull tight

repeat with all 10 long pieces, space them evenly 

then tie the short piece around the top of the mason jar. with the 10 knotted pieces hanging down


3. For the first row, knot two lengths of twine together about 1" down from the top. Repeat the whole way around. For the second row continue knotting 2 lengths together making a diamond pattern. Repeat each row until you get to the bottom of the jar - note you are creating a net of sorts and it will stretch, once I got towards the bottom I turned the jar over and stretched the twine to see how many more rows I needed. Once you have created enough net to cover the jar tie all the little ends together underneath the jar, try to make them somewhat even so the jar will sit straight when upright.
 
take two lengths and tie them together about 1" down from the top

 repeat around the jar to make the first row.

repeat for each row


stretch the net a bit until it looks right and is long enough to be able to wrap around the bottom

then start knotting all 20 of the ends together to hold the net in place.

try to space the knots so they aren't all on top of each other in one place so the jar sits flat and not all wobbly. 

4. Trim off any tails - you could finish this with additional twine wrapped around the top of the jar if you want. 

For Ronda's table I filled them with paper spider mum flowers; sand, shells, a candle, etc. would look good too!

I found some instructions here at itallstartedwithpaint.com

Friday, July 7, 2017

K-Cup Craft: Twine Light Shades

Yep, it's another k-cup craft :). I'm pretty sure Ronda was hoping I'd run out of ideas and stop making k-cup crap for her display table... after making ghosts, snowmen, bunnies, and birds she might be over it haha but I'm not! So here goes:


These are super simple - all I did was hot glue some twine around the cups and run a little piece of wire thru the top to form a loop. Then tie onto a long piece of thin ribbon to form a garland. That was a little plain so I cut out a few paper starfish (found a free template online and used Stampin' Up patterned paper), made 2 little notches in the middle of each one and threaded them onto the ribbon in between each k-cup light shade. Nice and beachy for the display table I'm working on!


Note: it would be cute to poke a hole in the top of the k-cups and insert mini twinkle lights in them - like what I did with the ghosts and snowmen but I thought I'd change it up this time and just make a garland instead with the paper starfish.


click to see other k-cup posts:
snowmen
ghosts
bunnies
birds

Monday, June 26, 2017

Paper "Fireworks"


I'm working on making things for Ronda's seasonal display table (click here  for Halloween and here for Fall), we're doing a "beachy" summer theme and I'll show you all the fun things I've been making for her in the next few posts. While making some pretty paper flowers I thought how much they looked like fireworks if I used red, white, and blue paper - they'll be perfect for Fourth of July decorations.


Starting with a 3.5"x8.5" strip of cardstock, fringe one long edge with fringing scissors (or just make thin cuts the entire length with sharp scissors). Tightly roll up the strip, run some glue (I used a glue stick) along the last one inch of end so it'll stay coiled up. Pull the fringe down, slightly curving it with your fingers as you go so it pulls apart and looks like a paper pompom. Add a drop of glue to the underside of the coil then insert a wooden skewer. Done. I did the flowers a little differently and will share that later (click here to see the spider mum post).