I just learned how to make these 3-D paper stars, they are very easy so you can whip some out before the Fourth of July (which is coming up so quickly!) no problem - all you need is paper and scissors. I did find that regular paper is easier to fold than cardstock, practice on paper before you start folding your good paper. When I did them out of cardstock I used a bone folder to get a nice crisp crease.
Wouldn't these be cute if you hole-punched them and added a little hanger (twine, jute, yarn, thread, whatever); then hang around the house, as a garland, in the windows, off a table...options are endless! I'm going to remember these at Christmas time and make some in either Christmas-y papers or silver and gold - it'll be so pretty! Oh, or as a gift topper? I think that'd work. Anyway - I took lots of pictures and also made a little video to show you how to do this; as always I struggle with describing how to do it hahaha - it's much easier to do then I make it look!
step 1: fold an 8.5 x 11" piece of paper in half, lay the paper down with the fold at the top away from you:
step 2: bring the top left corner to the middle of the right side of the paper and crease smooth:
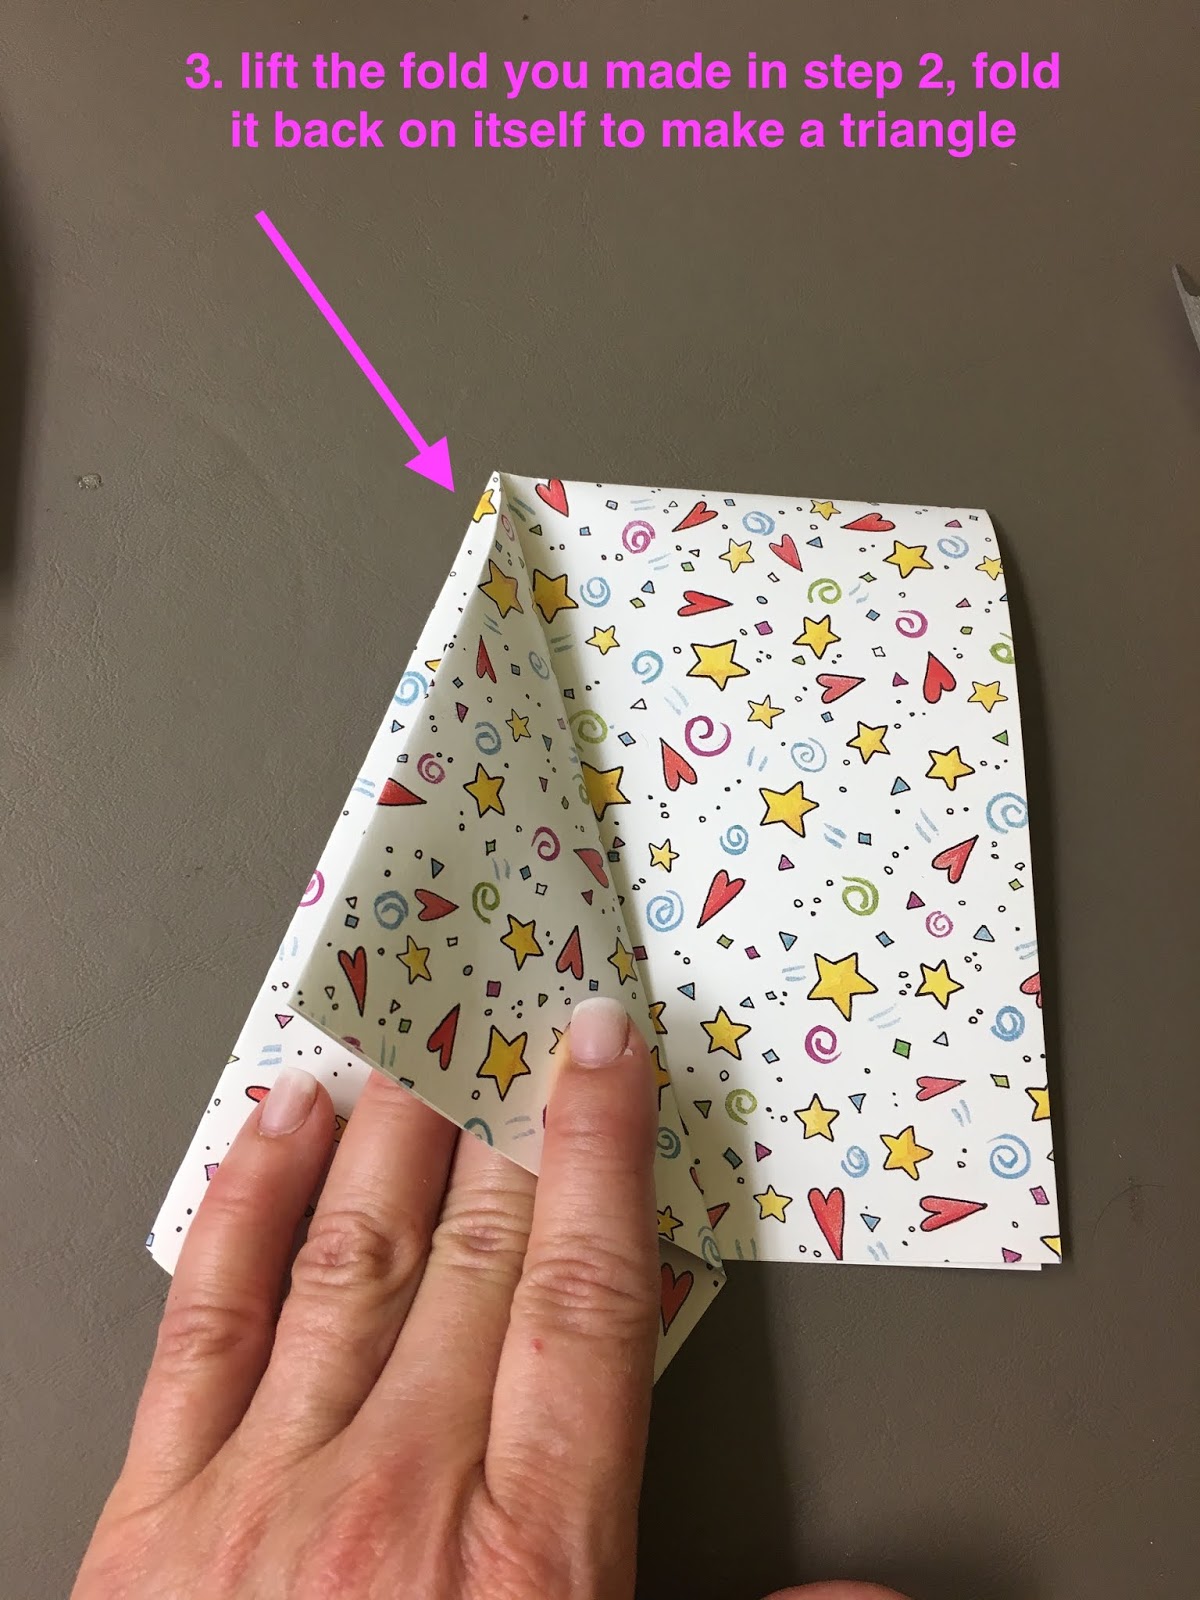
step 3: lift the fold you just made (originally it was the top left corner) and fold it back on itself following the line of the paper underneath. It'll make a triangle shape:

.
step 4: fold the right side of the paper over the triangle you made in step 3, crease along the edge:
step 5: when you folded the right side of the paper over the triangle in step 4 there is a piece overhanging what is underneath, fold the overhang back on itself following the edge of the paper underneath:
step 6: see the bottom edge of the folded part in the middle above? You are now going to cut above that edge all the way across, snipping off the top of the folded package. Follow the edge of the bottom to know what angle to cut at (follow the arrows in the next 2 photos):
step 7: unfold the small part you just cut off, there's your star! Now you just need to re-fold the creases so the ones on the long points (the star arms) are creased up, and the folds on the star sides are down (note when you unfold the star some of the creases aren't in the correct position as shown in the picture below):
after you crease the long points up and the sides down, you have a 3-D star:
You can change the size of the stars by using different pieces of paper, or cutting the top off closer to the point. Have fun!
click
here for original source
6.29.18: Lisa's
button flag art
6.29.17: make a
red, white, and blue windsock
6.29.16:
patriotic potato salad
Happy moment ~
watched a turtle dig a hole in the dirt and lay her eggs, so cool!


 .
. 


No comments:
Post a Comment