Showing posts with label sprinkles. Show all posts

Wednesday, August 1, 2018

White Chocolate Brownies with Sprinkles

Made these for my niece G's birthday - we took them to her last week (on our girls road trip) and didn't want to make cake that would fall apart or cupcakes that might dry out - so googled for other birthday dessert ideas that would travel well and found these white chocolate brownies full of sprinkles. They are pretty, chocolatey (even though it doesn't look it), and they arrived fresh and in one piece. Can't ask for much more than that in a birthday dessert! She kept cutting off little pieces saying she couldn't stop eating it - I'll take that as they are yummy in addition to being pretty :)


  • 6 tablespoons very soft butter
  • 8 oz. white chocolate (I used chips)
  • 3/4 cups granulated sugar
  • 2 eggs
  • 1/2 teaspoon salt
  • 1 teaspoon vanilla extract
  • 1 1/4 cup all purpose flour
  • 1/3 cup sprinkles (I used regular sprinkles in the batter and topped with my sprinkle mix - click here for that post)
Directions:

  1. Preheat oven to 350'F.
  2. In a glass bowl, melt the white chocolate according to package instructions (I put in micro for 30 seconds, stirred, then did 15 more seconds and stir again until super smooth)
  3. Once melted and smooth, stir in the softened butter. Add sugar and mix will with a wooden spoon. Mix in the salt, vanilla, and eggs until incorporated. Stir in flour until well combined. Fold in the sprinkles until evenly distributed.
  4. Spread batter into a greased 8" pan and add a few extra sprinkles on top. Bake for 28 minutes until it's set and lightly browned. Let cool before cutting into squares. 


serves 16. Found the recipe here. 

note: I cut parchment to fit the pan and lightly sprayed with non-stick spray so I could easily lift them out of the pan. Then I put in a large baggie to transport. 


she's a teenager and wouldn't
let me take her picture!! 


two years ago: see the earrings I made out of fish lures!

Saturday, September 16, 2017

Make My Day Camp Turns 2!

Well that year went fast. Feels like I just wrote about turning 1 and now it's 2 already! I had no idea 730 posts ago that I'd still be doing this 2 years later - or that you'd continue to read my blog! Thank you SO much for reading, sharing, liking, and supporting my crazy/hectic/scatter-brained/silly/and hopefully useful/helpful/inspiring blog. I appreciate all of you!


Since I have a never-ending list of things I want to try (it'll always be never-ending because I continuously add to it haha!), I don't have any plans to stop posting and sharing with you - and if you have any ideas you'd like me to try, or great projects you've done and would like to share, please let me know :)

To celebrate I'm holding a drawing again for a $25 Michaels gift card - to enter either leave me a comment below, or go to Facebook and follow the directions there. I'll leave it open until Monday 9/18 at noon e.s.t. then draw a random name from the list of people that do either one and let you know. Good luck!

Two years ago today: it all started with sprinkles 


Saturday, September 2, 2017

She's 14!

Happy Birthday to my blogger buddy (and niece) Brooke!


She celebrated with her friends yesterday and asked if I'd make her a cake (like she had to ask, of course I will hahah) then sent me a beautiful inspiration picture of a cake she found on Pinterest and I thought "great, no pressure" but told her I'd do my best ;). It actually wasn't hard to do at all, just super super messy because of the mounds of sprinkles involved!

I baked a 2-layer doctored-up vanilla cake mix (extra egg, sour cream, vanilla, sprinkles in the batter) and made a double batch of buttercream frosting and tinted it bright pink. My favorite new thing is combining different kinds of sprinkles together to make a really cool new mixture - I literally mixed together just about every kind of sprinkle I had in my cupboard to come up with this fun idea...there's different sizes and shapes, multi-colored sugar, silver balls for sparkle - love this!


Frost the layer cake making the sides and top smooth - before it sets up pat on handfuls of the sprinkle mixture halfway up the sides. Around the top edge pipe big mounds of frosting (they remind me of Peeps!) - I did 14 mounds for her 14th birthday, then pile on sprinkles in the middle of them. I mean really pile them on! When you cut the cake sprinkles just fall off which was really cool actually and everyone loved it. They loved this cake so much in fact, that 10 girls ate the entire thing in probably 15 minutes! Seriously, I don't think I've ever had a cake just devoured like that - got home and Dave goes "there wasn't even a tiny sliver left for you to bring home?" HAHA!


Saturday, December 17, 2016

Chocolate Dipped Pretzel Rods


Dave is going to a potluck Christmas Party today and didn't want to take anything because "they always have SO much food"...but I worry that makes him look like a loser guy whose wife didn't send anything hahahah - so I made him easy dipped pretzel rods and wrapped them in pretty bags so people can just take them home if there is too much food and they don't want to eat them right away. Super easy, a tiny bit time consuming only because when you dip them in the chocolate it takes a minute to shake all the excess chocolate off - if you leave too much on then it pools weird after setting up.

I didn't take pictures as I was making them, really you don't need any. Simply melt white, semi-sweet, or dark chocolate; dip about 3/4 of a pretzel rod in it (use a spoon or knife to help with the coating) and shake off until pretty smooth; then immediately sprinkle on whatever you want - I used some Christmas sprinkles, little red balls, green and red sugar...all of it looks good so just use your judgement. You can mix things together, or stripe the sugars, roll them in the toppings or just sprinkle on.

Wednesday, September 21, 2016

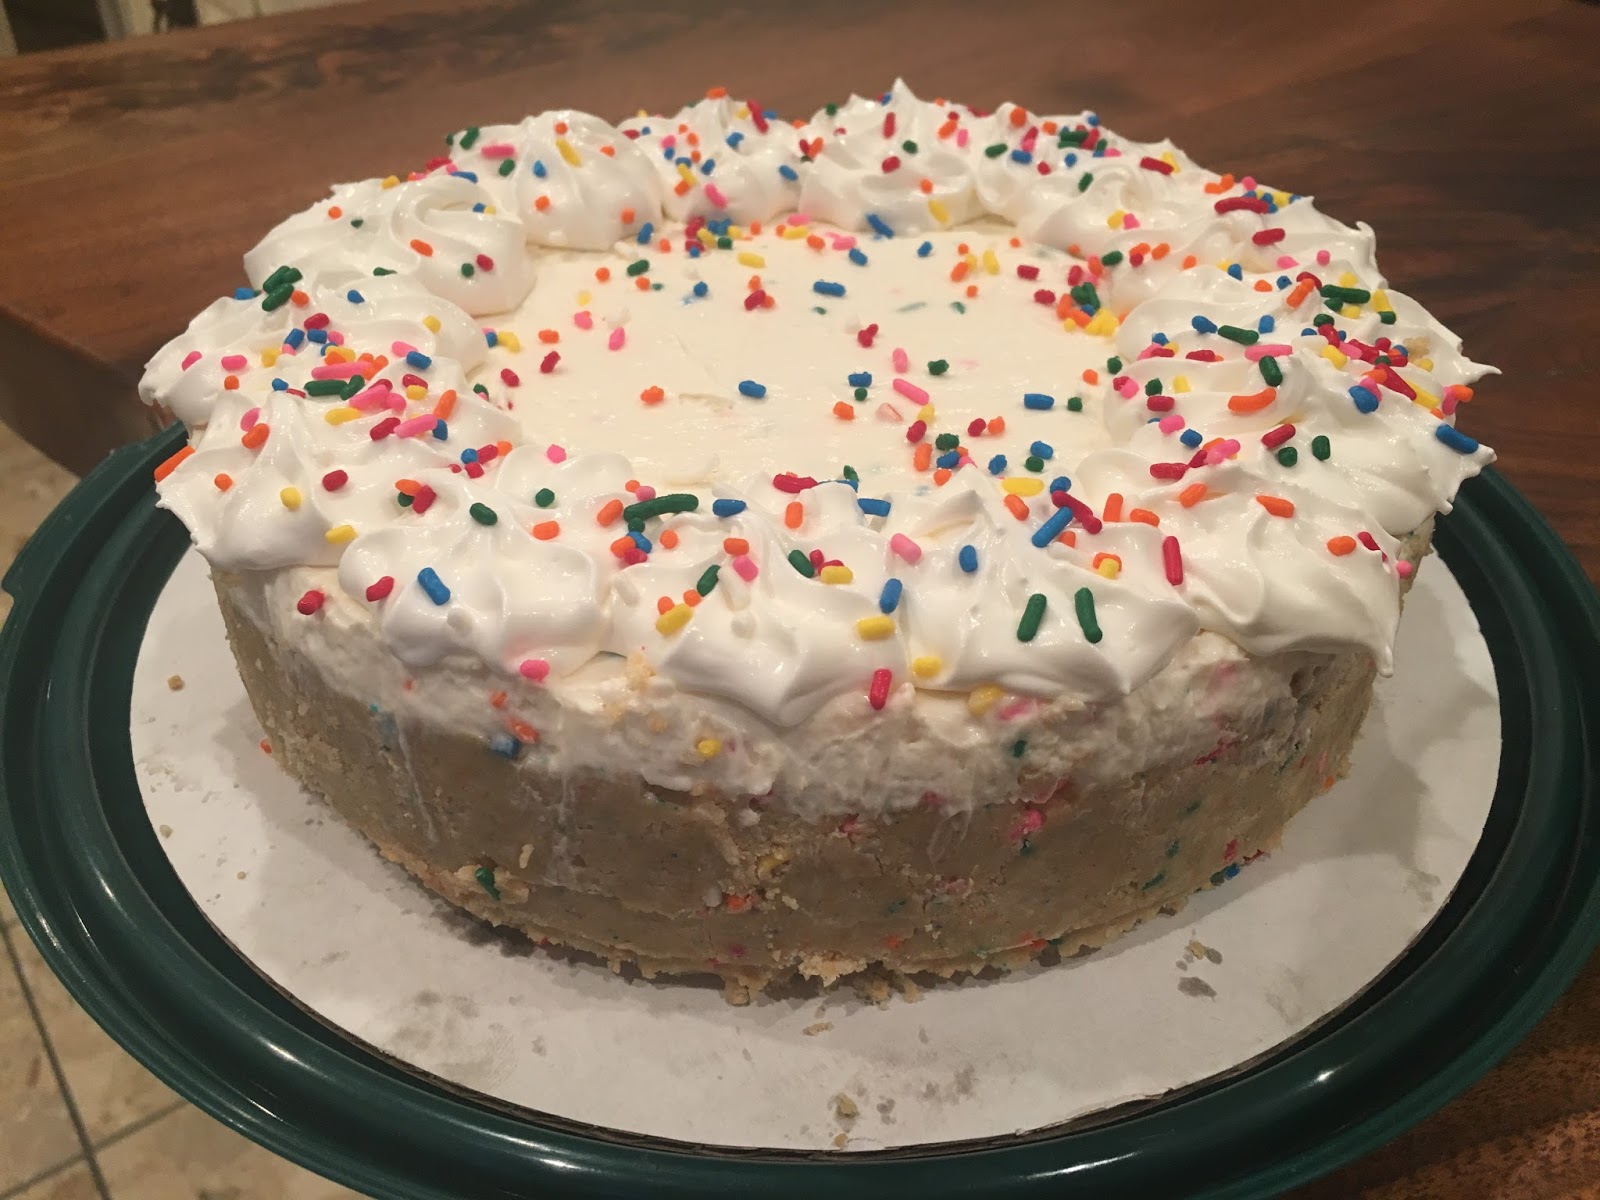
Sprinkles No-Bake Cheesecake

Funny story - at my sister's work they take turns bringing in birthday treats, you bring for the person who has the next birthday after yours. Every year when it's her turn to bring in for the guy (I'll call him P.) who has the birthday after her (and it's always been P., no one has hired in to change the order) I always volunteer to make the dessert for her because...well I think we all know why - she dislikes baking but I love it! So over the years I've made quite a few different things for her to take in, P. doesn't like buttercream frosting so I come up with something other than the usual frosted cupcakes for him (last year it was a giant whoopee pie). Well this year another man has hired in that shares the same birthday with P. - they were all discussing this and someone said they were sorry for my sister cuz now she'll have 2 people to bake for and P.  goes "no, I feel sorry for her sister!". Ha! That made me laugh...
Add caption

Anyway - this year I decided to make Sprinkles No-Bake Cheesecake and it turned out pretty good. It tastes great, there are just a couple things I'd do different next time - here's the recipe I followed and then I'll post my notes after.

Crust:
2 1/2 cups Golden Birthday Cake Oreo crumbs (I found it's about 25 oreos FYI)
3 T. melted butter
2 T. sprinkles

Filling:
24 oz. cream cheese, room temperature
3/4 cup granulated sugar
2 Tablespoons flour
3 teaspoons vanilla extract
1 1/2 teaspoon butter flavor
3 T. sprinkles, plus more for decorating
12 oz. Cool Whip, divided
*note I added a big spoonful of sour cream to the batter, I like that flavor in cheesecake - you do not have to do this and it's still delish.

Instructions:
1. Combine oreo crumbs with melted butter and sprinkles, press into the bottom and halfway up the sides of a 9" springform pan. Set in the refrigerator to firm.
2. Mix cream cheese, sugar, flour, vanilla, butter flavor together in a large bowl until smooth and well combined.
3. Gently stir in 8oz Cool Whip and sprinkles.
4. Pour filling evenly into the crust and smooth the top.
5. Refrigerate for about 4-6 hours or until firm.
6. Remove cheesecake from springform pan and put on a cake plate. Top with remaining whipped cream and additional sprinkles. Refrigerate until ready to serve.

Notes: spray the springform pan before putting the crust in to make it easier to remove the cheesecake from the pan. make sure the crust around the sides of the pan is not too thin or it will crumble when you remove the finish cake from the pan - try to get it even all around the sides and the bottom. I put the cool whip in a decorating bag and piped stars around the top and added sprinkles, it wanted to spread though and didn't stay in high peaks. I would probably make fresh whipped cream in the future for decorating - or just spread the cool whip evenly across the top (or swirling it around with a spoon would be pretty) and then add sprinkles. Oh, and you will use a small bottle of sprinkles for this cake so make sure you have enough!
I didn't know there was such a thing as birthday cake oreos! Where have I been?

Sarge wondering why I'm holding this pan over his head..


I based the idea for this cheesecake from this recipe (click here to see it), then changed it a bit.

Wednesday, September 16, 2015

Sprinkles!

Saturday was the 6th anniversary for my husbands ukulele group - yep, I said ukulele group - he asked me to make chocolate cupcakes with chocolate frosting (the sprinkles were my idea, he's a man and doesn't care if they look pretty!). I didn't want to tell him that I feel like chocolate cupcakes tend to be dry and just made sure to watch them closely so they wouldn't overbake at all. I made the cake using a boxed mix (triple chocolate fudge - why not use a shortcut when they taste just as good as homemade!), it said to bake for at least 34 minutes and I took them out at 30, they turned out perfect. I also measured exactly 3 tablespoons into 24 muffin cups and ended up with uniform cupcakes for once (I usually just eyeball it and get some that are shorter than others!). 


Topped with homemade chocolate buttercream (click for the recipe, it's delish and that totally makes up for using a cake mix in my book. I have an aversion to store bought canned frosting - there really is a huge difference - but I don't know why that wouldn't work the same as homemade in regards to piping in on your cupcakes...but really, homemade is pretty simple and tastes SO much better - just sayin') that I piped onto the cakes using a 1M tip and a #16 decorating bag - I put the tip at an angle at the top of each cake and squeezed the bag while making a spiral pattern. 

Then came the pretty sprinkles - I have found that if I add them after frosting each cake, they tend to stick better than if you wait and do them after you have frosted them all. He didn't bring any home after the party and I'll take that as a sign they were a hit!