Wednesday, May 20, 2020

Jen's 'Miracle' Pork Chops

From my sister, the whiner:


Well my sister isn't feeding me often enough and turns out the darn people in this house think they need to eat EVERY SINGLE DAY. Saw this recipe on facebook (doesn't everyone get their recipe's from facebook?) so decided to give it a try.  

Looks SUPER easy and I like everything in it, so what's not to like. First issue though was I had to send Brooke to 3 different stores to try and find the french onions. Why would those be gone during a quarantine? Why is that something people would buy the store out of? Are enough people making Green Bean Casserole that this is a thing? Anyway. So I followed the directions from the facebook screen shot attached. 


Really did just season the chops, spread the sour cream on it, sprinkle the onions and bake. Their description said something magical happened. That's a lie. Nothing "magical" happened. The beans got slightly soggy like they do with green bean casserole. Not what I would define as "magical". The family wasn't super impressed and I definitely liked it better than they did but that could be because neither of them are cooking dinners night after night. I thought this was pretty good as a change and a nice easy recipe. They thought they would have preferred if I had used cream of mushroom soup instead of sour cream. True that would have provided a different flavor but at that point EVERYONE uses cream of mushroom soup on their pork chops so the onions would have been the only change. Maybe I'll try that next time. In the mean time this recipe was somewhere between decent and magical.


Tuesday, May 19, 2020

Tip-sy Tuesday: freezing food

I saw this info about freezing food in an old Rachel Ray magazine and I didn't know some of it so thought I'd pass along in case you are interested. With food shortages and hoarding it's good to know that I can freeze some of this stuff for later!

5 UNEXPECTED THINGS YOU CAN FREEZE:
  • MILK pour into freezer bags and freeze flat. 
  • EGG WHITES freeze each white separately in an ice cube tray. Once frozen, store them in freezer bags.
  • BUTTER buy it on sale with no fear of it spoiling. Store sticks in the paper wrap in a freezer bag.
  • AVOCADO save ripe avocados by mashing them with a bit of lemon juice and packing in airtight containers.
  • NUTS AND GRAINS store in airtight containers or freezer bags to prevent them from going rancid at room temperature.
5 THINGS YOU SHOULDN'T FREEZE:
  • COFFEE the aromatic oils in the beans break down when frozen, resulting in a less-flavorful cup.
  • WHOLE EGGS yolks become gummy when frozen.
  • RAW POTATOES they'll turn black and gritty. Cooked potatoes, however, are fine to freeze.
  • CHEESE many fresh cheeses will weep liquid and become gritty when frozen. Grated cheese and blocks of processed cheese can withstand the cold but after freezing are best used for melting.
  • ONIONS they turn mushy and watery when thawed. 

HOW TO THAW FOOD FROM FREEZER:

1. The best way: IN THE FRIDGE Set frozen food in its wrapper on a plate to catch drips. Foods thawed in the fridge will last 2 or 3 more days than those thawed using other methods.

2. The shortcut: IN COLD WATER place food in an airtight bag and submerge in cold water; change water every 30 minutes. Using hot water is a no-no: It encourages bacteria.

3. The cheat: IN THE MICROWAVE unwrap foods and thaw using the defrost or low setting. If meats start to brown, remove and cool before continuing. Cook immediately.

4. For baked goods: ON THE COUNTERTOP bread and other frozen baked goods are safe to thaw on the counter. Keep them loosely covered with their wrapping from the freezer and place on a wire rack to prevent condensation and sogginess. 


STOCK YOUR FREEZER PANTRY 
(make extras of these things to keep on hand for quick use):
  • PANCAKES reheat them in the microwave or toaster oven
  • BURRITOS bake one for a snack or a few in a casserole
  • COOKED RICE stir into soup or toss with salads
  • BREADED OR BATTERED COOKED CHICKEN CUTLETS instant dinner!


Monday, May 18, 2020

Kyle's Tree Shelf

Mickey just sent me these photos of the 5' shelf Kyle made from a tree - I love it SO much and am beyond jealous, I want this SO bad!! I told her that and she wrote "well I have extra, but you'll have to come and get it". Might just be time for a road trip to North Carolina! 

                    
Here's what she wrote about the steps he went thru (and she said it was a lot of work - but I think it was totally worth it. LOL easy for me to say, right?!):

So he cut down a magnolia tree. Shaved it down with his chain saw. But then he couldn’t get it skinny enough with his chain saw, so he took it to a guy with an Alaskan saw mill who sliced it for him. Then brought it back and sanded it down, and stained! Used the same pipes to hang as we did the herb boxes (click here for that post).


before taking it to the saw mill
the underside

Sunday, May 17, 2020

Around the Campfire 🔥 (week 20)

Dear Campers ~

A quick recap of what happened at camp last week in case you missed anything:

Posts ~
5/10: ðŸ”¥week 19
5/11: pasties
5/12: My sis is hungry: pasty review
5/13: churros
5/14: barre workout
5/15: baked chimichangas
5/16: Jane's baked beans

What's Cooking ~
  • meaty minestrone (recipe soon!), grilled cheese
  • grilled chicken sausage, beans baked in spaghetti sauce with feta, roasted green beans
  • baked panko crusted scallops, couscous, kale salad
  • pesto marinaded grilled chicken, spinach ravioli
  • grilled marinated pork tenderloin, peas with pine nuts
  • steak, roasted potatoes, caesar salad
Miscellaneous stuff keeping me busy ~
  • made a couple more masks, still haven't put all the supplies away in case I need to make more
  • read 'coconut layer cake' by Joanne Fluke. She writes a series of light murder mysteries solved by a baker, and includes recipes which is fun. Plot line of this one was pretty ho-hum ⭐️⭐️ but I got what appears to be a couple good recipes out of it so not a complete waste of time
  • I probably should own up to this, but after finishing the True Blood vampire series last week that I've whined about for a while now but continued to read - I started reading them again! Because by the time I got to the end of the series I couldn't remember a bunch of things that I know want to know! I didn't pay enough attention first time thru because I just thought they were so stupid LOL but now that I've invested so much time I want to remember some of the beginning story lines. I know, I know, ridiculous right?!
  • planted more pea and bean seeds, and against my good judgement went ahead and planted some tomato plants I found - rule of thumb is to wait until Memorial Day but I checked the Farmers Almanac and it appears I'm safe. I will cover them for the next few nights to help harden them off and get them used to the weather.
Hope you had a great week - staying productive, keeping a schedule, creating while you're waiting (or maybe you're in one of the lucky states that has opened back up? In which case I hope you're out there living the dream hahah). See you next week for more fun projects, recipes, and whatever else I can think of to make.

Sincerely ~


Jill
camp counselor and true blood hypocrite 😂

PS: I really wanted to walk 5.17 miles today (May 17) and we live in a 517 area code. But it's raining and chilly,  I'm seriously procrastinating and pretty sure it's not gonna happen this year!

5.17.19: pet emergency care
5.17.18: make a party planner
5.17.17: pallet garden
5.17.16: change a duvet cover


Saturday, May 16, 2020

Jane's Baked Beans with Burger

We had sausage and baked beans last night for dinner and it reminded me that I've had this recipe from Jane for a really long time and keep forgetting to share it. Mine are nothing like this so that's not what triggered the memory hahahah, I guess it was just "beans" that did it. Her recipe is so good, and different - have you ever had burger in baked beans? I'd never heard of it, and it's delicious!


BAKED BEANS with BURGER
  • 1 pound bacon, diced
  • 1/2 pound ground beef
  • 1 onion, chopped
  • 1 can (16oz) pork and beans, with liquid
  • 1 can (16oz) northern beans, with liquid
  • 1 can (16oz) butter beans, with liquid
  • 1/2 cup brown sugar
  • 1/3 cup white sugar
  • 1/4 cup barbecue sauce
  • 1 Tablespoon mustard
  • 2 Tablespoons molasses
  • 1/4 cup ketchup
Fry bacon just until it's limp and drain off grease. Remove bacon and, in the same pan, brown the beef and onions. Add the remaining ingredients and mix well. Bake at 375' for 1 1/2 hours. For a crunchy top and less moist beans, bake uncovered during the last 30 minutes.


Note: her recipe card doesn't say what to do with the bacon after removing it from the pan. I'm assuming she added it along with the other ingredients before baking the beans.

5/21 update: Jane brought these beans to a bbq yesterday and OMG, they are SO good! Everyone was raving...

Friday, May 15, 2020

Baked Chimichangas

Made these for dinner - pretty healthy, easy to make, and we loved them. I took lots of pictures but really, it's just filling inside a tortilla and rolled up like a burrito. Feel free to change the filling up, I saw a few different recipes for these and ended up making my filling with leftover rice and black beans. You could just do chicken and cheese, or change the meat, skip the beans, whatever you like or have on hand. You definitely want toppings tho, the plain tortilla would be a little dry (for me, but then again I'm a dipper!).

  • 2 cups cooked chicken, chopped or shredded
  • 1 cup salsa
  • 1 cup cooked white rice
  • 1 can black beans, rinsed well
  • 1 teaspoon Mexican spice blend (or cumin, chili pepper, red pepper flakes, oregano, etc.)
  • 1 cup shredded cheddar cheese
  • 6 (8") flour tortillas
  • 2 Tablespoons butter, melted
chopped tomatoes, sour cream, guacamole, salsa, and shredded cheese for topping

Instructions:

Preheat oven to 400'. Combine chicken, salsa, rice, mexican spice blend, and cheese. Place a spoonful of black beans in the center of each tortilla and smash a little bit. Top each with about 1/3 cup of the chicken mixture. Fold opposite sides over filling. Roll up from bottom and place seam-side down on a baking sheet. Brush with melted butter. Bake at 400' for 25 minutes or until golden brown and crispy. Garnish with desired toppings.


Thursday, May 14, 2020

Barre Workout

My friend Athena is a dance teacher in California - when I'm out there I love to tap with her and my tap friends, she also does barre dance class and a world dance class. One upside to the stay at home world we are in right now is that she has moved her classes to online so now I get to keep doing class with her! She tried having live class thru Zoom and Facebook Live but there is too much lag, so she's now recording the workouts and putting them on YouTube for all to see. Thought I'd share with you today in case you're starting to notice a possible 'quarantine 15' weight gain LOL or if you just want to move and have some fun. I'm new to the world dance class and it's my new favorite - especially since I'm doing it at home with no one except Sarge watching so it doesn't matter if I don't have the moves right hahahaha.

For real - here he is watching Athena on my iPad, taking up my space!


Below is her most recent barre class, search Athena Guinchard on Youtube and you'll find more of her videos. Have fun!


5.14.19: tipsy tuesday: cleaning the microwave
5.14.18: organizing die cut templates for the Big Shot
5.14.17: one of my favorite cakes - raspberry and whipped cream
5.14.16: make a birthday balloon card

Wednesday, May 13, 2020

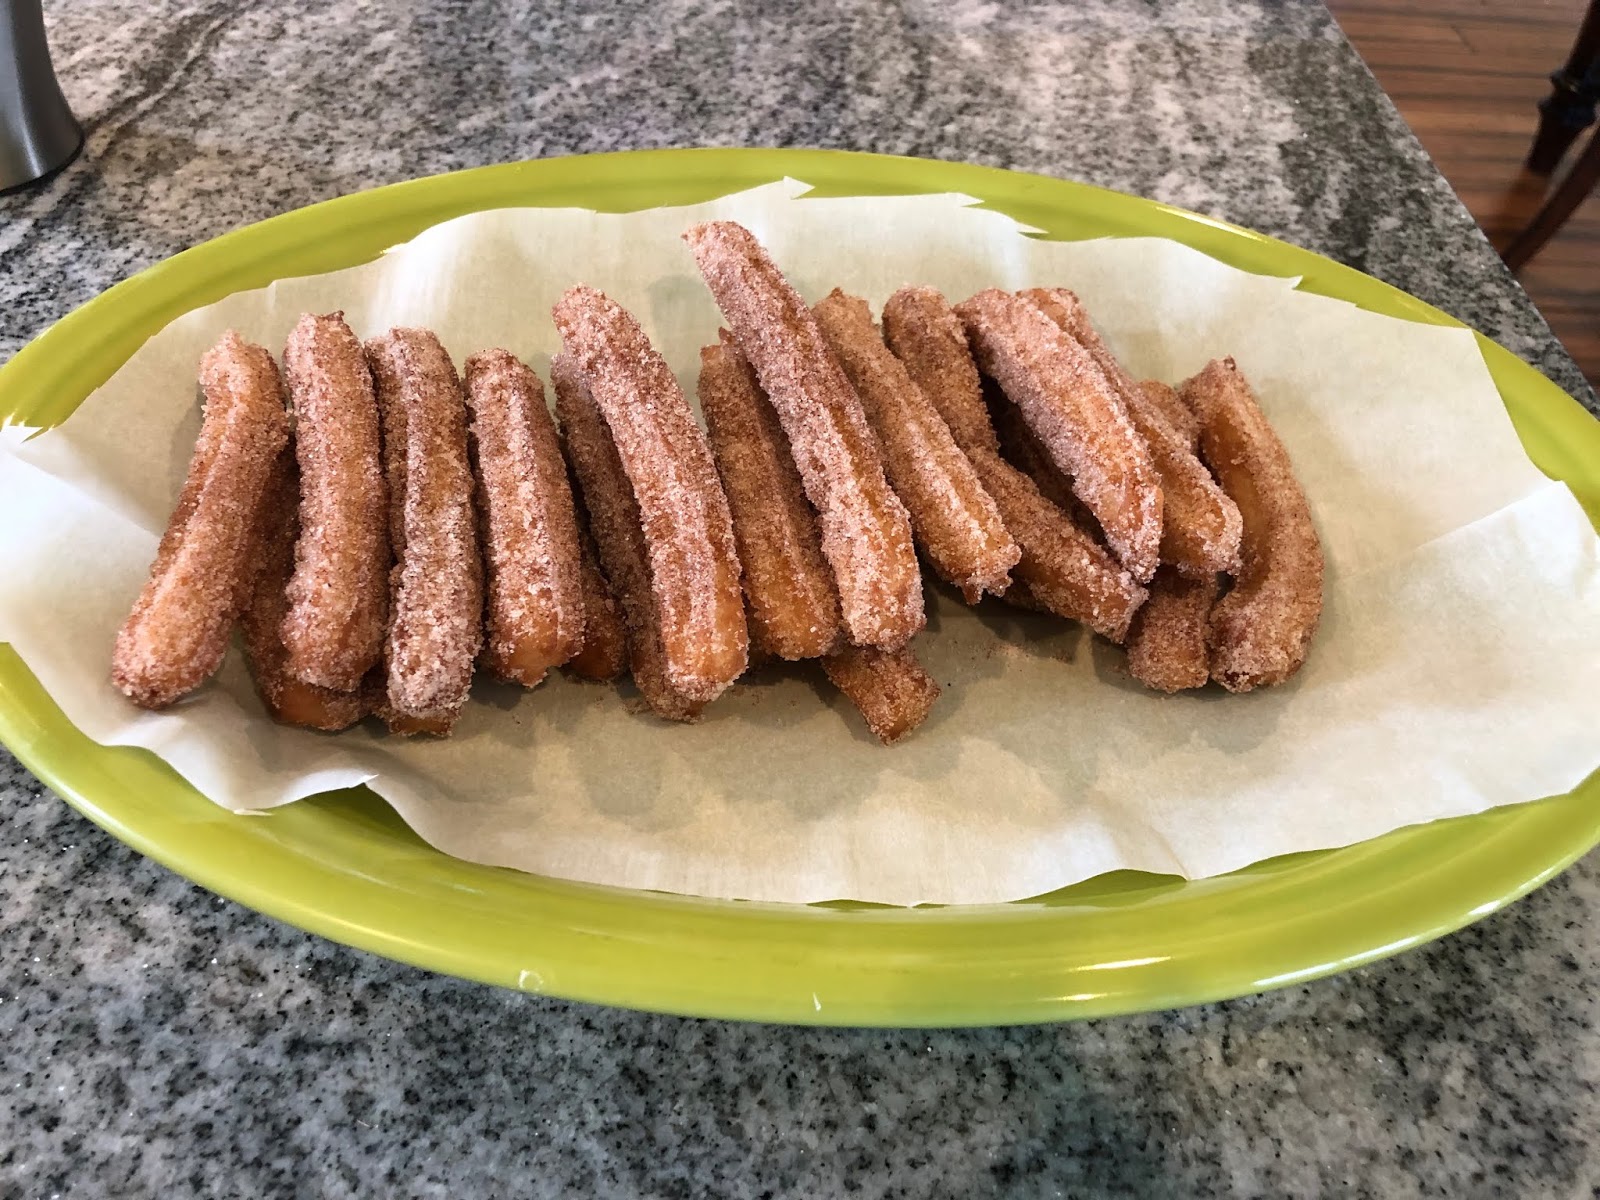
Churros


Natalie sent me these pictures of her and Jimi making churros - she said they turned out great and are easy to make. I've never made churros before, I've always thought they'd be difficult but now that she's tested it out I'm not as intimidated to try doing it (and Dave would be thrilled! He loves them).

Whatcha think? This would be a fun (and delicious) boredom buster right?!!


 Ingredients:

  • 1 cup water
  • 2 1/2 Tablespoons white sugar
  • 1/2 teaspoon salt
  • 2 Tablespoons vegetable oil
  • 1 cup flour
  • 2 quarts oil for frying
  • 1/2 cup white sugar, or to taste
  • 1 teaspoon ground cinnamon


Directions:

  1. In a small saucepan over medium heat, combine water, 2 1/2 T. sugar, salt, and 2 T. vegetable oil. Bring to a boil and remove from heat. Stir in flour until mixture forms a ball.
  2. Heat oil for frying in deep-fryer or deep skillet to 375'F. Pipe strips of dough into hot oil using a pastry bag. Fry until golden, drain on paper towels.
  3. Combine 1/2 cup sugar and cinnamon. Roll drained churros in cinnamon sugar mixture. 


5.13.19: macrame owl (I have him hanging from my rear view mirror, so cute!)
5.13.18: coriander crusted pork tenderloin
5.13.17: parachute cord dog collar
5.13.16: Brooke's emoji cookies

Tuesday, May 12, 2020

My Sis is Hungry: Pasties

I posted about making pasties yesterday, along with the recipe. Here's a follow up post with my sis's review:


WOW. These look AMAZING. We have had Pastie’s from the UP before and to be honest these look even better than those. Those were brought back by the husband in his hot car in a paper bag but still - these were impressive.
First of all the crust was fantastic.  The presentation was fantastic.  The slits in the top, the pepper and whatever on it. Looks fantastic. Then you get to the contents inside and also amazing. The flavor was great.  The husband would have liked some kind of “gravy” inside so it wasn’t so dry.  Apparently he isn’t understanding the point of a hand held sandwich.  He’s going to have that drip gravy?  Okey dokey.  Seems messy but who am I to judge.  So even while he was inhaling it though and repeating how great it was he kept saying things like “no really, don’t you think this would be great with gravy inside?”.  Anyway.  Loved it. If he really needs gravy he could dip it in some next time.

This was amazing.  Clearly beyond my skill set to make but I will happily test these for her again!


Jill here ~ I'm pretty sure if I put gravy inside a pastie I'd have a 'walking pot pie' hahahah (like a take on 'walking taco'). Hmmm, maybe he's on to something, I might need to see if that works. Of course you couldn't eat it cold or hold it in your hand, but I'm thinking if a pizza can be basically folded in half to make a calzone maybe a potpie can be stuffed inside a crust?

PS: and yes to all you pastie lovers who are yelling "you serve them with gravy or ketchup!!", I did tell them that! Now simmer down and stop rolling your eyes LOL 😂


5.12.19: 🔥
5.12.18: Amsterdam tulips
5.12.17: summer vegetable bake
5.12.16: makeup remover wipes tip

Monday, May 11, 2020

Michigan Pasties

Talking with my mom and she told me about having pasties when she was little and loving them - can't remember why we were talking about pasties hahahah, kind of a random topic. Anyway...she found this recipe online and I said I'd give it a try. I've eaten my fair share of them but have never made them - not gonna lie, they took longer to make than I anticipated, but it just so happens I have lots of time since we are still 'staying home' and turns out it was well worth the time and energy. These are great! I shared some with my sister, who is going to review them later and I'll update when she does, but spoiler alert - I already know she also loved them. (Click here for her review)


Mom emailed me the recipe and had this to say about them: 

We had a neighbor Mrs Christie who lived in the farmhouse across the street (I think she was English) who always brought us over “pasties” that I still remember being the best thing ever. She was very old with a bun and always had a long apron on, I got in trouble for crossing the street to go visit her. Thanks for helping me find a good memory from childhood!


UPPER PENINSULA PASTIES

Ingredients:

crust ~
  • 2 cups shortening
  • 2 cups boiling water
  • 5 to 5 1/2 cups all-purpose flour
  • 2 teaspoons salt
filling ~
  • 6 medium potatoes (about 3 pounds), peeled, chopped into 1/4" cubes
  • 1 large rutabaga (about 1 1/2 pounds), peeled, chopped into 1/4" cubes
  • 1 pound ground beef
  • 1/2 pound ground turkey
  • 1 small onion, finely chopped
  • 1 carrot, chopped into 1/4" cubes
  • 2 teaspoons salt
  • 1 teaspoon coarse salt, plus more to finish
  • 2 teaspoons pepper, plus more to finish
  • 2 teaspoons garlic powder
  • 1/4 cup butter
  • 1 egg, lightly beaten
Directions:
  1. In a large bowl, stir shortening and boiling water until shortening is melted. Gradually stir in flour and salt until a very soft dough is formed; cover and refrigerate for 1 1/2 hours.
  2. Combine ground beef and turkey, break into small crumbles. In a large bowl, combine potatoes, rutabagas, onion, meats, and seasonings.
  3. Divide dough into 12 equal portions. On a floured surface, roll out 1 portion at a time into an 8" circle. Mound 1 generous cup of filling on half of each circle; dot with 1 teaspoon butter. Moisten edges with water; carefully fold dough over filling and press edges with a fork to seal.
  4. Place on uncreased baking sheets. Cut several slits in top of pasties. Brush the tops with beaten egg, sprinkle tops with coarse salt and pepper. Bake at 350' until golden brown, about 1 hour. Cool on wire racks. Serve hot or cold. Store in the refrigerator. 
my notes: In the comments section people were complaining that 'traditional' recipes don't use ground meat but for whatever reason once baked these didn't seem like hamburger to me. I questioned the recipe when I realized the meat didn't get cooked first, it goes raw in the filling and then baked for an hour - thought to myself 'why doesn't the grease from the ground meat seep out?', but it didn't. Also, this makes 12 very large pasties - so big I didn't even eat a whole one for dinner. The recipe states 1 1/2 to 2 cups of filling in each one, but I found a generous 1 cup was perfect. The first one I made I rolled out too thin and used more filling, it was hard to move to the baking sheet, and wasn't pretty - I got better after that. Only roll to an 8" circle, I use a measuring tape to keep them the right size. 

I adapted the recipe a bit and am sharing what I did, click the source below for the original recipe if you want.
recipe found at tasteofhome.com

I took lots of photos to walk you thru the steps:

1. cut the veggies into a small dice, crumble up the raw meat as best you can. you need a very large bowl for this step. 
 
2. I weighed the dough and then figured out how big each portioned piece should be. Each of the 12 pieces was just a touch over 4 ounces
   
3. roll out the dough to an 8" circle, put a generous 1 cup of filling on one half, moisten the edges of the dough to help it seal. I do this by dipping my fingers in a cup of water and running my fingertips along the edge.  
 
 
 4. fold the dough over the filling, press the edges together then crimp with the tines of a fork. put on a baking sheet, cut a few slits in the top, brush with beaten egg, sprinkle with coarse salt and pepper.

 
5. I wasn't sure how to reheat these, the crust won't be crispy if microwaved - so we did an experiment. Jen did oven at 300' for half hour, I did 350' for 20 minutes, and Cathy did 400' for 10 minutes. All 3 worked! 
see what I mean about size? It's bigger than the dinner plate!


 I wrapped them individually, put in freezer bags and popped into the freezer for another time. Can't say how they'll hold up doing it that way but since this recipe made so many and they're so big, we can't eat them all at once hahahah!