Wednesday, June 9, 2021

Champagne Cupcakes

My step-niece loves champagne, so when I saw this recipe I thought she'd be the perfect person to bake them for - sadly you can't taste champagne at all, it was just fun to make 'champagne cupcakes' for her birthday! I've seen other recipes for this type of 2-ingredient cake - just using a cake mix and pop or club soda, but I've never tried it. Not sure why this works, but it does! The texture is different than regular cake, light and fluffy almost like angel food cake. Not gonna lie, I didn't love the texture but I don't actually love cake (but I love to make cake so...hahhaha), maybe the texture is amazing to everyone who loves cake! However, the frosting is great - I'll use it on other cake in the future for sure. 


Mix together white cake mix and 1 1/2 cups champagne for 2 minutes. Pour into greased cake or cupcake lined pans and bake at 350' according to the package directions for cooking times. That's it!

For the champagne buttercream frosting, beat together until fluffy:

  • 2 sticks butter, room temperature
  • 4 cups powdered sugar
  • 1/4 cup champagne
  • 1/2 t. vanilla
  • pinch of salt


I added a couple drops of pink food coloring to make it pale pink, and added colored sugar sprinkles. 

 recipe found here at delish 

6.9.20: tip-sy tuesday: multiple ways to make pesto

6.9.19: 🔥week 23

6.9.18: packing tip - pillbox jewelry holder

6.9.17: outfit idea - cuffed jeans and t-shirt

6.9.16: garden update 


Tuesday, June 8, 2021

Tip-sy Tuesday: Saving the Bees

Dave found this chart of things to plant to 'help save the bees' -  yesterday I posted about finding flower seed mixtures ("bee my friend") so it seemed like a good time to share this info on what else to plant to attract bees and other pollinators. 


Monday, June 7, 2021

Simple Card with Belly Band

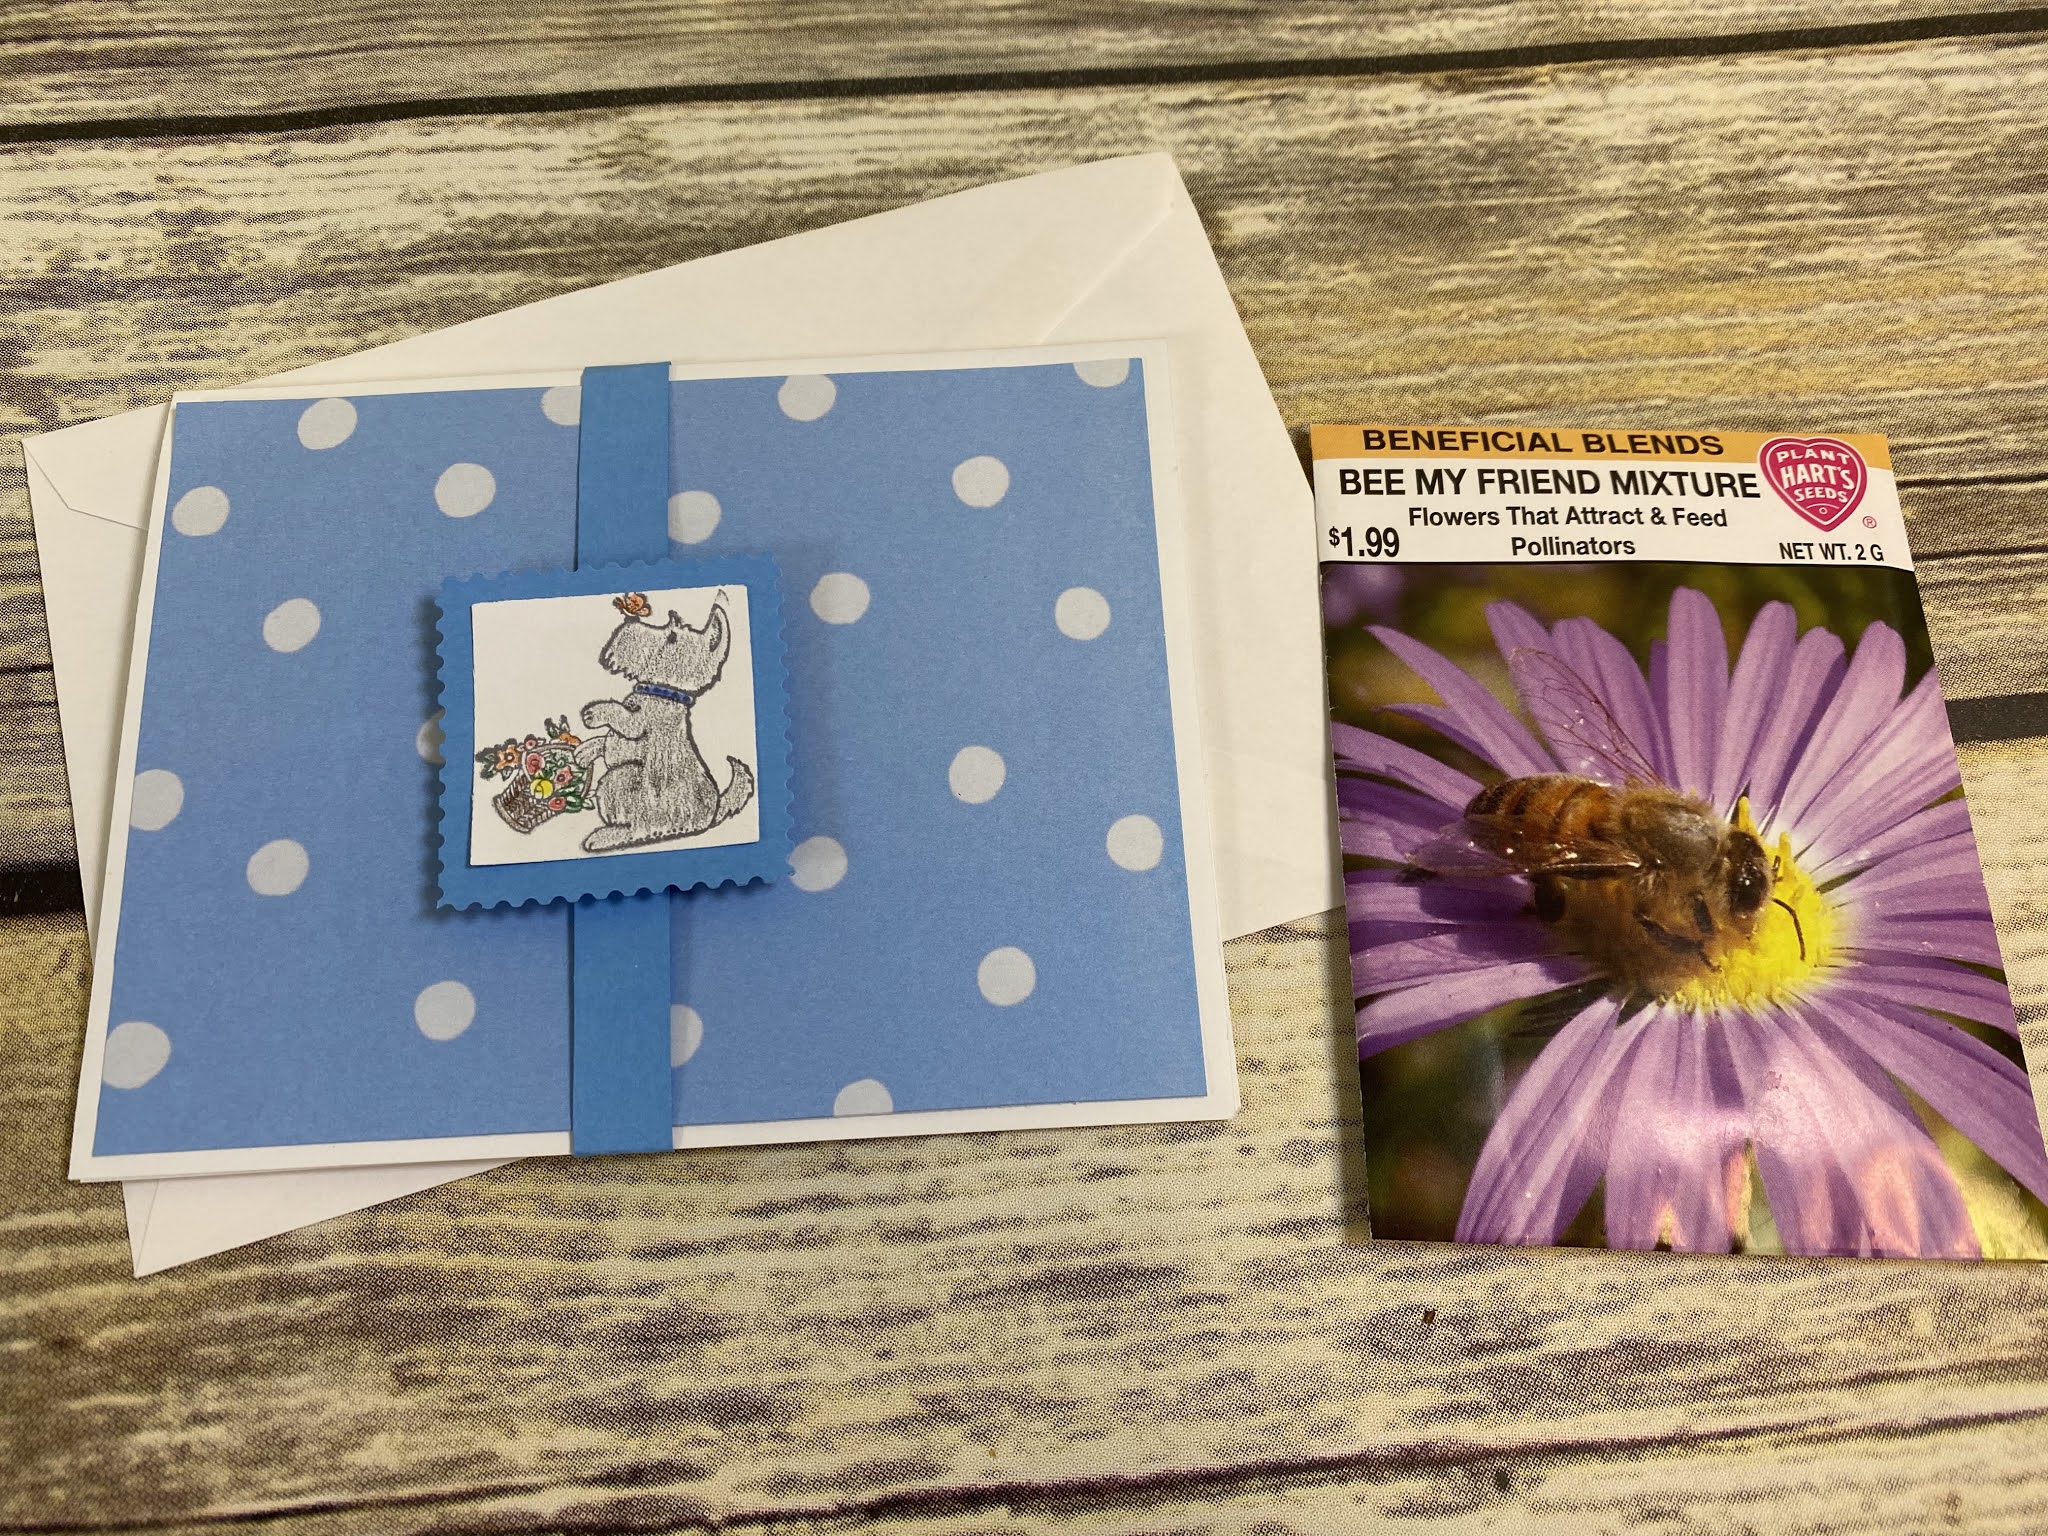
I found these cute flower seeds that say "Bee My Friend" and thought it'd be fun to send them to a couple friends - I made super simple basic cards and added a belly band so the seeds would stay in the card when removed from the envelope. I'm talking super simple here - you can probably just look at this picture and figure out what I did hahahha, my directions are waaaaay longer than necessary!! It's just folding a piece of cardstock, glue on paper to the front, make a band to wrap around the card, stick on a cute image. Done! But just to make it an actual crafty post I'll break it all down...

For this card I used white cardstock for the base card and the smaller square, blue and white polka dot paper for the card front, and blue cardstock for the larger square and the belly band strip. It's fine to change the colors obviously, I'll use my colors in the directions to make it clearer when giving directions. I stamped a cute Scottie holding a basket of flowers which seemed appropriate when giving flowers hahah. Stamp whatever you like, or use a sticker or something. 

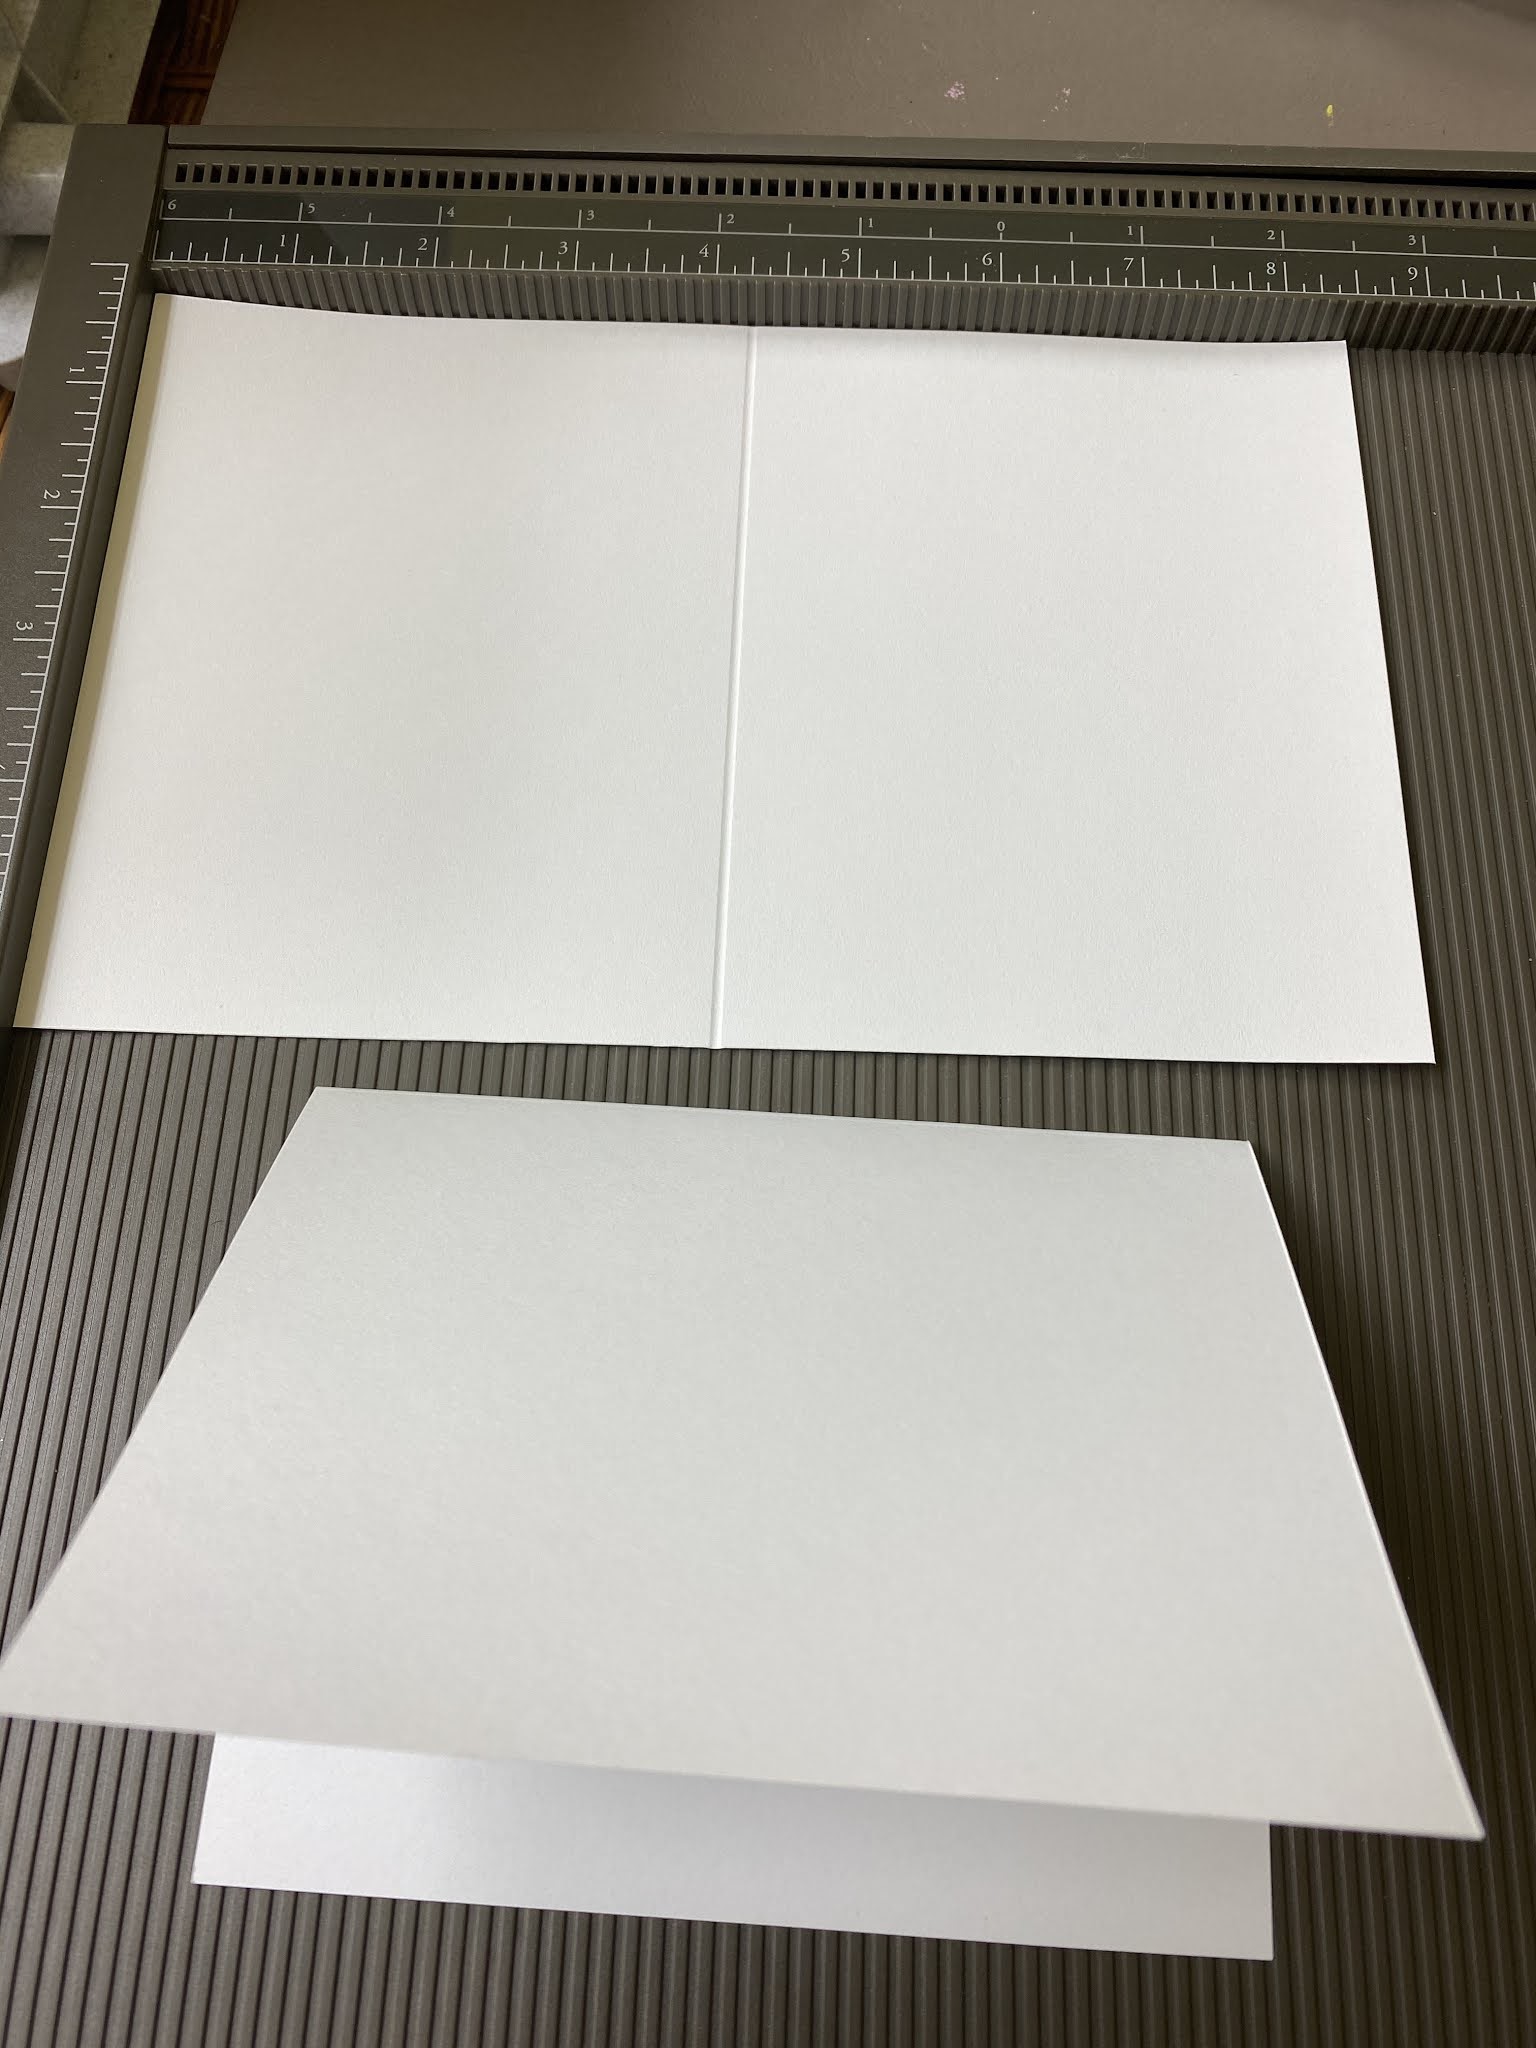
Cut a 8 1/2 x 11" piece of white cardstock in half so you have two rectangles 4 1/4 x 11". Score the center and fold in half creating a card that is 4 1/4 x 5 1/2". 

Cut a piece of the decorative polka dot paper 4 x 5 1/4" and glue to the front of the card. 

Stamp an image (or use a sticker) onto white cardstock and punch or cut it out in a square. Cut another square out of coordinating blue cardstock that is about 1/4" larger than the square with the image, trim the edges with decorative scissors if desired. Glue the two squares together. 

To create the belly band: cut a long skinny strip out of the blue cardstock, about 1/2" wide x 11" long. Fold one end in a couple inches, and put it around the card with the folded end at the front center, then wrap the long end around the back of the card and fold again at the other side so the ends meet in the front;  trim off a couple inches of the long overlap and glue the ends together - that creates the 'belly band'. Oh, in case you don't know that term - a belly band is a strip of paper with the ends glued together creating a band that goes around the card, or a box, to keep the card/box closed. I put the overlapping ends in the front because the squares will cover the ends up - otherwise you can put the glued ends in the back of the card where you won't notice the glued part. You want the belly band to fit snuggly so it'll actually keep the card closed - if it's too loose it'll slip right off the card (and if too tight you won't be able to slide it off!). 

Color the stamped image - I used colored pencils and didn't try to make it perfect, just lightly give it some color. Stick the stacked squares on the belly band with a foam dimensional (which makes the squares pop off the band a little) or just glue it right to the band. 


I found an envelope that fits the card, if I didn't have one on hand I'd have figured out how to make one! I wrote a note on the inside, inserted the flower seed packet, slid the bellyband overtop and put it in the envelope.  See - easy, right? I know Ronda and all the gorgeous card-making Stampin' Up people are totally rolling their eyes right now but hey - I was going for easy, quick, and simple and it's cute enough for me hahahha!!! 

Sunday, June 6, 2021

🔥Around the Campfire (week 23)

Dear Campers ~

Here's a quick recap in case you missed anything at camp last week:

Posts ~

5/30: 🔥week 22

5/31: Memorial Day

6/1: marshmallow filled cupcakes 

6/2: Yeti gift

6/3: peanut butter cheese ball

6/4: how to: use a Cricut to make the above Yeti gift

6/5: wedge salad dip

What's Cooking:

  • burgers, brats, Jane's baked beans, potato salad
  • chicken potpies (I was sick and needed comfort food haha!), green salad
  • topopo salad
  • grilled pork chops, chopped salad, roasted cauliflower
  • burger patties on caesar salad
Miscellaneous stuff keeping me busy ~
  • we are at the campground, it's super hot and windy and I've been sick all week so staying inside and catching up on computer stuff - I just found that I skipped a couple weekly recaps at the end of last year! So doing some blog housekeeping haha! 
  • still working my way thru all the John Sandford Prey series and Virgil Flowers series. They are all good but sort of running together so I'm not going to review them all at this point. They are all summed up with 'really bad criminals up against some very smart good guys'. Well, they aren't exactly always good guys but they are the protagonist/heroes who solve the crimes.
  • finished planting my garden - I, as usual, planted waaaay too many tomatoes but I can never help myself - I love them SO much. I'm too late for Lucy's (the parrot) peas but did green beans which she also loves. Cukes for Dave, onions and herbs for me, and sunflowers in anticipation of using them for centerpieces at my nieces rehearsal dinner later in the summer. She's having an 'I do bbq' - cute right? Checked tablecloths, mason jar glasses, sunflowers and twinkle lights, and traditional bbq food. 
Brooke brought me chicken soup one day while I was sick - I love this bag so much! 


That's it for now - hope everyone had a great week! Stop back often for more crafts, recipes, and whatever else I can think to make next week at camp - maybe I'll get lucky and find some guest bloggers too hahaha! Bye!

Sincerely ~

Jill
camp counselor

6.6.20: crock pot pork roast (from frozen)

Saturday, June 5, 2021

Wedge Salad Dip

Here'a another recipe my sis gave me  in hopes that I'd make it for her - yes, she is perfectly capable of making this herself but for some reason she'd rather I just do it and bring it to her ... sigh...sisters ;)

When she said it's 'wedge salad dip' I literally was like 'salad dip? what the...' but really, it's a great idea and is really good - if you like wedge salad (you know - usually a wedge of iceberg topped with chopped tomatoes, bacon, sometimes onions, and bleu cheese. click here and here for recipes for the salad, not the dip) I bet you'll love this! If you aren't a bleu cheese fan I think it'd be just as good with a different kind of cheese - I'm thinking crumbled feta but try whatever you like! 

I questioned putting lettuce on top of a cream cheese mixture topped with tomatoes - doesn't it seem like the lettuce would get gross? Nope, it held up just fine! I served it with tortilla chips and corn chip scoops. 

  • 8 oz. cream cheese, room temperature
  • 1 c. sour cream
  • 1 1 oz. package dry Ranch Dressing Mix
  • 1 ½ c. chopped romaine lettuce
  • ½ c. chopped tomatoes
  • ½ c. chopped cooked bacon
  • 2-4 oz. crumbled blue cheese (more or less to taste)
  • 1 Tbsp. chopped fresh chives

  1. Combine cream cheese, sour cream, and Ranch Dressing Mix and mix until smooth.
  2. Spread into the bottom of a 9-inch pie plate or other similarly sized pan.
  3. Top with lettuce, tomatoes, bacon, blue cheese, and chives.

    6.5.16: greek salad

Friday, June 4, 2021

Making the Yeti gift...

My sis posted a couple days ago about a Yeti that she asked me to personalize so she could give as a gift (click here to see how cute it turned out), of course I forgot to take pictures of the steps so I made another one for myself so I could show you - I love this one too (and I made myself laugh so...)! 

I have a Cricut Joy, which is the smallest in the Cricut line of cutting machines. I think my little one will print with a marker but I haven't explored everything it can do yet - so far I've just cut out words to personalize some things. There's different materials depending on the project - iron on, vinyl, and paper to name a few. 

They make it quite easy to use this machine right out of the box - I signed up for their free design space which has tons of fonts and objects you can use; I'll walk you thru how to make these words to stick on a yeti or other beverage holder (or whatever you want to stick some words too using permanent vinyl!).


Once design space is open click 'text' on the left side (see pink arrow) and a box will appear (another pink arrow), type your words there. You can drag the box anywhere you like on the screen, it doesn't need to be in the right place, the machine will cut it from the top left corner no matter where you have the boxes. Note: I made 3 different text boxes for this project because whatever is in the box will get the same font and size - and I wanted 'hmmm~', 'water, wine, whiskey?', and 'or' to be different fonts and sizes. After you get your text in the text box click the font button at the top left to play with fonts. Drag the box arrows to change the size. This is the part that takes the longest - trying to choose fonts and size! 

It doesn't matter where the text boxes are on the design space, I spent lots of time in the beginning fitting all the pieces together and trying to use as little vinyl as possible but it doesn't matter - when it's time to cut the machine arranges the words together as it sees fit. It will not show up as you intended, they'll most likely be out of order or not in the right place - you'll then cut the words apart and stick them on your project how you want them. 

Once you have the words how you want (font and size) click 'make it' at the top right corner. Next it asks if you are using a mat or not - here's another tip: if you use the roll of smart vinyl you don't need a mat. If you use a smaller leftover piece of vinyl then you'll want to use a mat. I wasted a lot of vinyl in the beginning not realizing that I could use the scraps! 

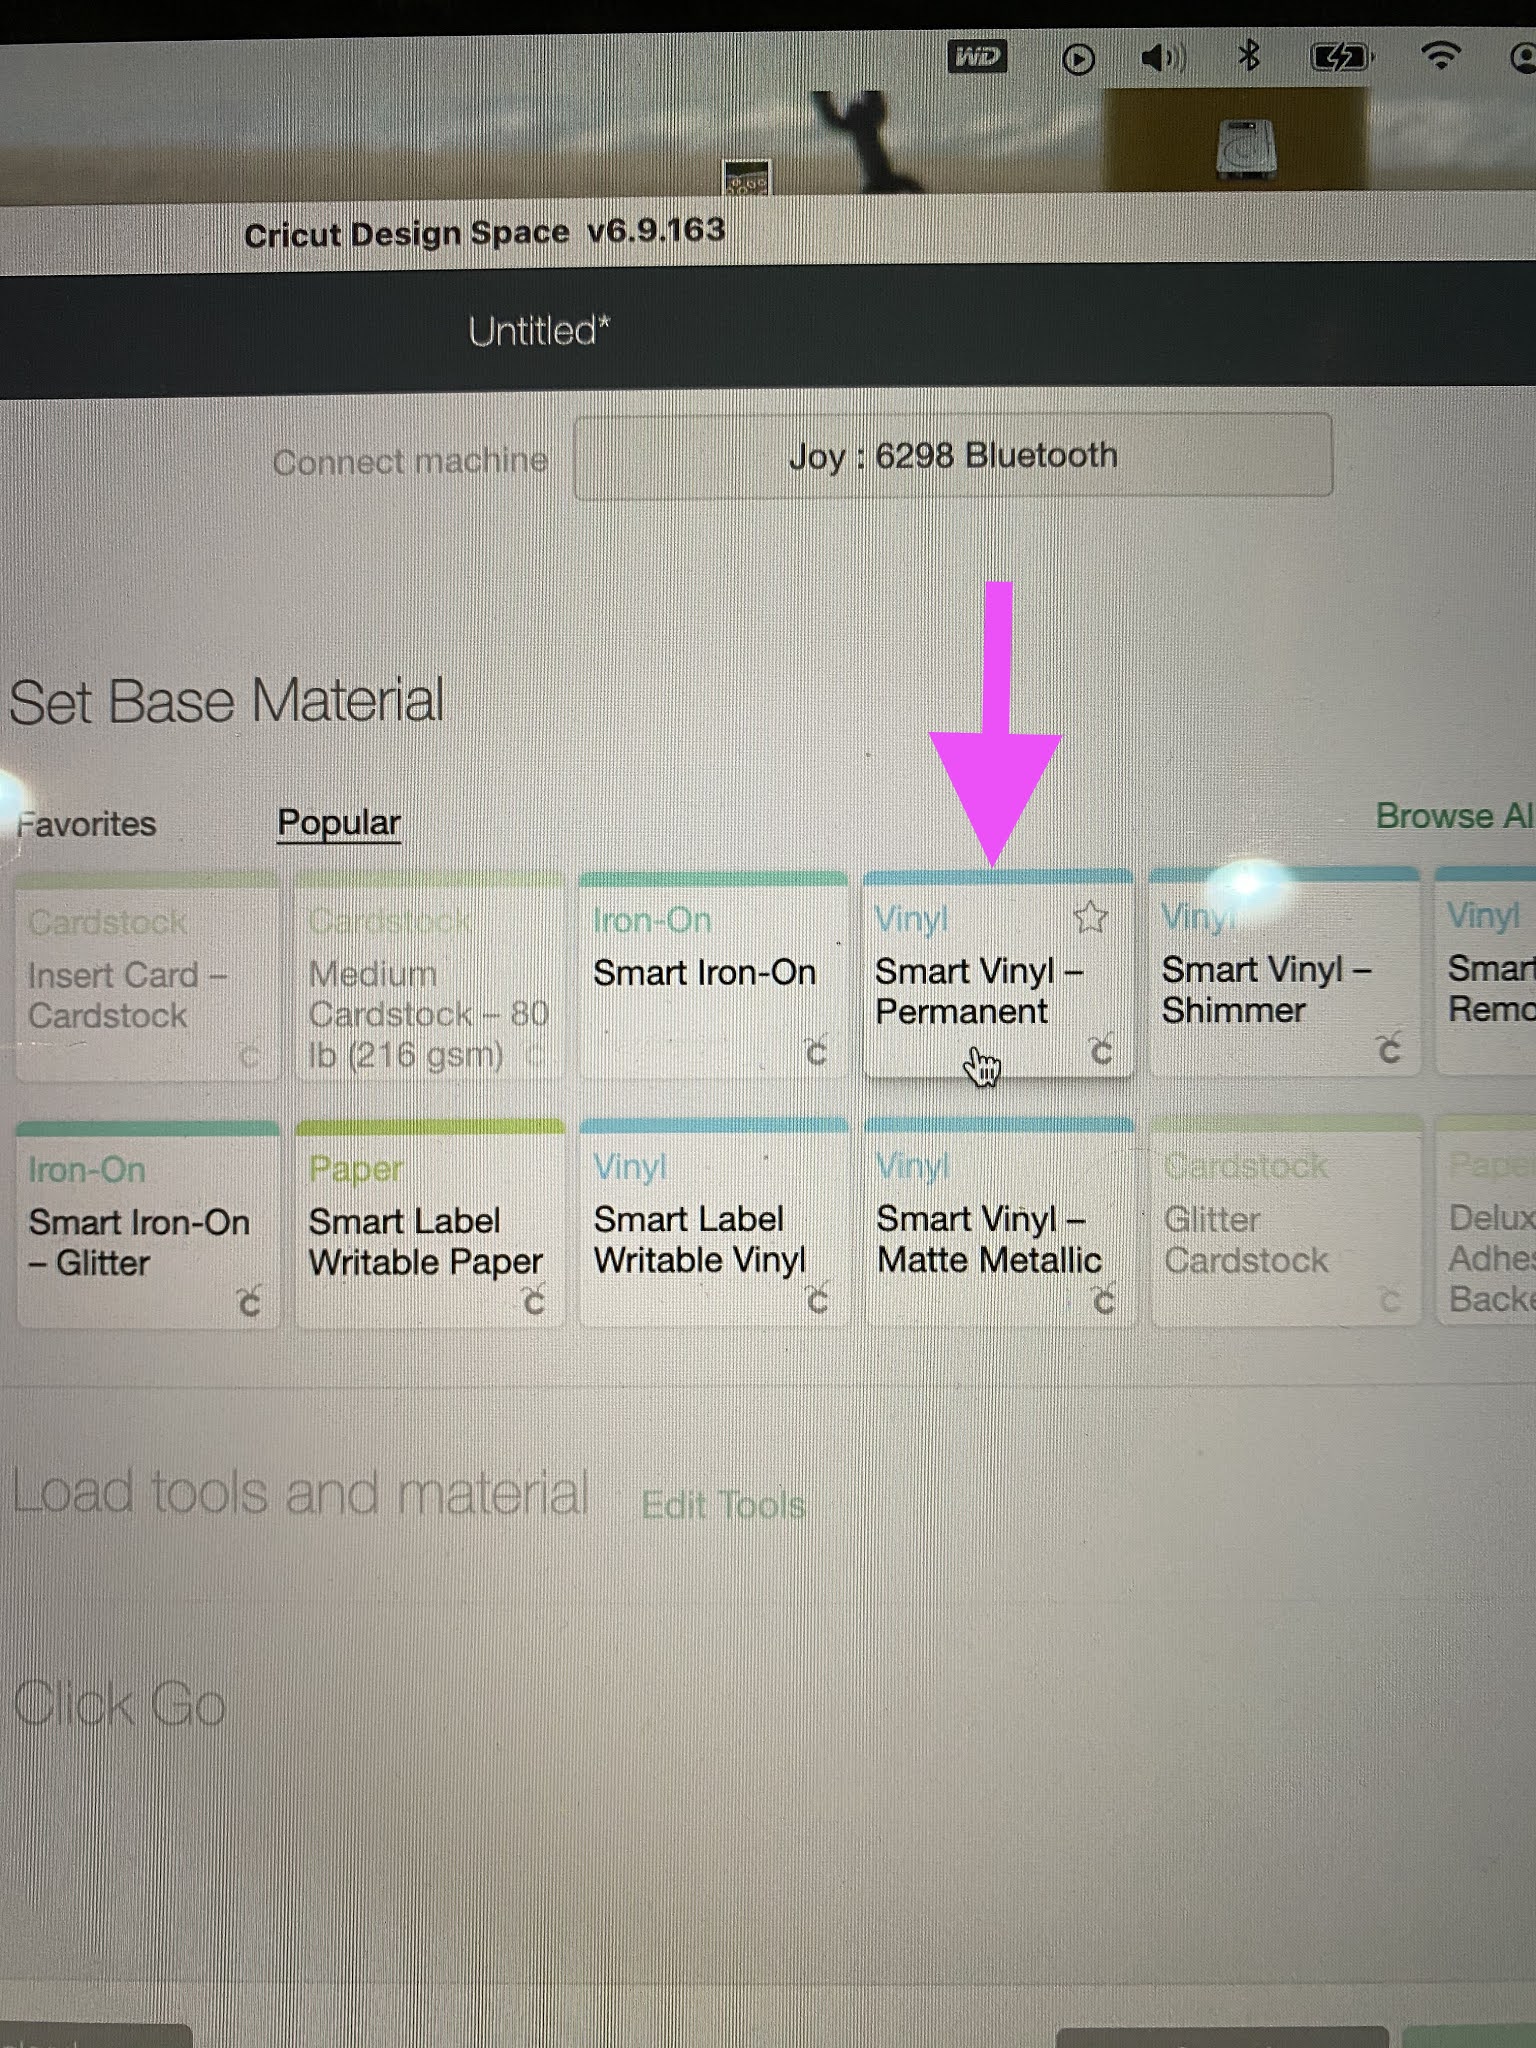
Next it'll ask you to review your artwork - this is where the words will not be in the right order, just make sure all the pieces are there. Next it'll ask you to pick your material from a list of possibilities. After feeding the material in click 'go' at the bottom right. For the vinyl you feed it in with the colored side up. 


The machine will then cut out the words, it cuts the vinyl but not the backing. First rub the letters so they'll stick better to the backing or else when you remove the backing the letters tend to come with it. I use an old gift card or something like that. Then you'll remove the vinyl from the backing that is the space around all the words, leaving the words on the backing. I do this by sticking a pin in the corner and pulling the vinyl away from the backing - they have tools for this but I'm cheap and a pin has worked fine so far!

Oh I should say that originally I cut out the words 'chances are it's..." but then I changed to 'hmmm', don't want to confuse you hahahah!


Remove the vinyl that is in the middle of some letters (like the e's, a's, h's...), I stick them with a pin and gently pull off. 


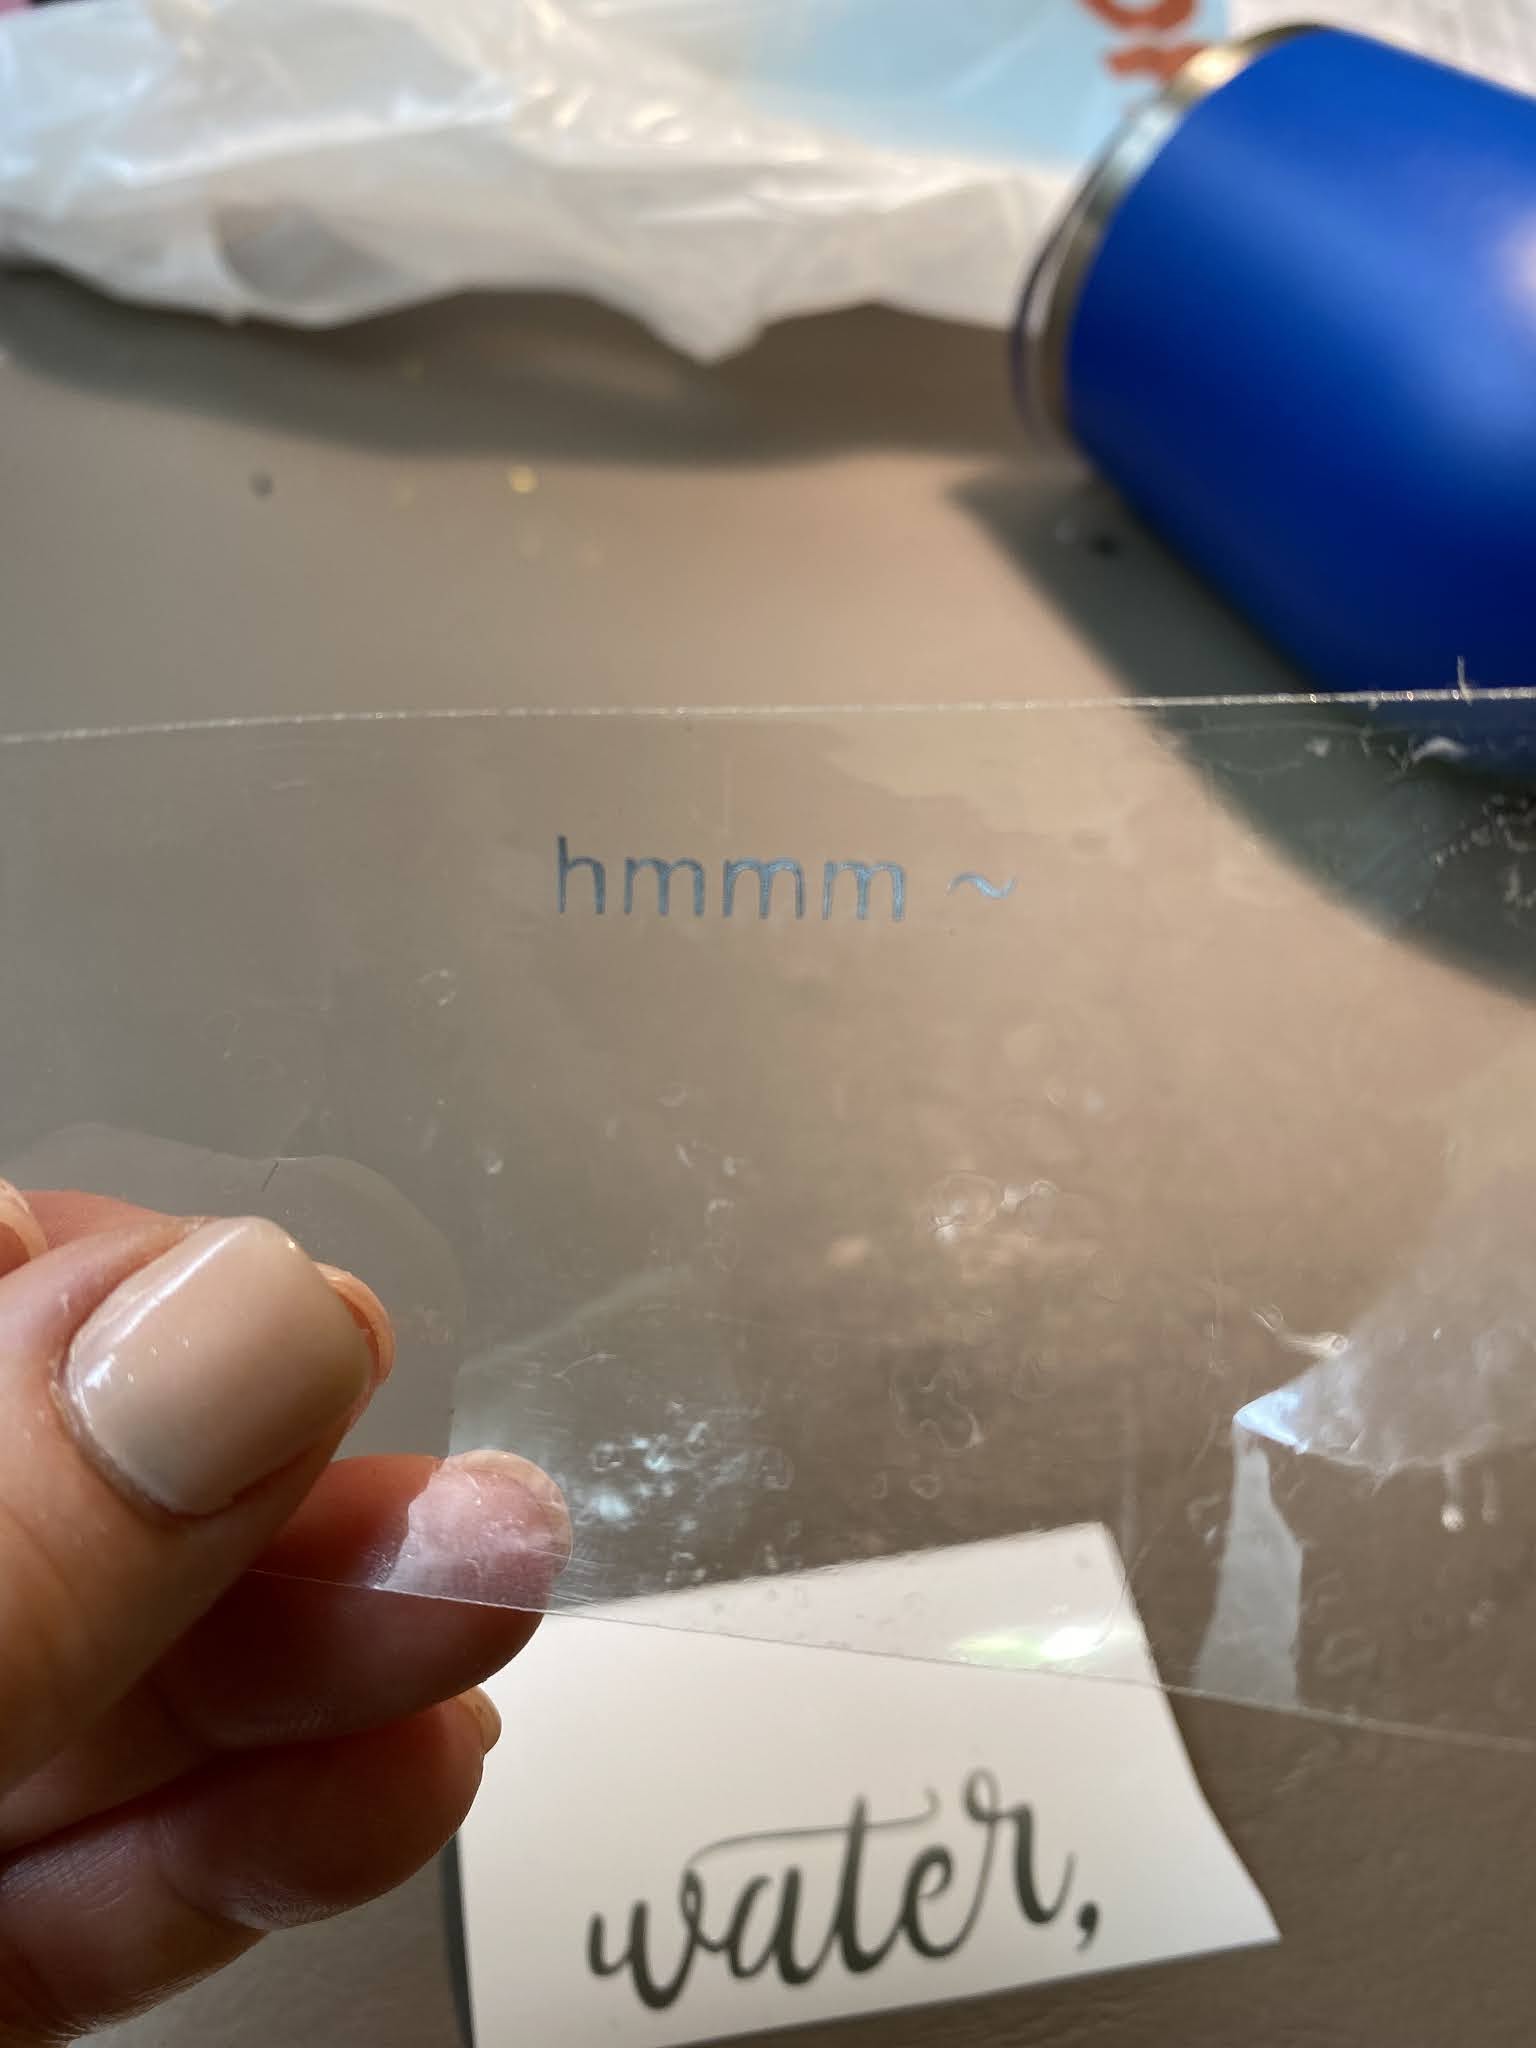
Now you're ready to apply the words to your mug or whatever. Instead of trying to place each letter on it's own I have discovered a very helpful trick - put a big piece of clear tape over the words. You need the tape to be larger than the words so I separated 'water' from 'wine, or whiskey?' so they'd fit in the tape. Rub your finger over the tape to get the letters to stick really good, then slowly peel the tape off the backing and the letters are now transferred to the tape. You can now see exactly where the letters/words will go and they are all in line because you transferred them to the tape. I used the edge of the tape as a guide to help make sure the words were level. Stick the tape to the mug, rub the letters to get them to adhere to the mug, then peel off the tape. Repeat using the tape for each section of words you are applying. I took photos of this - it might be easier to see than figure out what the heck I'm trying to say LOL:


I started with 'hmmm ~' at the top, then added 'water', and last 'wine, or whiskey?'


I know this is a lot if instruction but really, it's not that hard - you'll need a little patience when removing the vinyl and also when removing the words from the backing to the tape, but if I can do it so can you!


Thursday, June 3, 2021

Peanut Butter Cheese Ball

Made this at my sister's request and I cannot even tell you how much everyone loved it. Like everyone! Super easy, I actually felt a little guilty when getting so many raving comments about how great it is - it's ridiculously simple!

 I guarantee if you make this you'll look like a superstar (more than you already are!!) 😉

  • 8 oz. cream cheese, room temperature
  • 1 cup powdered sugar
  • 3/4 cup creamy peanut butter
  • 3 T. packed brown sugar
  • 3/4 cup milk chocolate chips
  • 3/4 cup peanut butter chips
  • graham cracker sticks, teddy grahams, Nilla wafers, and/or apple slices for dipping
Beat together the cream cheese, powdered sugar, peanut butter, and brown sugar in a mixer until smooth.

Transfer to a large piece of plastic wrap, form into a ball; wrap tightly in the plastic wrap. Freeze for 1 and 1/2 hours until firm enough to keep its shape. 

Place chocolate and peanut butter chips on a plate. Remove the plastic wrap from the ball and roll it into the chips to completely cover, press them into the ball as necessary. Place the covered ball on a serving dish; cover and freeze for a couple hours. Note: you can make this ahead, thaw at room temp for 20-30 minutes before serving. 


I didn't change anything other than I found a bag of chips that are chocolate and peanut butter mixed! 

recipe found here


PS: I lied on yesterday's 'Yeti gift' post that I'd share tips today how to make it - I'll post it tomorrow!

6.3.20: MSIH: banana oatmeal cookies
6.3.16: amazing (Legends) race (kid party idea)

Wednesday, June 2, 2021

Yeti gift

Jill here - my sis wrote this post, I'm sharing her story today and then will give you some Cricut tips tomorrow about how I made it! 


So if it seems like my sister does a lot for me it could be because she does.  I know I have said it before but I’ll say it again; no you cant have her.  HAHAHA

So this time she came through clutch on a gift.  Let me start at the beginning.


I have a good friend who also happens to be my golf partner and sometimes my partner in other games such as ping pong, foosball, etc.  (don’t tell my sister she isn’t my ONLY foosball partner).. HAHA..

Anyway, when a normal person would be playing a game for fun and the pride of being a winner, my friend has to bet something.  Money isn’t a fun thing to play for so she decided way back when that we would play someone for their shirt.  The first time it was random guys in a bar.  She REALLY liked one of their shirts and tried to buy it but he refused.  She then decided she would play them for it. That was an offer young cocky college guys could not refuse. And yes, she went home with the shirt. 


After that it became part of the game/challenge.  In the years that have followed its our standard practice to play everyone for their shirt.  So that said, for my friends birthday I thought this “Lets play for shirts” Yeti in her fav color was the winning gift… and my sister made that happen with her cricut.  She tells me peeling these stickers off and placing them on things isn’t fun but the result is fantastic. Definitely worth it to me.. HAHA.. (cuz she didn’t make me do it..)


Oh.. and if you ever come my way and want to play me in a game of some sort be sure to wear a shirt you are willing to risk losing.


6.2.20: tip-sy tuesday: whipping egg whites

6.2.19: 🔥week 22

6.2.18: message box

6.2.17: outfit tip - full pants with t-shirt

6.2.16: tomato container garden

Tuesday, June 1, 2021

Vanilla Cupcakes with Marshmallow Filling

Made a few cupcakes to take to a gathering last Sunday - I liked the filling from last week's cupcakes that I took to my niece's soccer party but I didn't have pudding or cool whip and since I was making these last minute I didn't have time to run to the store. So I searched my baking cupboard and found some marshmallow fluff and winged this filling - which turned out great so I'm sharing! Mix together the fluff with 1/2 stick of butter at room temperature. Add a dash of vanilla and a pinch of salt. Add half and half or milk to get the consistency needed to fill - you don't want it stiff or it won't go down into the cupcake, but not too runny either. Think pudding-ish. I chopped up a handful of white chips and stirred them in for a little texture. Fill a pastry bag fitted with a large tip, push the tip into the top of a cupcake and gently squeeze. You'll know that it's filled enough when the cupcake just starts to bulge - obviously if you squeeze in too much you'll have a blowout hahahahah, not all bad since you get to eat the ones that break open ;)


6.1.20: wine cork plant markers


Monday, May 31, 2021

Memorial Day '21

 A couple of interesting facts I didn't know regarding Memorial day:

  • there is a National Moment of Remembrance Act that asks for a moment of silence at 3:00 local time this afternoon. 
  • flags should be flown at half-staff from sunrise to noon, and then raised to the top until sunset to honor the nation's battle heroes. 


'Remember to remember' ❤️

5.31.19: MSIH: dorito casserole