My sis posted a couple days ago about a Yeti that she asked me to personalize so she could give as a gift (click here to see how cute it turned out), of course I forgot to take pictures of the steps so I made another one for myself so I could show you - I love this one too (and I made myself laugh so...)!

I have a Cricut Joy, which is the smallest in the Cricut line of cutting machines. I think my little one will print with a marker but I haven't explored everything it can do yet - so far I've just cut out words to personalize some things. There's different materials depending on the project - iron on, vinyl, and paper to name a few.
They make it quite easy to use this machine right out of the box - I signed up for their free design space which has tons of fonts and objects you can use; I'll walk you thru how to make these words to stick on a yeti or other beverage holder (or whatever you want to stick some words too using permanent vinyl!).

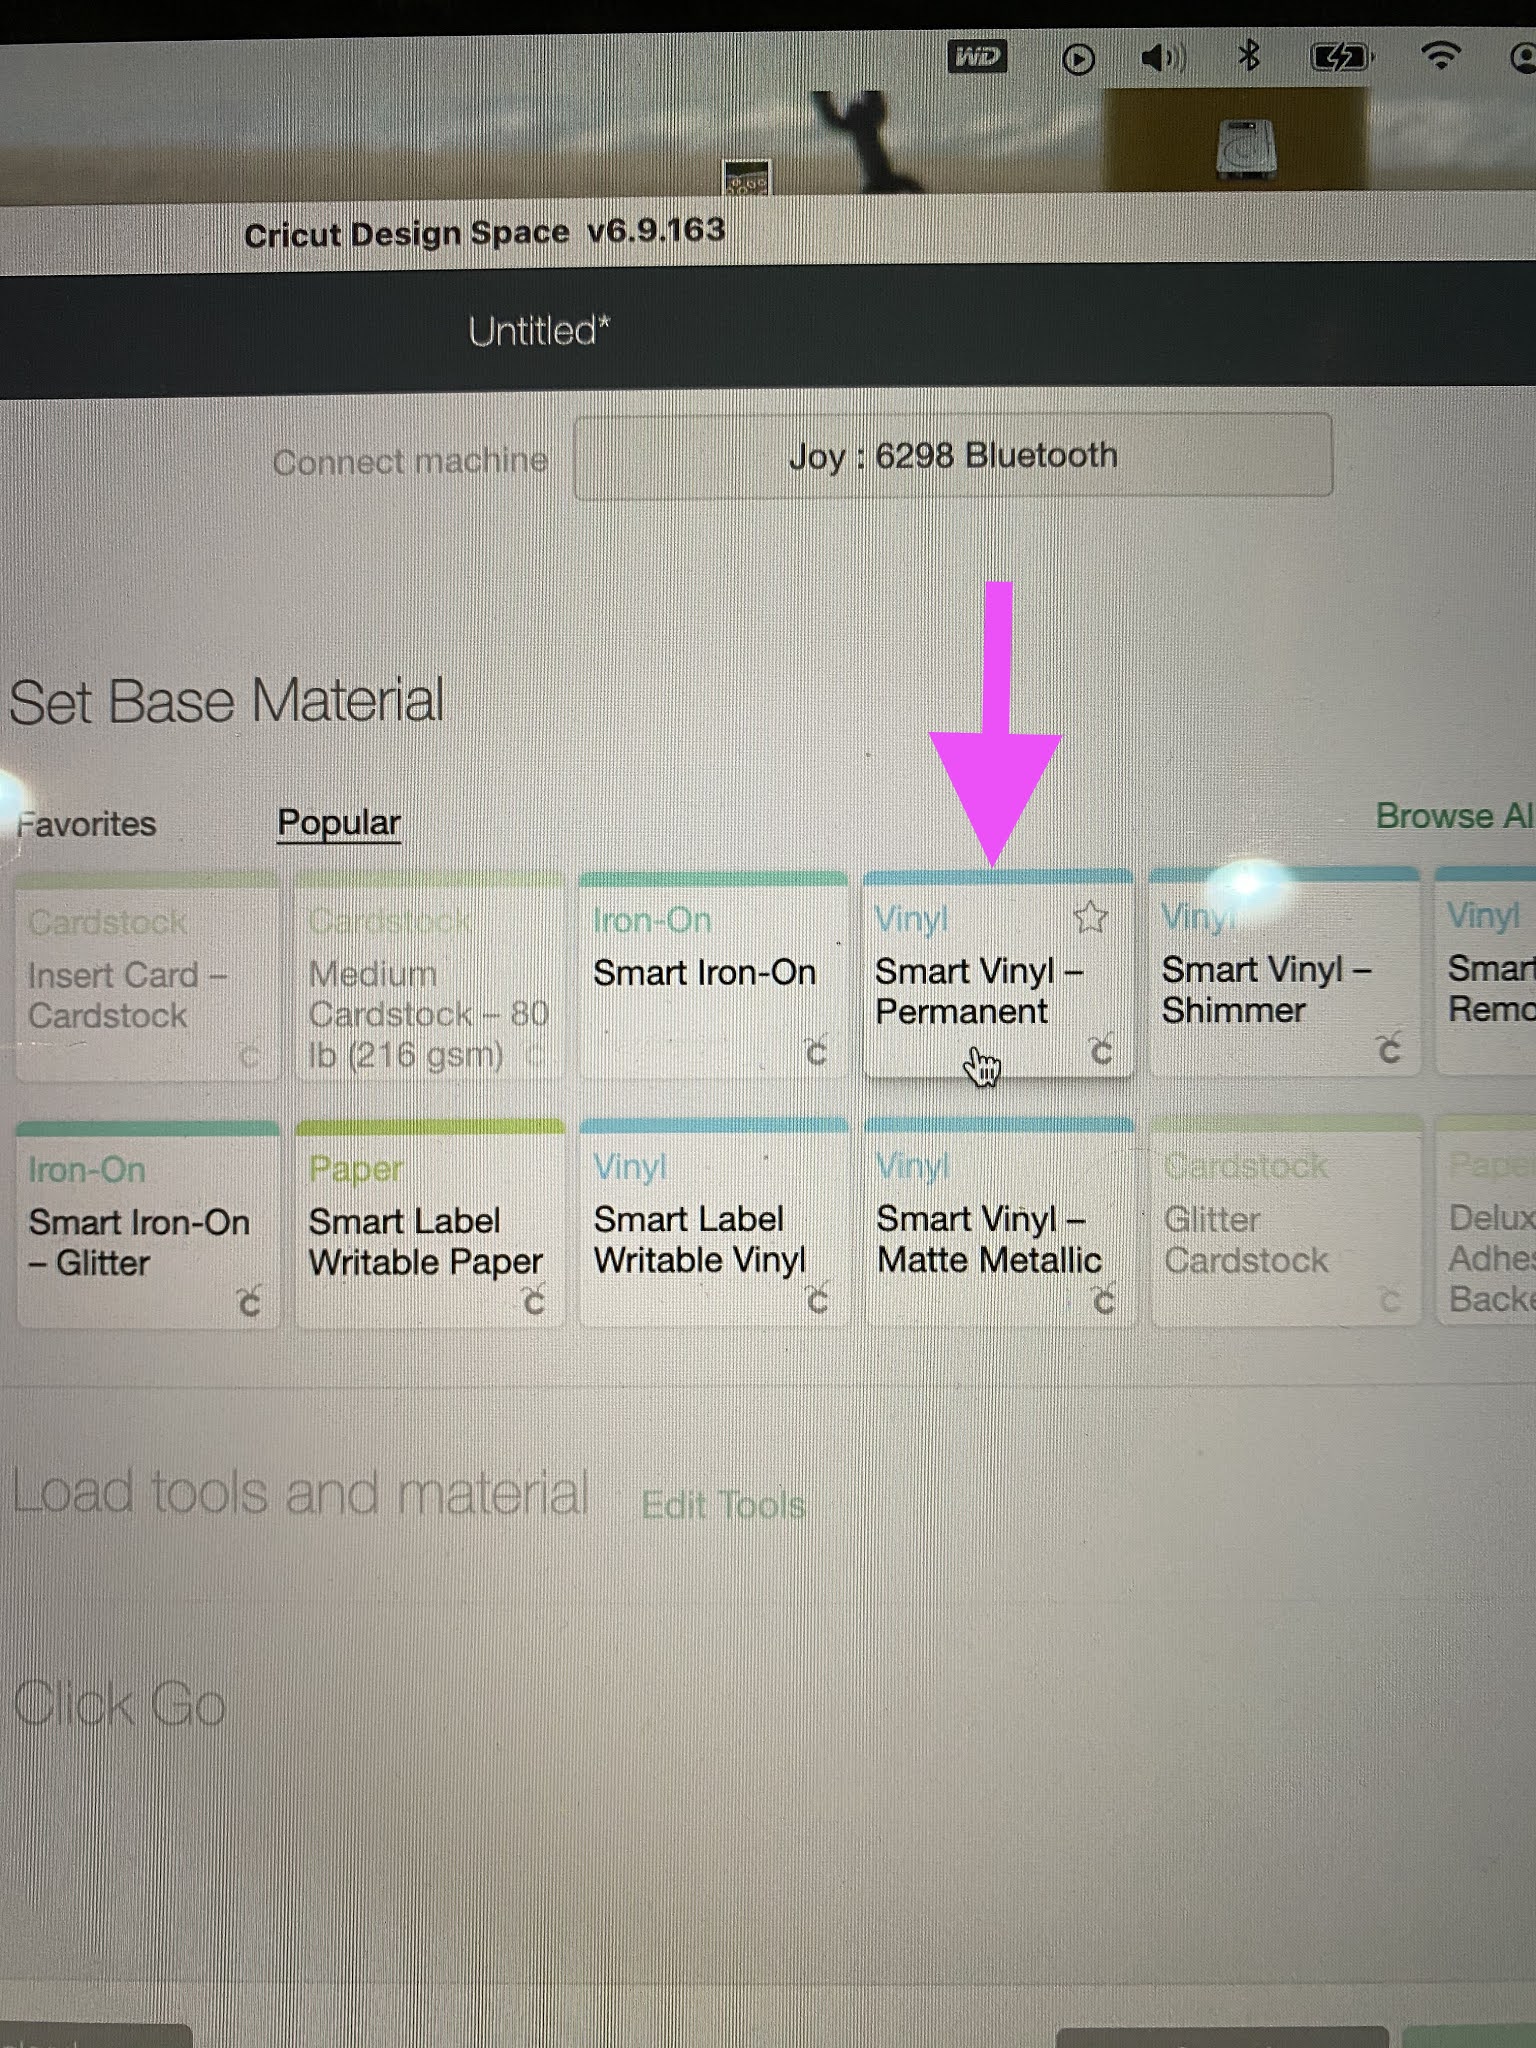
Once design space is open click 'text' on the left side (see pink arrow) and a box will appear (another pink arrow), type your words there. You can drag the box anywhere you like on the screen, it doesn't need to be in the right place, the machine will cut it from the top left corner no matter where you have the boxes. Note: I made 3 different text boxes for this project because whatever is in the box will get the same font and size - and I wanted 'hmmm~', 'water, wine, whiskey?', and 'or' to be different fonts and sizes. After you get your text in the text box click the font button at the top left to play with fonts. Drag the box arrows to change the size. This is the part that takes the longest - trying to choose fonts and size!
It doesn't matter where the text boxes are on the design space, I spent lots of time in the beginning fitting all the pieces together and trying to use as little vinyl as possible but it doesn't matter - when it's time to cut the machine arranges the words together as it sees fit. It will not show up as you intended, they'll most likely be out of order or not in the right place - you'll then cut the words apart and stick them on your project how you want them.
Once you have the words how you want (font and size) click 'make it' at the top right corner. Next it asks if you are using a mat or not - here's another tip: if you use the roll of smart vinyl you don't need a mat. If you use a smaller leftover piece of vinyl then you'll want to use a mat. I wasted a lot of vinyl in the beginning not realizing that I could use the scraps!

Next it'll ask you to review your artwork - this is where the words will not be in the right order, just make sure all the pieces are there. Next it'll ask you to pick your material from a list of possibilities. After feeding the material in click 'go' at the bottom right. For the vinyl you feed it in with the colored side up.


The machine will then cut out the words, it cuts the vinyl but not the backing. First rub the letters so they'll stick better to the backing or else when you remove the backing the letters tend to come with it. I use an old gift card or something like that. Then you'll remove the vinyl from the backing that is the space around all the words, leaving the words on the backing. I do this by sticking a pin in the corner and pulling the vinyl away from the backing - they have tools for this but I'm cheap and a pin has worked fine so far!
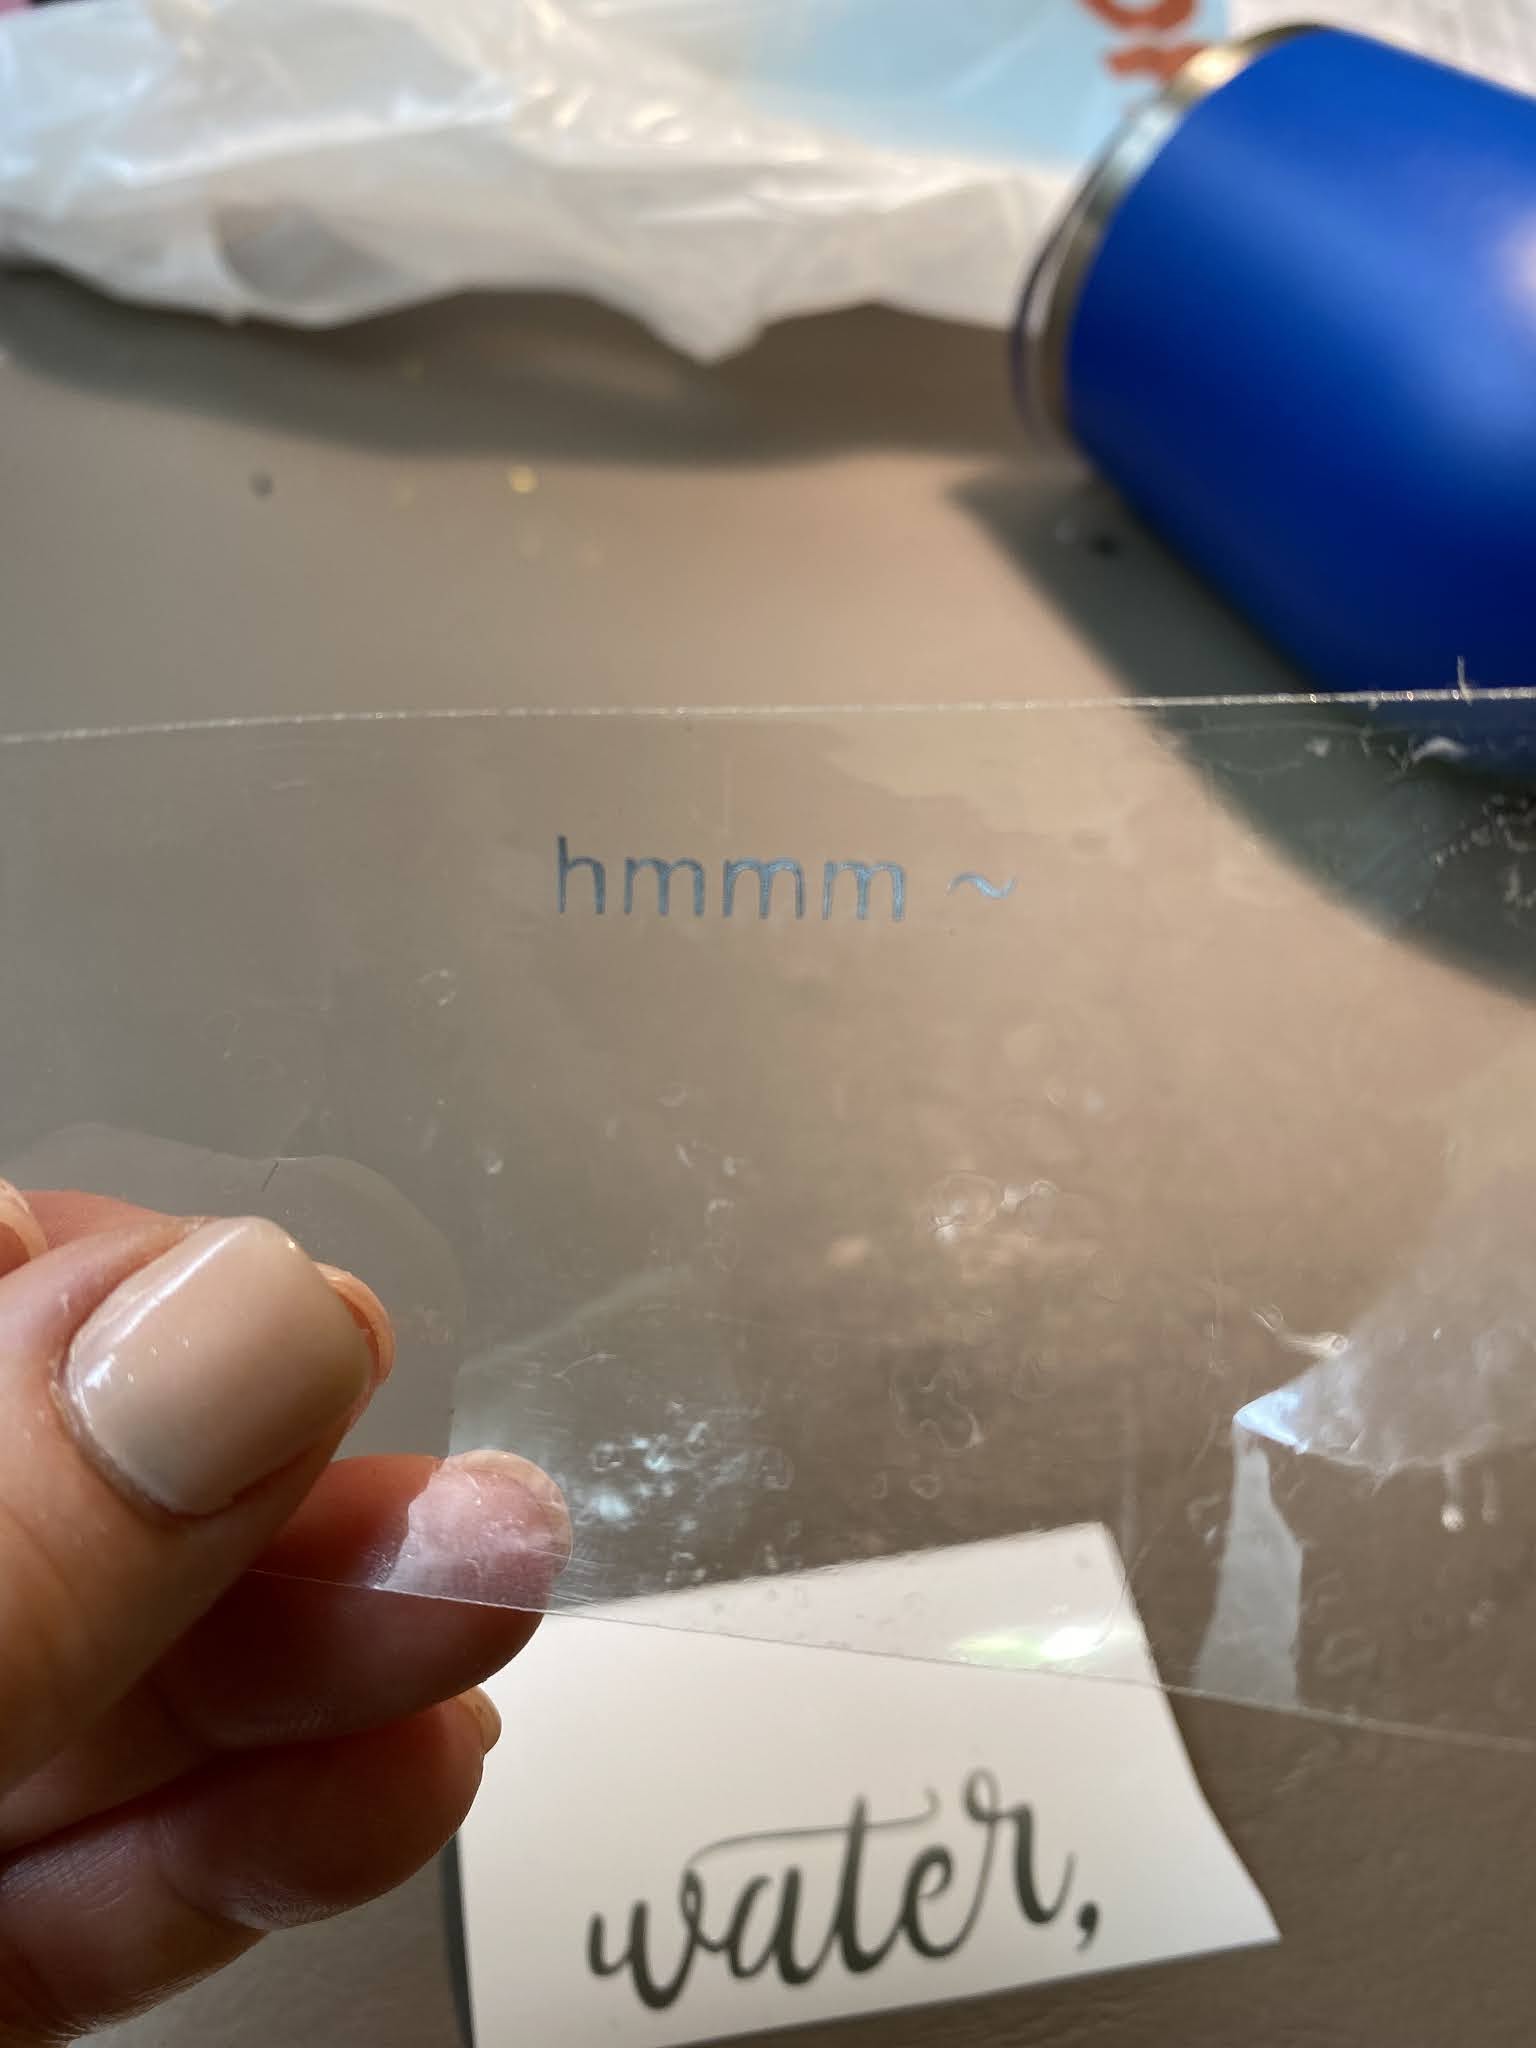
Oh I should say that originally I cut out the words 'chances are it's..." but then I changed to 'hmmm', don't want to confuse you hahahah!


Now you're ready to apply the words to your mug or whatever. Instead of trying to place each letter on it's own I have discovered a very helpful trick - put a big piece of clear tape over the words. You need the tape to be larger than the words so I separated 'water' from 'wine, or whiskey?' so they'd fit in the tape. Rub your finger over the tape to get the letters to stick really good, then slowly peel the tape off the backing and the letters are now transferred to the tape. You can now see exactly where the letters/words will go and they are all in line because you transferred them to the tape. I used the edge of the tape as a guide to help make sure the words were level. Stick the tape to the mug, rub the letters to get them to adhere to the mug, then peel off the tape. Repeat using the tape for each section of words you are applying. I took photos of this - it might be easier to see than figure out what the heck I'm trying to say LOL:


No comments:
Post a Comment