Thursday, May 20, 2021

MSIH: Chicken Tamale Casserole

I've had this recipe in my drafts for 3 years, finally got around to making it and I'm so glad I did - we loved this! Bought enough ingredients to make my sis a pan - figuring I haven't done a 'my sis is hungry' for quite a while; then Dave came home after seeing them and told me to get ready for a bad review - what? How could we love it and they dislike it? LOL - I hear my b-i-l doesn't like cornbread so yep, it makes sense he wouldn't like a dish that is basically doctored up corn bread as a meal instead of a side dish hahaha. Read below for her review!


  • 1 cup (4 oz) shredded Mexican blend cheese, divided
  • 1/3 cup fat-free milk
  • 1/4 cup egg substitute
  • 1 t. ground cumin
  • 1/8 t. ground red pepper
  • 1 (14 3/4 oz) can cream-style corn
  • 1 (8.5 oz) box corn muffin mix
  • 1 (4 oz) can chopped green chiles, drained
  • non-stick cooking spray
  • 1 (10 oz) can red enchilada sauce
  • 2 cups shredded cooked chicken breast
  • 1/2 cup fat-free sour cream
Preheat oven to 400'F. 

Combine 1/4 cup cheese, milk, egg, cumin, red pepper, corn, corn muffin mix, and green chiles; stir just to combine (don't over mix). Pour into a 13 x 9" casserole dish sprayed with non-stick cooking spray. 

Bake air 400' for 15 minutes until set. Pierce entire surface liberally with a fork; pour enchilada sauce over top. Top with shredded chicken, sprinkle with remaining 3/4 cup. shredded cheese. Bake for an additional 15 minutes or until cornbread is baked thru and cheese is melted. Remove from oven and let stand for 5 minutes. Cut into 8 pieces, top each serving with a tablespoon of sour cream. 

Jill's notes: I pretty much followed this recipe with a couple changes: I substituted 1 egg for the egg substitute and added some crushed red pepper flakes; I didn't love the idea of the chicken just being on top of the cornbread layer so I added some mexican seasoning to the chicken and put it in the baking dish before adding the prepared batter. I didn't top with sour cream, served with a side salad/garnish of lettuce, chopped tomatoes, chopped avocado, and sour cream. 

put seasoned chicken in the bottom of dish

add the batter over the chicken

bake 15 minutes or until set

poke holes and pour enchilada sauce over. add remaining cheese


From my Sis: 


Cornbread Casserole.  I LOVE Cornbread.  I’m going to let you peek to the last page of the book and say this was “good”.  The flavor was GREAT.  The Chicken (whatever Chicken my sister uses in this?) was GREAT.  Loved this.  What brought the entire recipe down for me to only a good was the consistency.  It was slightly Mushy.  Not sure what I would have preferred to keep it at a great but the base being mushy held me back. 

It had good flavor, like I said the chicken was awesome, and I put sour cream and jalepenos on mine also.  The husband didn’t put anything on his- and he gave it a solid “fine”.  But that isn’t a fair review because he doesn’t like cornbread. LOL.  

Brooke tried it also and didn’t enjoy but she’s a teenager so her review doesn’t count either.  If we ask her again today she may love it. HAHAHAHA.. Hope she doesn’t read this.


All in all, I try to give honest reviews – but hope by me doing that it doesn’t make my sister stop cooking for me! ðŸ˜‰


Click here for original recipe and source

Wednesday, May 19, 2021

Spaghetti Squash Lasagna

Made this for dinner for a healthy alternative to lasagna - no noodles (yes there's some cheese but not a ton!), and ground turkey...we loved this! Here's the original recipe, see my notes below for a couple changes. 

  • 2 small spaghetti squash (about 1 1/2 pounds each)
  • 2 t. olive oil
  • 4 garlic cloves, thinly sliced
  • 1 (8 oz) package fresh baby spinach
  • 1/2 cup part-skim ricotta cheese
  • 1/8 t. salt
  • 2 oz. shredded park-skim mozzarella cheese (about 1/2 cup), divided
  • 8 oz. 93% lean ground turkey
  • 1 1/2 cups lower-sodium marinara sauce
  • 1 oz. parmesan cheese (about 1/4 cup), grated
Directions:


1. Preheat oven to 350'
2. Cut each squash in half lengthwise. Scoop out seeds; discard. Place squash halves, cut sides up, on a baking sheet. Bake at 350' for 50 minutes. Let stand 10 minutes. Scrape inside of squash with a fork to remove spaghetti-like strands. Place strands on a clean dish towel; squeeze until barely moist. 
3. Heat a large skillet over medium-high heat. Add oil to pan; swirl to coat. Add garlic; cook 30 seconds. Add spinach; cook 1 minutes or until spinach wilts. Remove from heat. Combine spinach mixture, squash strands, ricotta cheese, salt, and half of mozzarella cheese in a medium bowl.
4. Return skillet to medium-high heat. Add turkey to pan; cook 4 minutes or until browned, stirring to crumble. Add marinara sauce; cover, reduce heat to medium, and simmer 4 minutes. Remove from heat. 
5. Increase oven temp to 425'
6. Spoon sauce evenly into the bottom of each squash half. Top evenly with squash mixture. Sprinkle evenly with remaining mozzarella cheese and parmesan cheese. Bake at 425' for 20 minutes.
7. Preheat broiler to high (keep squash in oven). Broil squash 1 to 2 minutes or until cheese is golden brown and bubbly. Remove from oven; let stand 10 minutes.


makes 4 servings. cal per serving: 374
    recipe found here

    note: I cooked the spaghetti squash my normal way (similar to this prep, I've posted it here), baked in 375' oven for 45 minutes, turned off the oven and left it in there for awhile (usually until I remember I left it in there, roughly an hour). It's usually dried out pretty good that way and I don't have to squeeze out the moisture. You can also cook the squash in the microwave if you want to speed things up, you'll need to drain and squeeze out a lot more moisture tho. I didn't have spinach, added a bit of cubed fresh mozzarella on top, and made one large squash - delish. 

Tuesday, May 18, 2021

Tip-sy Tuesday: bread ties

Here's something I didn't know, have never heard, never actually wondered about but when I read this I thought 'huh, interesting'. 

According to Insider, the different tag and tie colors display which day of the week the bread was baked on. Both Wednesday and Sunday tend to be excluded, though, since distributors use a five-day delivery schedule (bread makers need breaks, too!).


Here's what the different colors mean:

  • Monday = blue 
  • Tuesday = green
  • Thursday = red
  • Friday = white
  • Saturday = yellow

In addition to telling consumers when the bread was baked, these ties also allow employees to know when bread loaves are stale and need to be replaced.

Since the colors are in alphabetical order, that makes it easier for everyone to remember. However, because every grocery store is different, you'll still want to check the expiration date just to be safe.


found at hunker

Monday, May 17, 2021

Individual Baked Eggs

A new favorite grab and go breakfast - bacon and eggs baked in a muffin tin! Yum. They might not be the prettiest thing but it's an egg baked in a muffin tin, does it need to be pretty? hahahaha. In the future I'll sprinkle pepper or other seasoning on top before baking, that'd probably make them look better...whatever, they taste great! 


Per serving:
  • 1 slice bacon
  • 1 t. melted butter
  • 1 egg
  • 1/4 slice cheddar cheese
  1. preheat oven to 350'
  2. place bacon in a deep large skillet over medium-high heat, cook until evenly browned but still flexible.Wrap bacon slice around the inside of a muffin tin cup, put butter in the center and add an egg.
  3. bake in preheated oven for 10 to 15 minutes, place cheese over the egg and continue baking until cheese is melted and egg is cooked thru. 
Make up to 12 individual baked eggs in a muffin tin; if you don't fill all 12 cups try to spread them out so they'll cook evenly. 

Good for breakfast or as a quick, easy lunch. 

recipe found at allrecipes.com 

note: I saved a step and used precooked bacon!


Sunday, May 16, 2021

🔥Around the Campfire (week 20)

Dear Campers ~

Here's a quick recap in case you missed anything at camp last week:

Posts ~

5/9: 🔥week 19

5/10: cheese tulips

5/11: stamp ink hack

5/12: paper gift box

5/13: baked bbq chicken with smashed baby potatoes 

5/14: fresh tomato pie

5/15: gazpacho 2.0

What's Cooking ~

  • grilled pork chops, breaded cauliflower, chopped salad
  • stuffed eggplant, caesar salad
  • grilled chicken breast, roasted asparagus, carba-nada pasta 
  • chili, green salad
  • chicken sausages, orzo salad with tomatoes, mozzarella, basil


That's all for this week - we are off to set up the camper today so I gotta run. Have a great day, stop back often to see more projects, recipes, whatever else I can think of to make at MMDC!! Bye!

Sincerely ~


Jill
camp counselor


Saturday, May 15, 2021

Gazpacho #2

I posted a gazpacho recipe 3 years ago that had bread in it - click here for the recipe - it's really good but I wanted to make a lighter version without bread, so came up with this recipe after getting a few ideas online. It's just as good as gazpacho #1. I do still feel like gazpacho just tastes like runny salsa haha, but I'm changing my mind about not liking it - this is light and fresh, easy to put together, and was a perfect lunch. I pulsed it in the food processor to get it finely chopped but still chunky, you could just hand dice each vegetable if you want it very chunky (or don't have a processor). 


I didn't really measure the veggies so add as much as you want according to your preference - I'll guesstimate to give you an idea: 

  • tomatoes (I used a big handful of cherry sized)
  • cucumber (I used 1/2 an english hothouse cuke and left the peel on)
  • 1/3 orange bell pepper
  • 3 stalks celery
  • bunch of green onions, white and a little of the light green part
  • 1 minced garlic clove
  • 2 T. olive oil
  • 2 T. white wine vinegar
  • 1 T. apple cider vinegar
  • 1 t. Italian seasoning
  • 1 t. pepper, or to taste
  • 1/2 t. Worcestershire sauce 
  • salt to taste
  • 1 1/2 cups V8 juice (I used hint of pepper version)


1. Roughly chop the tomatoes and sprinkle with coarse salt while you are chopping the other veggies. 

2. Roughly chop the rest of the vegetables. Add everything to the food processor (if you're using) and pulse until it's the texture you want. Adjust the seasonings to taste. 

3. Transfer to a glass bowl and refrigerate overnight for the flavors to develop (but it tasted good right away if you don't want to wait!). 

5.15.16: steak fries

Friday, May 14, 2021

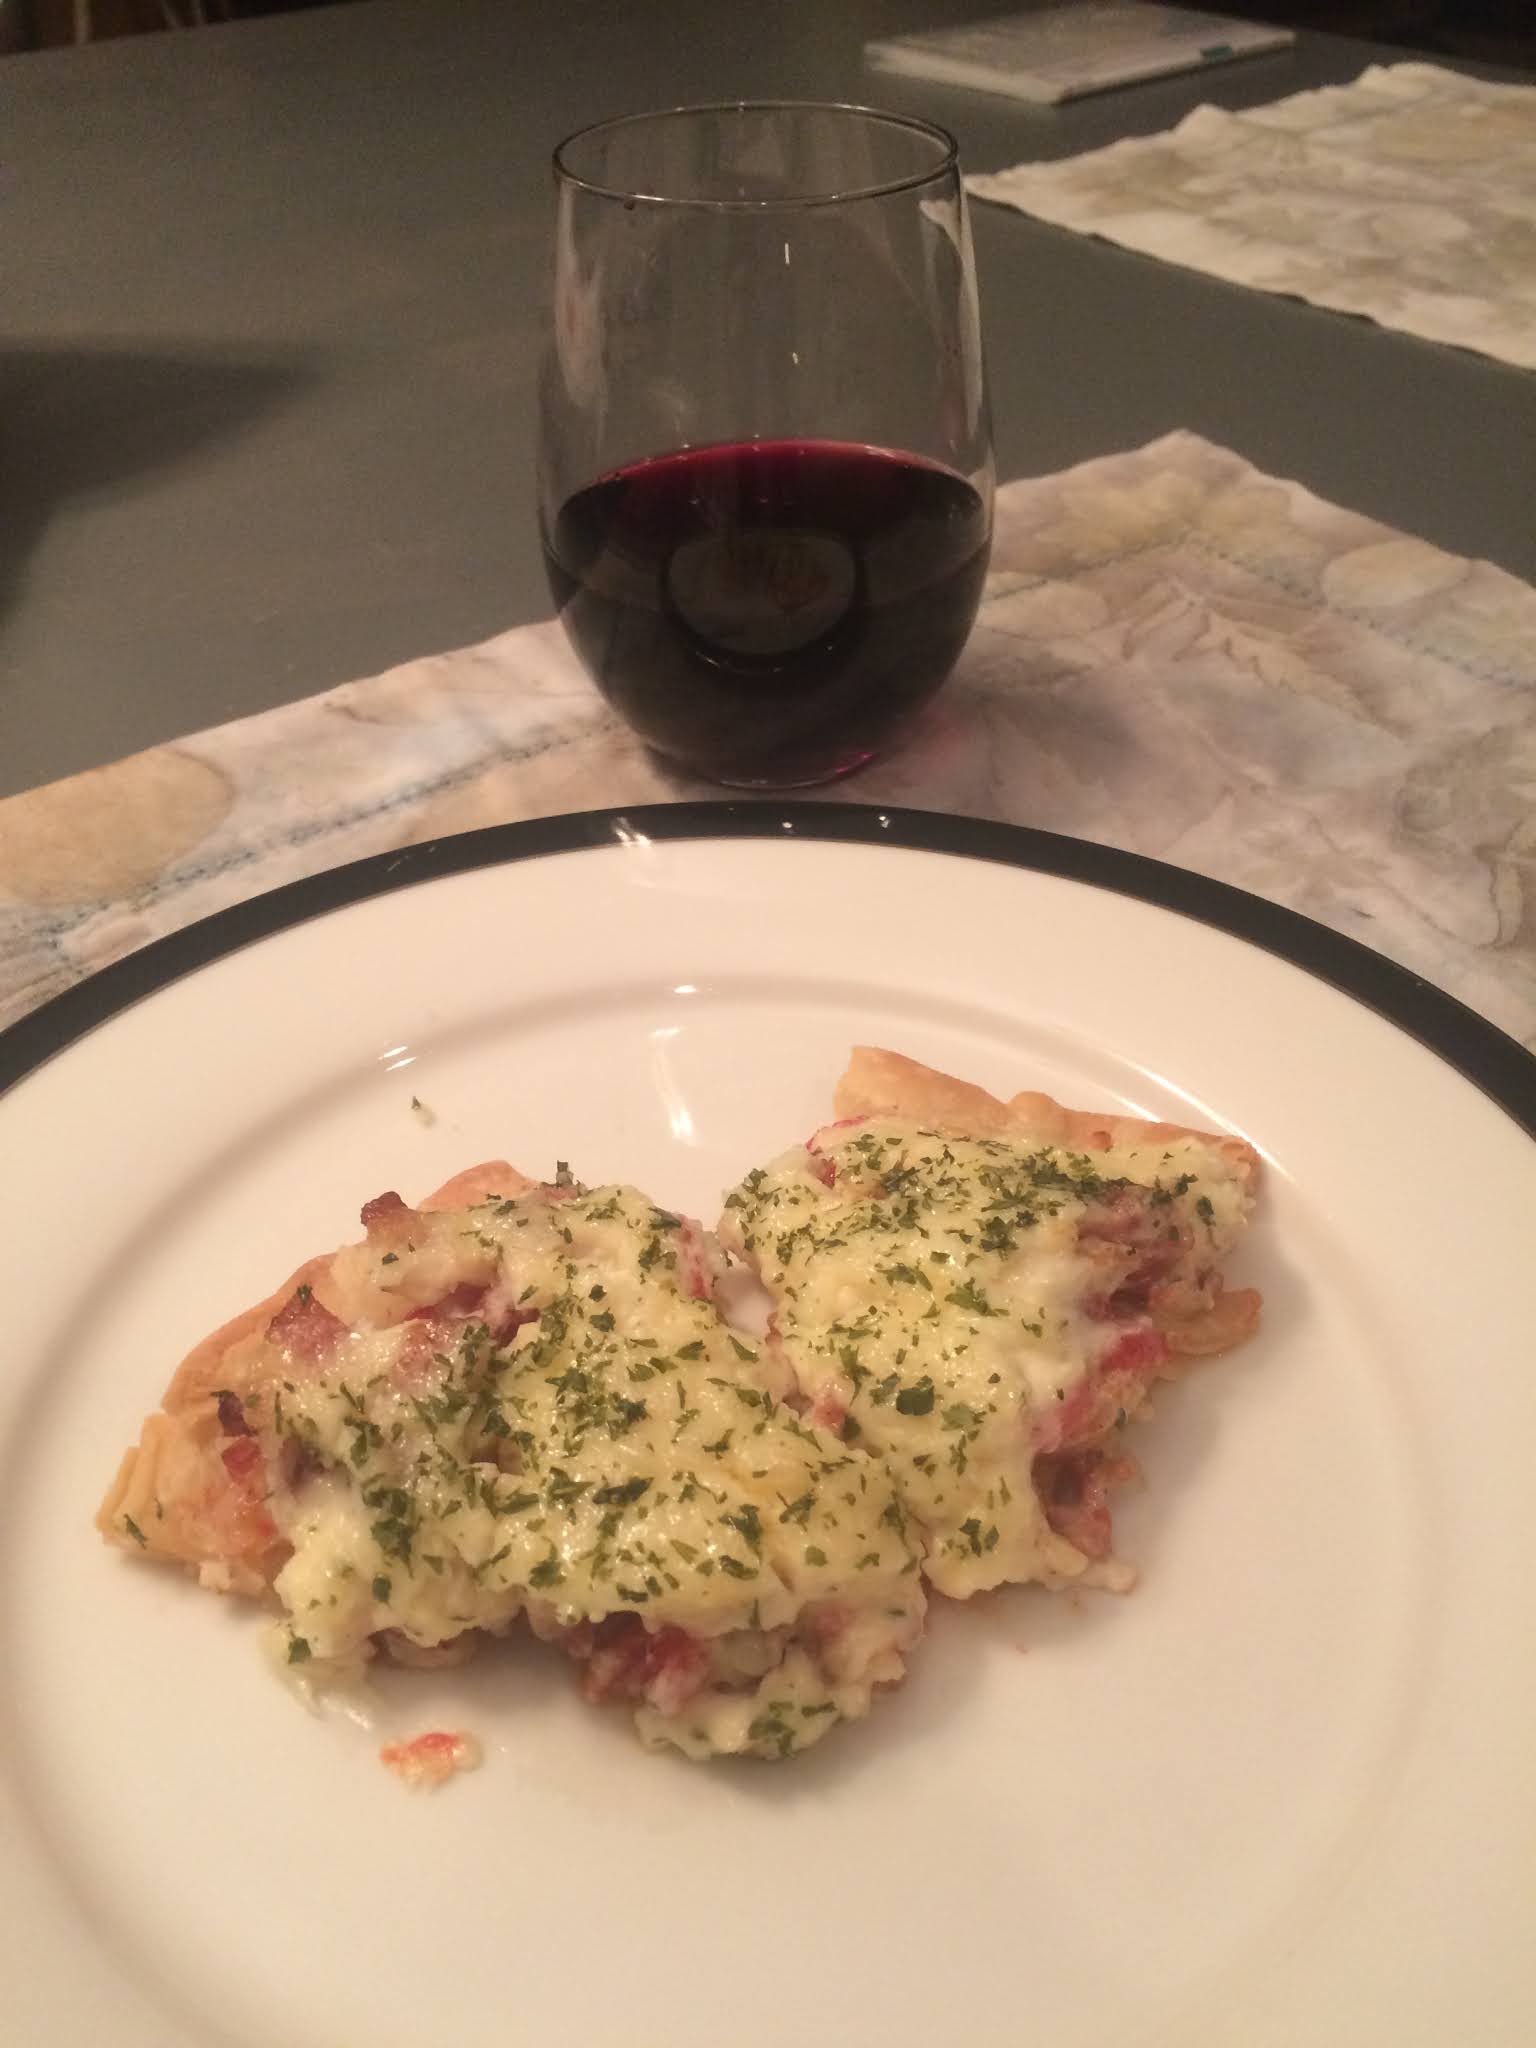
Fresh Tomato Pie

This is from LeDonna, she has a funny story to go along with this amazing recipe. I can personally attest to how great it is, I even ate it cold for breakfast the next morning :) 


Summer, Friday TGIF drinks on our deck.  Dan/Bernadette and Dave/Susie from across the street. 

I was planning very simple dinner for Mark and I, can’t even remember what it was, but knew we had plenty.  Probably when 2nd martini’s were being shook, we invited them all to join us for dinner.

Well when we started getting dinner stuff around, Bernadette wanted to contribute and said, I am gonna run home and “whip up a tomato pie”, in her very sweet southern accent, that was awesome!  And so we had tomato pie along with whatever I made.

Obviously tomato pie was fantastic, and I asked her to give me the recipe!  Bernadette is so sweet and I have teased about “whipping up tomato pie”, now I am so happy to have whipped up my own tomato pie, and plan on whipping up more in the future ❣️


FRESH TOMATO PIE

  • 9" unbaked pastry shell
  • 1 medium onion, sliced and slices separated 
  • 2 (6" to 8") ripe tomatoes, sliced
  • 1/3 cup grated mozzarella
  • 1/3 cup grated parmesan
  • 3/4 cup mayo
  • salt, pepper, and basil for garnish
Preheat oven to 400'

Bake pastry shell 8-10 minutes or until lightly browned. Remove from the oven.

Place onion slices in bottom and arrange tomatoes over top, salt and pepper to taste. Combine cheeses and mayo in a separate bowl, spread over tomatoes and onions. 

Bake 20-25 minutes until golden. Garnish with basil leaves. 


note: I did not have fresh basil, so I sprinkled parsley flakes on top after pulling from oven

And I used cherry tomatoes, sliced little.  Not sure how many, just what I thought would be enough to layer over the onion. Sometimes I add chopped cooked bacon.


5.14.20: barre workout

5.14.19: tipsy tuesday: cleaning the microwave
5.14.18: organizing die cut templates for the Big Shot
5.14.17: one of my favorite cakes - raspberry and whipped cream
5.14.16: make a birthday balloon card

Thursday, May 13, 2021

Baked BBQ Chicken and Smashed Baby Potatoes

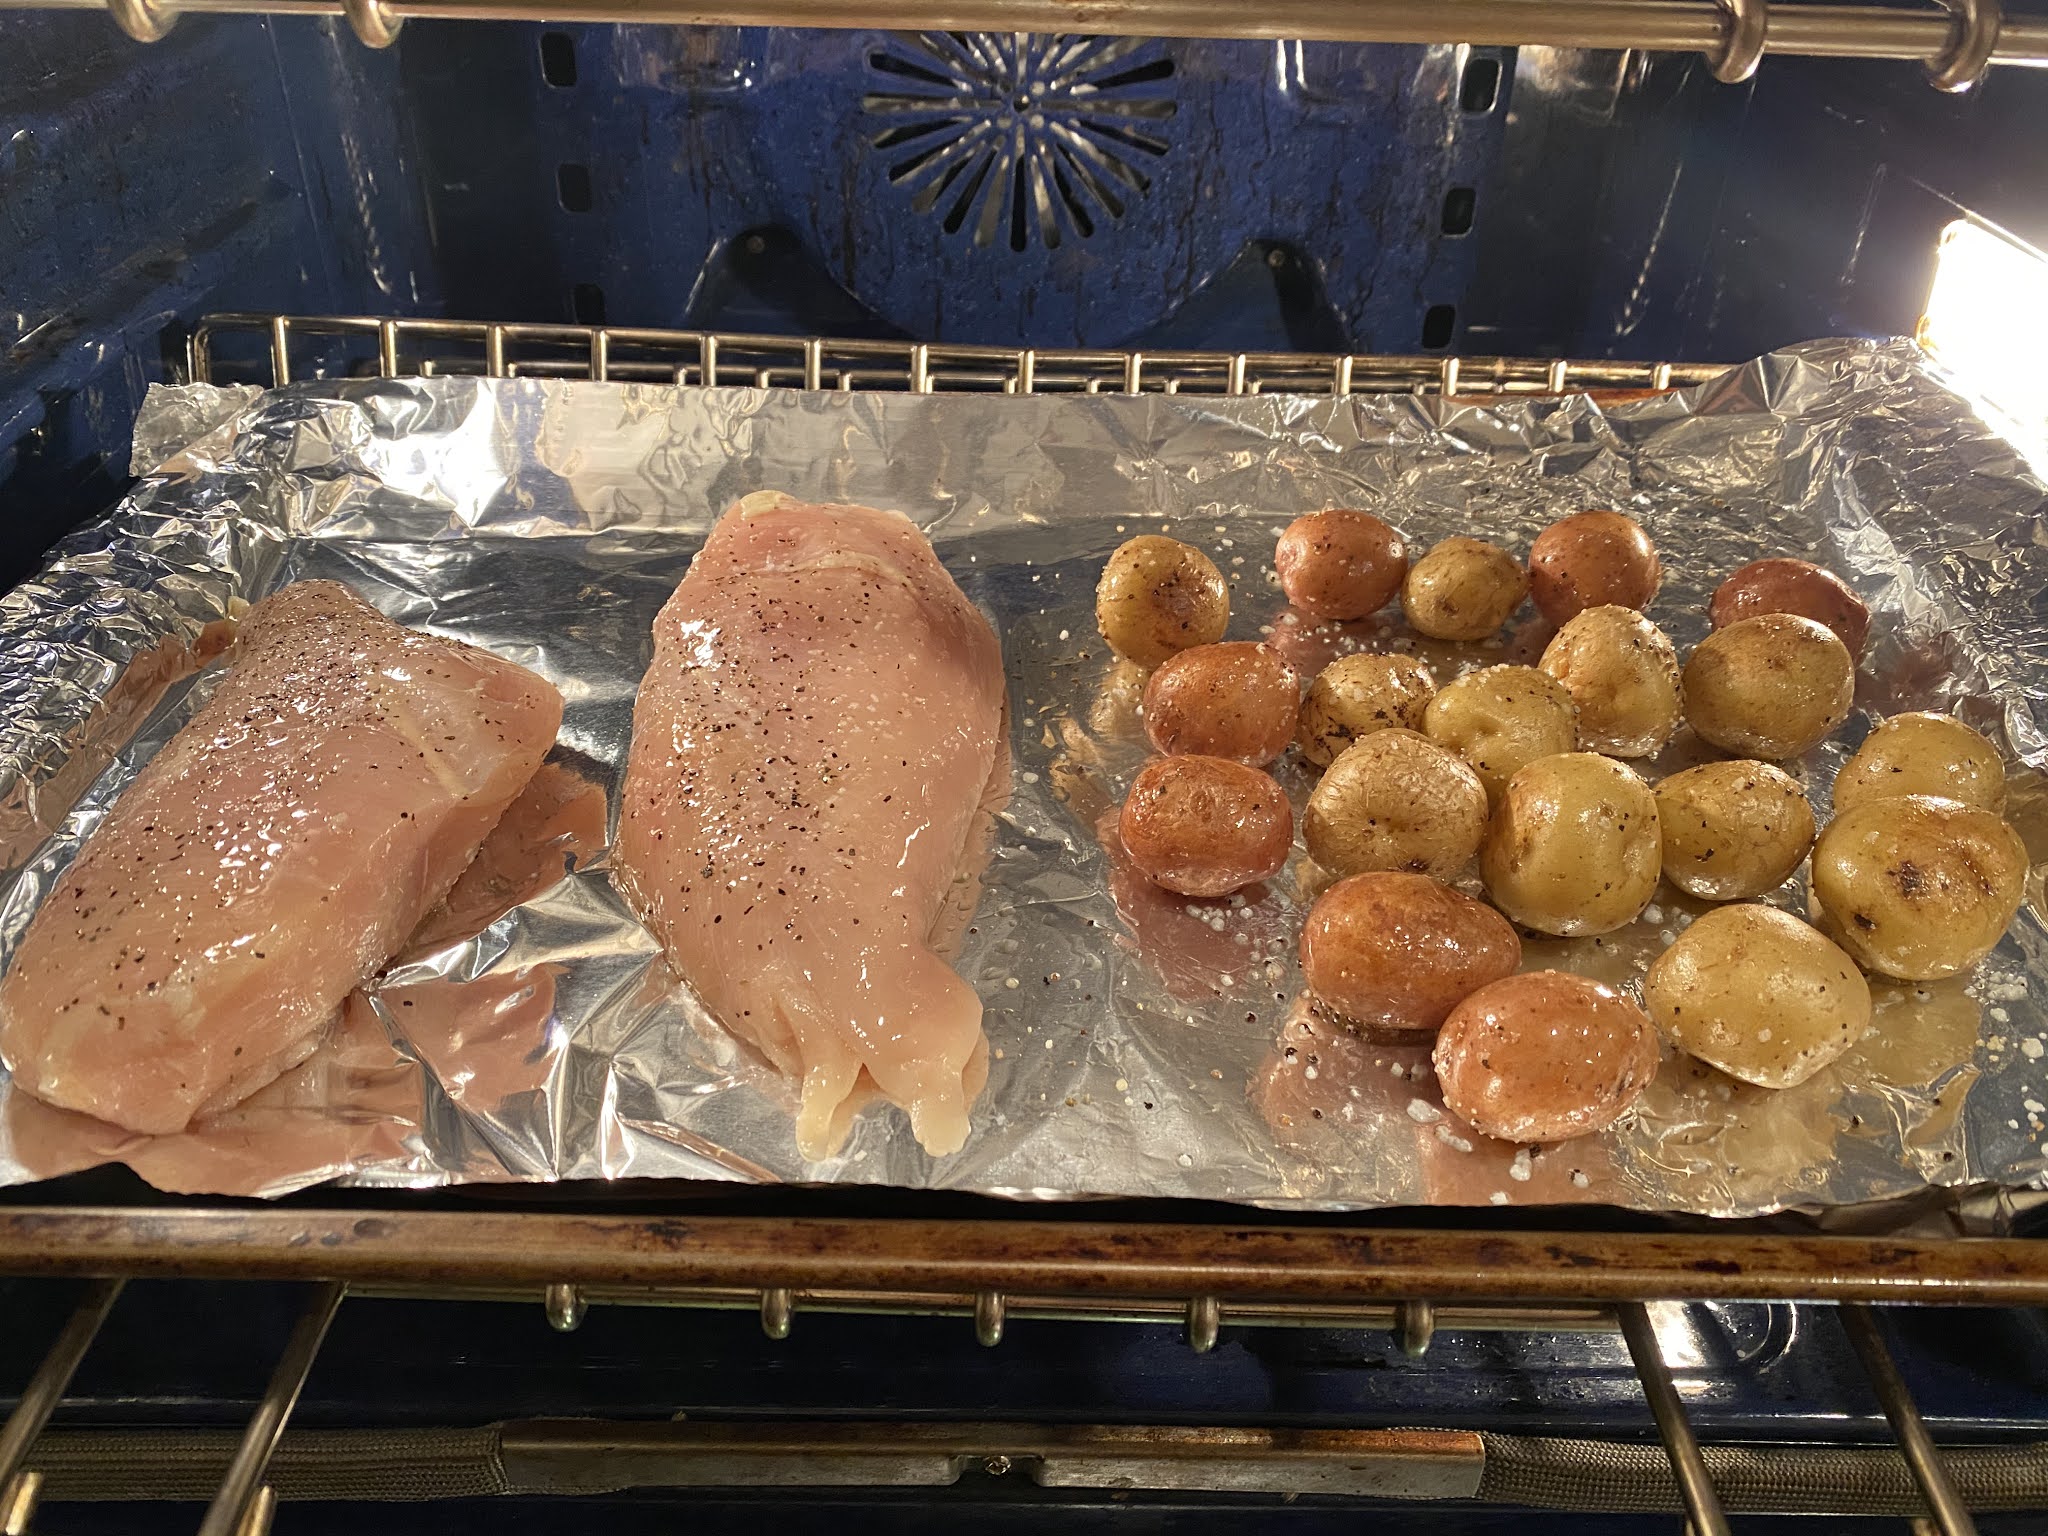
My sister gave me a stack of Hello Fresh recipe cards and I thought it'd be fun to take their ideas and make 'em my own - they have lots of prepared sauces and spice blends that I might try to recreate or I'll just wing my own seasoning/sauces. For example, this bbq chicken recipe originally called for skin-on, bone-in thighs and legs and the potatoes are topped with 'smoky red pepper crema' - I changed it to boneless chicken breasts and served the potatoes with sour cream on the side. Same idea, different execution. Here's what I did:


  • 2 large boneless skinless chicken breasts (or 4 smaller ones, adjust the baking time as needed)
  • baby potatoes (18-20 or however many you want and can fit in the pan)
  • shredded Monterey Jack cheese
  • olive oil
  • bbq sauce
  • salt and pepper

Adjust oven rack to the top position, and preheat oven to 425'. Line a baking sheet with foil. 

Pat chicken dry with paper towels; drizzle with a little olive oil and rub to coat. Season both sides with salt and pepper. Place on one side of the prepared baking sheet.

Put the potatoes on the other side of the baking sheet, drizzle with olive oil and season with salt and pepper, toss to coat. 

Roast for 20 minutes. 

Remove baking sheet from the oven. Carefully flatten the potatoes with a spatula or fork, season with salt and pepper, sprinkle the shredded cheese over top. Brush bbq sauce on the chicken. Return to the oven and continue cooking until the chicken is done and the potatoes are slightly crispy and the cheese is melted. 


5.13.20: Natalie's churros

5.13.19: macrame owl (I have him hanging from my rear view mirror, so cute!)

5.13.18: coriander crusted pork tenderloin

5.13.17: parachute cord dog collar

5.13.16: Brooke's emoji cookies

Wednesday, May 12, 2021

Paper Gift Box

Clicking thru a bunch of Ronda Wade's youtube videos showing all kinds of fun paper crafts the other day, I found this one from a couple years ago showing how to make a cute little paper gift box - it comes together so quickly and turned out so good that I will definitely be keeping this idea in my arsenal of gift enclosures (she's given me SO many great ideas, I can't believe that she keeps coming up with different ones!). I didn't decorate mine like she did, I love this cute decorative paper so much I didn't want to cover it up - she makes beautiful multi-layered designs but I'm way lazier and decided to just let this paper stand alone... I might add some gems or sequins for a little sparkle, we'll see. I think it'll be perfect for a baby shower gift - I'm thinking I'll put a gift card and maybe some little kisses or something inside. So cute! 

Obviously you can decorate yours however you like :) Click here to see Ronda make hers, I took lots of photos while making the actual box, and you can watch her if you can't follow my words and also to see how pretty she decorates hers. 

This is quite easy to make, and it only takes one sheet of 8.5" x 11" cardstock and some ribbon to make the box, plus whatever papers and embellishments you want for decorating the top. The finished box is     3 1/2" square and 3/4" high.

Score the paper and fold along all the lines:

on the long side - score at 3 1/2", 4 1/4", 7 3/4", and 8 1/2"

on the short side - score at 1 3/4", 2 1/2", 6", and 6 3/4"


scores on the long side

all the score lines made, now fold along every line

Remove the 2 rectangles on the right side, same for the left side except leave one little square so you'll have tabs - see the next picture:


Apply glue to the flap on the right - Ronda used tear tape but I don't have any so I applied glue stick. Fold in the 2 side flaps and then fold the glued flap up over the side flaps. See the next picture:


Fold the little square tabs in, and then close the 'lid':


Wrap a length of ribbon around the box to hold it shut. Place the bow at the side of the box where the cover will open when you untie the bow:


Now that your box is made it's time to decorate. I cut a piece of white paper 3 1/4" square, and the cute decorative paper 3" square. Glue the pretty paper on top of the white paper:


Add 4 foam dimentionals and attach the paper to the box over the ribbon - the dimensionals make the paper stand off the box a bit so the ribbon can slide out, if you stick the paper directly to the box with glue you'll fix the ribbon in place and that's fine too:


That's it! This comes together very quickly - as usual it took me way longer to type this then to actually make the box! Cute idea, right?

5.12.20: MSIH: pasties

5.12.19: ðŸ”¥

5.12.18: Amsterdam tulips

5.12.17: summer vegetable bake

5.12.16: makeup remover wipes tip


Tuesday, May 11, 2021

Tip-sy Tuesday: stamp ink hack

I haven't been stamping much lately so when I went to make the trifold card I posted a few days ago and wanted to stamp a cute image in the center naturally my ink pads are all dried up! Ugh. I remembered this hack from years ago to color the stamp using markers. This is really fun to do when you want the stamp outlines to be different colors - say if you wanted parts of this stamp to not have black outlines, you could use a colored marker for the flowers, a different color for the container, and the black for the words, etc. You only color the raised portion and you need to move fairly quickly or the marker ink will dry on the stamp before you have time to stamp it - if that happens tho I just blow on the stamped ink (like if you are cleaning your glasses) to moisten the ink.

 If this is a huge no-no in the stamping world I'm sorry, my bad - but it works!


In the photo above the right side is the first time I inked the stamp, it turned out very light because it dried too fast - left side is after I huffed on it hahaha!

5.11.20: pasties
5.11.17: travel folder