Tuesday, August 21, 2018

T-Shirt Rag Quilt

Cathy is helping her granddaughters pare down their clothes and thinking about making them t-shirt quilts for the shirts that are cute or memorable that they are having trouble parting with - that reminded me that I made a rag quilt out of my old t-shirts before I started this blog so thought I'd share it with you (and her). Great way to keep the memories without having to store all the old t-shirts.


I followed the instructions found here at sweet tea in the south; instead of my copying all her directions I'm including the link - just click on it if you want to make one and need more detailed instructions and photos -  I'll just give you the outline of what I did and will try not to be too confusing. This isn't hard it just takes a little time.

I made my quilt out of 20 t-shirts, each cut 12" square (you need the front and backs of the shirts). I also used 1 narrower piece of the shirts for filler 5 pieces (one in each row) to make the quilt even on the edges. For example, in the picture below there is a pink narrower filler piece on the top right, etc.
The quilt example I followed has the squares lined up evenly in rows but I like how the squares look being offset from each other, that meant I needed the narrow fill-in pieces to square the quilt up - you can just line them all up evenly if you want and skip the narrower fill-in pieces! (Once again, click here to see how it looks all lined up.)


In addition to the t-shirt squares, you'll need something to line it with - I used 2 pieces of lightweight flannel, cut the same size, per square. This makes each 12" square have a total of 4 layers. 

A summary to assembling this cute quilt:
  • for each square you need a front and back 12" square of t-shirt - note I tried to center the t-shirt logo/words/image in the center of the front square; for the back square sometimes I used the solid part of the shirt, or included a smaller detail if the leftover shirt had something on the front or back that I liked. In the photo above some of the squares are the backs of my shirts (like the number 18, or "coach jill") and some were the front (like the parrot or "frank the tank"). Play with the part of the shirt you really like and is the "memory" part of the shirt before cutting it out, save the rest of the shirt for the back of the quilt. 
  • you also need 2 (12") squares of lightweight flannel to go between the front and back t-shirt squares. Cut all the squares out before continuing on. 
  • lay out all the front squares on the floor and move them around until you like their placement. I tried to separate the same colored squares to make the quilt more balanced. Then do the same thing for the back squares (making up the back of the quilt). Take a picture on your phone of both sides so you remember where everything goes!
  • now to assemble the squares: lay down the back square with the "right" or good side of the shirt facing down, add 2 flannel squares and top with the front square "right" side up. Remember that the bottom square is the back of the quilt so make sure you lay the square down so you'll have any logo or the right side of the shirt facing out. Pin each square together, and then sew a giant "X" thru all 4 layers to hold them together.
  • look at the link I posted to see how to do this next part, I'm having a hard time describing how to sew it together. In order to get the front of the quilt to be "ruffled" you need to sew the squares together so that all of the edges are facing the front (you put the bottom of the squares together and sew thru all 8 layers, repeat adding the next square). Sew the squares together going across the row first - example, for the top row I sewed the light pink dance shirt to the black "big blue in the house", then added the white shirt, then the gray toyota shirt and lastly the pink filler square. Repeat for each row, and then sew the long rows together. I sewed 1/2 inch seams, you can make larger seams if you want a bigger ruffle. 

  • front of the quilt - all the seams are facing forward
back of the quilt        
  • this is the most time consuming part but it isn't difficult - make little notches along all the exposed seams including the edges, once you wash the quilt the notches with fray and curl and make the "ruffle" effect. Once it's all notched wash and dry the quilt - helpful tip that I'm happy I did is take it to the laundromat the first time...there are LOTS of little strings that come off in the initial wash and dry cycle! 


 I love this quilt - it's fairly heavy but in a nice way, and I love that I'm able to preserve my fun and memorable shirts while making way for new shirts in my closet (and eventually to be turned into another memory quilt haha), and it's so easy-care since it's just a bunch of t-shirts!


Monday, August 20, 2018

Marcia's Green Chile Fritatta

Here's the recipe for the green chile frittata that I made last week as a tester for my sister's work thing that changed into her needing sloppy joes instead (click here for that post and to get a great sloppy recipe). My friend Marcia gave me this recipe years ago and it's a favorite - perfect for a dish to pass, or for a buffet because it tastes good hot, cold, or at room temp. Also great for a vegetarian dish (it does have eggs tho), you could always add shredded chicken or chopped ham if you want.


A frittata is sort of like a crustless quiche, it has a firm consistency so it'll hold its shape if you cut it into squares and arrange on a plate. This recipe makes a 13x9 cake-size casserole, if you want to make a smaller one I don't see why you couldn't cut these ingredients in half and bake in a smaller square 8" or 9" baking dish. One more thing - my recipe says 3 lbs of cheese but I really question that amount (3 pounds?!), so experimented with using half that and it's delicious and cheesy, not dry. So I wrote the recipe using 1.5 lbs instead - if you want to see if 3 pounds is even better go right on ahead :)

Preheat oven to 350'

Ingredients:
  • 10 eggs
  • 3 cans chopped green chiles
  • 1 stick butter, melted and cooled
  • 1/2 cup flour mixed with 1 teaspoon baking powder
  • 1.5 lbs (24 ounces) grated jack cheese (or colby/jack, or mexican blend, etc)
  • 16 oz. container low-fat cottage cheese
Mix all together and pour into a buttered (or spray with non-stick cooking spray) 13x9 baking dish. 
Bake 45 minutes at 350'. Let sit for 10 minutes before cutting into squares. 
Can be served hot, cold, or room temperature. 

I lined the baking dish with parchment so I could
 easily lift the entire thing out of the dish


Sunday, August 19, 2018

Around the Campfire (week 33)

Dear Campers:

Happy Sunday! Everyone here is gearing up for 'back-to-school' - you guys ready? Summer should not be over all ready but that's how it feels. I had a blast taking my niece school supply shopping - I love getting my new folders, notebooks, and pencil fix. She asked why I wanted to take her shopping for school supplies since I don't even have a kid? Hello, did she just meet me? I love love love school supplies :).

Here's a 'week in review' recap and some random chitchat about the happenings at 'camp' last week.

Posts you might have missed ~

8/12: around the campfire week 32 summary
8/13: framed travel coins
8/14: make a tissue paper flower gift topper instead of a bow
8/15: zucchini bread, zucchini cake...you choose. Also a recipe for cream cheese frosting
8/16: sloppy joes with a secret ingredient
8/17: morse code bracelets
8/18: scrambled eggs and toast chicks

What's Cooking~
  • grilled steak with caesar salad and steamed green beans from the garden (so fresh, yum!)
  • baked seasoned salmon (I'm addicted to Paul Prudhommes Magic Salmon Seasoning - so good!), brown rice, roasted green beans from the garden
  • pork chops, butternut spiral salad (we are still in love with this amazing salad!)
  • grilled tuna steaks, greek salad (roasted garbanzo beans, tomatoes, cucumbers, feta cheese)
  • grilled marinated chicken (just pop chicken in a big bag with simple olive oil, vinegar, worcestershire, soy sauce, chicken seasoning), cold salad of leftover rice mixed with black beans, corn, tomatoes and avocado dressed with a little olive oil and seasonings. 
  • grilled pizza (store bought pre-baked crust topped with sauce, chopped ham, mushrooms, mozzarella and grilled for a few minutes until the crust is crispy and cheese is melted), caesar salad. 
Miscellaneous stuff keeping me busy but not interesting enough for an entire post ~
  • in addition to the 10 strand morse code bracelet I made for my sister, I've made a few more single strands for other people. the others ones I just did a stretchy circle without a clasp. Still obsessed.
  • I spent hours helping Dave build a database of charted ukulele chord patterns so he can chart songs for himself and others now. Yes, apparently that's a thing. And it's something he's been nagging asking me to help him with for a while now - it took a long time, was very boring, but it's done. Happy Birthday honey ;)
  • we have more tomatoes ripening at the same time then I can keep up with! I love tomatoes but why are they all coming in at the same exact time? A favorite way of mine to eat fresh tomatoes straight off the vine, all warmed up from the sun, is to sprinkle with coarse salt and pepper and either drizzle with a little olive oil or dip into mayo - I know, I know, dipping into mayo is not a healthy choice on my new "common sense" diet so I'm substituting plain greek yogurt and its good. Not mayonnaise good, but good enough and I like it. 
  • I read another Diane Mott Davidson "Goldy" mystery book - "Double Shot". The plot is a little dark for a caterer with recipes book, but I enjoyed it. Did I tell you that I've discovered I can borrow books from my library online? If you have a library card go online and see if they have a library app - I have one in both Michigan and Cali and borrow tons of books that way. So easy! I read them on my iPad which isn't my favorite (I love to hold a book) but I'm getting used to the iPad and it's all good. 
  • we saw "Crazy Rich Asians" with friends, a funny romantic comedy that we all enjoyed. I read all three books of this trilogy and really enjoyed them. The movie is, naturally, not as good as the book but still fun. 
That's it for this week. Go have a great day, and a great week - my wish for you is the spare time to make something, to be inspired by the blog, and to open your mind and be creative! 

Sincerely, 

Jill - 
your camp counselor :)


Saturday, August 18, 2018

Scrambled Eggs and Toast "Chick"

Jen saw this idea in a People magazine and thought I'd like to make it - of course I would, who wouldn't want to eat a super cute chickie scrambled eggs and toast dish for breakfast? I'll tell you who...my husband. I made him this as a surprise for breakfast and he said looked at it and said "what the hell?"


Whatever. I think it's adorable.

This is a fun and easy breakfast idea for your back-to-schooler, or for anytime you want to do a little somethin' extra breakfast...just maybe not for the hubby tho, geesh.

The toast is supposed to look like a cracked open egg but I think they look more like wings - to make them I just cut out 2 circles of toast using a cookie cutter, and cut the tops off in a zigzag. After cooking a couple cheesy scrambled eggs,  set the cookie cutter on the plate and filled it with the eggs so the chickie head would be sort of molded into a round symmetrical shape (you could just mound them into a circle). Add a couple blueberries for eyes and a wedge shaped piece of carrot or yellow cheese for the beak. Add some slices of avocado if you want, then set the toast on top. Easy peasy.


Note: in the inspiration recipe they made grilled cheese and scrambled eggs but I just went with toast. Up to you...


Friday, August 17, 2018

Morse Code Bracelets


Morse Code Jewelry is my new favorite thing to make. I'm obsessed. How fun is this? Do you know that morse code is short and long sounds (represented in print as dots and dashes) assigned to each letter of the alphabet and sent over a telegraph system so someone listening can understand (if you know the code) the message being sent? Yes it's much more detailed than that, but that's all we need to know to make these bracelets!

Using a code chart I found online, I made these bracelets for my sister spelling out secret words and messages that are special between us - most are from silly old stories we have that by just saying the catchphrase of the story brings back the memory of the event. For instance - we were all at one of Dave's pro/celebrity races where celebrities and drivers are all hanging out together in a big tent waiting, just sitting around. Minnie Driver was sitting at a table all by herself, not doing a thing - not on her phone, not reading a book, just sitting there. My sister and nieces approached her and asked for an autograph and Minnie looks at them and goes "later. definitely later". Seriously? If not then, when? Good grief. We haven't liked that actress since then! Anyway - anytime someone says "later" we answer "definitely later", so that is something I beaded onto the bracelet.


I ended up making 10 strands because I was having so much fun and kept thinking of other
funny or sentimental things to bead. Small round beads represent the dots, and long narrow beads represent the dashes - so going by the chart I laid out the beads to spell my messages, then strung them onto stretchy cord. My first thought was to put a clasp on each one of them individually, but when I realized I had 10 of them that seemed a little awkward to put on. So I attached them all together to a big jump ring, then attached a clasp to that - now all 10 are together with one clasp. It's a little big but I love that the entire thing is made up of messages to her. 


Because we aren't going to remember what each bracelet says without a cheat sheet, I typed up what each bracelet says and looks like with the morse code symbol underneath...as long as she has that she'll know which bracelet is which.


Do you love this as much as I do? I keep thinking who else I can make a morse code bracelet with a secret message on it for - maybe even for myself with positive affirmations and all that. Obsessed.

\
one year ago: caprese salad (tomato mozzarella salad)
two years ago: chocolate peanut butter layered dessert


Thursday, August 16, 2018

Sloppy Joes From Scratch

My sis had a work function and signed up to bring sloppy joes - so guess what I made yesterday? Yep, since I'm her personal caterer/gopher/assistant/slave I made the sloppy joes for her. On the plus side it gave me a chance to experiment on people I don't know and make sloppy joes from scratch which I've never done before, and now I can blog them :) Win-win.


Hold on - I need a break in the post to tell you a backstory: she was originally supposed to bring a dish-to-pass and asked if I felt like making anything, she didn't care what. I remembered a recipe that a friend gave me years ago for Green Chile Frittata and I thought that'd be a great buffet thing for her to take to work, but I questioned the recipe because it says it takes 3 pounds of cheese! 3 pounds? Hmmm, I worried that wasn't right - can anything that fits in a 13x9 cake pan take 3 pounds of cheese? So a few days ago I made a tester run of the frittata and halved the amount of cheese just to see if that was going to taste right - and it does. It is a delicious casserole and I was confident about sending it into work with her. Then she tells me that she doesn't need the frittata anymore, she needs sloppy joes instead. Now you know the rest of the story.

Back to the sloppy's...Cathy told me once that they put grape jelly in their sloppy joe sauce - yep, you read that right, grape jelly! I don't have her recipe but I googled to see if anyone else makes it like that and there are lots of recipes to pick from...I know, weird - right? I combined a few recipes to come up with this one, and fortunately this sauce turned out so good (otherwise I planned to make a store run for Manwich!). I had Dave try it and he said it tasted just like his mom used to make, I take that as a big compliment (Shirl was a great cook!) and it's now a keeper recipe. I'm never using Manwich again, these are SO much better!

Pssst: don't tell my sissy but it's really easy to make homemade sloppy joes - I might have made it sound like I slaved away all day on it but it comes together very quickly ;)

I used 6 pounds of burger so needed a lot of sauce - I made 6 cups and used almost all of it - here is what I will do next time for a smaller batch (if you want 6 pounds worth just triple these amounts!).

Joes:
  • 2 pounds ground beef
  • 1/2 cup chopped onion
  • garlic salt
Put the beef and onions in a large skillet and sprinkle with garlic salt, cook over medium heat until the meat is no longer pink. Drain it really well then wipe out the pan - greasy sloppy joes are gross. 

To make them sloppy: 
  • 1 can condensed tomato soup, undiluted
  • 1 cup ketchup
  • 3 Tablespoons grape jelly
  • 1 Tablespoon brown sugar
  • 1 Tablespoon cider vinegar
  • 2 teaspoons dijon mustard
  • 2 teaspoons yellow mustard
  • 1 teaspoon worcestershire sauce
  • 1 teaspoon salt
  • 1/2 teaspoon celery seed
Mix the sauce ingredients together in a big bowl and taste it - I added a few more dashes of this and that to get it how I wanted. If you like it sweeter add more jelly or brown sugar, more tangy add additional vinegar or mustard. Play with it. Once it tastes good to you, add it to the drained ground beef and cook until it gets hot (or put it in a slow cooker on low for 4 hours). 

For Jen to take to work I put it in a big ziplock baggie (I had a little worry that the bag was going to break open it was so heavy!) and then she transferred the mixture to a crock pot once she got to work. Easier than trying to carry a full crockpot in from the car! 


PS: I'll post the frittata recipe soon - the sloppy joes were a hit but they have no idea how good the frittata was that they missed out on! :)


One year ago: s'more pie
Two years ago: mashed cauliflower


Wednesday, August 15, 2018

Zucchini Bread or Cake

Mickey asked me the other day if I had a zucchini bread recipe - yep I do - I thought it was already on the blog but I can't find it if it is, so at the risk of repeating I'm posting it because it's a really good one and what's even better about this recipe is that it can be bread or cake!

Mmmmmm...cake.....


Mickey added some mashed banana (and chocolate chips on half) and baked it in a 13x9 cake pan. But she didn't frost it so which is it - cake shaped bread or unfrosted cake? Haha, either way it's so good!!


This makes 2 bread loaves or 1 13x9 cake. (I've also made muffins). If you want it to be "cake" it's delicious with fluffy cream cheese frosting : Mix 4 ounces softened butter and 4 ounces softened cream cheese in a mixer until smooth and blended. Slowly add 2 cups of powdered sugar and 1 teaspoon vanilla, beat until smooth and fluffy.


Tuesday, August 14, 2018

Tissue Paper Flower Gift Topper

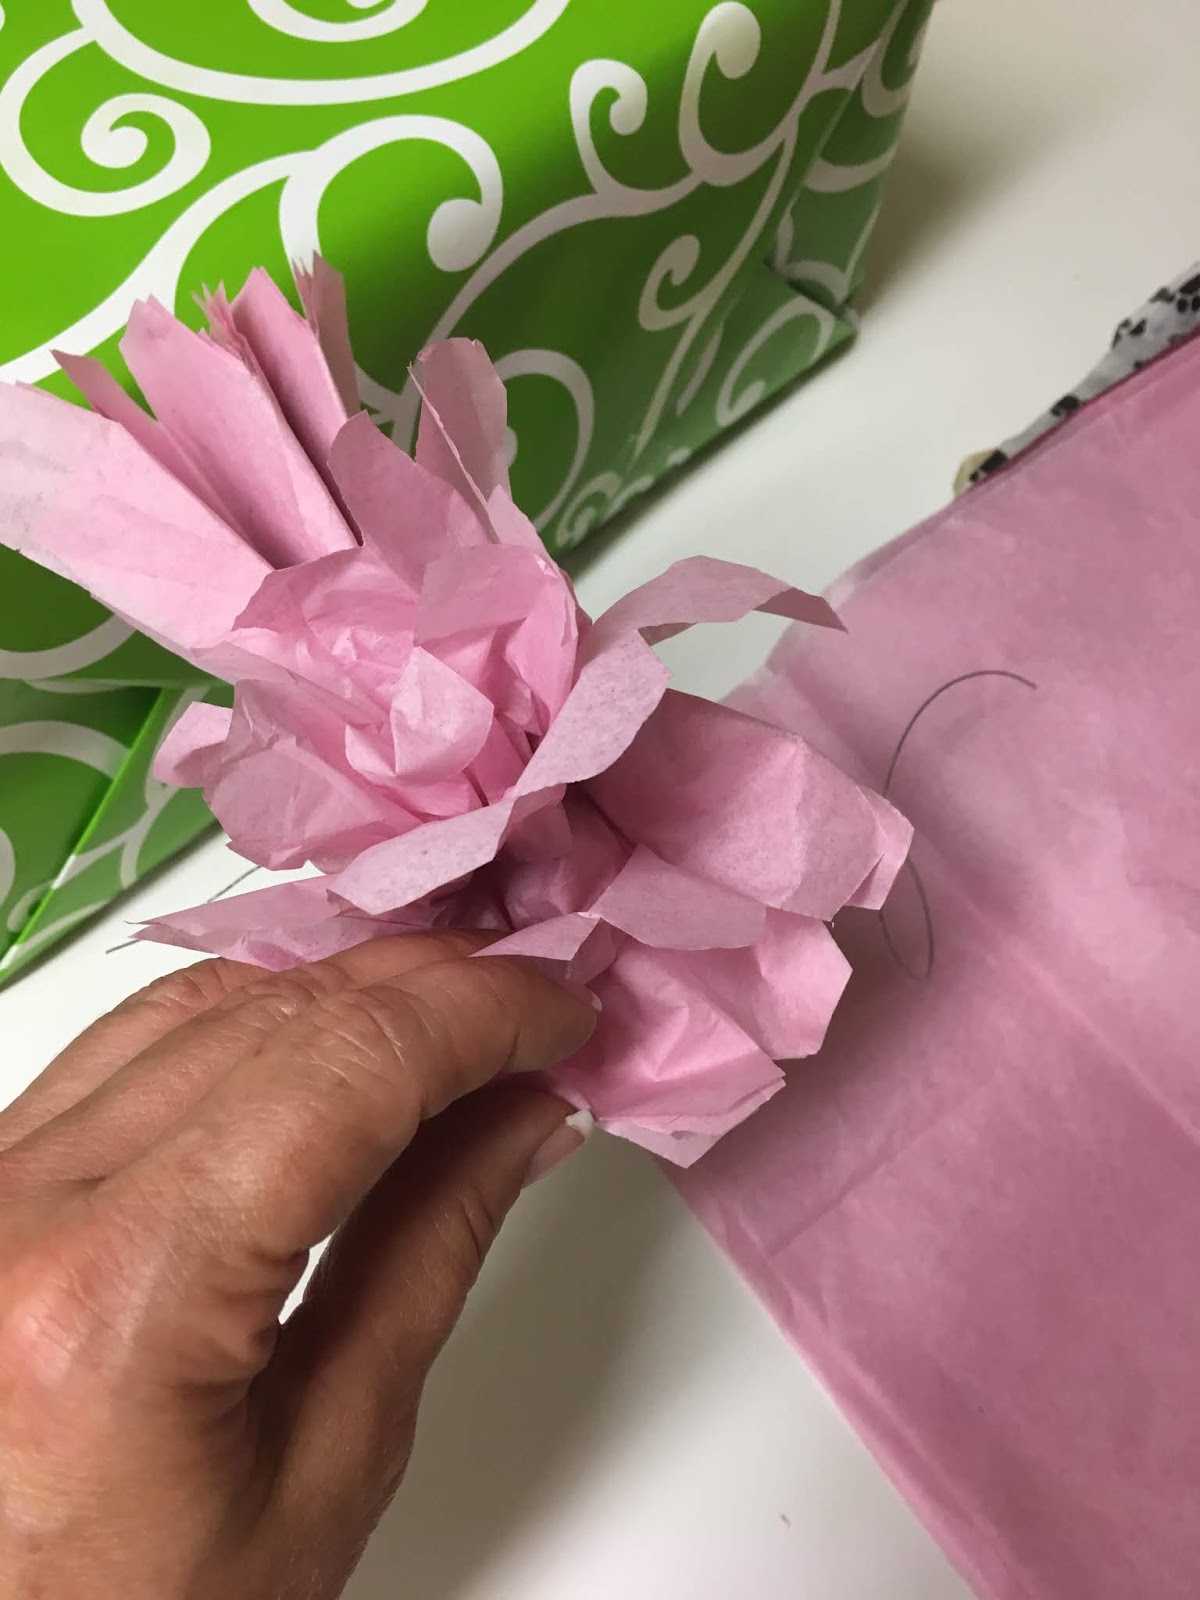
I haven't made tissue flowers in a long time (click here for another post) - I didn't have a good bow or ribbon for the big box I wrapped my sissy's gift in yesterday so I quickly made 3 small flowers to tie on top.


Cut a few squares of tissue paper, for these small flowers I cut them approximately 5" square and used 9 squares. Stack on top of each other, accordion fold them, twist a short piece of thin wire around the center, trim the edges either round or pointed, then carefully separate the layers and shape like a flower. I made 3 of them, twisted them together so they looked like a bouquet, and attached to a ribbon that I wrapped around the box. Look how pretty it looks! Very inexpensive, easy, and quick to do - and it's different than a regular ol' bow.

rounding the edges...

...or cutting them into a point gives the flowers a different look.

gently pull up the layers to separate

here I've separated the layers on the left side of the wire, continue with the right side and shape.

twist the flowers together into a bouquet


one year ago: make a personalized shopping bag
two years ago: quebec chicken

Monday, August 13, 2018

Framed Travel Coins

I just saw this on a friends Facebook wall and instantly knew I was stealing the idea! We have so many random foreign coins that are in a baggie - not enough to convert back to USD, plus I like to have them as keepsakes of our trips - so they've just been sitting around. This is just a frame with whatever background you want - it could be a piece of printed scrapbook paper, or you could arrange ticket stubs, maps, etc. and glue them all on a plain piece of paper to lay under the coins, if it will fit in the frame (check that out before you go to all the trouble of arranging the papers - see her note). Brooke recommends you glue the coins to the paper or they'll fall when you lift the frame.  I asked what she used as a background and this is what she had to say:

it's a solid piece, I thought about using postcards but it was going to be too thick so it's just a scrapbook page. I used super glue to attach the coins to the paper. I did have to play around with a few frames to make sure it fit, I didn't like the distance between the glass and coins on a shadowbox but found this frame at JoAnns on clearance and just took some coins with me to make sure the backing fit.

Isn't this a fun, useful, inexpensive (if you already have the coins that is!) idea - in addition to being a great way to display travel memories? Thanks for the idea and letting me steal your photo, Brooke! I literally just saw this idea and am posting it, I'll be making myself one and will show you when it's done. I couldn't wait to share :)

Sunday, August 12, 2018

Around the Campfire (week 32)

Dear Campers:

It's been a busy week (can you believe it's already week 32 of the year?) so I thought I'd give you a little 'week in review' recap and some random chitchat about the happenings at 'camp' last week.

Posts you might have missed ~

8/5: creamy cucumber salad (my mouth is watering just thinking about it)
8/6: fixed a bracelet and showed how to use crimp beads
8/7: kitchen tip - how I freeze cookie dough
8/8: Mary's cucumber and smoked salmon appetizer
8/9: made Sarge a dog necklace so he can wear his cute new tag
8/10: making square knots for macrame
8/11: boozy bears - vodka soaked gummy candy

What's cooking ~
  • grilled chicken, mozzarella, and spinach brats with grilled zucchini (slice and put in a foil packet with a little olive oil, salt, and pepper - throw on the grill until cooked, we did about 20 minutes and it could have gone longer)
  • grilled swordfish tacos (brush the swordfish with a little lemon butter while grilling, serve it with toppings of your choice - we do coleslaw - and warmed corn tortillas)
  • grilled pork tenderloin with black bean/corn/tomato/avocado salad
  • grilled halibut (last time Dave grilled halibut it broke up all over his grill and he was unhappy, this time we used a grill basket sprayed with non-stick cooking spray) with cauliflower rice and mixed veggies
  • grilled steak with mushrooms, roasted asparagus, and iceberg wedge salad
  • bbq ribs with homemade coleslaw
  • grilled chicken breasts (we've been buying thin cut breasts, regular chicken breasts are so huge lately and they take forever to cook!) with butternut squash risotto (found in the freezer section) and a mix of asparagus, green beans, and tomatoes (beans and tomatoes were first pickings from the garden - yum)
Miscellaneous stuff keeping me busy but not interesting enough for an entire post ~
  • the garden is doing SO good I had to spend some time staking the tomatoes and green beans - the tomatoes have so much fruit on them they are falling over and I'm worried the stems are going to break from the weight. Lucy the parrot was so happy to get the first beans of the season, and Sarge comes out with me every morning to "check the 'maters".
  • we spent the first part of the week camping up north and learned this cool trick from our campground neighbors (an actual campground, not the blogs pretend campground LOL) - while floating on the lake the current and waves kept pushing us into shore, but the neighbors were staying in place. Of course I asked how the heck they were doing that and she showed me her trick (maybe this is a wildly common trick but new to me!), they screw one of those dog stake things into the lake bottom and attach bungies to it and then to their float. Genius. I found the dog screw at Walmart along with 2 inexpensive 5' dog leashes, ran the end thru the float handle and thru the handhold loop of the leash, then clipped to the dog stake - no more floating away!

  • started "common sense" dieting (pretty much just what it sounds like - eating more of what I know I'm supposed to eat and less of what I shouldn't. Lost a couple pounds and then found them again after eating a gluttonous lunch at The Cheesecake Factory while back-to- school shopping with my niece!
  • read 2 books while camping - Still Me (book 3 by Jojo Moyes - The other two are Me before You, and After You - good books!), and Crunch Time by Diane Mott Davidson (she has a whole series of these about Goldy, a food caterer who solves mysteries, and she includes recipes. Sort of the perfect book format hahaha). Both were light easy summer reads that I enjoyed.
  • made two stretchy bead bracelets, and worked on a project that I'll show you next week. It's a surprise for my sister's birthday tomorrow so I can't tell you yet! 
Ok, enough rambling. Hope you have a great week, are inspired by what's coming up at blog 'camp', and find time to make something! 

Sincerely, 

Your camp counselor - Jill :)