Thursday, July 18, 2019

My Sis is Hungry: Mexican Stuffed Peppers

It's been 2 weeks since I made dinner for my sis to review and she's making it sound like it's been months 🙄 such a drama queen LOL. This week I made her these stuffed peppers (I also gave her some of yesterday's North Carolina Tarheel Cookies which she deemed "money" but wished there were no raisins in them, after she finds out they're rum soaked she might change her tune hahahah) - here's what she has to say about the peppers:


Hello!! I’m still here!! My sister tried to kill me by starving me to death but I refused!
Today’s meal could have really been anything and gotten a good review because we were so hungry! (haha . just kidding). Ok so lets get to it. 

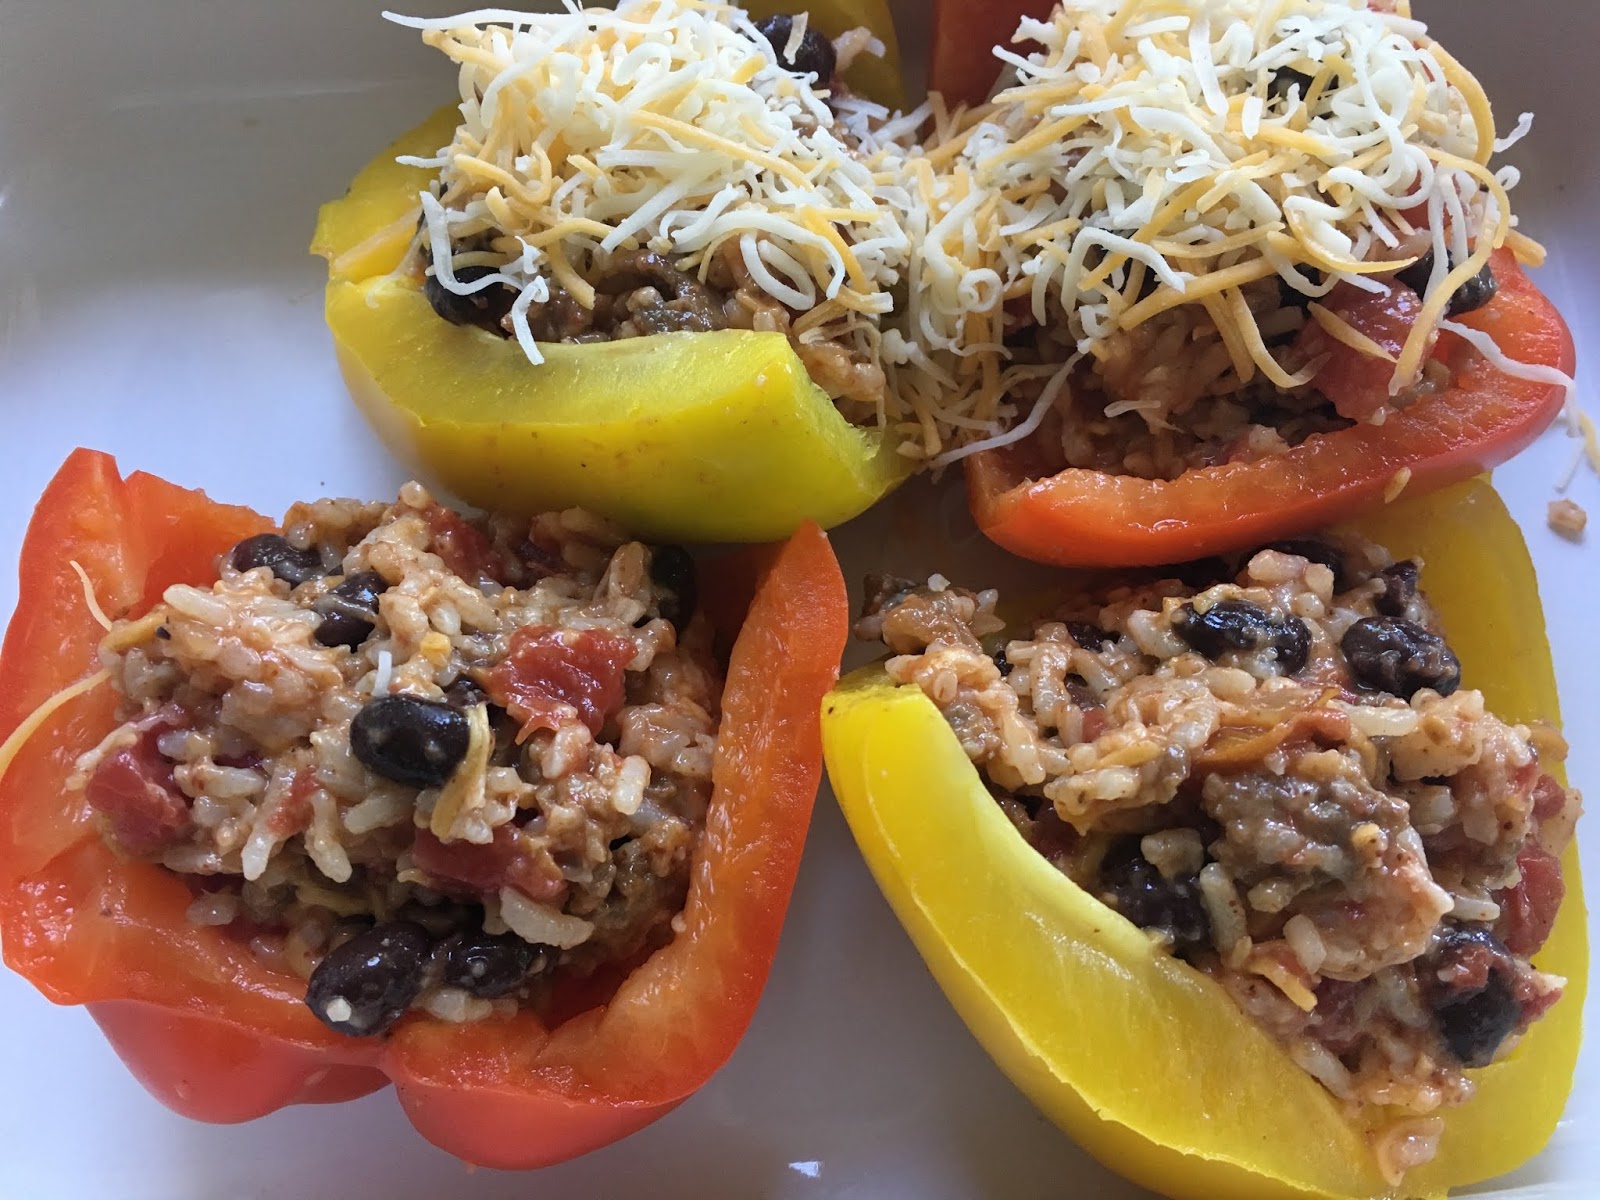
Stuffed peppers of some sort.  She called them “Mexican” something or other, probably just to get my husband to accept he was eating vegetables.
First her instructions to bake said “until heated thru and cheese is bubbly, at least 30 minutes”.  How would I know if heated through unless I bit into one?  The cheese was melted so I took them out and served them.  Yep, you guessed it, cold inside. So don’t listen to her 'at least 30 minutes'.  Lets say at least 45 minutes.

These look fantastic.  So pretty.  Plain green peppers wouldn’t have been as pretty at all so loved the peppers. I loved this meal.  Really loved it.  Have to be honest I have never had stuffed peppers before so can’t compare it to others.  But this one I liked. I am also a fan of the burrito bowl so this reminded me of that.  I hope they were healthy- which would make my rating of this go even higher.  If it wasn’t healthy I don’t see a reason it couldn’t be.  Whatever sauce was in the filling wasn’t strong or overpowering so I’m assuming its healthy (haven’t actually read the recipe yet.)
Now lets discuss the husband.  He doesn’t like rice, black beans or peppers so his review of “Not Bad” was actually a compliment. And he did eat it all so “Not Bad” must have been kinda ok.

All in all, I didn’t get a rating from him (forgot to do that) but I give it a 7.  If I hear its healthy I will go up to an 8.  I plan to actually make this one- I love the idea of putting all my burrito bowl ingredients into a pepper and baking. Hmmmm maybe I’ll swap her rice for cauliflower rice?  Yum.  Now I gotta look it up- unless I can get her to make it for me again. ðŸ˜Š

Mexican Stuffed Peppers ~
  • 6 large bell peppers
  • 1 tablespoon olive oil
  • 3 (sweet or hot) Italian sausages, casings removed
  • 1/2 cup chopped onion
  • 2 cups cooked rice
  • 1 (15 oz) can no-salt-added black beans, drained and rinsed
  • 1 (14.5 oz) can no-salt-added diced tomatoes, don't drain
  • 2 teaspoons chili powder
  • 1 teaspoon Mexican spice blend
  • 1/2 teaspoon garlic powder
  • 1/2 teaspoon cumin
  • 1/2 teaspoon salt
  • 1 (8 oz) package shredded Mexican cheese blend, divided
Preheat oven to 350'. Bring a large pot of water to a boil.

While waiting for the water to boil, cut off tops of peppers. Scoop out seeds and discard. Cook peppers in boiling water until slightly softened, 3 to 4 minutes. Drain and set aside.

Meanwhile, heat oil in a skillet over medium heat. Cook onion and sausage, stirring and breaking up the meat into small crumbles, until the onions are softened and the sausage is cooked thru. 

Stir together sausage, onion, rice, beans, and tomatoes in a large bowl. Stir in spices, then fold in
1 1/2 cups cheese. Divide rice mixture evenly among the peppers, stand them in a baking dish, sprinkle with remaining cheese.

Bake until cheese is melted and bubbling, about 30 minutes.


*Jill here - my sis didn't tell me that her husband doesn't like rice, black beans, or peppers! Good grief, the poor guy hahahaha. This is healthy up until the Italian sausage, if you omit the meat and use low-fat cheese they are definitely good for you and I think they'll still taste great without the sausage. LeDonna and I split one of these for lunch, we didn't bake them but microwaved for a couple minutes and they were plenty hot and we both loved them - she said she likes them maybe even more than regular stuffed peppers. I will absolutely be making this filling again - Dave doesn't like peppers so I will stuff large hollowed out tomatoes or zucchini next time. Oh, and I think cauliflower rice would definitely work Sissy!


7.18.18: Cathy's strawberry pie (so good!!)
7.18.17: tip to keep off the shoulder tops off the shoulder!
7.18.16: Jen's tip for washing baseball hats

Wednesday, July 17, 2019

North Carolina Tarheel Cookies

  1.  I have no recollection of taking a cooking class at "The Tasting Spoon" in Marina del Rey   where this recipe is from.
  2.  I have a terrible memory so even tho I don't remember it, doesn't mean it didn't happen.
  3.  I wrote on the top of the recipe "very good - chewy, many flavors"; I should totally be a food   critic with my eloquent descriptions.
  4.  I didn't read this recipe all the way thru, probably wouldn't have made them if I saw that it  makes 6 1/2 to 7 dozen cookies! 
  5. At the bottom of the recipe the author wrote "I always get 7 dozen, but I don't eat raw dough"
  6. Anyone else feel like that's a little bit judgey? hahahaha. I only got 57 cookies which is 4.75 dozen (I had to use the calculator to figure that out) but I did not eat 2.25 dozen cookies worth of dough Ms. Judgey Judgerson. Maybe my idea of "walnut size"* and hers is different.
  7. Lastly, I have no idea why these are named "North Carolina Tarheel Cookies". When I googled for other recipes nothing came up except college-themed frosted cookies. Weird. But whatever the name, these are really really really good. Oh wait - actually they are "very good - chewy, many flavors". Sort of a cross between chocolate chip and oatmeal with a few other things thrown in. Note I didn't add nuts so Dave could also eat them, which is good since I have 4.75 dozen cookies.
Ingredients:
  • 1 1/4 cup raisins
  • 1/2 cup rum or brandy
  • 1 stick butter, room temperature
  • 1/2 cup shortening
  • 2 cups firmly packed brown sugar
  • 2 eggs, lightly beaten
  • 6 ounces semisweet chocolate chips
  • 2 teaspoons vanilla
  • 2 cups flour
  • 1 teaspoon baking powder
  • 1 teaspoon baking soda
  • 1 teaspoon salt
  • 2 cups shredded coconut
  • 1 cup chopped nuts
  • 3 cups quick-cooking oats (note* I used regular old-fashioned oats which makes an even chewier cookie)
Directions:
  1. Soak raisins in rum overnight - or microwave, covered with plastic wrap for 1 minute. 
  2. In an electric mixer cream butter, shortening, and sugar until light and fluffy. Beat in eggs, then chocolate and vanilla.
  3. In a separate bowl combine flour, baking powder, baking soda, and salt. Add to mixer. On low speed add coconut, nuts, and oats. Drain the raisins and add to mixture (discard brandy).
  4. Roll dough into tablespoon/walnut-sized* balls. Place on parchment lined baking sheet about 2 inches apart. 
  5. Bake at 325' for 12-15 minutes until light golden brown. Leave on baking sheet for 1 minutes, then remove to wire racks to cool. Store in tightly covered containers in a cool place. 


Tuesday, July 16, 2019

Tip-sy Tuesday: Frosting

After making the cookie dough cupcakes last week I learned something I didn't know - the batch of buttercream frosting made exactly enough frosting for 2 tablespoons on each of 24 cupcakes. Usually I pipe the frosting on using a decorating bag but this time I used a scoop and found the size of the scoop is exactly right to divide the frosting evenly on one batch of cupcakes. Cool. Good to know.

mmmmm...nothing like ice cream scoops
of homemade buttercream frosting! 

I've posted my buttercream recipe a few times, but here it is again so you don't need to go looking:

Cream 1 stick of unsalted butter in a standing mixer (or use a hand mixer) until its fluffy. Add 1 teaspoon vanilla, a pinch of salt, 1 cup powdered sugar. Gradually add another 3 cups of powdered sugar alternating with a little milk or cream until you reach the right consistency.

You can change it up by adding cocoa powder to make chocolate frosting; or beat in some cream cheese or marshmallow fluff; or fold in thick pudding, whipped cream, or cool whip...lots of variations but you can't beat plain ol' vanilla buttercream in my book.

Funny story from when my nieces were little - I made cupcakes and for whatever reason used canned frosting. They were all "these are weird and don't taste like usual" - even little kids could tell the difference! After that they'd ask for cake with "the good" frosting. So cute.


7.16.18: golf counter pin
7.16.17: zucchini lasagna
7.16.16: Jen has a fun friend gift idea

Monday, July 15, 2019

Felt Flowers

Guys!

Check out the beautiful felt flowers Miss Lori made - I'm so, so impressed with how talented my friend is (and if I'm being truthful I'm also a tiny bit jealous - I mean c'mon, I make silly Lego crap and she's turning out these stunning flowers?). Just look how pretty they are, are you thinking what I'm thinking and cannot wait to attempt this yourself? 'Cuz after seeing these photos my first thought was 'I need to learn how to do this, and I need to do it asap'!


Big thanks and shoutout to Miss Lori for sharing this with me (and you!) along with a few notes, I will absolutely be attempting to make these in the near future. Seriously, I love these wreaths so much...I can't even pick a favorite, they are all gorgeous.


Here's what Lori has to say about making them:


Thank you Jill! I saw this little video on the Hobby Lobby website and gave it a whirl!  (I started with the flowers on the side like in the video but I didn’t like how it hung when it was done, so changed it up a bit)


I did a little variation on the one where you clip straight lines along the fold-I just did the cuts diagonally instead and it turned out cute!


For the tall, longer flowers, you use the same folded and clipped piece that is shown in the video and then hot glue at the top of the wire then wrap the piece around and around from top to bottom, push it up to where you like and hot glue bottom in place.


For the flower with the felt center, I just cut the inner piece for example, 1 inch and the outer piece 2 inches.  Cut and rolled the inner, then cut and rolled the outer piece over it.


I tried a couple variations-a 6 petal flower instead of 5, and I used pinking shears on a couple.

I saw this pic for the daisy-it is the only one that is sewn rather than hot glued-

By altering the colors and sizes the possibilities are endlessly wonderful!  The best thing, they don’t take long at all!


This is it for a bit now though, my fingers need a break from hot glue!


7.15.18: greek chicken bowls
7.15.17: card holder
7.15.16: Jen organizes some clutter

Sunday, July 14, 2019

Around the Campfire 🔥 (week 28)

Dear Campers ~

Here's a recap of what happened at camp this week in case you missed anything:

Posts ~

7.7: 🔥 (week 27)
7.8: beaded hoop earrings
7.9: Tip-sy Tuesday: Jen's hair bun hack
7.10: cookie dough cupcakes
7.11: my niece is hungry: oslo pasta bake
7.12: za'atar bread with kefir cheese (sounds weird, but it's so good!)
7.13: Cathy's banana pudding

What's cooking ~
  • steak, stuffed mushrooms, sautéed green beans and spinach
  • grilled chicken, veggie tots, salad
  • grilled pizza, salad
  • grilled brats, potato salad, kale salad
  • bbq ribs, roasted green beans, mashed potatoes
Miscellaneous stuff keeping me busy but not worth a whole post ~
  • Spent all morning weeding, staking, and working on my miniature garden which is just popping with beans right now! and the plumeria stick has 4 leaves on it, yay I'm actually growing a tree.
  • Read #2 Amos Decker series book "The Last Mile" by David Baldacci ⭐️⭐️⭐️⭐️⭐️ and "A Dangerous Act of Kindness by LP Fergusson ⭐️⭐️⭐️. 
  • Our cc&r's forbid (among many things) pink flamingoes in our yards. Sigh. So guess what I have all over inside the front courtyard where you can only see them from the house? Yep - lots and lots of pink flamingoes 😂 I will not be denied my flamingoes - just sayin'. 
  • Made my sis another golf stroke counter, maybe if she didn't need to count so high every game she would stop wearing them out LOL!! Don't tell her I said that...

Have a great week - stop back often to see more recipes, crafts, whatever else is happening at camp!

Sincerely ~


Jill
camp counselor and flamingo lover

Saturday, July 13, 2019

Banana Pudding

Cathy made this banana pudding for a party and it is SO good - really, I don't even like bananas and I just about licked my bowl clean! When other people at the party said they didn't want to try it we forced them to at least take a bite, sure enough they didn't stop at one bite hahahah.


Ingredients:

  • 1 (8 oz.) package cream cheese, room temperature
  • 1 (14 oz.) can sweetened condensed milk
  • 1 (5 oz.) package instant vanilla pudding mix
  • 3 cups cold milk
  • 1 teaspoon vanilla
  • 1 (8 oz.) container frozen whipped topping, thawed
  • 4 bananas, sliced
  • 1/2 (12 oz.) package vanilla wafers
Directions:

1. In a large bowl, beat cream cheese until fluffy. Beat in condensed milk, pudding mix, cold milk, and vanilla until smooth. Fold in 1/2 of the whipped topping.


2. Line the bottom of a 13x9" dish with vanilla wafers. Arrange sliced bananas evenly over wafers. Spread with pudding mixture. Top with remaining whipped topping. Chill.


Friday, July 12, 2019

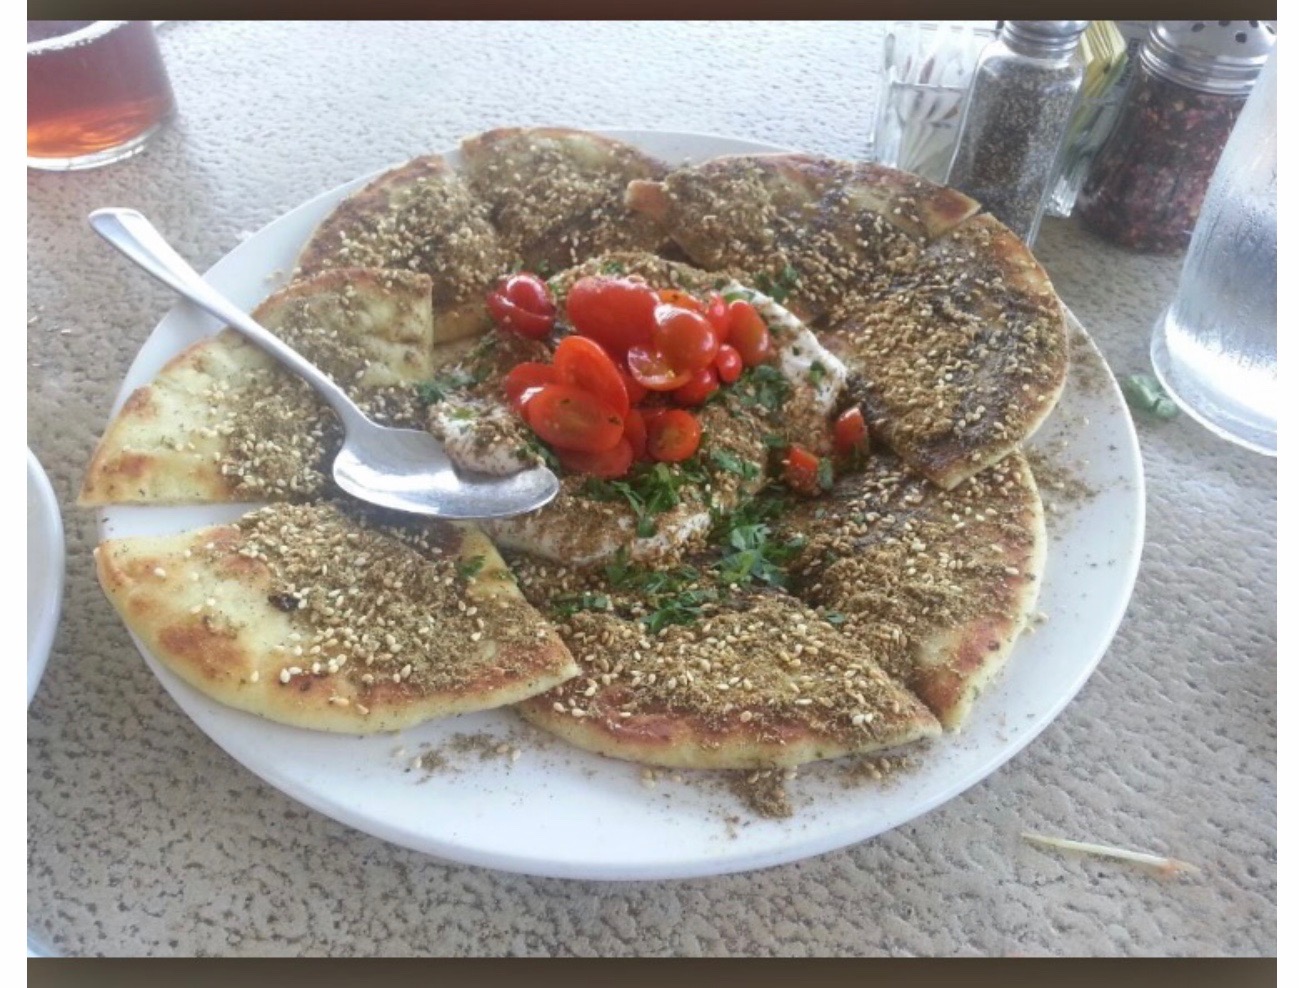
Za'atar Bread with Kaffir Cheese

Janis and I had lunch at Sammy's in El Segundo and shared the most delicious appetizer - I wasn't familiar with Za'atar or Byblos Lebni before having this dish and am now obsessed with both!  Za’atar is a Middle Eastern spice blend that you can purchase or make your own - it tends to be a mix thyme, toasted sesame seeds, oregano, and sumac. Byblos Lebni is a rich creamy dairy product, similar to thick greek yogurt or sour cream - if you can't find it I'd substitute plain greek yogurt in a pinch.  This is a very easy, flavorful, and pretty appetizer - thanks to Janis for the recipe so we can now make it at home!


Za’atar Bread with Kefir Cheese


Pita Bread, Flat Bread or Frozen Dough Rolls
Olive Oil
Zaatar Seasoning
Byblos Lebni (pasteurized kefir cheese) - add salt to increase flavor
Chopped Tomatoes

Preheat oven to 350.  Brush olive oil over bread and sprinkle with a generous amount of Za'atar seasoning.  Place in oven to for approximately 6-8 minutes or bake until dough is cooked if using raw dough.  Cut into slices and serve with kefir cheese and chopped tomatoes. 

note: to serve, I put the byblos lebni or yogurt in the middle of a big bowl or plate, top with more za'atar seasoning and chopped tomatoes; place the warm seasoned bread around the outside edge of bowl or plate as shown above. 

I bought za’atar seasoning at the grocery store, here’s a recipe if you want to make your own: 

Combine all in a small bowl ~
1 tablespoon ground sumac
1 tablespoon dried thyme
2 teaspoons dried oregano
1 teaspoon toasted sesame seeds
1 teaspoon salt
1 teaspoon pepper

Thursday, July 11, 2019

My Niece is Hungry: Oslo Pasta Bake

My niece questioned why my sis is getting meals to review (all those "my sis is hungry" posts I've been running), as she is also hungry. So today it's "my niece is hungry"! Here's her review - recipe and notes follows what she has to say:


This weekend my Mom came to visit me in Chicago, and brought a dish in a cooler that my aunt made for me. (I didn’t even ask what it was but excited for 1. Free food and 2. Who doesn’t love pasta? 

At first glance, the dish looked like some sort of lasagna/red sauce casserole? The small bag of shredded cheese on top of the dish made me excited (more cheese!) and her directions seemed easy so I popped it in the oven and was ready to give it a try. I’m not really sure what kind of meat she used but it was good.  It wasn’t overly seasoned and not too heavy (where afterward you’d most likely feel ‘gross/too-full’??)  Overall I thought the pasta was super delicious; total comfort food, yet felt somewhat ‘healthy’ thanks to the sauce. The base of the sauce felt more like real tomatoes than pasta sauce, which I enjoyed. My only suggestion/recommendation would be to enhance the spiciness...maybe something with more heat, or even additional pepper. I personally would’ve liked it over a bed of spinach or chopped spinach or another “green” for dimension (which I did the second day, when I packed leftovers my for lunch!) I’d definitely enjoy this meal again (take 2 ‘my niece is hungry?’ or maybe I’ll save the recipe and give it a whirl!)

Personally, I’d love if there were more ‘my favorite niece is hungry’ recipes ðŸ˜‰!!

 ðŸ˜Š Thanks Auntie/Make My Daycamp!!
XOX - Buffy


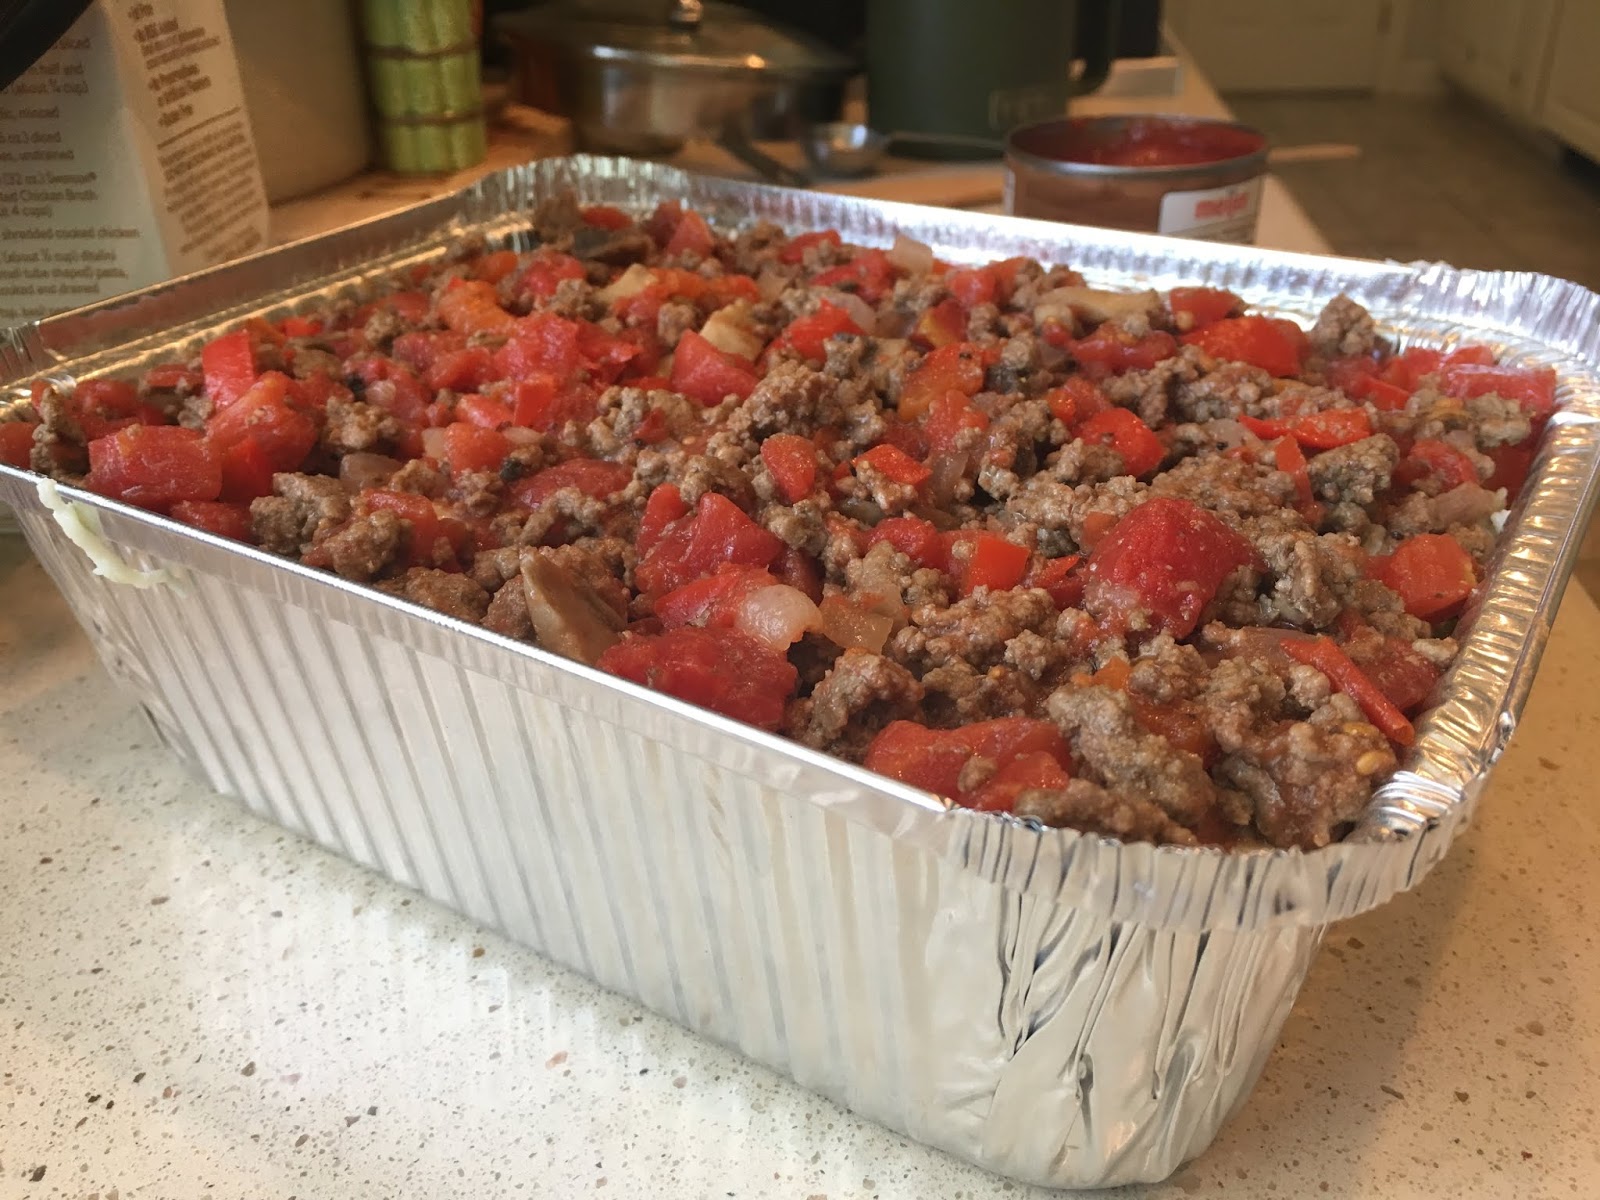
Jill here: This pasta dish is layers of tomato meat sauce and pasta in a cheese sauce. I have no idea where this recipe came from, it's in my file of clippings to try sometime and the original name is "Oslo Macaroni Bake" which is slightly confusing to me since it calls for rotelle pasta and not macaroni. So I've renamed it "Oslo Pasta Bake"; it would be fine to use other shapes for sure - I'm thinking any short pasta that you'd use in macaroni and cheese like shells, bowties, penne, heck even macaroni! The way the original recipe is worded is also a little confusing to me - I'm just going to give you the recipe as I made it:

1 pound lean ground beef
2 tablespoons butter
1 cup sliced mushrooms
1 medium onion, chopped
1/2 cup chopped red pepper
1 teaspoon salt
1/8 teaspoon pepper
1 16 oz. can tomatoes, chopped, drained

1/4 cup butter
1/4 cup flour
2 1/2 cups milk
2 cups shredded Swiss/Gruyere cheese, divided

3 cups cooked rotelle pasta
1 8oz. can tomato sauce

for the meat sauce:
Melt 2 tablespoons butter in a large saucepan, add the mushrooms, onion, red pepper, and season with salt and pepper; cook until the veggies are tender. Add the ground beef breaking it into small pieces (I don't like big chunks of meat in my sauce, do it how you like) and cook until the beef is done, stirring often. Stir in the chopped tomatoes. Set aside. (I drained off any standing liquid before assembling this casserole).


for the pasta and cheese layer:
In a saucepan, melt remaining 1/4 butter. Add flour and cook, stirring, several minutes. Remove from heat. Gradually blend in milk; cook, stirring, until thickened and smooth. Stir in 1 1/2 cups cheese. Stir in cooked pasta.


To assemble and bake:
Alternate layers of pasta and meat mixtures in a buttered 2 qt. baking dish. Top with tomato sauce. Bake at 350'F for 35 minutes, top with remaining cheese*. Bake 5 minutes longer until the cheese is melted.


Makes 6-8 servings.

*note: the extra 1/2 cup cheese you put on after baking for 35 minutes is the small bag of cheese that Macey is referring to in her review. I put the casserole together for her but didn't bake it, sent it wrapped up with the above baking directions.

7.11.18: banana cupcakes with marshmallow filling
7.11.17: spider mum paper flowers
7.11.16: coco lopez

Wednesday, July 10, 2019

Cookie Dough Cupcakes 2.0

I posted cookie dough cupcakes back in '16, here is another version that had everyone at Al and Cathy's raving - Cathy said "I don't even like cupcakes and these are the best cupcakes in the entire world!" and Al texted "Cathy & I agree your cupcakes are the best we have ever had" and thanked me for bringing them...wow, high praise! This is obviously a keeper recipe.

You'll need:
  • yellow cake mix (without pudding in the mix- I used Betty Crocker Favorites yellow cake mix, note the amount of liquid and fat you need might change depending on what brand you buy - change my amounts below if yours calls for something different)
  • banana instant pudding (I did not use sugar-free)
  • 3 eggs
  • 1 cup whole milk (instead of water)
  • 1/2 cup melted butter, cooled slightly (instead of oil)
  • dash of vanilla
  • 1 24-count tray of store-bought chocolate chip cookie dough (I used Nestlé Toll House, the kind that comes in squares you can break off and bake individually)
  • buttercream frosting
  • 1/2 block of cream cheese
Directions:
  1. Cut the cookie dough into it's pre-scored 24 squares, freeze until solid.
  2. In a large bowl mix together the eggs, milk, melted butter, and vanilla. Add the cake mix and pudding, beat with hand mixer (or standing mixer, or by hand) for a couple of minutes.
  3. Divide the batter evenly into 24 cupcake tins lined with cupcake liners. 
  4. Place 1 frozen cookie dough square on each cupcake batter, slightly press into the batter but don't push it all the way in. 
  5. Bake at 350'F for 16-18 minutes. Do not overbake or the cookie dough will bake solid. Sticking a toothpick or skewer in the cupcake to check for doneness like normal doesn't work because you want the cookie dough soft - check the edges of the cupcake to see if the cake is done. Remove to a rack to cool.
  6. Meanwhile, make the buttercream frosting. Blend 1 stick of butter with 1/2 block cream cheese until fluffy. Add 1 teaspoon vanilla, a pinch of salt, and one cup of powdered sugar, mix to combine. Slowly add 3 more cups of powdered sugar alternating with a little milk or cream until you get the right consistency. 
  7. Once the cupcakes are cool frost with the buttercream cheese frosting, sprinkles optional :)

*note: I set the cookie dough on top of the batter and didn't press down. The dough didn't sink all the way to the bottom and made the top of the cupcakes uneven - but once you frost them no one will ever know! Don't freak out if they come out of the oven a little wonky. I will lightly press the cookie dough into the batter next time.


I kind of like how a scoop of frosting looks on the top
before I smoothed it out - reminds me of a scoop of ice cream

Update * Cathy made these cupcakes the following day and made 1/2 with macadamia white chocolate chip dough; she said they taste great but one thing she found is that the dough was portioned into bigger pieces and filled up the cupcakes a little too much - the Nestle dough I used is a total of 16.5 ounces, check the weight of whatever dough you use. If you use homemade dough I would just put about a couple teaspoons in each cupcake.

Tuesday, July 9, 2019

Tip-sy Tuesday: Hair Bun Hack...by Jenny

So we have established I don’t cook or craft but there is something I do well... I purchase crap off Amazon. I see an ad usually popping up on Facebook (because they have tracked my history of buying crap so keep popping things up for me).  Here is my latest thing I couldn’t live without. It’s an odd version of a slap bracelet used to make a bun. Yes we have all seen the sponge bun- I have that also. That one makes my bun GIANT and obviously fake. This one looked so easy and great! So boom- $8 on Amazon prime overnight and here it is. 


I eagerly open the packet and pull it out and race to try it out! All the time this will save me in the morning before work!  I put my hair in the pony tail and place the bun maker on- boom. It immediately curls up (like a slap bracelet does). Not to be deterred I try it again. And again. And again. 


On the 10th try I got it. A semblance of a decent looking bun. Maybe with more practice this will get faster. So my verdict? Decent bun but not quick. I’ll keep practicing because I do love the idea. 

Ignore the dirty hair in these pictures but hey.. what do you expect from someone who purchases a slap bracelet to do their hair for work?


Jill here - this is one thing I miss out on since I have short hair, I'd love to play with this bun-making-slap-bracelet! Looks great Sissy!


7.9.18: beach terrarium