Saturday, November 14, 2015

Wine and Design Class


My friend Candy and I took a "Thanksgiving Decor Wine and Design" class and had so much fun. This centerpiece can easily be done at home with supplies you can find in the yard and a couple things from the craft store.

We started with a block of oasis (green almost styrofoam like stuff that retains water when soaked, it is used with fresh floral arrangements to help keep moisture in) that had been soaked in water and placed into a dish, use whatever shallow container you want. Break apart some greenery (I don't remember the name of the greenery they used, see the picture for an idea of what to use) and stick in evenly to start covering the oasis. Next we put long pieces of curly willow branches around the bottom - this is where things started to go wrong for me haha but everyone else seemed to figure it out - that you then bring up and tie so the centerpiece has a round shape and looks similar to a lantern. We then added leaves, mums, sorghum stalks - doing this on my own I would find whatever was in the yard to use - to fill in the empty spaces however you like.

Water every couple of days to keep it fresh, and if you change out any flowers that wilt you should be able to keep this looking good until Thanksgiving.


Here's our finished projects - Candy's looks great, I'm laughing 'cuz mine is lopsided and a mess.  Oh well :). There was wine and designing and I'm happy enough with that!


Friday, November 13, 2015

Dog Double Loop Infinity Scarf

Hunting season is here, and even though Sarge isn't going to be mistaken for a deer (he has a better chance of being mistaken for a footstool!) I made him an orange "safety" scarf so he stands out and can be seen. Plus he just looks super handsome in orange :)

I crocheted this in less than an hour - simple stitch kept it quick. Using a size I hook, chain 110 (about 35 inches long), single crochet one row, half double crochet until it's as wide as you want, then a final single crochet row. If you leave a long tail when you end you can sew the ends of the scarf together with it, then weave the end of the yarn in. Loop it twice and then try to catch the dog to put it on him...
This scarf is 35 inches long (17" loop when you sew the ends together) and about 4 inches wide - obviously measure your dog to see how long it needs to be to double it up.

Thursday, November 12, 2015

Pumpkin Roll

I'll start by admitting I've never been able to get the hang of making a pretty pumpkin roll that doesn't have big cracks in the top. Until now...

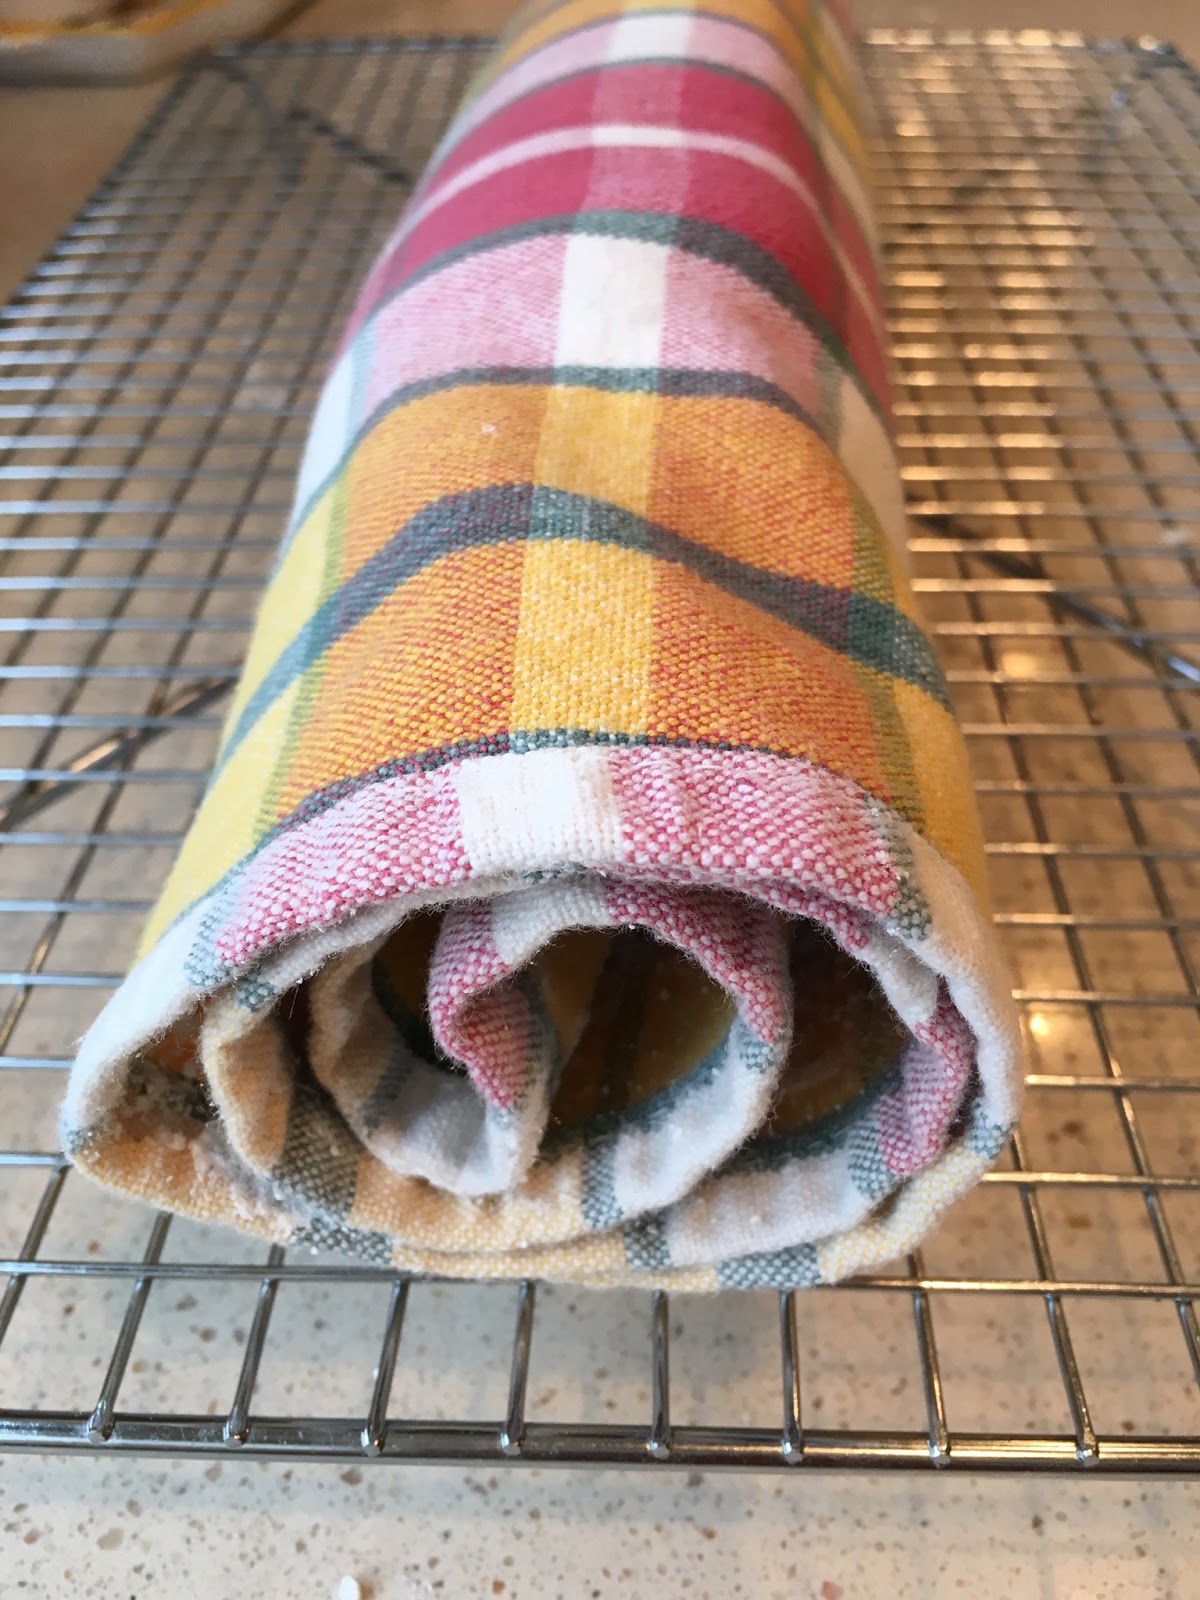
My niece Mickey requested this (and nutella stuffed chocolate chip cookies, I'll post that a different day - they are SO good!) for her birthday - and even though I figured it wouldn't be pretty it would still taste good so I'd give it another go. This time it turned out perfectly! The two things I did differently must have made the difference - I pulled the cake out a couple minutes before I normally would, it was light brown but a tiny bit underdone; and I coated the tea towel heavily in powdered sugar before rolling the cake up. I followed a  Libby pumpkin roll recipe that I googled - the only thing I changed was swapping a big teaspoon of pumpkin pie spice for the cinnamon and clove the recipe called for. I figured I have the pumpkin pie spice, might as well use it.  I sliced this before realizing I forgot to sprinkle with powdered sugar (oops), and I made whipped cream to serve on the side. Delish and impressive - I'm so happy I finally did it!

before you add the filling, the cake gets rolled
up in a kitchen towel well coated with powered
sugar until it cools. 

Wednesday, November 11, 2015

Fleece Scarf

I got the idea for this scarf while browsing in a little boutique store (the same store that I saw what I thought was a scarf for a dog, turned out to be for a person - I made it for Sarge last month) - but it was super expensive, I didn't look but it must have been some rare cashmere hand spun from exotic animals or something haha, and I had one of those "aha, I can make that" moments... here is my homemade version.

double loop scarf


I bought 1 yard of anti-pill fleece (the kind you make a tie blanket out of - have you made those? Another simple fun project that makes great gifts) in gray. They have tons of different colors and patterns, the hardest part of this project was deciding what color I wanted!


To make a single loop scarf I cut the material in a 15.5" x 44" rectangle (in this picture I folded the material in half and cut it 22" long so there is a fold in the middle), decided I wanted the fringe to be 7" long so put a piece of blue painters tape 7 inches
up so I'd know where to make my cuts to, then with my rotary cutter and a ruler I made 7" cuts every inch all along the bottom. You can do this with scissors if you don't have a rotary cutter, it just takes a little longer.


To make it a loop scarf I sewed the 2 edges together from the top of the material to where the fringe starts (about an 8" seam). First scarf done. 


I had enough material left over to make a second scarf - I wanted to try one long enough to have a double loop and a little narrower, so it's 10" x 88" with 5" fringe.  I messed up a little trying to make it 88" long by folding it over one too many times and ended up with fringe on both sides of the scarf - not what I wanted so I cut the whole thing in half which gave me 2 pieces of fringed material instead of one piece with a fold in the middle, so I had to seam it together in 2 places to make a big loop. Does that make sense? What I'm trying to say is that this scarf is 88" long before I sewed it into a loop, if you have to piece the material together to get that size more than one seam is fine! I like the scarf with fringe on one side only but you could do both sides if you like that. Also play around with the size of your fringe, I totally made up this pattern - change it however you want! The beauty here is that for very little time and money, and the only sewing is one or two short seams, you can have a handmade custom scarf the size and color you want! Great gift I think - hope no one in my family is reading my blog today since they will all probably get one of these haha!! 


single loop scarf

my model and the single loop scarf


Tuesday, November 10, 2015

Button Earrings

I love buttons! I have a big container of them and am always looking for pretty, interesting, vintage, you name it, new ones...today I turned some into earrings - fast, fun, and pretty inexpensive (depending on your button!).


It's a quick project that doesn't require any jewelry making skills or a lot of supplies -  you only need either gold or silver earring posts (find in the jewelry making section of the craft store - they are a flat disk with a post attached, see picture), 2 buttons of your choice that have a flat back, and a hot glue gun.

I don't have pictures of my making these because it's pretty self explanatory - simply hot glue the button to the earring post. That's it! Cute gift idea or quick accessory to make for yourself :)


Monday, November 9, 2015

Magazine Page Bows


Discovered a new favorite thing to do for decorating a present - making bows out of magazine pages...love!  Once I got the hang of it they are super easy and quick to make.


I know this idea has been around a long time, but it's new to me... my mom always wrapped our presents in newspaper and comics, I'm wondering why she never made these bows - it would have been perfect (and inexpensive!) and she could have got us to make them for her haha. I'm bummed to find out I was deprived of this awesome project as a child :)


Start by cutting a magazine page into 3/4" strips, you'll need 9 total. Leave 3 of them the full size (mine are 10 1/2" long), cut 3 of them to 9 1/2" long, 2 of them 8 1/2" long, and one 3 1/2" long.
 You should have:
3 - 10 1/2" x 3/4"
3 -   9 1/2" x 3/4"
2 -   8 1/2" x 3/4"
1 -   3 1/2" x 3/4"

Twist each strip (except the shortest one) so it has a loop on each end. This step is what took me a minute to figure out - it's almost like making a figure 8. Play with it looking at my picture and you'll get the hang of it. Staple it in the center. Shape the shortest strip into a circle and hold with a glue dot or double sided tape.
 This is what you'll have when they are all formed into the loops and circle.
Space the largest 3 on top of each other evenly like flower petals and staple to hold. Repeat with the next 3, and the remaining 2. This gives you 3 bundles. I used glue dots to then stick the 3 layers together but you could also staple or use double sided tape. Add the circle to the center of the "petals". There you go - magazine bow!


Sunday, November 8, 2015

Provençal Summer Vegetable Bake


Layers of sliced summer squash, potatoes and tomatoes over a bed of white beans, topped with crumbled cheese - I found this recipe in an old Family Circle (click for recipe) magazine and it's really good. I do it a little differently from the original recipe omitting the called for eggplant (I don't love eggplant) and onion (my husband doesn't like onion) and I don't think it's missing either of those ingredients - it's very flavorful and pretty! It also calls for herbes de provence which is a mixture of dried herbs that you can make yourself or buy in the spice section at the grocery store (I bought it in a jar and had no problem finding it), if you don't have it or want to buy it I think this would taste just fine without it - add salt and pepper to taste and maybe a sprinkling of any kinds of herbs you happen to have - thyme, rosemary, etc. I served it on the side with grilled chicken - it would taste good with lots of different meats and could also be served alone since it has the beans for a protein. Usually I slice all of these by hand but I'm still learning how to use all the attachments on my food processor so decided to play with the slicing disk and it worked great - saved some time and made everything more uniform for sure. It works just fine slicing by hand tho, don't let that stop you from making this! It's a good one - enjoy!
the magazine shows these arranged in overlapping layers, I stand
 them up alternating veggies and like how it looks...

Saturday, November 7, 2015

Pumpkin Spice Cookies


I have very nice neighbors that did me a favor so I decided to make them cookies as a thank you. I've been reading about Betty Crocker Pumpkin Spice cookie mix - it's a limited edition flavor that's apparently hard to find and people are raving about how delish they are...well I was in the grocery store the other day and they had a few so I bought 4 - if it's not as good as the hype then I'm stuck with 3 packages haha! I made them according to the package directions but frosted them with homemade cream cheese frosting and sprinkled with pumpkin pie spice (cinnamon or nutmeg would work good too). I thought they were pretty good before frosting, not sure I would hunt all over trying to find the mix - but adding the frosting took them to yummy and I will definitely make them again!  I got a big thumbs up from the neighbors so it seems they were a good thank you gift :)

To make the frosting:

In a mixer beat together 8 oz softened cream cheese, 1 stick of softened unsalted butter, a pinch of salt, 1 teaspoon of vanilla and 3 cups of powdered sugar until smooth and spreadable - if it's too soft add additional sugar to firm it up.

Note: don't add salt if you are using salted butter. To soften butter in the microwave I cut in pieces and put in microwave safe bowl, microwave at 50% power for 1 minute. You don't want to melt the butter though so watch it - the size of your microwave might change the time it takes to soften.

Friday, November 6, 2015

Crocheted Beanie for B

As predicted, here is a post about the beanie that I made for Brooke to wear Halloween night - this hat works up pretty quickly (don't tell her that, I made it seem like I stayed up nights working on it for her haha) and is a simple pattern. I've changed the pattern a bit of course -  I like it longer than what the instructions are, sometimes I change it up by doing a different stitch for a few rows, I usually add a pompom (seems everyone wants a pompom on theirs!), and I use a size I hook and whatever yarn I feel like. I've made a few of these hats lately, every time I make one I get another request for one so it's keeping me busy crocheting - which I love and am happy to do!

I don't have a picture of Brooke wearing her hat, but here it is on my "model"...


Thursday, November 5, 2015

Corn Husk Wrapped Candles

 Love this for an easy quick fall decorating idea:
  •  moisten corn husks so they are pliable - I put them in a bowl of water for a minute then dried them. They aren't as fragile when damp and you can bend them to shape around the candle. 
  • wrap the husks around any size glass candle you want, overlapping the edges -  I used a 3.5"x3" candle. 
  • tie raffia, twine, cord, hemp (whatever!) around the husks to hold them in place.
  • stick in a little decorative thing - I used a feather but lots of little things would work (small pinecone, nuts, or sticks are a few things I can think of off the top of my head. Look around and see what you can find!)

Make one or a bunch - I found the corn husks in the produce section of the grocery store, there are a lot of them in a package for $2.99 so it's an inexpensive decoration if you have the candles already. I would check the dollar store for candles if you don't have any already. Nothing is attached to the candle so when you are done with this decoration you can easily remove the husks and do something else to the candle - I'm thinking Christmas candle next haha!

This would be cute if you did a few of the small little votive candles, lined up on the dining room table or in a windowsill.  Or one big one. Whatever you like!

I got this idea from an old Midwest Living Magazine, if you want to see the whole article click here.