Monday, February 29, 2016

Oscar Party

We threw an Oscar party last night, not because I care who wins haha but because it's a reason to have a party!  Actually it's mostly because our friend Patty loves to bet (and she usually wins, darn
her) and if I'm going to lose to her at least we have fun hanging out...;)


Here's a few photos and ideas for you - save them for next year or use them for inspiration at your next party:

* My sister gave me this idea: I put up two separate poster boards with categories to vote on - we wrote our names on sticky notes and put them under our choices. As the winners were chosen on tv we removed the losing sticky notes so all that was left were the winners. That made it easy at the end to tally up points.


*We played "name the famous Oscar movie quotes" - I found the idea for that here. I just wrote out the quotes on pieces of paper, taped them to a door with decorative tape I got at the Dollar Store, made a sheet for guests to fill out guessing the name of the movie, the person or character who said it, and what year it was released.
name the quote game

*We also played Oscar Bingo - I downloaded the bingo sheets here.

*There was a "seat filler", if anyone got up from where they were sitting they put the bear in their seat to hold their spot; a "red carpet" up the front sidewalk (plastic tablecloth I taped down to the cement); I made bow ties out of black napkins (idea from here), and we did food that had a movie-related theme. For example: a plate of desserts was for "Joy", little sausages was "Spotlight" (think about that one, it took me a second!), potato skins was "Brooklyn", etc. People got pretty clever and creative!


the "red carpet"
napkin bowties
*I found most of the supplies at Dollar Stores - poster board, foil stars, decorative tape, popcorn buckets (I filled small ones with flowers and a large one with popcorn), raffle tickets (we used them for tie-breakers and I decorated with them), and big boxes of candy for prizes.
dollar store supplies


Sunday, February 28, 2016

Grilled Steak and Chicken over Salad with Mustard Vinaigrette

This is an easy yummy dish that I make quite often - especially when we are having people over for a casual dinner. I marinate flat iron or flank steak and chicken in gallon size zip lock bags for a few hours; Dave then grills them (you can also grill them earlier in the day and serve at room temperature over the salad), let them rest for a few minutes while you assemble the salad.


I totally wing this, use whatever you like or have available - usually it's sliced tomatoes, avocado, and arugula all tossed in a vinaigrette; this time I added a can of white beans and used a mustard vinaigrette that I made earlier in the week and had on hand. Sometimes I'll add corn, chopped jicama, other kinds of beans...really, whatever you want! Sprinkle shredded parmesan on top.

To marinate steak - I combine some olive oil, vinegar, a splash of worcestershire and soy sauce, and montreal steak seasoning in a bag; add the steak and roll it around in the marinade so it's coated, seal the bag and put in fridge until ready to grill.

For the chicken - combine some olive oil, white wine vinegar, a splash of orange, lemon, and lime juices, a little soy sauce, some poultry seasoning, and dried thyme in a bag; add the chicken and turn to coat all of the meat, seal the bag and put in fridge until ready to grill.

I don't have measurements because I literally just pour some of each ingredient in the bag.


Mustard Vinaigrette - in a jar with a lid I put some olive oil, white wine vinegar, a tablespoon of water, a couple tablespoons of dijon mustard, salt and pepper; put the lid on and shake until completely mixed together. Then add a splash of cream, shake again. This will keep in the fridge for quite a few days, but you'll use it up quickly it's so good.


Saturday, February 27, 2016

Tomato Pear Chutney

Here is the chutney recipe I made to go with grilled pork tenderloins the other day - I made a couple changes so I don't know how it'll be if you follow the recipe exactly but my version was very good. Peaches aren't in season right now so I substituted pears, and added a handful of golden raisins. I didn't want to make as much as the recipe called for so I halved all the ingredients except I put in all of the vinegar and I probably should have used half the amount and added water for the extra liquid I needed. It was pretty vinegary, but still tasted good! Even halving the recipe it still made a lot, we have a bowl of it leftover but it will keep in the fridge (or maybe I'll put it in the freezer for later).
wrap the spices in a double layer of cheesecloth, tie closed with some kitchen twine

the chopped ingredients before it started to cook down;
remove the spice packet before serving.


Friday, February 26, 2016

Crayola Makeup


Hahahahaha - every time I watch this I laugh; whether you want to draw on lipstick and henna tattoos using moistened colored pencils or not, please watch this just to see how darn cute she is. I didn't edit this at all, it could maybe use a little streamlining but it's adorable as is so I'm leaving it alone. Enjoy!

note: I just googled if this is safe to put on your lips and while they are non-toxic the company advises against using as makeup as it hasn't been put thru that kind of testing - there are tons of people and magazines that are showing it done though! I'm thinking this could come in handy in an emergency situation (no don't ask me what would constitute a lipstick emergency haha!), and I'm sure the "tattoo" idea would be lots of fun for kids - best of all is that it comes right off with a makeup remover cloth!

Thursday, February 25, 2016

Photo Scavenger Hunt

Dave and I are taking a creative photo class at our favorite local photo store (creativephotoacademy.com if you want to check it out) that is challenging, insightful, and fun! It isn't a technical class so I thought it would be great for me since I'm more creative than technical (I don't get all the numbers and language in photography...fstops, aperture, iso...makes my brain hurt), and Dave is taking it because he is super technical and wanted to learn to be more creative. I'm now realizing that I need to learn the technical stuff in order to make my creative ideas translate to taking the photo!! Good grief. 

Anyway, thought I'd share a couple ideas from the classes to inspire you to look around your surroundings differently and be on the lookout for interesting photo opportunities - this class has really helped us with that. It's also made me start wearing my camera when I go anywhere in case I see something cool (like the grocery store - I got a great picture of the meat guy with a mask on his face), which means I have to match my outfit to the brightly colored strap I have on the camera! Yep, I'm a dork.

something sacred

At the first class we were assigned a scavenger hunt - so fun. Homework was to fill a bunch of different categories from common things in our daily life... for instance - pictures of water in motion, from a snake's point of view, something you're afraid of, etc. Maybe give yourself a little challenge and make a list of things to look for, then see if you can find those things and take a photo. It's fun! Something I learned right away is to be aware of what is in the background of your picture, check all around the subject you are taking the photo of and see if there is anything distracting or unwanted in the rest of the shot - if so, then either move your camera so it's a cleaner shot or zoom in or move to a different angle. Make sense? Example - I took a very cool shot of a guy for our homework project this week that I thought was going to be great and then when I looked closer it looks like he has a lamp coming out of the side of his head! Not good...haha! Fortunately if you shoot with a digital camera or your phone you can just delete the photos when you're done, it's just a fun way to practice and engage your creative side!

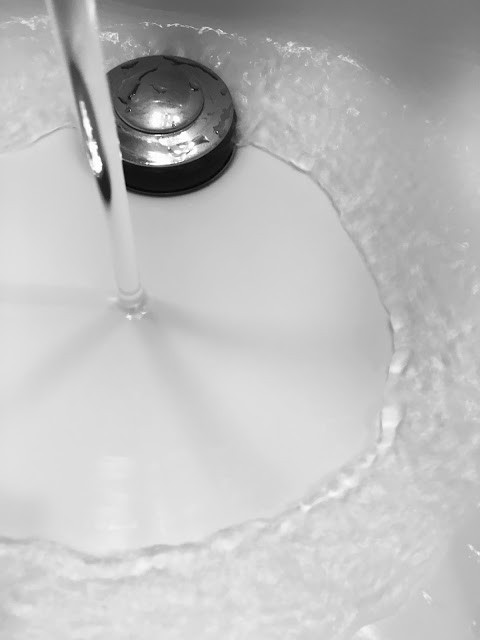
water in motion - while brushing my teeth I thought the water in the sink looked pretty cool

for a 'snakes point of view' - it's a falcon on the corner of our roof

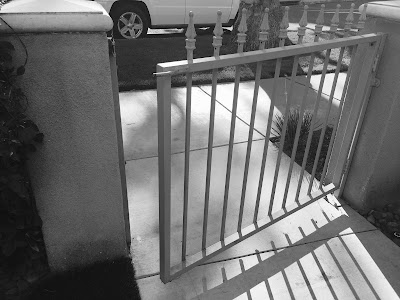
something I'm afraid of - who left the gate open?!

I highly recommend taking some classes if you want to learn more about your camera, or different ways to think about your photos - it has really helped open our eyes to how we view taking pictures. Now if I can just get up the courage and muster some brain power to take a technical class or two - that's next on my list :). Just FYI, the classes we are taking are at Creative Photo Academy at Paul's Photo in Torrance, CA if anyone is in the area and interested in learning more!


Wednesday, February 24, 2016

Baked Salami Chips

Guys! These are so good, so addictive, and soooooo easy you are going to love me for this one...baked salami chips. Perfect as a quick appetizer on its own - you could have a dip with them if you want, mustard would be good for sure - or add them to a fruit and/or cheese platter. These are surprisingly good and everyone loves them - I never have leftovers.
 Preheat oven to 350'. Put thin salami slices on a parchment paper lined baking sheet (you can just do them straight on a baking sheet, I try to make cleaning up as easy as possible tho) and bake for 8 to 10 minutes until crispy around the edges. Transfer them to paper towels and blot, a lot of grease will bake out of them so you want to soak that up with paper towels.

I added the salami chips to a platter of cheese (I cut some into shapes with
a heart shaped cookie cutter, there is also a wedge of blue cheese and a wedge of brie),
crackers and fruit for Valentines day. 

Tuesday, February 23, 2016

How to Separate an Egg

I overheard a conversation (what's the difference between overhearing and eavesdropping? I don't know - whichever it was lets just go with 'I overheard'...) between a couple behind me at the grocery store, and the guy said what a good cook his mom is - "she even knows how to separate an egg and stuff". At first I thought to myself "well separating an egg doesn't mean she's a good cook" but that wasn't very nice, I don't know his mother at all and she might be an amazing cook. Then I tried to remember who taught me how to separate an egg, I feel like I've always known but not sure how - did I see it on tv? Did I teach myself? Were there numerous attempts and lots of broken eggs on my part figuring it out? That memory is gone... So my little tip for today is how to separate an egg if you don't already know!

I didn't talk on this video, I think it's pretty obvious what I'm doing without explanation. You'll need 2 bowls, one for the egg white and one for the yolk. Crack the egg open over one bowl, as it cracks in half let the white run out into the bowl but tip your hands so the yolk stays in the shell. Then transfer the yolk back and forth between the 2 shell halves until all the egg white separates from the yolk and is in the bowl. Then put the yolk into the second bowl. Repeat as necessary for your recipe.

Now your kids can tell people what a good cook you are :).

2022 update: I have no idea why my videos keep disappearing! you can look for this on my youtube channel  https://youtu.be/VRg6WA1LWfo

Monday, February 22, 2016

Making Dreamcatchers

Looking thru photos recently reminded me how much fun Brooke and I had making dreamcatchers last summer before I started this blog - they turned out so cute I thought I'd make another one to show you guys. The hardest part is weaving the actual "dreamcatcher" part, this time I followed the directions I found here but there are lots of tutorials online if you search. For this one I used a small 3" metal ring (craft store in the yarn/crochet area, they have lots of different sizes), last summer we made bigger ones - all depends where you are going to hang it. It'll probably turn into some kind of driving hazard but I think it would be cute to hang a little one from the rear view mirror in my car.


Wrap the circle with material, ribbon, whatever you want. I ripped about an 1" wide piece of material from some scrap cloth I have leftover from making tote bags last winter, ripping the fabric gave me a rough raggedy edge with strings coming off that I like.

 I did the weaving and knotting the dreamcatcher using about 4' of cream colored embroidery floss, you can use a number of different things like thin hemp or cord - I used what I have on hand. I added one bead to the floss, you can add as many as you like or none at all.


wrap the material around the ring, secure
 with a little glue
tie on approx 4' of floss to weave the dreamcatcher
weaving the dreamcatcher, I added one bead


I tied a long piece of twine to the top for hanging, then hung it on a knob above my craft table to make it easier to add the long pieces to the bottom. I cut a few pieces of ribbon and twine approx 22" or 24" inches long, fold them in half (one at a time) and then put the fold thru the dreamcatcher and pull the ends thru the folded part to hang them off the bottom - I also added some feathers to a couple of the ribbons by winding some twine around the ends of the feathers and then around the ribbon to hold (I put a little drop of glue on the end so it wouldn't unwind). Lastly I glued a shell to one of the ribbons, and tied a couple knots in the loose ends of the twine.
to make one like this - wind twine around the feathers to
attach to a ribbon, and glue on a shell to another


For the other dreamcatcher I made (below), I wrapped the circle with ribbon so it's smoother. While weaving the actual dreamcatcher I added a few shells and small beads in the netting. I did the same thing as above with flowers, beads, shells, etc. and this one is hanging in our tiny RV - I love it!

August 2015 making dreamcatchers with Brooke and then doing duck face selfies with them for some reason...notice Brooke did not care about following instructions for the weaving part and just wound the floss around the ring however she liked and glued it! Looks good to me!


Sunday, February 21, 2016

Three Cheese Potato Gratin

Sunday Supper this week was so good! Love when everything comes together easily and successfully :).  We ended up doing it last minute so I had to think of something I could make pretty quickly  and settled on this menu:

Grilled pork tenderloins - in a large dish I whisked together olive oil, red wine vinegar, a dash or two of worcestershire sauce, a little soy sauce, and some chopped parsley; add the tenderloins and cover, put in fridge for a couple hours and then grill.

Tomato pear chutney - I have a chutney recipe that I love but it takes hours and there is so much of it that I can a few jars...obviously I didn't have time for that so I searched for a quick chutney and found a recipe for tomato peach chutney that cooks in a couple hours. Peaches aren't in season right now so I substituted pears, and I added a big handful of raisins (I don't love raisins but they are really good in chutney). I will post that recipe later.

Three cheese potato gratin - I found the recipe here. I made a couple of changes: used 5 large yukon gold potatoes (with the skins on) and 1 very large peeled yam, layered them in a 13x9 dish with the onion cream mixture instead of pouring it all on top, used italian seasoning instead of rosemary, and before baking I poured additional cream over the top so it wouldn't be dry. This turned out so good, it's very pretty with the 2 colors of potatoes, and everyone loved it.

layering the gratin


Roasted green beans - I do these all the time, so easy and different. Put the washed green beans on a baking sheet, toss with olive oil and coarse salt, bake at 400' until they are roasted (I like when they get almost a little crunchy - not burned - so just watch them) probably about 10-15 minutes.

The friends that came for supper brought a yummy salad of arugula, beets, and jicama tossed in a mustard vinaigrette and topped with spoonfuls of marscapone cheese. So good. For dessert we had strawberries and frozen yogurt.

Oh, and there was lots of wine and bread to round it all out. Mmmmmmm....it was a nice dinner!

I forgot to take pictures, except of the potatoes - it was all beautiful tho!

Saturday, February 20, 2016

Lucky Cat Martini

I love to get ideas when we are at restaurants for food and drinks that I think I'd like to try to make at home - problem is as soon as I get home I forgot all about them. So I started taking pictures of the menu and cocktail ideas when I see something that intrigues me, with the idea that maybe if I can remember what the ideas are I will actually try them! Yes that means I have probably hundreds of pictures on my phone of recipes, pictures, drink descriptions, etc - and while I still won't remember where I took the picture at least I have captured the thought.


I took a picture of this drink years ago at a PF Chang's - I was with non-drinkers (a bunch of kids!) at the time so wouldn't order one then, but since I still have the description on my phone I finally decided to make one. Naturally I modified it a little bit, I don't have vanilla vodka so I substituted cake flavored instead. It is delicious! Not sure if changing the vodka flavor changes the name - maybe I've made up my own drink, think I'll call it the "lucky dog" instead hahahaha! I have no idea if that name is already taken and I'm too lazy to google it so...call this whatever lucky animal you want and enjoy :)


Directions:
Put some ice in a shaker. Add 2 oz. cake (or vanilla) flavored vodka and 1 oz. pineapple juice. Shake for 30 seconds until really cold. Pour into glass. Add 1/2 oz chambord, it will sink to the bottom of the glass.


I don't have stemmed martini glasses, it would be even prettier in one of those!


Friday, February 19, 2016

Kids Craft: Brooke personalizes notebooks

For todays craft, Brooke shows you 2 different fun ways to customize notebooks. She uses supplies she had on hand - beads, cards, a pencil case, and a whole lot of hot glue (of course) - use her ideas and whatever things you want to jazz up your own notebooks.


They are both cute projects, but I especially like her idea of gluing the pencil case to the front of the notebook so she doesn't drop it while running to class - good thinkin'. And she has the forethought to line up the holes so she can put it in her binder if she wants, love that :)

How can you not be inspired by this creative, imaginative kid!

Thursday, February 18, 2016

Fleece Tie Pillow

Have you made a no-sew fleece tie blanket? I love them, they make great gifts and it's a project that anyone can do...and there are like a billion choices of patterns at the fabric store! That part is overwhelming for sure - choosing 2 coordinating fabrics takes me forever. Anyway, I thought using that technique and making a throw pillow for the guest room would be a fun easy project and it turned out really cute. I wanted to put felt letters on the front so got white fleece to put them on, and a striped pattern that matches the room for the backside. I cut out letters L,T, N, S - which stands for "Long Time No See" from different colors of scrap felt I had on hand, I used 2 different colors and sizes for each letter but it would be just fine with only one.


You'll need:
  • pillow form - whatever size you want. Mine is 11"x15"
  • 2 pieces of anti-pill no-sew fleece (note: my fringe is 4" so whatever size pillow form you get you'll need to add 8 inches in length and width to look like mine. If you get a larger pillow form you might want longer fringe so plan accordingly. My fabric is 19"x23")
  • scissors, ruler
  • cutting mat and fabric rotary cutter, optional
  • felt (if you want to make letters for the front) that matches the fleece fabric.

Instructions:

Cut out and remove a 4 inch square from each corner, then make 4 inch cuts every inch, along all 4 sides. I like to cut thru both pieces of fabric at the same time so the cuts exactly line up, but you can do the pieces separately if you want - sometimes the double fabric is really thick and hard to cut thru at the same time. I lay a long tape measure or yardstick along the fabric for a guide to make the cuts every inch, or you can just wing it and guesstimate where an inch is - it does not need to be exact.  

If you are putting letters on the front, cut out the size and colors you want, and sew or glue them on the front fleece fabric. You can use a stencil or print off the letters the size you want and trace around them - or free hand it. I made big bubble letters in two sizes and laid them on top of each other for a layered letter, the bottom letter is 5.5" and the top one is 4.75". 

Lay the fabric front and back on top of each other right sides out, line up the fringe strips top and bottom and then tie them together to form the pillow case. Do three sides and then insert the pillow form, then finish the last side to encase the pillow form.

I also glued on some little shells because I can't leave anything alone, it must have more decoration haha. It looked fine without, but I couldn't help myself...


Wednesday, February 17, 2016

Making Paper Crowns

 Brooke and I have been making paper crowns for years, not sure why or how this started but it's been a thing for a long time. Its a simple kid project, great time filler/boredom buster/distraction when you need one! All you need is regular white printer paper, scissors, markers, and tape or a stapler. 

Fold one piece of paper in half lengthwise, then cut across the paper in whatever crown shape you would like. In the first picture Brooke cut hers in zig zags; you can also do scallops, deep V cuts, straight across, fringed...whatever. After you cut it out you will have 2 identical pieces, attach them with tape or staples. Lay the long piece out and color or decorate it however you want - Brooke and I usually write "Queen of (something)" and then draw some pictures and designs. I used to always be "Queen of Everything" but now Brooke usually calls that before I can haha, brat. This time she did "Queen of California", I'm "Queen of the Condo", and Sydney who doesn't know how to write very many words yet is queen of something but we don't know what (it appeared to have something to do with roads...LOL). After it's decorated wrap it around your head to see where you need to fasten it, and tape or staple. Then wear them proudly :). Oh, and don't forget to practice the queen wave - "elbow, elbow, elbow, wrist, wrist, wrist". HA!! 


Sydney wore her crown most of the day :)


Here's a picture of us wearing our crowns in 2011!


Tuesday, February 16, 2016

Lemon Cake

My friend Sheryl brought a slice of this lemon cake to me at work and I loved it SO much she brought a whole loaf over for our super bowl party. I asked her to share the recipe along with any changes or tips she has so I could share it with you guys (well for you guys and so I'd have it too haha) - and here it is! This is a very lemony cake, I actually think it's more of a lemon quick bread but whatever category you want to put it in it is delicious and if you like lemon I hope you'll try this! Promise, it's really really good.

The recipe is from Food Network (click here for the recipe), Ina Garten/Barefoot Contessa is usually reliable and this is no exception.

Sheryl's changes are:
-  she uses 2/3 cup each of sugar and lemon juice to make the syrup, noting that she uses Meyer lemons and if you use regular lemons that much syrup might be too sour - so I would leave the recipe alone if you are using regular, increase it if you have milder Meyer lemons.
-She removes the cakes from the pans and sets on a rack covered with aluminum foil to let the cake absorb all the syrup instead of having it run off.
-for the glaze, she decreases the amount of lemon juice to 3T to thicken it a bit.

Ok, now my mouth is watering from thinking about lemons and this cake...enjoy!


Monday, February 15, 2016

Enjoy the Little Things

I ordered this project kit and stamp set from Stampin' Up mostly because I'm obsessed with clip boards and the little standing one that comes with this kit was just too cute to pass up. I thought I'd make a couple of their cards to display on the clip board but then I would use it to display lots of other things too - recipes, photos, etc. Well I started making the cards that came with the kit and I couldn't stop - since it's a kit most of it is done and you just assemble it all, a little bit of stamping is about the only thing left to do so it came together very quickly. I made a little video montage while I was assembling so you can see how easy it is to do - don't worry, I did it in time-lapse so you don't have to watch every second of me putting these together, I sped it all up for you but hopefully you get the sense of how quick and easy it is. And it was fun! Even though I will still use this little clipboard to display other things, I now have like 10 cute cards to use with it.


I can order the kit for you if you want, just let me know. I don't think the stamps and all the ink pads are totally necessary to buy if you already have some that would work with the cards - it would not be hard to change these using whatever stamped sayings or patterns you would like and personalize them to your own taste and style. I highly recommend getting the fine tip glue, there are lots of little bits to glue on that would be harder to do with a wider tip craft glue.

Sunday, February 14, 2016

Tuna Over Nice (Nicoise Salad)

This is a recipe I've been making for years and years - actually I don't know where the original recipe
is anymore, I just throw it together now and it's probably changed over time. I'm not sure why the name is "Tuna Over Nice" instead of Salad Niçoise because it seems the same to me but whatever, I didn't name it. And it's really good so you can even call it "salad with tuna and a bunch of other stuff" and people will still be impressed.

Dave took the picture for me, he didn't get
the pretty tomatoes and beans in the shot but
they're in there!


For 2 servings I use:

-1 pound Tuna steaks, fresh or frozen, grilled how you like. I don't like rare or seared but that seems to be the traditional way people like it.
-4 red potatoes or 6-8 baby potatoes, boiled and chopped in big pieces (or halved if you use baby potatoes)
-1/2 cup cherry tomatoes, halved
-a big handful of steamed green beans (don't overcook, you want them a little crunchy), I leave them whole but you can chop into bite sized pieces.
-2-3 hard boiled eggs, halved/quartered/or chopped up
-1 Tablespoon capers, rinsed and drained
-lettuce (enough for 2 people. I like to use spring mix or spinach/arugula mix - once again, whatever you like or have on hand)
-the original recipe called for black olives but I don't use them
-olive oil, vinegar (whatever kind you have) or bottled vinaigrette
-salt and pepper


In a big bowl mix together olive oil and vinegar, salt and pepper to make a vinaigrette. I don't measure them out, just pour in some oil (I'm going to say maybe 1/3 cup, it can be whatever you want depending on how much dressing you like) and then some vinegar (maybe a tablespoon or more depending on how vinegary you want it) and whisk it together with a fork. Season with salt and pepper. Sometimes I just use bottled vinaigrette, or I'll add a spoonful of dijon mustard just to change it up. You just need an oil and vinegar type dressing of some sort.

So, put the dressing in the bowl first. On top of that add chopped up cooked potatoes, halved cherry tomatoes, and the steamed green beans. I let that set without mixing or stirring it while Dave grills the tuna. When the fish is done, add the lettuce on top of everything in the bowl and then gently toss. Divide onto 2 plates, top with capers and hard boiled eggs (it doesn't matter how you cut them up, usually I just chop them and sprinkle over the salad but it's pretty to have them halved or quartered and arranged around the outside of the tuna). Top with the grilled tuna.

It might seem like there are a lot of steps because of the way I rambled while writing this recipe, but it's easy - vinaigrette, boiled potatoes and eggs, steamed green beans, grilled tuna. It's not hard, please try this recipe!

PS: I don't steam the beans separately, when the potatoes are almost done boiling I throw the beans on top of them for the last couple of minutes and then drain the whole pot. Done, and one less pan.

Saturday, February 13, 2016

Wine Label for Valentines Day

We are going to the neighbor's (yes, THAT neighbor - I've forgiven her haha) for Valentine's dinner tonight so I thought I'd  take a little hostess gift. I found these free printable wine labels online here and one of them popped out at me, I knew I had to make it for them. It says "my child might be the reason you drink, so please enjoy one from us" - let's just say that living next to the Sarge must be noisy at times! We are very lucky they're always good sports about his barking :)


Super easy to do - download and print the free printable on cardstock (there are a few to choose from, I made other friends the one that says "Happy Valentine's Day - Now Drink!); cut the label out, brush glue evenly on the back and stick it over the existing wine label that is on the bottle. That's it!