Tuesday, December 18, 2018

Melting Snowman Bark

Here is a very easy, fast, and fun candy idea - I made this for Dave to take to one of his ukulele group get-togethers and it literally only took minutes to make!

Just melt white or semi-sweet chocolate chips according to the package instructions, then thinly spread on a piece of non-stick foil or parchment paper. Very quickly add the snowman parts - really, you do need to work quickly as the chocolate sets up fast. Tip: have all your add-ons ready to go and have a good idea how you want to lay them out - you can keep them in a somewhat snowman shape like they would melt, or scatter them all around. Another thing I learned is to only melt half a bag of chips at a time - I did the white chocolate first and melted the entire bag at once, I almost didn't get all the pieces in place before the chocolate hardened. I melted 1/2 of the semi-sweet bag and added the snowman bits, and then repeated with the other half. Much easier.

For the white bark I used 1/2 mini reeses peanut butter cups for the hats, candy eyes, orange sprinkle for the nose, red hot buttons, pretzel sticks for arms.


For the semi-sweet one: I added mini marshmallows, snowflake sprinkles, and sprinkled coarse white sugar over the whole thing in addition to the reeses, candy eyes, orange sprinkle noses, pretzel arms and red hot buttons.


Once the chocolate is hard, break into pieces or leave it in a whole sheet and let people break it apart themselves.

12.18.17: how to stabilize whipped cream
12.18.16: cocoa snowballs
12.18.15: how to make a gift bag using wrapping paper

Monday, December 17, 2018

Wine Cork Angel Ornament

I love, love, love these ornaments! Seriously, how cute is this angel made from a wine cork, wood ball, ribbon, and a shiny pipe cleaner? I know, I know...I say I love things all the time - but look at this! Adorable.


I made the face just like the pinecone angel  - add a little blush for the cheeks on the wood ball, then draw on a face using a thin black sharpie. Hot glue the ball to one end of a wine cork; wrap the neck with a piece of twine or ribbon; hot glue a short length of twine (or whatever you want to hang these with) to the back, then glue a pretty ribbon bow over that for the wings. Lastly, hot glue a small coil of pipe cleaner to the top for the halo.

Silly, but these just make me happy!


12.17.17: cream of mushroom soup
12.17.16: chocolate dipped pretzel rods
12.17.15: homemade dog cookies

Sunday, December 16, 2018

Around the Campfire (week 50)

Dear Campers ~

Here's a recap of what happened at camp this past week!

Posts you might have missed ~

12/9:   around the campfire (week 49)
12/10: Santa's wreath making workshop
12/11: bath salt ornaments
12/12: Mary's painted ornaments
12/13: felt Christmas tree
12/14: Christmas pinecone wreath
12/15: rolled paper Christmas tree

What's cooking ~

  • Sunday supper - crock pot West Coast Turkey chili over white rice, cornbread, salad
  • hamburger patties in mushroom soup gravy over rice
  • grilled chicken, butternut squash risotto
  • grilled pork chops, mushroom ravioli, roasted green beans
Miscellaneous stuff keeping me busy but not enough for a post of its own ~
  • I made the 'mistake' of thinking I could just pop in to the mall real quick, yikes. I hope you have your Christmas shopping done because I don't wish going to the mall on anyone right now! Dave was nice enough to go stand in line at the post office for me, whew - dodged a bullet on that one ;)
  • read "Bridge of Clay" by Markus Clay, it's so so good. The story is about brothers in Australia who are basically on their own. I bawled at the end, not so much about the storyline but because the book was over! 
  • started sorting thru Christmas decorations that I didn't put up this year - I want to get it cleaned out so putting away stuff will be easier after Christmas! I have too much...will take it to Goodwill in the next couple days and hopefully someone else can use it. 
Hope you'll stop by Day Camp this week and get some last minute Christmas crafts, gifts, and food ideas! Have a good one :)

Sincerely ~


Jill, your camp counselor

Saturday, December 15, 2018

Rolled Paper Christmas Tree

I can't remember where I saw the idea for this easy rolled paper tree, quite truthfully I get ideas from so many places it all runs together! Fortunately for me I'm a paper scrap hoarder (I hate wasting paper!) so putting this together was a cinch. Super simple but cute - I'm thinking to add them to the top of wrapped gifts, or punching a small hole in the top and attaching string to hang them up. I stuck all of this together using glue dots so it's a very kid friendly project.

I used 7 different patterned papers (all from Stampin' Up), a 1" x 7" strip of chipboard for the base, 1 wood star, and a bunch of glue dots. The rolls are 1" wide at the top of the tree and 4.5" at the bottom, increasing each roll by 1/2"; each piece of paper is 3" long before coiling it. So for this tree I cut:

3" x 1"
3" x 1.5"
3" x 2"
3" x 2.5"
3" x 3"
3" x 3.5"
3" x 4"
3" x 4.5"

You can make your tree bigger or smaller (my tree is 8" tall) by changing the sizes of the rolls - by starting with 3 inches before coiling the paper, each of my rolled papers ended up making a 1" high roll.

To make each roll: Curl the paper around a pencil to help give it a curved shape before gluing the roll closed. Once you have as many rolls as you want, glue them to the chipboard and stick the star on the front. You could also put ribbon, a bow, or nothing on the top if you prefer! This would also be cool out of different wrapping papers - hey I have an idea,  you could even coordinate the tree to match your gift wrapping and lay it on top of the present ... oh I'm so going to do that!


Friday, December 14, 2018

Christmas Pinecone Wreath

I very easily turned my pinecone wreath (click here for that post) into a Christmas wreath by removing the feathers and spray painting the entire thing silver. Took me like 2 minutes and I love it. I sprinkled white glitter on the pinecones right after spraying them, but it didn't stick like that. Fortunately the silver paint is shiny enough that it looks great without  (unfortunately all the glitter that didn't stick landed in a big pile on the garage floor when I lifted the wreath, oops... Dave was super happy about that); if I really wanted it more sparkly I would brush white glue onto the pinecones and sprinkle with glitter, it'll definitely stick that way.
A tip for spray painting small objects is to do it inside a big cardboard box - I went outside on a not-windy day, put the wreath in a box that I set on it's side on the ground (sort of like creating a shadow box) then sprayed into the box, completely covering the brown pinecones. If you spray down into the box from above (instead of it being on its side), the fumes and spray come straight up in your face and that is not pleasant - turn the box on its side and spray into it that way. I didn't take a picture so use your imagination...it's a box on it's side. Tell me if you don't know what I mean and I'll post an example! Oh, and I did wear disposable gloves so it was easy to lift the wreath up a bit to cover all the pinecones.

I put this on a silver sequin placemat in the middle of my table; I had small votive candles in the center which was super pretty, but then Patty gave me an amaryllis bulb in a really pretty crock that fits exactly in the wreath - love!

the wreath before...
...and after


Thursday, December 13, 2018

Felt Christmas Trees

Janis and I made these at "day camp" (along with the filled snowman ornaments) and they turned out even better than I imagined. Of course it took us waaaaaay longer than it should have, but that's only because we talked and laughed too much (and had to walk into town for lunch, and then got side tracked shopping on the way home LOL) - if you don't have all the distractions this is a fairly quick, easy, inexpensive project and you still have time to whip out a few for gifts, decorating, or to tie onto packages or stockings (you can easily vary the size of these trees!).


Our trees are about 10" tall - the tree itself is about 7" and the wine cork stand is 1 3/4" tall, plus the wire star on top. What actually took us the longest was trying to decide how to top them; we liked adding bells on the top, wood stars, felt balls, or even just plain - all of it was good! If you're making more than one you can do different toppers, we only made one each so committing to just one top was hard!

If you want taller or shorter trees just make the largest felt squares you'll be stacking bigger or smaller  (depending on the scale of your tree) - for our trees we used 6 of each size square starting with 3" as the largest square for the base of the tree, then went down in increments of 1/4" all the way down to 3/4" at the top of the tree.
So for us that meant cutting (we used a rotary cutter which saved time and spared our hands from having to use scissors hahaha, but cutting by hand would obviously work just fine!) the felt squares:
6 - 3"
6 - 2.75"
6 - 2.50"
6 - 2.25"
6 - 2"
6 - 1.75"
6 - 1.50"
6 - 1.25"
6 - 1"
6 - 3/4"
In addition, we started building the tree with 2 - 1 1/2" squares of thick brown felt but you don't really notice it so could skip, and one little 1/2"square for the tip top just to finish.

Supplies:

  • Regular felt in your choice of colors. Note: I bought really thick felt online thinking that would make a nice tree but it didn't look as good as regular felt - the thinner felt just hangs better, thick felt was too solid and stiff looking. We made ours mostly green with a different color square in between each size change (for example: 6 - 3" green, 1 - 3" red, 6 - 2.75" green, 1 - 2.75" light brown, etc.).
  • Wire that is a thick enough gauge to hold all the squares, but pliable enough to wrap around the base and form the star at the top. We used copper color, there are other colors available. We used approx. 2 feet, you'll need more or less depending on the size of your tree. 
  • 3 wine corks for the base, hot glue to hold them together. 
  • scissors or rotary cutter.

Directions:

First, make the base by hot gluing 3 corks together and wrap them tightly 2 or 3 times with the wire, then feed the long end of the wire up thru the middle of the corks so it is standing straight up off the base. 


Starting with either the 2 smaller brown squares if you're using, or the largest of the tree squares, skewer each square of felt onto the wire and push down to the base. We found it was easier to poke a hole in the middle of each square first with a thick pin but you can just push the felt onto the wire if the wire is strong enough. Continue adding the squares largest to smallest until you like how the tree looks. 


We were left with about 8" of wire at the top that we bent into a star shape - I had a little bit of a tail leftover so curled it around a wooden skewer to make a little curly-q to finish.


Other ideas - you could skip the base altogether and add a little string or twine to the top for hanging the trees or adding to the top of a package; you can think of something else for the base if you don't want the wine corks; multiple colors of felt would make for a fun whimsical tree - you could coordinate with your decorating scheme if you have one, or with your wrapping paper, or customize for the gift recipient if you know they have a favorite color.  

playing with different toppers - jingle bells are cute...
but so was felt balls...and wood stars...so many choices!


Wednesday, December 12, 2018

Painted Ornaments


Mary made me a super cute Scottie ornament last year for Christmas - she did other dogs as well but I didn't see any pics of them, if they're anything like the Scottie I'm sure they are equally cute! I don't know why I didn't blog them last year - so this year when she sent me photos of a basset hound ornament she made for another friend, and some pretty Christmas tree ones she made to hang from her dining room chandelier, I remembered to ask her how she did them and am definitely sharing this time around! 


Here's what Mary texted me when I asked for the deets: 

I freehand in white (or dark color for a different breed) on the plastic ball (you can scratch off mistakes if you do it quickly).  I painted the other colors over that. Then I used mod podge to paint the spots I wanted white and shook glitter over it. Same with other colors.  I think in hindsight I would do the darker colors first. I used a soft brush to brush away the extra glitter which sticks like a mutha on the plastic! I have “glitter glue” in a squirt on bottle that I used for the nose & the eye. I should probably top it with a fixative, but can’t remember if that’s what I did last year.    

supplies: craft paint, glitter, mod podge, brush, and clear plastic ornaments
There is no way I could freehand dog shapes right on the ornament like Mary does! And good thing you can scratch it off because I'm sure I'd be having to restart my shapes a bunch of times haha. What a great personal last-minute gift idea - love 'em!


12.12.2017: coincidentally, I posted the adorable pillow Mary me one year ago today!
12.12.2016: marquee letters  (using paper mache letters and christmas ornaments)
12.12.2015: fireball hot toddy


Tuesday, December 11, 2018

Bath Salt Ornaments

I love this easy little gift you can quickly make for everyone on your list that likes to take baths (I'm definitely in that category and might even make a couple for myself just 'cuz I like them so much - Merry Christmas to me hahah). I'm going to make shower cubes as an alternative gift and will post the results soon.


I saw this idea on the Doterra essential oil website. I'm just pasting directly from their site because I don't think I can say this any better - no need to reinvent the wheel :)


Everyone can use some extra peace and tranquility this holiday season. Give the gift of relaxation through essential oils. Disguise an aromatherapy Epsom salt bath treatment as a festive Christmas ornament. When it's not decorating your tree, this ornament will double as a therapeutic addition to your warm bath. Just take the top off and pour it in. Customize the color and aroma of each ornament for everyone on your Christmas list.

Ingredients
Round plastic ornaments
1 cup Epsom salt (you may need more or less depending on the size of your ornament)
5–10 drops favorite doTERRA essential oil

Instructions
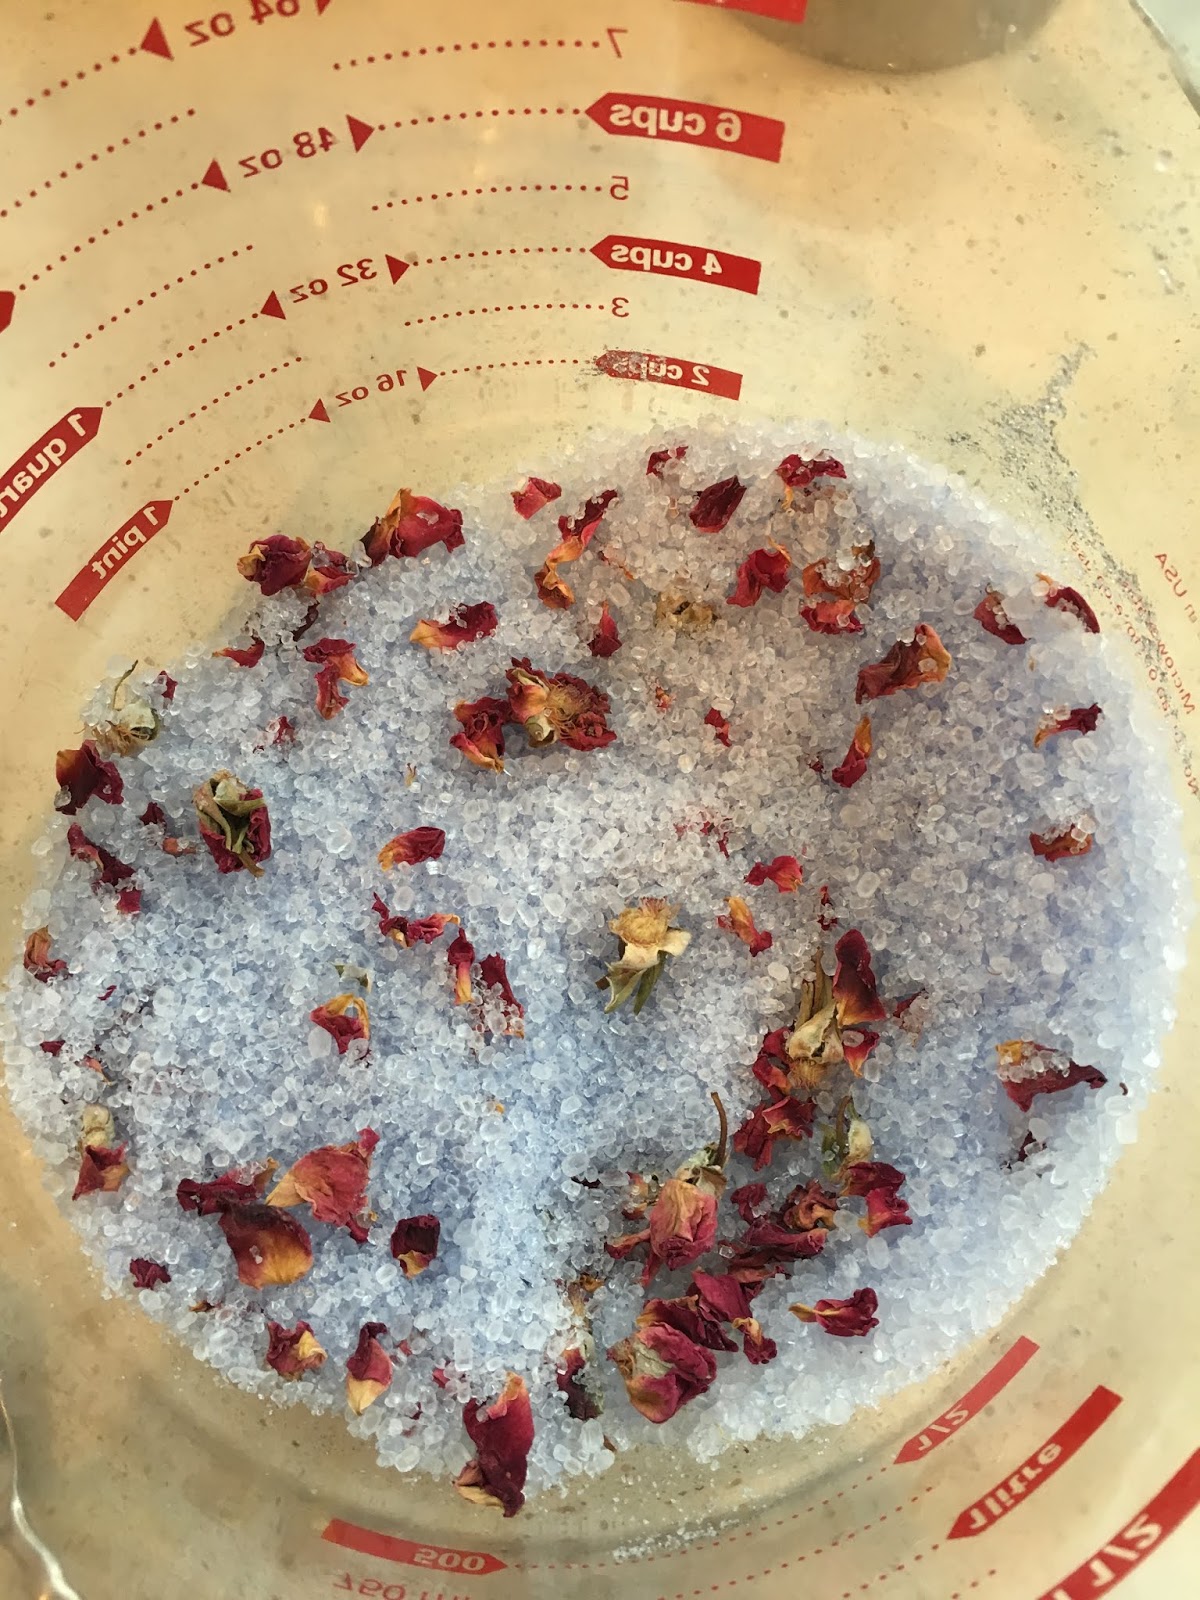
  1. Mix desired amount of Epsom salt in bowl and add some skin-safe colorant if desired
  2. Add dried herbs or flower petals to mixture for color and added aroma
  3. Add the essential oils of your choice; mix well
  4. Add the bath salt to plastic ornaments until full
  5. Once full, put the top of ornament back on
  6. When ready to use, add desired amount to warm bath


12.11.2017: tinsel wreath
12.11.2016: chicken marsala
12.11.2015: make a Christmas tree

Monday, December 10, 2018

Santa's Wreath Making Workshop


This (a) is probably not something I'll ever be able to do at home, (b) is so cool that I wanted to share how it's done with you, and (c) puts my baggie wreath, tinsel wreath, sucker wreath, spooky hand wreath, etc. to shame!! This is serious wreath making right here...wouldn't it be great to have your own Santa's wreath making workshop at your house?!!

LeDonna took pictures for me (and you!) when she went to make wreaths at Dick and Becky's workshop where they make these gorgeous evergreen wreaths every year; she gets to go help out and make some too...we've been lucky enough to be on the receiving end of one of these wreaths every December for a few years now and it's something I really look forward to - I'll be bummed if she decides to stop making and sending them (I save a place for where it's going to be hung before I even know if she is sending one hahaha!).


You get an idea of what the process is by looking at the pictures - I asked what the thing is called that is hooked onto the table and attaches the evergreens to the wreath (it looks like a big stapler), she said
"Basically it is a big clamp!  There is a foot petal that we press down and that clamps the wires on wreath around each bunch of greens. There is one pic that shows the whole table and you see the foot pedal".


They gather a lot (seriously - A LOT - look at the piles!) of different kinds of evergreen clippings; trim the pine pieces into the right sizes, and make small bundles that they then lay, one at a time, on these special wreath frames that have small metal spokes every few inches around the edge; stepping down on the foot petal works the clamp on the table that bends the spokes around the bundles and holds them in place. They keep adding bundles and clamping in place until the whole wreath is filled in. To finish - they add a big, pretty bow and (most importantly) send to very,very lucky people :)


I really do love these wreaths, and had no idea how much work was involved - receiving one of these  beautiful, fresh, handmade wreaths has always been a joy, and now I'm even MORE appreciative :) Thanks for sharing your Santa Workshop pictures LeDonna, so interesting!

Sunday, December 9, 2018

Around the Campfire (week 49)

Dear Campers ~

Here's the weekly recap of what happened at camp this week!

Posts you might have missed ~

12/2: around the campfire (week 48)
12/3: snowman tealights
12/4: snowman wreath
12/5: snowman ornaments
12/6: snowman treat holder
12/7: pumpkin snowman
12/8: snowman place setting (and some Christmas tree light tips!)

What's Cooking ~

  • baked chicken and stuffing (I put the chicken in a casserole dish, spread with a little cream of mushroom soup, topped with a box of stuffing made according to the package directions, bake 350' for about 1/2 hour)
  • grilled pork tenderloin, mushroom ravioli, roasted asparagus
  • grilled tuna, greek salad (tomato, cuke, avocado, feta, roasted garbanzo beans)
  • unstuffed chicken cordon bleu, roasted green beans, drop biscuits (will share recipe soon!)
Christmas is coming so fast! Next week I'll share some last-minute gifts you still have time to make (they are quick which helps!), a recipe or two, and anything else that I have time for when an idea pops up and I have to make it! Have a good week :)

Sincerely ~


your camp counselor, Jill