Showing posts with label decorating. Show all posts

Monday, October 1, 2018

Peeking Pumpkin

opened my planner this morning to this - love it!!


This is just about the easiest Halloween decoration ever - and a fun little super cute surprise to anyone like Dave who doesn't notice it right away, and when he did just laughed and said "you probably gave him a name too, didn't you..." um, I'm going with "peeping tom" hahahah. Literally just stick some google eyes on a pumpkin (mine are tacks so I just pushed them into the pumpkin - you could glue on anything tho and it'll be cute! If I didn't have google eyes or didn't want to buy them I would substitute white and black paper circles), put the pumpkin in a pot with the lid cracked, and done. Took me longer to type it than make it!


Wednesday, January 24, 2018

Updated Side Table

before...

I have this little table in my office that is too modern for the space - I was in a 'that's gotta go' mood but then thought maybe it just needed a fresh look. It started with the frosted glass top that was a weird off white greenish color - I happen to have a fresh roll of that woodgrain contact paper (are you sick of seeing that stuff by now? So far I've made Sarge's 'doghouse' and covered the chair backs at our new game table with it) so I simply cut out a big circle and stuck it to the top. Much better. It was still pretty modern looking tho with the metal legs so I got some thick twine for $3 at the hardware store and started wrapping. I didn't glue anything and the contact paper can easily be removed so I haven't permanently changed the table if I ever want to change it again. Easy fix and it looks so good now in my little space!

...and after


one year ago: eggs and avocado toast
two years ago: citrus scented lamb stew

Monday, August 21, 2017

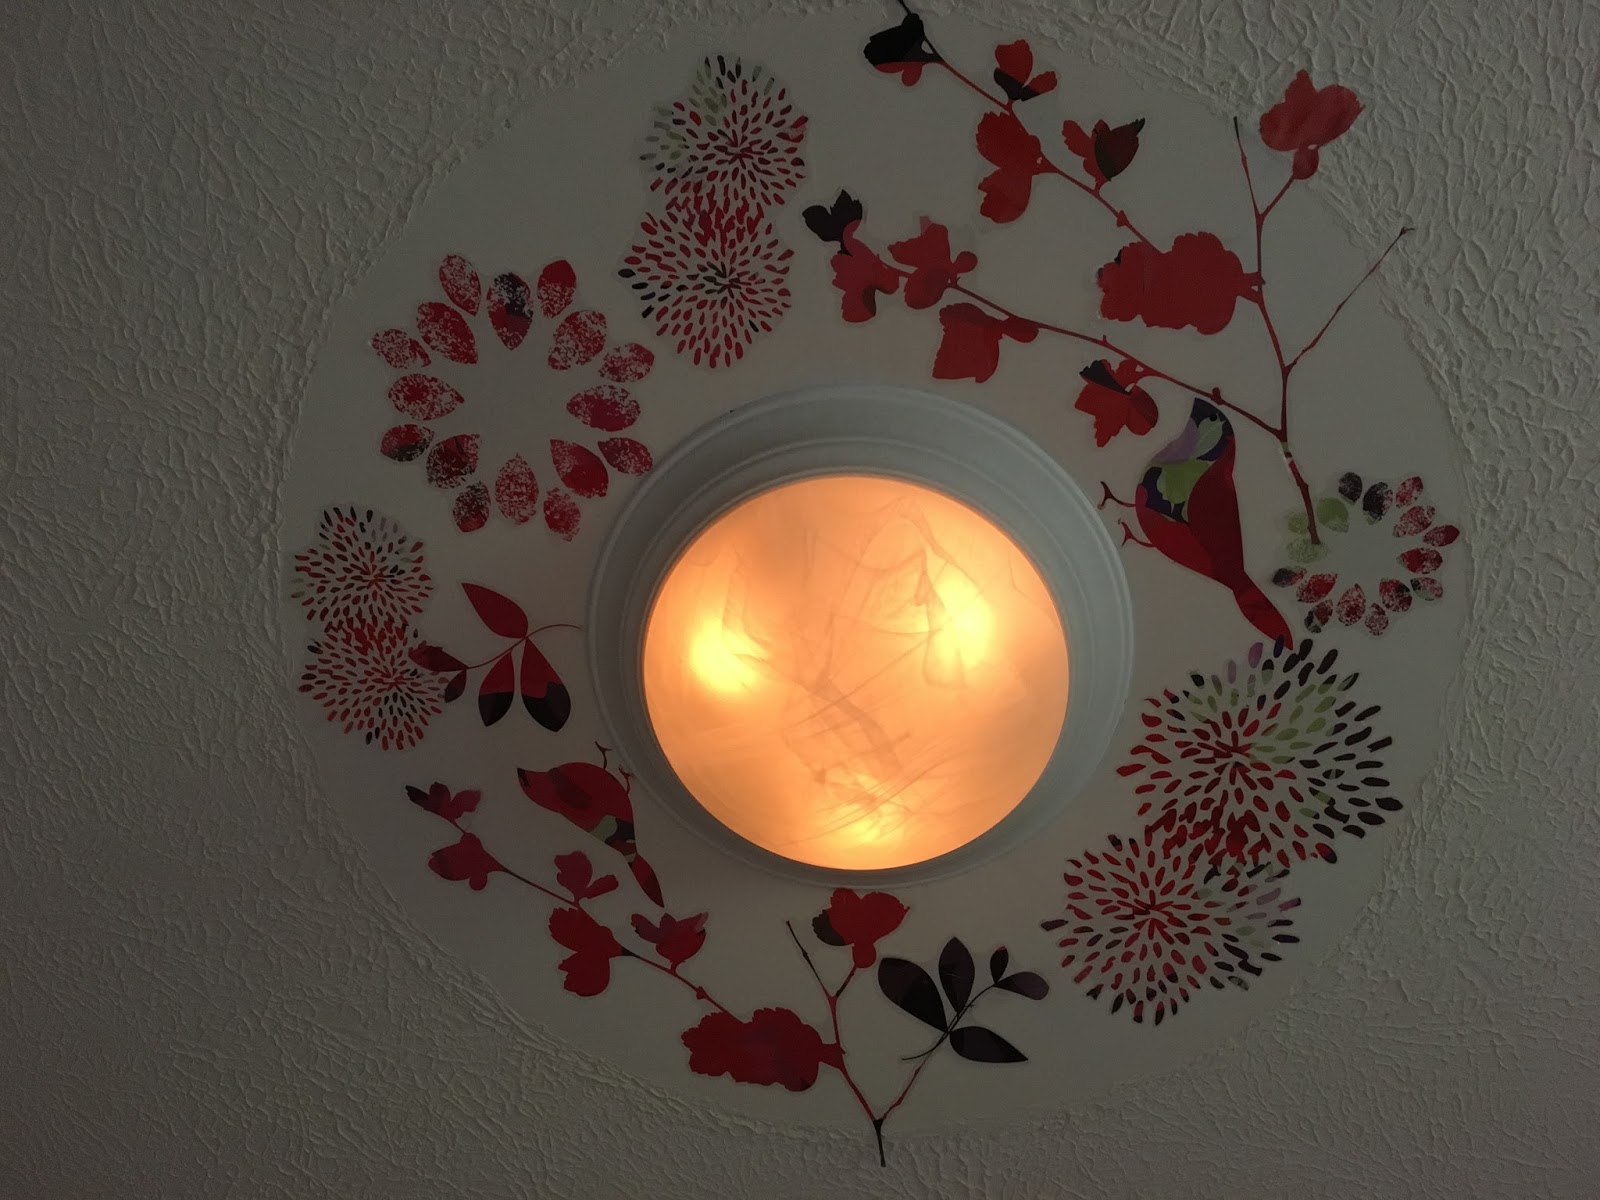
Ceiling Light Decoration

Remember my motto "if it stands still long enough it's gonna get decorated"? Well here's another example of that hahaha! 


We smoothed an area around the flush mounted ceiling light in the guest room (it had to be sanded which was a little messy, not gonna lie) a couple years ago with my intention to paint flowers and vines and add big sparkly gem stones after seeing the idea somewhere...trying to remember where I saw it is giving me brain pain - I don't know! Anyway, I just hadn't found the perfect thing I wanted to do so have ignored the ceiling until now. I had these removable wall stickers on my filing cabinet and walls of my office, you can buy these stickers everywhere now but instead of getting new ones I just peeled them off and put them up around the ceiling light. I did work up a good old sweat balancing myself on the bed and a stool with my arms up in the air for like an hour trying to get them placed just right, but it was worth it in the end...look how cute this turned out! A silly simple little thing that makes me happy :)


the stickers look cute on the ceiling in this guest room that my niece Brooke has claimed as "hers" haha!
also in this photo is the 3 canisters I painted that Candy and I found at a junk store (click here for that post) ,and I covered the lampshades in white terrycloth material and decorated with giant sequin fringe.


I hung the picture I painted of Sarge up - colors go great!
Click here for a better look at it - this photo isn't great.

One year ago today: stuffed cabbage rolls. 

Saturday, August 5, 2017

Porch Sittin'

We have a screened-in area under our deck that is the perfect spot to be when the weather is as hot as it's been lately (well I take that back, hanging in the basement in front of a fan is the perfect spot in the house haha - but if you want to be outside this is the place, it's shady and no mosquitos). We had outdoor furniture and a table with chairs already, but it wasn't really "done" and every time I go down there I wish it was fixed up...so I finally did it.


Moved the furniture around to make it cozy, added pillows and plants, outdoor lamp and big clock on the wall. That all helped but the best part is the lights we strung on the ceiling. We put up this plastic sheeting stuff on the ceiling to keep the debris and rain from coming thru the deck above so we can't put holes in it to hang anything - I really, really want to put a swing out there but no way to attach it! - so I stuck a bunch of those Command hooks up there and after a couple failed attempts (you really need to clean the surface good to get them to hold) finally got them to stick and then I just hung up some indoor/outdoor Christmas lights back and forth over the seating area. This has made a huge difference in how the space feels, especially at night (I don't have a good picture of that - the metal ceiling makes the light glow even more). I absolutely love the screened porch now! Little changes can make such a big difference.


A couple other cute things - got a few paper lanterns from a dollar store to hang from the ceiling (also using stick on command hooks), and put a bench cushion over 2 dining chairs to make it look like a bench when the chairs aren't needed.


one year ago today: fidget stress balls. 
For some reason the video isn't working for that post, but use your imagination for what they look like - little squishy balloons! 

Saturday, November 19, 2016

Fall Decorating with a Glass Block

I've had this glass block kicking around my craft room for a while now waiting to come up with the right project - bought it just because I liked it! Working on Ronda's seasonal display table I decided to make a little sort-of diorama scene using some basic materials. First I found a free Thanksgiving word template online and printed it on cream cardstock. Trim to fit and then put in at the back of the block. Then add some pinecones, paper leaves, feathers, whatever you want. I dangled 2 paper leaves by thread (attached to the top with a glue dot) then covered where it hung over with a burlap ribbon bow. This will now be super easy to change for her table with the seasons - I'm thinking a snowman figurine and fake snow for December.


I found this at the craft store on sale, they have different sizes and stands for it too.
  A look down inside...


Thursday, September 29, 2016

Chalkboard Doors


My mom did this really cool thing to her pantry doors and I wanted to share - it's a fun creative idea that I am totally gonna steal! She taped off a border around each panel and then painted the inside with chalkboard paint. Simple and look how cute it is! She drew pictures and words of favorite places, I can also see using it for grocery lists, recipes, or just fun doodles. Good job mom :)

Wednesday, July 13, 2016

Jen Blogs - Table Centerpiece

Hey.. Sister here again.  
So we have established I am the non crafter.  My sister Jill’s table always has some kind of crafty thing on it.  Once for her birthday she asked for me to go to the woods and find her a big giant stick and give it as my gift.  Her plan was to paint it a bright color and lay it there.  I absolutely refused by the way- I wanted no part of that).  Anyway, I do still want something cute on my table.  So what I did was I spent a little money and got this one big giant glass bowl.  It looks similar to a giant daiquiri  glass.. hey future idea.. mixing drink in giant daiquiri glass with a huge straw.. has merit.  Anyway, what I do with the giant glass for now is that I put a colored candle with something seasonal around it.  At easter I use easter grass and some cheap plastic eggs from the dollar store, in the late fall I use pine cones that I picked up outside, at Christmas I use colored ornaments, etc.. you get the idea.  None of the filler costs any real money but still looks festive and seasonal.  And you never get tired of it because it is ever changing.  No, its not my sisters table but hey.. at least I’m not painting sticks. 

Monday, January 25, 2016

Stamped Floor Mat

I ordered a "Larger than Life" alphabet and number stamp set from Stampin' Up and the first project I wanted to do with them is make this cute floor mat for under Sarge's food and water bowls. Look how cute it turned out! Next I'm thinking to use these on towels and pillowcases...I'll let you know how that turns out.

I used a super cheap throw rug from IKEA (I had no idea if this was gonna work so didn't want to risk using a decent rug!) that has a very low pile, I don't think it would work to stamp on something that has a deeper or fluffier pile.  I had to stamp over each letter twice to get the ink dark enough - with these photopolymer stamps it's easy to do that since you can see thru them. If you have the wooden block kind it will be a little harder to line the letters up to stamp them more than once but you can make it work if that's what you have. I did words but you could stamp a design or symbols - I'm thinking dog paws, birds, whatever! This could also be cute for other things than a dog dish mat, maybe in front of the back door or craft/laundry/kids room? Use your imagination :)


these stamps come stuck to a heavy piece of plastic, peel the one off you want and stick it to a clear stamp block.

the stamp will be backwards, when you turn the block over to stamp it will be facing the correct way.

decide what you want to stamp and where you want to place the words, then stamp away! I used black ink and just eyeballed where I wanted the letters to go. 

after stamping each letter I stamp the excess ink off on a piece of paper, then clean it with a wet paper towel or rag and put it back in its place in the stamp set. 

what a cute face! I wonder if he's thinking "this is what you do all day?" or maybe just "what the...?" hahaha! 

I don't know what will happen to the ink when I need to wash this mat - we'll see! Another good reason to experiment with an inexpensive rug...

I just signed up to be a Stampin' Up demonstrator -  if you want to order this stamp set or anything else just let me know - I can help :).