Wednesday, January 8, 2020

Steak Gorgonzola Alfredo

Here's another dish I made and forgot about (I even wrote in a 🔥recap that I'd be posting the recipe soon! Good grief); Macey requested one of her favorite Olive Garden pasta dishes for her birthday (last October!) and it is fantastic. I googled around for recipe ideas, there are lots of different ones and I just kind of mashed a bunch together to get this - I haven't had Olive Gardens steak gorgonzola alfredo pasta so didn't know exactly what it's supposed to taste like, so this might be way different but it's so good I don't care (and everyone else loved it too!).


These photos are totally not doing the dish justice 🤦‍♀️ It's really pretty in person - promise!

Most of the recipes called for chunks of marinaded top sirloin cooked in a pan on the stove but I decided to do flank steak on the grill, then slice it 'cross grain on an angle super thin. Mixed it together with cooked pasta, homemade alfredo sauce (you can buy store-bought in a jar but it's really easy to make yourself), serve it on a bed of spinach and top with crumbled gorgonzola cheese. It's supposed to have balsamic glaze drizzled overtop but I forgot to do that and I for one didn't miss it.


  •  3 pounds flank steak
  • salt and pepper
  • 1 pound fettuccini, cooked according to package directions (keep warm)
  • 1 stick unsalted butter
  • 2 cups heavy cream
  • 3 cups grated parmesan
  • 1 garlic clove, minced
  • 1/4 t. nutmeg
  • 6 oz. gorgonzola cheese, crumbled
  • baby spinach
  1. Season the flank steak with salt and pepper, grill to your liking.
  2. Make the alfredo sauce: melt butter in a saucepan over medium-low heat; add garlic and let simmer for a couple minutes watching very closely that it doesn't brown, add cream and simmer for 5 minutes, then add nutmeg, parmesan and 3 oz. gorgonzola cheese and whisk quickly, heating through until it's melted and smooth. I like to add coarse pepper and salt, adjust the seasonings to your liking. Add the pasta and toss until well combined. Note: if you prefer you can just use store-bought alfredo sauce and skip this step - just heat the sauce before mixing with the pasta).
  3. Slice the cooked steak across the grain on an angle into very thin slices, almost shaved; add to the fettuccini alfredo.
  4. Lay the spinach on a platter, top with fettuccini alfredo and steak, sprinkle the remaining gorgonzola on top. Drizzle with balsamic glaze if you remember.  

1.8.19: mini trees

Tuesday, January 7, 2020

Tip-sy Tuesday: wrapping paper filler

I have lots and lots of wrapping paper. Like, lots and lots. Problem is I don't like a bunch of it, either it's been around too long and I'm over it, or it's not good paper (too thin, or it just doesn't wrap nice...), but I'm just frugal enough to not get rid of it for what feels like 'no good reason'. So I have a large collection of paper just sitting there collecting dust - until now...


Cut the paper into long thin strips and run it thru the shredder. Now the unwanted paper is pretty, colorful shreds perfect for using as gift filler - fill a box or gift bag with the shreds before adding the gift, or use it to pad a box that you are shipping. Cute, resourceful, purposeful, and it beats using styrofoam popcorn that goes everywhere and is such a pain!


1.7.19: the short-lived segment of Man-day Monday
1.7.18: breakfast egg muffins
1.7.17: grocery store bouquet
1.7.17: fruitcake squares (don't be afraid, they're good!)


Monday, January 6, 2020

Crocheted Cowl

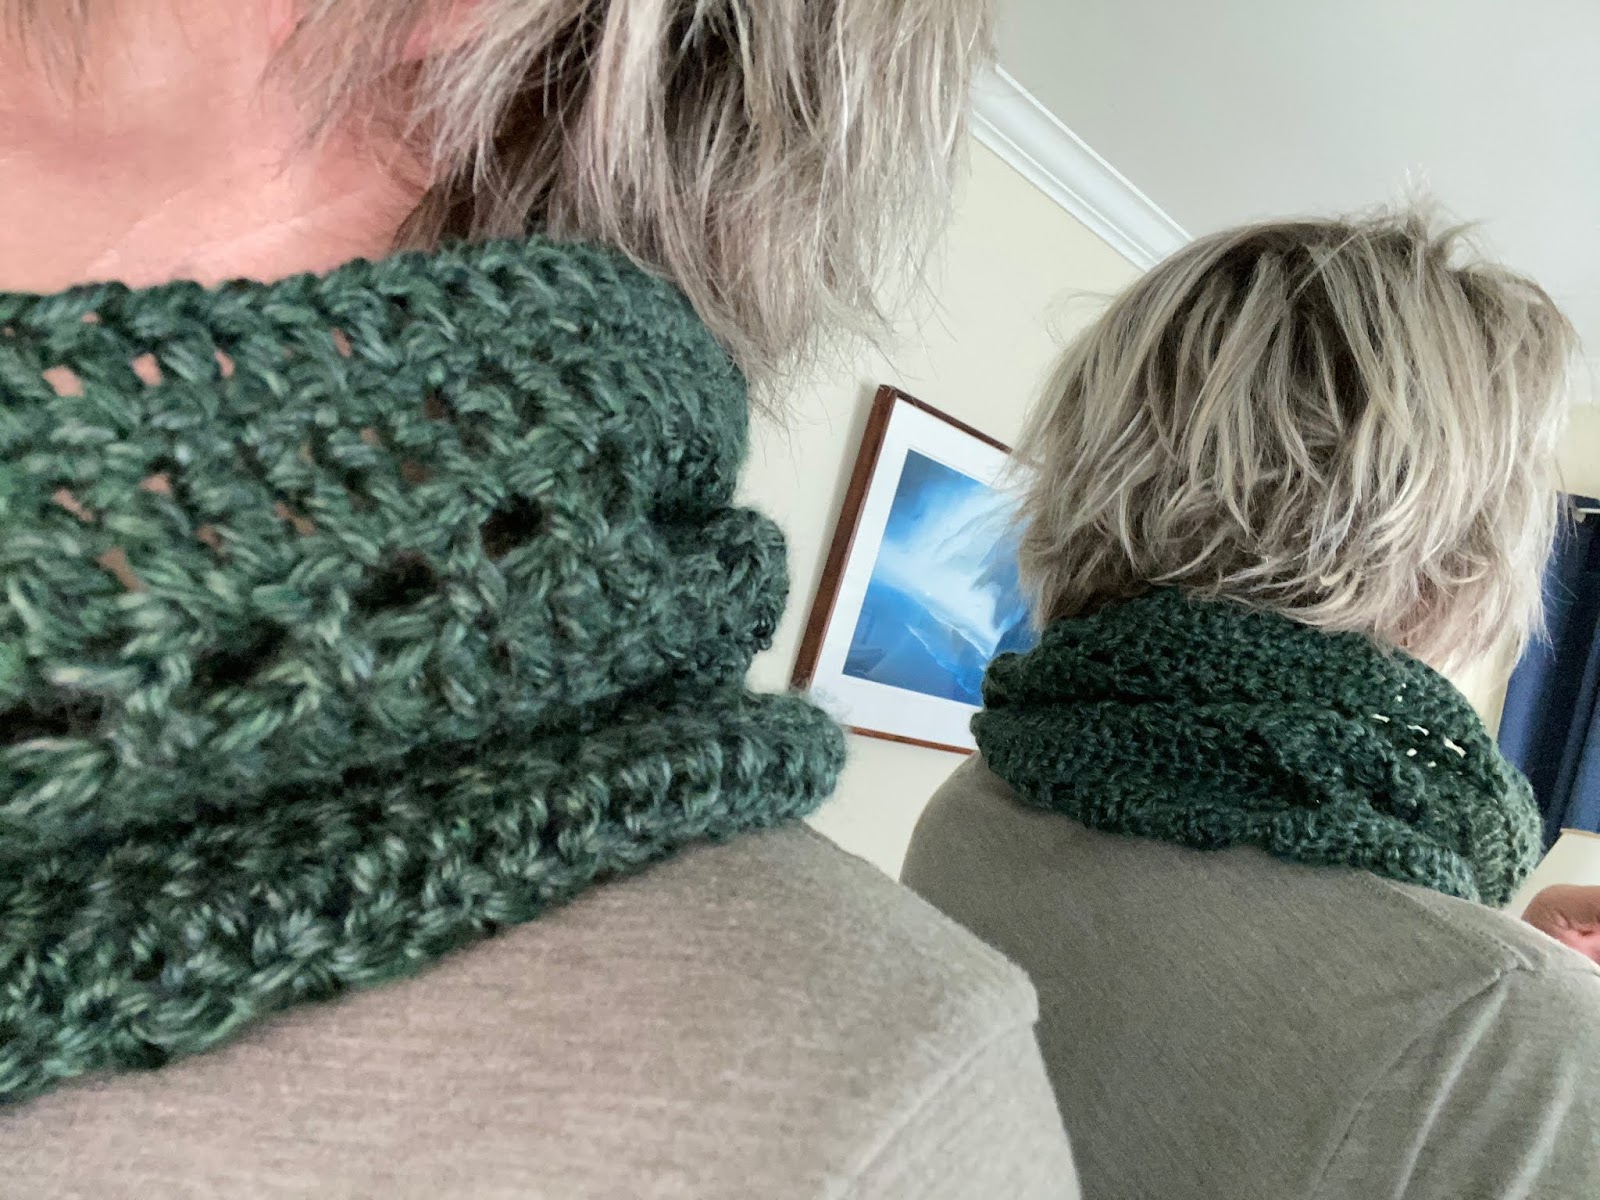
I've made two of these quick pretty cowls for gifts - the first one I followed the directions exactly but thought it'd look pretty to weave ribbon thru the double crochet spaces; the second one I skipped the ribbon but added one more set of "row 4-7" to make it a little wider (final size of that one is 9x25"). I did twist both of them (creating a 'mobius' scarf - do you know what that is? I didn't and had to google it hahaha - it's an infinity scarf. Hello, why not call it that then?!) before sewing the ends together to form the cowl. Pretty right? I'm definitely making myself one next :)     


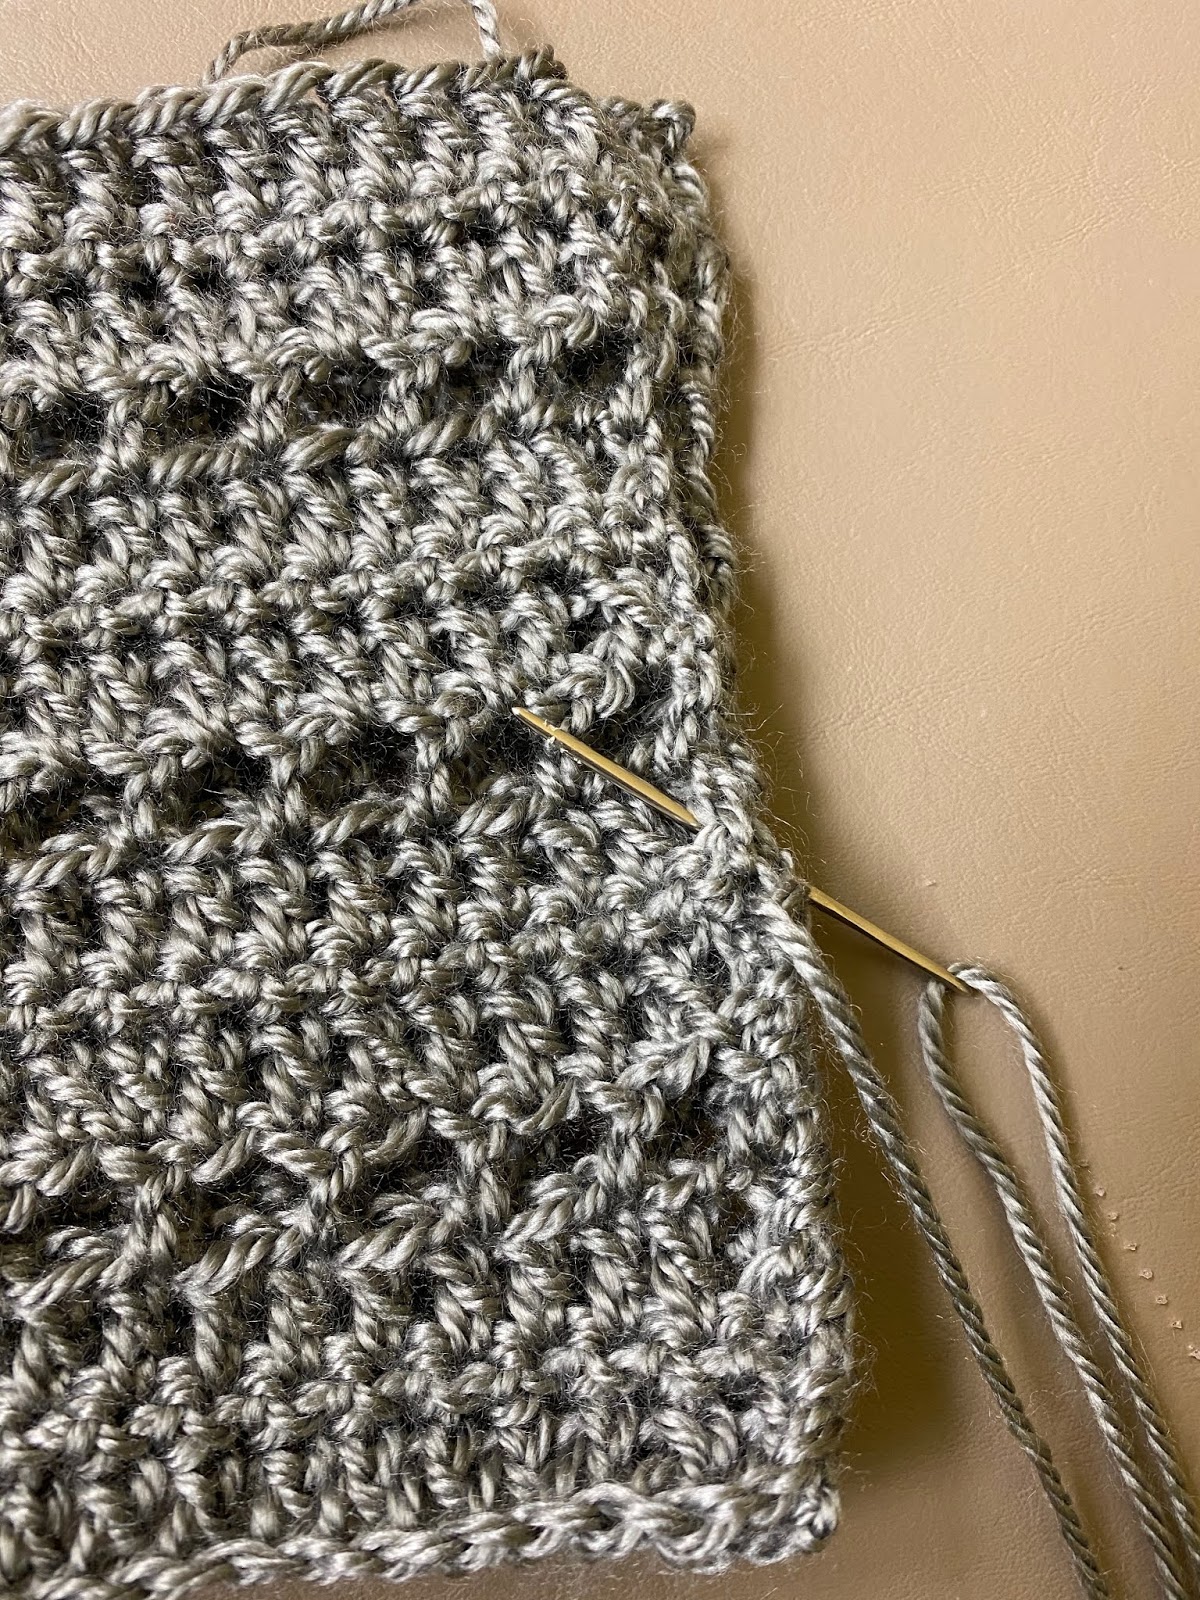
 I screenshot the instructions on my phone, not sure you can read it very good - I'll reprint it below so you'll have it, or you can click here for the original source.


Chi-Town Crochet Cowl
by Kathy Kelly
Yarn: 1 skein Lamb’s Pride Worsted 190 yards
Size K 6.5 mm hook, or size to achieve a relaxed stitch and flexible fabric, gauge is not important.
darning needle
This pattern uses a multiple of 4 + 1 stitches.
Example is 30” long and 8” wide, joined with a single twist to make a moebius.
Stitch abbreviations U.S. Terminology used
ch = chain
dc = double crochet
sc = single crochet
st = stitch
sp = space
sk st = skip stitch
Instructions
Make enough chains so that when the ends are joined it will easily fit over your head. Be sure the final number is a multiple of 4 + 1.  (I chained 81).
Note: When working dc rows do not work into 1st stitch directly underneath turning ch. Ch 3 turning chain counts as a dc throughout.
Row 1: dc in 4th chain from hook and each chain across. (If you started with 81 ch you should have 79 stitches. Be sure you have an odd number of stitches.) Turn.
Check again to make sure this fits easily over your head and that it is the desired length.
Row 2: ch 1, sc in first dc and each dc across ending with a sc in top of turning ch from previous row. Turn.
Row 3: ch 3, dc in each sc across skipping the first sc under ch just made. Turn.
Row 4: ch 4, skip one stitch, dc in next stitch, (ch 1, skip one stitch, dc in next stitch) repeat across ending with a dc in top of turning ch of previous row. Turn.
Row 5: ch 3, (dc in ch 1 sp, dc in next dc) repeat across ending with a dc in ch 4 sp and a dc in 3rd ch of ch 4 of previous row. Turn.
Row 6: ch 1, sc in each stitch across ending with a sc in top of turning ch of previous row.
Row 7: ch 3, dc in each stitch across.
Repeat rows 4-7 two more times or until desired width is reached.
Fasten off.
Weave in ends and block. Whip stitch the ends together to form a ring. Or, if you’d like a mobius, give one end a single twist and then stitch the ends together.
Options:
You may make this as a straight scarf by beginning with more chains (be sure your chain is a multiple of 4 + 1).  For a skinny scarf do just one repeat of rows 4-7.
If you want this to be a wider cowl you may add an extra repeat of rows 4-7.
To make a cowl that wraps around your neck twice, chain more and check to be sure the chains easily fit over your head when doubled. If you do this you’ll need extra yarn.
You may substitute other weights of yarn using an appropriate sized hook. The amount of yarn needed will vary depending on the weight of the yarn used.
Chi-Town Crochet Cowl © 2012 Kathy Kelly

1.6.19: 🔥week 1
1.6.18: Hawaiian inspired jewelry set
1.6.17: spicy crumb coated broccoli
1.6.16: washi tape lampshade


Sunday, January 5, 2020

Around the Campfire 🔥 (week 1)

Dear Campers ~

HAPPY NEW YEAR!!! There, that's the last time I'm saying that this year ;) Movin' on...

I'm pretending Michael Buble is singing in the background ~

It's a new dawn

It's a new day

It's a new life

For me

And I'm feeling good

I'm feeling good. 

Here's a quick recap from a very short week at MMDC in case you were busy living the dream and not sitting at the computer reading my blog LOL ~

Posts you might have missed ~

12/31: New Years Eve (hope you read 'how to open champagne' and didn't lose an eye)
1/3: 2 days after New Years Day (just kidding, it's an ornament tip)
1/4: Christmas card garland

What's cooking ~

Miscellaneous stuff keeping me busy (other than de-holidaying the house) ~
  • read 'Split Second' by Alex Kava, thriller about a serial killer who escapes prison and continues to kill. ⭐️⭐️⭐️ and 'Dog Songs' by Mary Oliver, a short book of poems and observations by the author - when I first started the book my first thought was that I was buying it for all the dog people in my life, but then it made me cry too many times so I'm not forcing anyone else to read it hahaha. It's really good, I'm just super sappy and a cry-baby when it comes to dogs. ⭐️⭐️⭐️⭐️
  • made a couple more things with old Christmas cards that I'll share next week if I don't forget (you know me!) so don't go crazy today and throw them all out (if you haven't already), save them for more crafts!

Ok, that's it for this week - hope you had a very, very happy week and you aren't exhausted laying in a pile of used wrapping paper and confetti! Stop by often for more crafts, recipes, and whatever else happens at camp! Bye!

Sincerely ~


Jill
camp counselor of the decade (get it? cuz it's like 5 days into a new one hahahha)


1.5.18: Brooke made a hanging ribbon hoop thing
1.5.17: t.p. holder

Saturday, January 4, 2020

Christmas Card Garland


Hope you haven't tossed the Holiday cards you received this year, 'cuz check out this really cute idea to reuse them - make a garland for next year!


It's easy and came together really quick (best kind of crafts!). Punch out circles (I used my 2 1/2" Stampin'up circle punch) from used cards*, some from the fronts and some from inside - my absolute favorite thing about this was when I saw all the handwriting and thought if I incorporate some it'll make this like a memory garland - love! Oh, and I thought about including circles from photo cards but I didn't have the heart to chop those up yet - maybe by next year I'll be ready! Before just punching out circles I thought about how best to get a whole picture (for instance, all of a snowman or a bird) or word (for example, all of "believe" or "merry"), in addition to punching out the handwritten greetings and notes in a way that included as much as I liked. Makes sense?


You need 4 circles for each bundle (is it a bundle? A grouping? A ball?) that will get attached to bakers twine to form the garland. I cut out 44 circles for a total of 11 bundles.

After punching out the circles I laid them all out on my craft table, then matched them up into pairs. Fold each circle in half and glue half of the circle to half of its paired up circle - I used Elmers glue stick and it stuck great. At this point you'll have 22 pairs joined together on one side.


This next step is optional but I have these felt pompoms on hand and decided to put one in between each grouping. Before I started gluing the circles onto the twine, I threaded one end of twine thru a big-eye embroidery needles and threaded on 12 small pompoms - note I didn't cut the twine from it's spool yet, just thread the pompoms on and push them down out of the way.


Take the needle off the twine. Put one pompom about 12" from the free end and the second pompom 6" away. Make a small mark at the halfway point between the two pompoms (at 3") just so you can keep the paper circle bundles centered between the poms. Put glue over the flat base of one of the circle pairs, set the twine in the groove between the 2 with the mark you made in the center of the circle, then top with another circle pair. Repeat with the next pompom on the twine (put it 6" from the previous one, make a mark 3" in between the 2 pompoms, add two circle pairs). Repeat until you have a pompom, a paper bundle, a pompom, a paper bundle, a pompom, etc. for as long as you want your garland to be.


I'm afraid I am making this sound way harder than it is! To summarize and simplify - you are just gluing 4 paper circles together over twine, as many of those bundles as you want, for as long as you want the garland to be. I took lots of pictures, hopefully they help make sense of my instructions!


*if you don't have any old cards to recycle you could do this same thing with a package of new cards, that way you can choose your colors and designs - and right now you should still find clearance ones super cheap!

1.4.19: paper mâché reindeer
1.4.18: cookie sheet hack
1.4.17: grilled turkey ruebens 
1.4.16: scrabble tile keychain

Friday, January 3, 2020

Christmas Ornament Storage

This should probably be a "Tip-sy Tuesday" post because it's super fast and easy, and is more of a tip than making something! Hmmm, let's call it 'making something more organized' instead of a tip because I don't want to wait til Tuesday to show you this handy little ornament organizing idea!

I have a big tub that holds all the miscellaneous, handmade, or special ornaments and decor that don't go in my plain old ornament container (I bought one years ago that is 3 stacks high with multiple dividers that holds the regular colored and clear balls and basic ornaments); I wrap the breakable ones in tissue paper and set among soft things to protect them. This year I put them in plastic drinking cups - so much safer this way. If the ornament is too big for one cup (and you can always use different sized cups of course!) just turn another cup upside down overtop. See - easy!

I thought I had a picture of all the cups in the tote that looked much nicer than this, but I can't find it - and I already put the tote away so you'll have to trust me that the cups in the tote are a great idea ;)

this looks way messier than when I finished and put the tote away!


1.3.19: removing wax from candleholders
1.3.18: chocolate birthday cake for Noah
1.3.17: monthly bill log
1.3.16: black-eyed pea jambalaya

Wednesday, January 1, 2020

Happy New Years 1.1.20


 ~ Happy New Year ~ 

here's wishing you an amazing 2020 full of all good things :)
Cheers 🎉

Tuesday, December 31, 2019

New Year's Eve


Are you with me? LOL! Made me laugh... Happy New Year's Eve everyone! 

PS: still looking for one more appetizer idea for tonight? Here's a quick little dip/spread you might like to make and take:

I made this Pesto and Sun Dried Tomato spread for Christmas last week especially because of the green and red stripes, but it's great for anytime! And really easy - mix together 8 oz. softened cream cheese and 4 oz. goat cheese until creamy. Layer with store-bought pesto and sun dried tomato spread (I found it right next to the pesto at the grocery store), refrigerate until firm. Usually I make this in a small bowl and once it's chilled invert the dip onto a platter but this time Dave took it to one of his ukulele things so I made it in a clear bowl so you can see the layers but was easier for him to transport on his Vespa. Serve with crackers.

Note: when layering the cream cheese mixture on either of the pesto/tomato layers, the spreads tend to squish out. I find it helps to pop it in the freezer for a few minutes to firm the cream cheese enough to make spreading easier. Also, if you want to un-mold it - spray a bowl with non-stick spray and line the bowl with plastic wrap before adding the layers; it makes it easier to get out in one piece when you flip the bowl over onto a serving plate.


Of course I didn't get a picture of this before sending it with Dave! He brought half of it home tho so at least I got an inside look at the dip - kinda messy I know, but it gives you an idea of what it looks like (and obviously it's nicer looking before people start scooping it out! hahah).


12.31.18: antipasto wreath and wrapped pears
12.31.17: January no-sugar challenge
12.31.16: new years eve "write a good one"
12.31.15: opening champagne


Monday, December 30, 2019

Crostini Appetizers

Have you ever made crostini? It's so easy and everyone always loves it - it's basically toasted bread with toppings...what's not to like? If you need an appetizer for New Year's Eve I highly recommend a platter of these gorgeous crostini :)


Deciding which toppings I want is the only hard part - so many options! These come together quickly once you have the ingredients. For the base, slice baguettes (sourdough, Italian, multigrain, dark pumpernickel - so many choices) about 1/4" thick, brush with olive oil, bake 5 minutes, turn over and bake another few minutes until toasted. Then top with whatever you've decided on.

The most common crostini I make is to chop tomatoes and smoked mozzarella into small (I'd say about 1/2") pieces and toss with a little olive oil, balsamic, and coarse salt before layering on top of the toasted bread slices - the oil and vinegar soaks into the bread and is SO good! It's a little messy but worth it, just be careful to not be holding this over your nice shirt when eating it hahah.

Here's a couple more examples for different toppings that I've made, but really just use your imagination - it's hard to go wrong...

layer sliced mozzarella and halved cherry tomatoes on sliced, toasted, sourdough baguette; drizzle with balsamic glaze, sprinkle with Italian seasoning:


spread soft boursin cheese on sliced, toasted, multigrain baguette; top with thinly sliced roast beef and a baby arugula leaf:


spread creamy goat cheese on sliced, toasted, pumpernickel bread; top with prosciutto and a blackberry:


12.30.18: 🔥week 52
12.30.17: elf place cards
12.30.16: pimento cheese spread aka: yummy cheese!
12.30.15: breakfast pie